You know that high-pitched, rhythmic chirping coming from your engine every time you idle? Most shops will see that and immediately try to sell you a whole new serpentine belt and a labor charge that’ll make your eyes water. But here’s the thing: nine times out of ten, it’s just a tired spring in your tensioner, not the belt itself. I remember one Saturday back when I was just helping my dad in the garage; we spent hours chasing a “bad belt” only to realize a simple belt tensioner replacement was all it actually needed to stop the noise. Don’t let a shop convince you that a simple mechanical part failure is a massive, expensive overhaul.
I’m not here to give you some textbook lecture or a list of fancy diagnostic tools you don’t own. I’m going to show you exactly how to tackle this job with the basic tools you probably already have in your trunk. We’re going to walk through how to spot the actual wear, how to get that stubborn bolt loose without stripping it, and how to make sure everything is seated right so you don’t end up back under the hood tomorrow. It’s a straightforward fix if you have a bit of patience, and I’m going to make sure you get it done right the first time.
Table of Contents
- Step-by-Step Instructions
- Spotting Automatic Tensioner Failure Symptoms Before They Strike
- The Truth About Tensioner Pulley Bearing Wear
- Pro-Tips to Save Your Sanity (and Your Wallet)
- The Bottom Line on Your Tensioner
- The Real Cost of Waiting
- Don't Let the Shop Overcharge You
- Frequently Asked Questions
Guide Overview
Tools & Supplies
- Socket set and ratchet for removing bolts
- Serpentine belt tool or long-handled breaker bar for tensioner release
- Flashlight to inspect surrounding components
- New belt tensioner assembly (1 unit)
- New serpentine belt (1 unit, if worn)
- Degreaser or brake cleaner (1 can for cleaning pulleys)
Step-by-Step Instructions
- 1. First things first, you gotta get the car up and stable. Don’t just trust a cheap jack; get some proper jack stands under the frame before you even think about crawling underneath. Once you’re set, pop the hood and find your serpentine belt. If you’re working on an older car, you might need to clear some space by removing a plastic shroud or a cooling fan, but usually, you’ll have a clear view of the tensioner right there.
- 2. Grab your tools and get that belt off the system. You’ll need a long-handled wrench or a dedicated serpentine belt tool to put some pressure on the tensioner pulley. Rotate the tensioner to release the tension, and then carefully slide the belt off the outermost pulley. Pro tip: take a quick photo of how the belt is routed before you move anything. Trust me, you don’t want to be guessing where every single pulley goes when you’re trying to put it all back together.
- 3. Now, let’s get the old tensioner out of the way. Locate the mounting bolt that holds the tensioner assembly to the engine block. You’ll likely need a socket wrench for this. Once you’ve loosened it, pull the tensioner out. It might be a little heavy or greasy, so watch your fingers. If the bolt is being stubborn, don’t just force it and strip the head; give it a solid hit with a breaker bar to break that initial torque.
- 4. Before you throw the new part in, take a second to clean the mounting surface. I always grab a rag and wipe down the area where the new tensioner sits. You want a clean, flat surface so the new unit seats perfectly. If there’s old grime or rust buildup, the new tensioner might sit at a slight angle, which is a fast way to ruin your new belt.
- 5. Slide your new tensioner into place and start threading the mounting bolt back in by hand. I always do this to make sure I’m not cross-threading the bolt, which is a nightmare to fix once it’s deep in the block. Once it’s hand-tight, grab your wrench and snug it down firmly. You want it tight enough that it won’t vibrate loose, but don’t go absolutely overboard and snap the bolt.
- 6. Now comes the part where you re-route the belt. Using that photo you took earlier, thread the belt back over the pulleys one by one. It’s a bit of a puzzle, but just take your time. Once the belt is seated on all the pulleys, use your tool to tension the assembly one last time so you can slip the final loop of the belt over the last pulley.
- 7. Give everything a quick inspection. Make sure the belt is centered on every single pulley and isn’t riding up on the edges. Start the engine and let it idle for a minute. Listen closely—you’re looking for a smooth hum, not a squeal or a rattle. If it sounds solid, you’ve officially saved yourself a trip to the shop and a hefty repair bill.
Spotting Automatic Tensioner Failure Symptoms Before They Strike
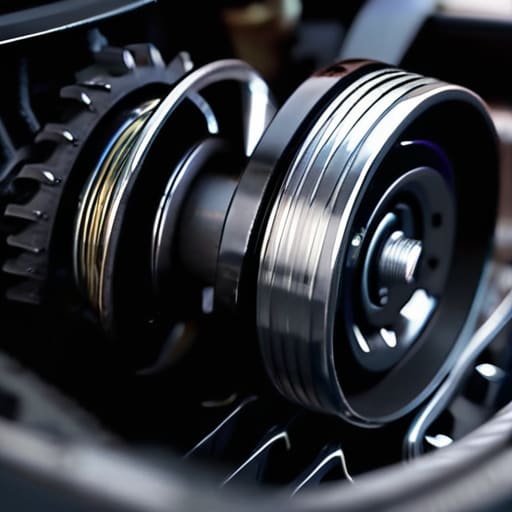
You don’t always have to wait for something to snap to know something is wrong. Usually, your car will try to tell you it’s struggling. The most obvious giveaway is that high-pitched serpentine belt squealing noise that hits you right when you start the engine or when you’re idling at a red light. If that sound is constant, it’s usually a sign that the spring inside the tensioner has lost its fight, or you’re dealing with some serious tensioner pulley bearing wear.
I’ve seen plenty of guys ignore these little warnings until they’re stranded on the side of the road. Another thing to watch for is how your car behaves when you turn on the AC or flip the headlights on. If you notice the engine stumbling or the RPMs dipping weirdly, it might be because the engine accessory drive system isn’t getting the consistent pressure it needs. If you see the tensioner arm dancing or vibrating excessively while the engine is running, that’s your cue. Don’t wait for it to fail completely; catching these automatic tensioner failure symptoms early is the difference between a quick fix and a massive headache.
The Truth About Tensioner Pulley Bearing Wear
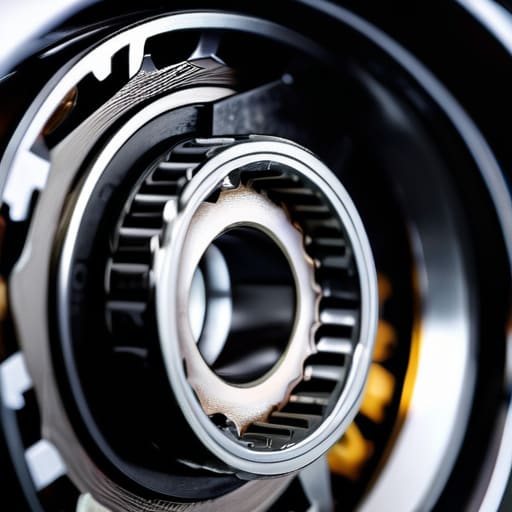
Here’s the thing most shops won’t tell you: it’s not always the spring in the tensioner that goes bad first. A lot of times, you’re actually dealing with tensioner pulley bearing wear. The tensioner assembly might still have plenty of life in its spring tension, but the internal bearings in that pulley are grinding themselves into dust. If you hear a high-pitched chirping that changes pitch when you rev the engine, don’t just assume you need a whole new assembly. Sometimes, you can get away with just swapping the pulley, which saves you a decent chunk of change.
I’ve seen plenty of guys jump straight into a full replacement when the real culprit was just a dry, dying bearing. If you want to check this yourself, grab a mechanic’s stethoscope—or even just a long screwdriver held against your ear—and touch it to the tensioner housing while the engine is running. If you feel a heavy vibration or a rhythmic grinding, that bearing is toast. Catching this early keeps your entire engine accessory drive system from seizing up, which is a much bigger headache than a simple pulley swap.
Pro-Tips to Save Your Sanity (and Your Wallet)
- Don’t just replace the tensioner—inspect your serpentine belt at the same time. If the tensioner was acting up, your belt has likely been getting beaten on, and putting an old, cracked belt on a brand-new tensioner is just asking for trouble later.
- Grab a high-quality socket set and a long breaker bar. Most of these tensioner bolts are torqued down tight to handle engine vibration, and trying to muscle them with a cheap, flimsy ratchet is a quick way to snap a tool or strip a bolt.
- Keep your magnetic parts tray handy. I swear, if you don’t have one, you’ll end up dropping a crucial bolt into the abyss of the engine bay, and then you’re spending an hour fishing it out with a screwdriver instead of finishing the job.
- Double-check your belt routing before you take the old one off. I’ve seen way too many people finish a repair only to realize they don’t remember which way the pulleys were supposed to spin. Take a quick photo with your phone first—it’ll save you a massive headache.
- Use a bit of thread locker on the mounting bolts if the manual calls for it. Since the tensioner is constantly fighting against belt tension, you want to make sure those bolts aren’t vibrating themselves loose while you’re out on the highway.
The Bottom Line on Your Tensioner
Don’t wait for a total breakdown; if you hear that high-pitched squeal or see the belt dancing around too much, swap the tensioner immediately before it snaps and leaves you stranded.
Most shops will try to charge you for a whole belt kit, but if the bearing is just noisy, you can often just replace the tensioner itself and save a decent chunk of cash.
Keep your workspace clean and use a magnetic tray for those bolts—losing a single small bolt in a greasy engine bay is a headache you definitely don’t need.
The Real Cost of Waiting
A squealing belt is basically your car’s way of screaming for help, and ignoring it is just asking for a massive repair bill. Swapping a tensioner is cheap and easy, but letting it snap can turn a simple afternoon in the garage into a total engine nightmare.
Nikolai·Osterman
Don't Let the Shop Overcharge You

Look, replacing a belt tensioner isn’t some high-level engineering feat that requires a specialized shop and a massive invoice. We’ve covered it all: from listening for those early warning squeals and checking for bearing play, to actually getting the new unit seated and tensioned correctly. If you caught the failure early, you probably saved yourself from a snapped belt and a massive headache in the middle of a highway. Just remember to double-check your alignment and make sure everything is seated tight before you fire the engine back up. It’s all about the small details and having that right socket ready to go.
At the end of the day, the goal isn’t just to fix a car; it’s about taking ownership of what you drive. Every time you get your hands dirty and successfully swap a part like this, you’re proving that you don’t have to be a victim to unnecessary repair costs. It might feel intimidating when you first pop the hood and see a mess of pulleys and belts, but I promise you, it gets easier every single time. Keep that magnetic tray handy, stay patient, and just keep turning the wrench. You’ve got this.
Frequently Asked Questions
Can I just replace the pulley itself if it's making noise, or do I really need to swap out the whole tensioner assembly?
Look, I get the temptation to just swap the pulley and save a few bucks, but honestly? Don’t do it. If that tensioner is making noise, the internal spring is likely losing its tension or the mechanism is getting gummy. Replacing just the pulley is like putting a new tire on a car with a blown suspension—it’s a band-aid. Just swap the whole assembly. It saves you from having to tear everything apart again in a month.
How do I know if my serpentine belt is actually bad, or is it just the tensioner causing the slipping?
It’s a common headache, but here’s how I tell people to check: look at the belt itself first. If you see cracks, fraying, or glazing (that shiny, burnt look), the belt is toast. But if the belt looks clean and the engine is still slipping or squealing, it’s almost certainly your tensioner. If the tensioner can’t hold that constant pressure, the belt just slides, and no amount of new rubber will fix it.
Is there a specific torque spec I need to worry about when bolting the new tensioner down, or is it pretty much just "tight enough"?
Look, I get it—you just want to get the job done and move on. But please, don’t just go “tight enough.” That’s how you end up snapping a bolt head off or, worse, stripping the threads in your engine block. If you’re working on something modern, find the specific torque spec for your engine online. If you don’t have a torque wrench, at least be precise. “Hand-tight plus a firm tug” isn’t a real measurement.
