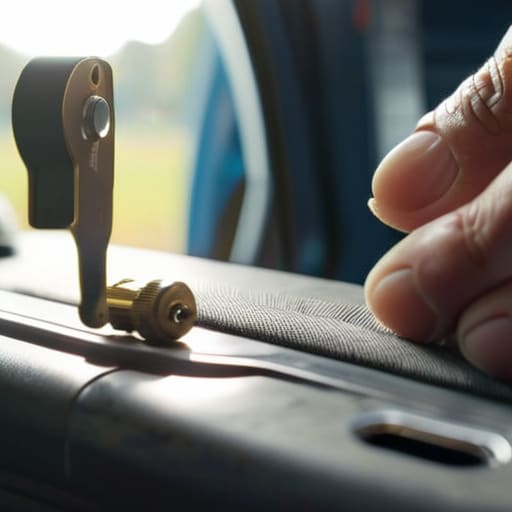
You’re probably staring at your door handle right now, wondering if you need to drop a few hundred bucks at the dealership just because the latch won’t budge. Most mechanics will try to tell you the entire actuator assembly is fried and needs a full replacement, but honestly? That’s usually a total exaggeration. I’ve spent way too many afternoons in my dad’s garage seeing people get talked into expensive repairs when the actual issue is just a bit of grit or a loose linkage. A little bit of door lock repair doesn’t require a master technician or a diagnostic computer; most of the time, it just takes a screwdriver and a little bit of grit to get it sorted.
I’m not here to give you some textbook lecture or sell you on fancy, overpriced kits. I’m going to show you exactly how to strip things down, find the actual culprit, and get that lock clicking smoothly again without breaking the bank. We’re going to walk through the common failure points and the specific tools you’ll actually need to get the job done right. Let’s stop letting these small mechanical hiccups ruin your day and just fix it ourselves.
Table of Contents
- Step-by-Step Instructions
- Finding Stuck Door Lock Solutions Without the Professional Price Tag
- The Truth About Fixing a Jammed Door Latch Yourself
- Pro Tips to Save Your Sanity (and Your Wallet)
- The Bottom Line on Fixing Your Own Locks
- ## The Real Cost of a Sticky Lock
- Don't Let a Sticky Lock Win
- Frequently Asked Questions
Guide Overview
Tools & Supplies
- Screwdriver (Phillips head for removing screws)
- Lubricant (Graphite powder or silicone spray for moving parts)
- Pliers (To grip or adjust small components)
- Replacement screws (Small set if original are lost)
- Cleaning cloth (To remove old grease and debris)
Step-by-Step Instructions
- 1. First things first, you gotta get inside the door. Pop that plastic trim panel off by using a trim removal tool or even a flathead screwdriver—just wrap the tip in some electrical tape so you don’t scuff up the paint or the plastic. Once the panel’s off, you’ll see a bunch of wires and some metal rods; just be careful not to yank them too hard or you’ll be looking at a much bigger headache.
- 2. Now, you need to find the culprit. Most of the time, it’s either a disconnected rod or a dried-out actuator. Look for the metal linkages that connect your handle to the locking mechanism. If a rod has popped out of its little plastic clip, that’s your golden ticket right there. If it’s still connected but just feels limp, we’re likely looking at a mechanical failure inside the actuator itself.
- 3. If you find a disconnected rod, don’t just shove it back in and call it a day. Check the plastic clips for cracks. If they’re busted, go grab some replacements from the auto parts store—they’re dirt cheap. Snap the rod back into the clip and give it a little wiggle to make sure it’s seated right before you start putting everything back together.
- 4. If the rods are fine but the lock still won’t budge, you’re probably dealing with a dead actuator. This is the little motor that does the heavy lifting. You’ll need to unbolt the actuator assembly from the door frame. It’s usually held in by a couple of Torx or Phillips screws. Keep your magnetic tray handy here, because if you drop one of those screws into the bottom of the door cavity, you’ll be fishing for an hour.
- 5. Once the old actuator is out, take a second to clean out any grit or old, nasty grease that’s built up in the housing. It’s a small step, but it makes a huge difference. Wipe everything down with a bit of cleaner and apply a fresh layer of lithium grease to the moving parts. This keeps things smooth and prevents the new part from wearing out prematurely.
- 6. Swapping in the new actuator is pretty straightforward. Line it up with the existing rods, bolt it down, and make sure the connections are tight. Before you go through the trouble of snapping that door panel back on, test the lock a few times using both the interior handle and the key fob. You don’t want to realize you missed a step after you’ve already clipped all the plastic tabs back into place.
- 7. Finally, once you’re sure it’s working, reattach the wiring harnesses and the door handle cables. Line up the trim panel, press firmly around the edges until you hear it click into place, and then screw the mounting bolts back in. Give it one last test, and you’re done. You just saved yourself a massive shop bill.
Finding Stuck Door Lock Solutions Without the Professional Price Tag
Look, before you go calling an emergency lock repair service and dropping a couple hundred bucks just to have someone poke at your door, you need to realize that half the time, it’s just a buildup of grit and old, dried-out grease. Most of the time, I’m seeing people struggle with a jammed door latch simply because they haven’t done any real door hardware maintenance tips in years. If you can feel the mechanism moving but it just won’t “click,” it’s likely just gummed up. Grab a can of specialized dry lubricant—don’t use the heavy, sticky stuff—and try lubricating door lock mechanisms directly where the moving parts meet. It sounds simple, but it saves a massive headache.
If the lubricant doesn’t do the trick, you might be looking at something more mechanical, like a failing actuator. If you hear a whirring sound but nothing happens, you’re probably looking at a car door actuator replacement. That’s a bit more involved, but honestly, if you can follow the steps I laid out earlier, you can handle it. Don’t let a small mechanical hiccup turn into a massive repair bill.
The Truth About Fixing a Jammed Door Latch Yourself
Look, I’ve seen guys at the shop get totally overwhelmed because they think a jammed latch means they need a whole new door assembly. Most of the time, it’s just gunked-up debris or a tiny bit of corrosion inside the mechanism. Before you go tearing everything apart, try some lubricating door lock mechanisms with a high-quality dry graphite spray. Avoid the heavy grease stuff; it’ll just attract dust and turn into a sticky mess that makes the problem even worse in a few months.
If the spray doesn’t do the trick, you’re probably looking at a mechanical failure inside the latch itself. This is usually where fixing a jammed door latch gets a bit more technical. You might need to pop the door panel to see if a cable has stretched or if a small spring has snapped. If you hear a clicking sound but nothing moves, it’s a sign that the internal components are shot. At that point, you aren’t just cleaning; you’re looking at a more serious fix, but even then, it’s way cheaper to do it in your driveway than to pay a shop’s hourly rate.
Pro Tips to Save Your Sanity (and Your Wallet)
- Stop spraying WD-40 into everything. I know it’s the first thing most people grab, but that stuff attracts dust and grime like a magnet, which eventually turns into a thick sludge inside your mechanism. Use a dedicated dry silicone lubricant instead; it does the job without making a mess later.
- Get a decent set of screwdrivers before you start tearing things apart. Trying to force a cheap, stripped screwdriver into a door panel screw is the fastest way to turn a ten-minute fix into a three-hour nightmare of broken plastic.
- Don’t forget to check the door actuator first. Sometimes the mechanical parts are fine, but the little motor that actually moves the lock is just dead. It’s a lot easier to swap a part than it is to rebuild an entire latch assembly.
- Keep a small magnetic tray nearby, just like I do. Door locks involve tiny springs and little metal pins that love to disappear into the dark abyss of your car’s floor mats the second you drop them.
- If you’re working on a modern car with a lot of electronics, disconnect the battery if you can. You don’t want to accidentally short out a window switch or a central locking module while you’re poking around the wiring harnesses inside the door.
The Bottom Line on Fixing Your Own Locks
Most of the time, a “broken” lock is just a dirty one; a little lubricant and some cleaning can save you a massive headache and a shop bill.
Don’t go buying expensive replacement parts until you’ve actually checked the linkage and the actuator—it’s often a simple mechanical jam, not a dead component.
You don’t need to be a master mechanic to do this, just grab a screwdriver, keep your parts organized, and don’t force anything if it feels stuck.
## The Real Cost of a Sticky Lock
Most mechanics will try to sell you a whole new assembly when all you really need is a can of cleaner and ten minutes of your time. Don’t let them charge you a week’s worth of groceries just because a little bit of grit got into the mechanism.
Nikolai·Osterman
Don't Let a Sticky Lock Win
Look, at the end of the day, fixing a door lock isn’t some high-level engineering feat that requires a master technician. Whether you were just dealing with a bit of grit in the mechanism that needed some penetrating oil or you actually had to swap out a busted actuator, you’ve done more than most people would. We covered how to diagnose the jam, the importance of using the right lubricant instead of whatever grease you find in the junk drawer, and how to avoid those massive locksmith fees. Just remember: if the latch feels crunchy or won’t catch, don’t force it with a screwdriver, or you’ll end up breaking something way more expensive than a simple spring.
I know it can feel a bit intimidating when you’re staring at a door panel full of wires and clips, but that’s exactly how you learn. Every time you tackle a small job like this, you’re building the confidence to handle the bigger, scarier stuff under the hood later on. My dad always said that the best way to understand a machine is to get your hands a little dirty and see how it works for yourself. So, keep that magnetic tray handy, stay patient, and trust your gut. You’ve got this, and your wallet is definitely going to thank you for it.
Frequently Asked Questions
Is it actually safe to use WD-40 on my door locks, or am I just going to gunk everything up later?
Look, I get why you’d reach for the WD-40; it’s probably the first thing in your junk drawer. But honestly? Don’t do it. It’s a solvent, not a long-term lubricant. It’ll loosen the grit for a second, but it eventually dries out and leaves this sticky residue that actually attracts more dust and dirt. You’ll end up with a bigger mess than when you started. Grab some dry graphite spray or a dedicated lithium grease instead.
How do I know if the problem is just a dirty latch or if I actually need to buy a whole new lock assembly?
Look, don’t go ordering a new assembly just yet. First, spray some cleaner into the latch and work the mechanism manually. If it starts moving freely after a bit of scrubbing, it was just gunked up with road grime and old grease. But, if you hear a grinding sound or the metal feels physically snapped/stuck regardless of the cleaning, that’s a mechanical failure. At that point, you’re looking at a replacement.
Can I fix this without having to rip the entire interior door panel off, or is that part of the job no matter what?
Look, I’ll be real with you: sometimes you can get lucky. If it’s just a bit of grit or a loose linkage, you might be able to spray some cleaner through the gaps or wiggle things around. But if the actual actuator or the latch mechanism is shot? Yeah, you’re going to have to pull that panel. I hate doing it as much as you do, but you can’t fix what you can’t see.
