Category: Repairs

  • Replacing a Side View Mirror

    Replacing a Side View Mirror

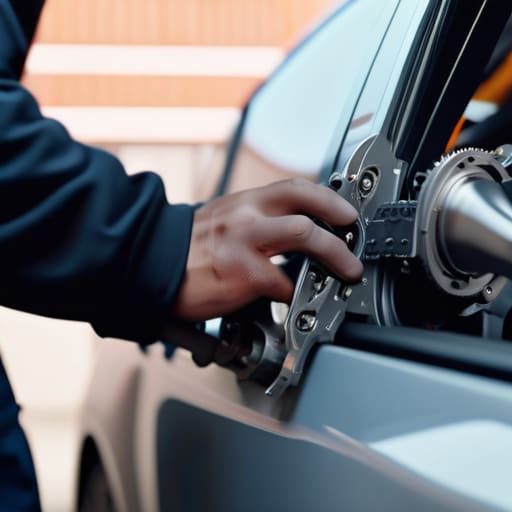
    I remember pulling into the shop last Tuesday with a customer who was absolutely livid because the dealership quoted him four hundred bucks just to swap out a cracked housing. He thought he was looking at a massive electrical nightmare, but honestly? It was just a few plastic clips and a standard screwdriver away from being fixed. Most people think a side mirror replacement is some high-tech, sensor-heavy ordeal that requires a computer programmer, but that’s just marketing fluff designed to keep your wallet thin.

    I’m not here to give you some polished, textbook lecture that ignores how messy real work actually is. I’m going to walk you through the actual grit of the job, from popping the door panel without snapping those annoying plastic tabs to making sure your heated elements actually work when you’re done. You’re going to get the no-nonsense truth on the tools you actually need and the small mistakes that usually trip people up. Let’s get under the hood—or in this case, inside the door—and get this sorted so you can stop overpaying for basic maintenance.

    Table of Contents

    Guide Overview

    Total Time: 30-60 minutes
    Estimated Cost: $50-$250
    Difficulty: Beginner

    Tools & Supplies

    • Socket wrench set to remove mounting bolts
    • Trim removal tool to pry off plastic panels
    • Screwdriver to detach electrical connectors
    • Replacement side mirror assembly (1 unit)
    • Microfiber cloth for cleaning contact surfaces

    Step-by-Step Instructions

    • 1. First things first, grab your tools and get inside the car. You’re going to need a screwdriver (usually Phillips head), maybe a small trim removal tool if you don’t want to scratch your door panel, and a socket set. Before you even touch a screw, pop the mirror glass out by gently prying it from the corner. Most of them just snap out with a bit of leverage, but don’t go hammering on it or you’ll shatter the glass everywhere.
    • 2. Once the glass is out of the way, you’ll see the motor assembly and a plastic cover underneath. This is where people usually get intimidated, but it’s just a few clips and screws. Use your trim tool to carefully pry that plastic housing away. You might have to dig around a little to find where the clips are seated, but once they pop, you’re in the clear.
    • 3. Now, look for the mounting bolts. These are usually tucked deep inside the door cavity, holding the mirror assembly to the actual metal of the car. You’ll likely need a socket wrench for this part. I always keep my magnetic parts tray handy here because if you drop one of these bolts into the bottom of the door, you’re going to have a very long afternoon trying to fish it out.
    • 4. After you’ve loosened and removed the bolts, you can finally pull the old mirror assembly away from the door. It might feel stuck because of the weather stripping, so give it a firm, steady tug. Once it’s off, take a second to clean the mounting surface. If there’s dirt or old debris stuck in there, your new mirror won’t sit flush, and that’s just asking for wind noise or leaks later on.
    • 5. Line up your new mirror with the mounting holes. This is a bit of a balancing act since you’re holding the weight of the mirror while trying to thread the bolts back in. Take your time with this part; you don’t want to cross-thread a bolt and ruin the mounting point. Get the bolts started by hand first to make sure they’re catching right before you tighten them down with the wrench.
    • 6. With the mirror securely bolted to the door, it’s time to snap that plastic cover back on. Press it firmly until you hear the clips click into place. If it feels loose, something is probably misaligned, so pull it back and try again. You want it to look like it came straight from the factory.
    • 7. The final step is putting the glass back in. Line up the clips on the back of the mirror glass with the slots on the motor assembly. Give it a firm press until it snaps into place. Once that’s done, turn your car on and test the power adjustments to make sure the motor is actually moving. If it works, you just saved yourself a massive markup at the dealership.
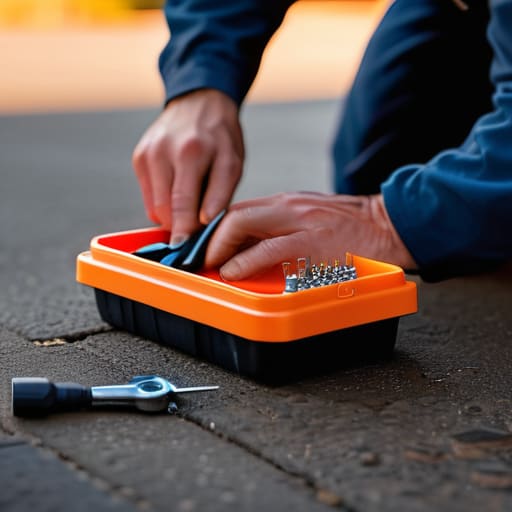
    Essential Automotive Mirror Repair Tools You Actually Need

    Essential Automotive Mirror Repair Tools You Actually Need

    Look, you don’t need a massive rolling toolbox to get this done, but don’t go trying to wing it with a kitchen knife or a dull screwdriver. If you’re planning to replace broken side view mirror components, you’re going to want a decent set of socket extensions and a trim removal tool. I can’t stress this enough: using a flathead screwdriver to pry off your door panel is a one-way ticket to scratching your paint or snapping a plastic clip. Grab a cheap plastic pry tool instead; it saves your interior from looking like it went through a war zone.

    Since I’m usually digging through my own kit, I’ve learned that having the right automotive mirror repair tools makes the difference between a thirty-minute job and an afternoon of frustration. If your mirror has power adjustments, make sure you have a small precision driver handy for those tiny electrical connectors. Also, if you’re dealing with a car mirror housing replacement rather than just the glass, keep a bit of electrical tape and some zip ties nearby. Sometimes the mounting bracket is a little loose, and a quick tie-down can keep everything from rattling while you’re cruising down the highway.

    How to Fix Cracked Mirror Glass Without a Pro

    How to Fix Cracked Mirror Glass Without a Pro

    Look, if the actual plastic housing isn’t smashed, you don’t need to go out and buy a whole new assembly. A lot of guys think a crack in the glass means they have to replace broken side view mirror units entirely, but that’s just throwing money away. If it’s just the glass that’s spiderwebbed, you can usually pop the old piece out and snap a new one in. Just be careful when you’re prying—you don’t want to snap the heating elements if your car has them.

    When you’re figuring out how to fix cracked mirror glass, grab a thin plastic trim tool or even a flathead screwdriver wrapped in a bit of tape so you don’t mar the surface. Once the old glass is out, wipe the backing down with some isopropyl alcohol. You want that surface completely free of grit and old adhesive before the new glass goes on. It’s a ten-minute job that saves you a hundred bucks, and honestly, it’s one of those small wins that makes DIY worth it.

    Pro Tips to Keep You From Screwing This Up

    • Don’t just yank the old mirror off. If you force it, you’re probably going to snap those plastic mounting clips, and then you’re looking at a much bigger headache than just a simple swap.
    • Double-check your wiring before you snap the new housing into place. If your mirror has heated elements or turn signals, make sure those plugs are seated tight and clicking. There’s nothing worse than finishing the job only to realize your blinker doesn’t work.
    • Keep a small container or even a piece of tape handy for the bolts. I always keep my magnetic parts tray in my back pocket for a reason—those tiny screws love to disappear into the floor mat the second you drop them.
    • If you’re working on a car with power-folding mirrors, make sure the electronics are turned off or the fuse is pulled if you’re getting weird resistance. You don’t want to burn out a motor because the system was trying to adjust while you were mid-install.
    • Clean the mounting surface thoroughly before you put the new one on. If there’s old grit or dried sealant in the way, the new mirror won’t sit flush, and you’ll end up with annoying rattles every time you hit a pothole.

    The Bottom Line on Mirror Repairs

    Don’t let a shop charge you a fortune just because a mirror looks intimidating; if you’ve got the right screwdriver and a little patience, it’s a job you can handle in your own driveway.

    Always double-check if you’re replacing the whole assembly or just the glass—sometimes it’s a five-minute fix, and other times you’ll need to tackle the wiring.

    Keep your workspace organized, especially with those tiny mounting clips, so you aren’t hunting for lost parts halfway through the job.

    ## Don't Let a Small Crack Cost You a Big Bill

    “A busted side mirror isn’t a reason to hand over a couple hundred bucks to a service advisor; it’s just a twenty-minute job that’s waiting for you to grab a screwdriver and get it done.”

    Nikolai·Osterman

    Wrapping It All Up

    Wrapping It All Up: Mirror replacement guide.

    Look, swapping out a side mirror might seem intimidating when you’re staring at all those wires and plastic clips, but we just broke it down. Whether you were just replacing the glass or pulling the entire assembly out of the door panel, the core process is the same: get the right tools, take your time with the fasteners, and don’t force anything that feels stuck. Most of the time, a little bit of patience and a steady hand with a screwdriver is all it takes to get back on the road safely. You’ve got the tools, you’ve got the steps, and now you’ve got a mirror that actually works without draining your bank account at a dealership.

    At the end of the day, my goal isn’t just to teach you how to fix a mirror; it’s to show you that you’re capable of more than you think. Every time you pick up a wrench and tackle a job yourself, you’re taking control of your own machine. Don’t let the fear of a little grease or a confusing wire harness keep you from owning your maintenance. Keep practicing, keep learning, and remember that most of these “complex” repairs are just puzzles waiting to be solved. I’ll see you in the next one—now go get that car back in shape.

    Frequently Asked Questions

    What if my mirror has heated glass or power-folding features—is the process way more complicated?

    Look, if your mirror has heating or power-folding, it’s not necessarily “harder,” it just means there’s more wiring to respect. You aren’t just dealing with a plastic shell anymore; you’re dealing with electrical connectors. Don’t just yank on the housing. You’ll need to be extra careful when unplugging the harness to avoid snapping those tiny plastic clips. As long as you take your time and don’t force anything, you’ll be fine.

    How do I know if I can just swap the glass, or if I actually have to pull the whole housing off the door?

    Look, here’s the deal: if the plastic housing is intact and only the glass is shattered or pitted, don’t waste your time pulling the whole assembly off. You can usually just pop the glass out. But, if you’ve got a cracked mirror cap, a loose mounting arm, or your power adjustments aren’t working, that’s a different story. In those cases, you’re swapping the whole unit. Don’t overcomplicate it—check the plastic first.

    Is there a way to tell if the motor inside the assembly is dead versus just having a loose wire?

    It’s a fair question, and honestly, it’s what saves you a ton of money. Here’s the trick: if you can hear a faint clicking or whirring sound when you hit the switch, but the glass doesn’t move, you probably just have a loose connection or a stripped gear. But if it’s dead silent and you’ve already checked your fuses, the motor is likely toast. Use a multimeter to check for power at the plug first.

  • Replacing a License Plate Light Bulb

    Replacing a License Plate Light Bulb

    I was standing in the driveway last Tuesday, squinting through the glare of a streetlamp, when I realized my rear plate was basically invisible in the dark. Most people see a dead bulb and immediately think they need to book an appointment at the dealership or pay some guy fifty bucks just to turn a plastic housing. That’s a total scam. A license plate light replacement isn’t some high-tech sensor calibration that requires a master technician; it’s one of those tiny, annoying tasks that most shops will try to overcharge you for just because they know you don’t have the right tools.

    I’m not here to give you some textbook manual or a list of expensive equipment you don’t need. I’m going to show you exactly how to pop that housing, swap the bulb, and get back on the road without wasting a dime. I’ll walk you through the specific tricks I use at the shop to make sure you don’t snap those fragile plastic clips, because once you break them, you’re looking at a much bigger headache. Let’s get under the hood—or in this case, the trunk—and stop letting small fixes drain your wallet.

    Table of Contents

    Guide Overview

    Total Time: 15-30 minutes
    Estimated Cost: $5-20
    Difficulty: Beginner

    Tools & Supplies

    • Screwdriver (Phillips or flathead depending on housing screws)
    • Small flathead screwdriver (for prying plastic trim or sockets)
    • Replacement bulbs (1-2 depending on vehicle)
    • Microfiber cloth (to clean housing)

    Step-by-Step Instructions

    • 1. First things first, grab your gear. You’re going to need a small flathead screwdriver—ideally one with a plastic handle so you don’t scratch the paint—and a fresh bulb. Before you even touch the car, make sure the lights are turned off and the ignition is out of the key. You don’t want to be getting a nasty little zap while you’re poking around the electrical housing.
    • 2. Locate the light housing on the back of your car. Most of these are held in place by either a small screw or a plastic clip. If it’s a screw, just back it out slowly. If it’s a clip, you’ll need to gently pry the edge of the plastic casing away from the trunk or bumper. Don’t go ham on it; these plastic tabs get brittle over time, and the last thing you want is to snap a piece off and end up with a permanent gap in your trim.
    • 3. Once you’ve popped the housing loose, you’ll see the bulb sitting in its socket. Depending on your car, it’ll either be a standard wedge bulb or a tiny T10 style. If it’s a wedge bulb, just pull it straight out. If it’s a twist-lock style, give it a tiny nudge to the left to unlock it from the socket. This is where I usually reach for my magnetic tray just in case a tiny screw decides to make a run for it.
    • 4. Take a quick look at the old bulb before you toss it. If the glass is dark or the little filament inside is broken, you’ve definitely found your culprit. Check the socket for any signs of burnt plastic or corrosion. If it looks crusty, give it a quick wipe with a clean rag or some contact cleaner. You want a solid connection, otherwise, you’ll be doing this whole dance again in two weeks.
    • 5. Slide your new bulb into the socket. If it’s a wedge bulb, it should just slide right in, but if it’s a T10, make sure it’s seated firmly. Don’t force it. If it’s not going in, you might have it oriented the wrong way. Once it’s in, give it a tiny wiggle to make sure it’s snug and won’t rattle around while you’re driving down a bumpy road.
    • 6. Before you snap everything back together, do a quick test. Turn your parking lights on and verify the new bulb actually works. I’ve seen plenty of guys spend twenty minutes wrestling with a housing only to realize they bought a dud bulb from the auto parts store. It’s a small step, but it saves a massive headache.
    • 7. Now, just reverse what you did to get in there. Slide the housing back into position and tighten the screw or press the clip back into place. Give the housing a light tug just to make sure it’s secure and isn’t going to fall off on the highway. If it feels solid, you’re officially done and you just saved yourself a trip to the shop and a $50 diagnostic fee.

    Tackling License Plate Light Socket Corrosion Without a Mechanic

    Tackling License Plate Light Socket Corrosion Without a Mechanic

    If you’ve already swapped out the bulb and you’re still staring at a dead light, don’t freak out—it’s probably not the bulb’s fault. I’ve seen this a hundred times at the shop: you put in a brand new part, but nothing happens because of license plate light socket corrosion. Moisture gets trapped in those little housings, especially if you live somewhere with salt on the roads or heavy rain, and it creates this nasty green or white crust on the metal contacts. If you don’t clear that gunk out, you’re basically just throwing money away on new parts.

    To fix this, grab a small wire brush or even a bit of sandpaper and gently scrub those contact points until they look bright again. A quick spray of electronic cleaner can work wonders here too. Once you’ve got the connection clean, this is actually the perfect time to consider an automotive LED upgrade kit. LEDs handle vibration better and generally stay cooler, which helps prevent that moisture buildup from getting as bad. Just take your time and don’t force the socket if it feels stuck; a little patience saves you from snapping a plastic clip.

    Mastering Car Exterior Lighting Maintenance With Simple Tools

    Mastering Car Exterior Lighting Maintenance With Simple Tools

    Once you’ve tackled that one bulb, don’t just pack up your tools and call it a day. I’ve seen way too many people ignore their other exterior lights until they get pulled over or fail a state inspection. Real car exterior lighting maintenance is about being proactive. Take a quick walk around the car every few weeks; it only takes thirty seconds to spot a cracked lens or a flickering signal. If you notice your plates are hard to read at night, you might need to look into how to fix dim license plate lights by checking if the housing is clouded up or if the bulb is just losing its juice.

    Honestly, most of what you need is already in your basic toolkit, but a few specific automotive bulb replacement tools, like a small trim removal tool or a decent set of precision screwdrivers, can save you from scratching your paint or snapping a plastic clip. If you really want to level up, I usually suggest grabbing an automotive LED upgrade kit. They last way longer than the old halogen ones and they’re much brighter, which makes life a lot easier when you’re working in a dark driveway.

    Pro Tips to Keep the Lights On (And Your Wallet Full)

    • Grab a handful of dielectric grease before you snap that new bulb in; it keeps moisture out and stops that annoying buzzing sound from a loose connection.
    • Don’t go brute-forcing those plastic housings if they feel stuck. If you’re working in the cold, a little bit of warmth or just being patient with the clips will save you from snapping a piece of plastic that’s impossible to replace.
    • Always check the fuse box if a new bulb doesn’t work immediately. I’ve seen plenty of people spend an hour tearing apart a light assembly only to realize they blew a $2 fuse ten minutes ago.
    • Match your bulb type exactly. Don’t try to jam a slightly different size in there just because it looks close; you’ll end up with a gap that lets rain in, and then you’re dealing with a corroded socket.
    • Keep a small magnetic tray—like the one I keep in my back pocket—nearby when you’re working. Those tiny screws for license plate housings love to jump into the gravel the second you let go of them.

    The Bottom Line on Your License Plate Lights

    Don’t let a tiny bulb turn into a massive shop bill; most of the time, it’s a ten-minute job that only costs a few bucks if you do it yourself.

    If the new bulb doesn’t work right away, stop messing with it and check your socket for corrosion—cleaning those contacts is usually the real fix.

    Keep a basic set of small screwdrivers and some electrical cleaner in your kit so you aren’t scrambling when a light goes dark right before a drive.

    ## Don't Let the Small Stuff Drain Your Wallet

    “A dead license plate light isn’t a mechanical failure; it’s just a tiny inconvenience that some shops try to turn into a fifty-dollar service call. Grab a screwdriver, swap the bulb, and keep that extra cash for something that actually matters, like better tires or a new set of wrenches.”

    Nikolai·Osterman

    Don't Let the Small Stuff Slow You Down

    Don't Let the Small Stuff Slow You Down

    At the end of the day, fixing your license plate lights is about more than just seeing your registration clearly at night. It’s about knowing that you handled the corrosion, picked the right bulb, and didn’t let a twenty-minute job turn into a fifty-dollar invoice at the shop. Whether you were struggling with a stubborn housing or just cleaning out some crusty contact points, you’ve officially taken control of a piece of your vehicle. Just remember to keep that magnetic tray handy so you don’t lose those tiny screws in the driveway, and always double-check that your seals are seated right to keep the moisture out for good.

    I know it can feel intimidating when you’re staring at a piece of plastic and a few wires, but honestly, most people overcomplicate this stuff just to charge you more. Once you get through this, you’ll realize that the gap between “knowing nothing” and “fixing it yourself” is much smaller than the mechanics want you to believe. Don’t be afraid to get your hands a little dirty and trust your own intuition. Every time you finish a repair like this, you’re building the confidence to tackle something even bigger under the hood. Keep at it, stay patient, and I’ll see you in the next one.

    Frequently Asked Questions

    I just put in a new bulb but it still won't turn on—could it be a blown fuse?

    Yeah, that’s a huge possibility. If you’ve swapped the bulb and it’s still dead, you’re likely looking at a blown fuse. It’s one of those things shops charge way too much for, but it’s actually an easy win for you. Grab your owner’s manual to find the fuse box diagram—it’s usually under the dash or the hood—and look for the one labeled for “tail lights” or “parking lights.” Check it with a tester or just swap it out.

    Can I just swap the old bulb for an LED one, or will that mess with my car's electrical system?

    You can definitely swap them for LEDs, but don’t just grab the cheapest ones on Amazon. Since LEDs draw way less power than your old halogen bulbs, some cars think the bulb is blown and’ll start hyper-flashing or throw a dashboard error. If that happens, you’ll need “CAN bus ready” LEDs—they’ve got built-in resistors to trick the car into thinking everything is normal. It’s a simple upgrade, just make sure they’re compatible first.

    How often should I actually be checking these lights so I don't get pulled over?

    Honestly, don’t wait for a cop to point it out. I usually do a quick walk-around every time I fuel up—it only takes thirty seconds to glance at the rear. If you’re hitting the road for a long trip, definitely do a full check of every bulb before you leave. It’s way better to catch a dim or dead light in your own driveway than under a spotlight at 2 AM.

  • Replacing a Brake Light Bulb

    Replacing a Brake Light Bulb

    I was pulling into my buddy’s driveway last week when he pointed out my left tail light was dark, and honestly, I almost felt that familiar sting of dread. Most people think a dead bulb means a mandatory trip to the shop where you’ll end up paying fifty bucks just for a guy to click a plastic housing open. But here’s the truth: a brake light bulb replacement is one of those “why didn’t I do this sooner?” tasks that takes less time than grabbing a coffee. I’ve seen mechanics try to charge full labor rates for something you can do in your driveway with nothing but a pair of gloves and a bit of grit.

    I’m not here to give you some overly polished, textbook manual that makes a simple fix sound like rocket science. Instead, I’m going to walk you through the real-world way to handle this, from finding the right part at the local auto store to making sure you don’t snap any brittle plastic clips in the process. My goal is to get you back on the road safely without draining your wallet for a five-minute job. Let’s get under the hood and get it done.

    Table of Contents

    Guide Overview

    Total Time: 15-30 minutes
    Estimated Cost: $5-20
    Difficulty: Beginner

    Tools & Supplies

    • Screwdriver (to remove housing screws)
    • Rag (to clean hands or surfaces)
    • Replacement brake light bulb (1 unit)
    • Work gloves (1 pair)

    Step-by-Step Instructions

    • 1. First, grab your spare bulb and make sure it’s the right one. I always tell people to check the manual or just pop the old one out first to match the base. You don’t want to get halfway through this only to realize you bought a single filament when you needed a dual one.
    • 2. Next, you need to get to the housing. Depending on your car, you’ll either be popping the trunk and looking for a small access panel, or you might have to reach through the wheel well. Just don’t force anything; if it feels stuck, you’re probably pulling the wrong way.
    • 3. Once you’re looking at the light assembly, you’ll see a plastic socket holding the bulb in place. Give it a firm but gentle counter-clockwise twist. It should click and loosen up. If it’s been sitting in the rain or salt for years, it might be a bit crusty, so just use a little extra patience there.
    • 4. Pull the socket straight out of the housing. Now, grab the old bulb and give it a little twist to release it from the socket. This is where I usually reach for my magnetic parts tray just in case I drop a tiny screw or a clip, because let’s be real, things love to disappear in a dark trunk.
    • 5. Take your new bulb and slide it into the socket. Line up the little metal tabs on the side of the bulb with the slots in the socket so it sits flush. You’ll feel it seat itself once it’s in the right spot, so don’t try to force it if it feels wonky.
    • 6. Before you put everything back together, do a quick test. Hit the brakes (make sure no one is behind you first!) to see if the new bulb actually lights up. It’s way better to catch a dud bulb now than to finish the whole job only to realize you’re still driving around dark.
    • 7. Finally, slide the socket back into the housing and twist it clockwise until it locks tight. If you had to remove any plastic covers or trim pieces to get there, just snap them back into place. You’re done—and you just saved yourself a sixty-dollar shop fee for something that took ten minutes.

    Identifying the Right Brake Light Bulb Size and Types

    Identifying the Right Brake Light Bulb Size and Types

    Before you even grab your tools, you need to make sure you aren’t walking into the auto parts store with the wrong info. Most people just guess, but if you grab a bulb that’s even a millimeter off, it’s not going to seat right in the socket. The easiest way to find your exact brake light bulb size is to check your owner’s manual or, honestly, just pull the old one out and look at the metal base. There’s usually a tiny code stamped right there, like 1157 or 7443. Knowing your specific automotive bulb types saves you that annoying second trip back to the store when the new one doesn’t fit.

    While you’re in there, keep an eye out for any nasty buildup. If you notice a white, crusty powder inside the housing, you’re likely dealing with brake light socket corrosion. It happens more often than you’d think due to moisture getting trapped. If the connection looks junk, a quick clean with some contact cleaner can prevent a massive headache later. Don’t just replace burnt out brake bulb units blindly; take a second to make sure the socket is actually healthy enough to hold a charge.

    Tackling Tail Light Assembly Removal Without the Stress

    Tackling Tail Light Assembly Removal Without the Stress

    Sometimes, you aren’t just dealing with a dead bulb; you’re dealing with a housing that’s stuck like it’s been welded on. If you find yourself needing to do a full tail light assembly removal because the plastic is cracked or the socket is fried, don’t just start yanking on it. You’ll snap a mounting tab, and then you’re looking at a much more expensive repair. I always tell people to grab a screwdriver and check for hidden screws tucked deep in the corners or behind trim pieces. If it feels stuck, it’s usually just road grime or a stubborn clip, not a sign that you’re breaking it.

    While you’ve got the assembly out, take a second to look inside the housing. This is the perfect time for some quick car electrical troubleshooting. Check the metal contacts for any signs of brake light socket corrosion or black soot. If the metal looks crusty or green, a little bit of electrical contact cleaner can work wonders. It’s way better to fix the connection now than to replace a burnt out brake bulb only to have it fail again next week because the socket was the real problem.

    Pro Tips to Save Your Sanity (and Your Hands)

    • Don’t touch the glass. Seriously. If you grab the new bulb with your bare fingers, the oils from your skin can bake onto the glass when it gets hot, causing it to burn out way faster than it should. Use gloves or just hold it by the plastic base.
    • Check the other side while you’re at it. If one bulb died, the other one is usually right behind it. Since you’ve already got the tools out and the assembly pulled, just swap both. It’s better than having to do this whole job twice in two weeks.
    • Inspect the socket for any crusty buildup. If you see any white or green corrosion inside the socket, give it a quick clean with some electrical contact cleaner. If the connection is junk, a brand-new bulb won’t do a damn thing.
    • Give it a wiggle test before you snap everything back together. Once you pop the new bulb in, turn your brakes on and have a buddy stand behind the car (or just use a reflection) to make sure it actually lights up. There’s nothing worse than putting the whole tail light assembly back together only to realize it’s still dark.
    • Keep your parts organized. I know it sounds basic, but I’ve seen guys lose those tiny plastic trim clips in the grass or under the car. Keep a small tray—or even just a magnetic one like the one I keep in my pocket—to hold every single screw and clip you pull out.

    The Bottom Line on Fixing Your Own Lights

    Don’t just guess on the bulb type—double-check your manual or the old bulb itself so you don’t end up with a part that doesn’t fit or, worse, blows a fuse the second you turn it on.

    Take your time with those plastic clips and housing screws; forcing a tail light assembly is the fastest way to turn a ten-minute job into a much more expensive repair.

    Most of the time, you don’t need a fancy shop setup to do this—just a basic screwdriver, some patience, and the confidence to know you’re saving yourself a ridiculous labor charge.

    The Real Cost of a Burned-Out Bulb

    “Look, a dead brake light isn’t a mechanical crisis, it’s just a minor inconvenience that shops love to charge you eighty bucks to ‘diagnose.’ Don’t let them turn a five-minute bulb swap into a whole afternoon of labor costs—grab a new bulb, pop the housing, and keep that money in your pocket instead.”

    Nikolai·Osterman

    Wrapping It All Up

    Wrapping It All Up: replacing car bulbs.

    Look, once you’ve grabbed the right bulb size and successfully navigated that tail light assembly without snapping any plastic clips, you’re basically home free. It really isn’t as intimidating as the service advisors at the dealership try to make it sound when they’re quoting you a hundred bucks for ten minutes of work. Just remember to double-check that the bulb is seated properly in the socket before you snap everything back together, and always make sure your hands are clean so you aren’t leaving grease all over the new lens. If you followed these steps, you’ve just turned a potential fine or a safety hazard into a five-minute win that stays in your pocket instead of the shop’s cash register.

    At the end of the day, these little wins are how you build real confidence under the hood. Every time you tackle a repair like this yourself, you’re taking a bit of control back from the big shops and learning the language of your own machine. Don’t let the fear of breaking something stop you from trying; honestly, most things are way more durable than we give them credit for. Keep that magnetic tray handy, keep turning wrenches, and remember that you’re more than capable of keeping your ride in shape. You’ve got this.

    Frequently Asked Questions

    What should I do if the new bulb still doesn't work after I've swapped it out?

    If you slapped a new bulb in and still get nothing, don’t panic—it’s usually something small. First, double-check that the bulb is actually seated right in the socket; sometimes they don’t click in all the way. If that’s fine, grab some contact cleaner and check the socket for corrosion or burnt pins. If the socket looks fried, you might need a new one. Worst case? It’s a blown fuse. Check your manual and swap it out.

    Is it worth buying the expensive LED bulbs, or should I just stick to the standard ones?

    Honestly, it depends on what you’re after. If you just want to pass inspection and keep things simple, stick to the standard halogen bulbs. They’re cheap, easy to find, and they work. But, if you want that crisp, modern look—or if you’re tired of swapping bulbs every few months—go with the LEDs. They last way longer, though they can be a pain if your car’s computer starts throwing error codes.

    Do I need to worry about cleaning the socket or checking for corrosion while I've got it all apart?

    100%. Honestly, if you’ve got it all apart, don’t skip this. If you see any white crusty stuff or green corrosion in that socket, it’s going to mess with your connection and eventually kill your new bulb. Grab a bit of electrical contact cleaner or even just a small wire brush to scrub it out. It takes two minutes, but it’s the difference between a solid fix and being back in the driveway next week.

  • Replacing a Windshield Wiper Motor

    Replacing a Windshield Wiper Motor

    There’s nothing quite like being caught in a sudden downpour, staring through a windshield that’s basically a sheet of moving water because your wipers just gave up. Most shops will see that and immediately start talking about electrical harnesses or expensive control modules to drive up the bill, but here’s the truth: it’s usually just a dead motor. I remember working on my neighbor’s old sedan last month; he was ready to shell out hundreds for a “diagnostic fee,” but a quick check showed the wiper motor replacement was the only thing actually needed. It’s a common headache, but it’s definitely not a death sentence for your wallet.

    I’m not going to bore you with a bunch of technical jargon or tell you that you need a professional-grade scanner to get this done. Instead, I’m going to walk you through the actual process of swapping that motor out using just a few basic tools you probably already have in your trunk. My goal is to show you exactly where the bolts are hiding and how to avoid those annoying little clips that always seem to snap if you aren’t careful. Let’s get under the hood and get those blades moving again.

    Table of Contents

    Guide Overview

    Total Time: 1-2 hours
    Estimated Cost: $50-150
    Difficulty: Intermediate

    Tools & Supplies

    • Socket set and ratchet for removing mounting bolts
    • Screwdriver set for electrical connectors and trim
    • Trim removal tool to avoid scratching plastic panels
    • Multimeter to test old motor functionality
    • Replacement wiper motor (1 unit)
    • Electrical contact cleaner (1 can)
    • Zip ties for wire management (1 pack)

    Step-by-Step Instructions

    • 1. First things first, you gotta get to the motor, which usually means clearing some space. Pop your hood and look near the base of the windshield. You’ll likely see a plastic cowl cover or some trim pieces blocking your way. Use a screwdriver or a trim removal tool to pop those clips out—just don’t force it, or you’ll end up with a handful of broken plastic bits.
    • 2. Once you can actually see the motor, you need to disconnect the power. Locate the electrical connector plugged into the side of the motor. Squeeze the tab and pull it straight out. If it’s been sitting there for years, it might be a bit stubborn due to corrosion, so give it a little wiggle, but don’t yank on the wires themselves or you’ll be looking at a much bigger problem.
    • 3. Now, you’ve got to unbolt the wiper linkage from the motor. This is where most people get frustrated because it’s usually tucked away in a tight spot. You’ll likely need a socket wrench to loosen the nuts holding the linkage arms to the motor shaft. I always keep my magnetic parts tray handy for this step, because if you drop one of those small nuts into the engine bay, it’s basically gone forever.
    • 4. With the linkage loose, it’s time to unmount the motor itself. There are usually two or three bolts holding the motor housing to the chassis or the wiper assembly. Use your socket set to back these out. Once they’re out, the motor should be free to move, but it might be wedged in there a bit by the surrounding brackets, so just lift it out carefully.
    • 5. Before you grab the new part, take a quick second to inspect the old one. If you see any signs of burnt wiring or heavy rust, it confirms you made the right call. Grab your new motor and line up the mounting holes with the chassis. It’s a bit of a puzzle piece game, so you might have to rotate the motor slightly to get the bolt holes to line up perfectly with the mounting points.
    • 6. Get those mounting bolts back in and tighten them down. You don’t need to go crazy with an impact wrench here—just make sure they’re snug enough so the motor doesn’t vibrate loose while you’re driving down the highway. Once the motor is secure, reconnect the electrical plug until you hear that satisfying click.
    • 7. The final step is the most important: the test run. Before you go through the hassle of putting all that plastic trim back on, turn your ignition to the “on” position and flick the wipers. If they sweep smoothly across the glass without any weird grinding noises, you’ve nailed the repair. If they don’t move, double-check that electrical connection you just made.

    Spotting the Signs Real Windshield Wiper Motor Symptoms

    Spotting the Signs Real Windshield Wiper Motor Symptoms

    Before you go tearing into your dashboard, you need to be sure it’s actually the motor and not something simpler. I’ve seen guys spend an hour pulling apart a cowl just to realize they actually needed a quick wiper motor fuse replacement. If your wipers aren’t moving at all, check your fuse box first. If the fuse is fine but you hear a faint clicking or a low humming sound coming from under the hood when you flip the switch, that’s a classic sign that the motor is trying to work but the internal gears are stripped or the motor itself is dying.

    Another thing to watch for is the speed. If your wipers are moving like they’re stuck in slow motion or they stutter across the glass, that’s a major red flag. It usually means the motor is losing torque or there’s a struggle within the linkage. If you want to be 100% certain before buying parts, try a quick windshield wiper motor diagnostic test by checking for power at the connector using a multimeter. If you’ve got juice hitting the plug but nothing happens, you’ve officially found your culprit.

    The Truth About Automotive Electrical Troubleshooting and Diagnostic Tests

    The Truth About Automotive Electrical Troubleshooting and Diagnostic Tests

    Before you go tearing into the assembly, you need to make sure you aren’t chasing a ghost. I’ve seen so many people jump straight to buying a new motor when the actual problem is just a blown fuse or a loose ground wire. A quick windshield wiper motor diagnostic test can save you fifty bucks and an hour of frustration. Grab a multimeter and check for power at the connector first. If you aren’t getting juice, don’t go buying parts—check your fuse box or look for a corroded wire in the harness.

    If you do have power reaching the motor but nothing is happening, that’s when you know the internal gears or the motor itself have finally given up the ghost. Most of the time, it’s an internal short or just plain old mechanical wear. When you’re diving into automotive electrical troubleshooting, remember that clean connections are everything. If a terminal looks crusty or green, scrub it down before you plug in the new unit. It’s the little things like that which keep a repair from failing a week later.

    Pro Tips to Keep You From Making a Mess of It

    • Don’t skip the fuse check first. I’ve seen guys spend an hour tearing the dash apart for a new motor when all they really needed was a $2 fuse from the fuse box. Always check the electrical basics before you start unscrewing things.
    • Grab a can of contact cleaner. Once you pull that old motor out, spray down the electrical connectors. It’s easy for corrosion to build up in there, and a little cleaning can prevent your new motor from acting glitchy right out of the box.
    • Keep your magnetic tray handy. I can’t tell you how many times I’ve lost a tiny 10mm bolt under the cowl because I just tossed it on the floor. Keep those mounting bolts organized so you aren’t hunting for them in the dark.
    • Check your wiper arms while you’re in there. If you’re already struggling with the motor, it’s the perfect time to hit those linkage points with some lithium grease. It makes the whole system run smoother and takes the strain off the new motor.
    • Take a photo of the wiring before you unplug anything. Modern cars can have weird harness configurations, and even if it looks simple, having a reference photo on your phone saves you a massive headache when you’re trying to plug everything back in.

    The Bottom Line on Fixing Your Wipers

    Don’t let a shop talk you into a massive bill; if your wipers are dead or dragging, it’s almost always just a motor swap that you can handle in your own driveway.

    Before you go buying parts, actually test the electrical side first—sometimes it’s just a blown fuse or a loose connection rather than a dead motor.

    Keep your workspace organized with a magnetic tray and take your time; most of the “hard” parts of this job are just making sure you don’t lose a random bolt in the engine bay.

    ## Don't Let a Small Part Drain Your Wallet

    “A dead wiper motor feels like a massive headache when you’re staring at a rain-soaked windshield, but don’t let a shop talk you into a huge bill. It’s just a small motor and some basic wiring—if you’ve got a socket set and ten minutes of patience, you can fix it yourself and keep that extra cash in your pocket.”

    Nikolai·Osterman

    Don't Let the Shop Overcharge You

    Don't Let the Shop Overcharge You.

    Look, replacing a wiper motor isn’t some high-level engineering feat that requires a master technician and a massive invoice. We’ve gone over the signs, from those annoying stuttering blades to a total dead zone, and we’ve walked through the actual diagnostic steps to make sure it’s the motor and not just a blown fuse. Once you’ve got your tools ready and the old part out of the way, it’s really just a matter of staying organized with your bolts and connectors. As long as you double-check your ground wires and make sure everything is seated tight before you snap the trim back on, you’re going to be just fine.

    At the end of the day, the goal isn’t just to fix a car; it’s to realize that you actually have control over your own ride. Every time you swap a part yourself instead of handing over your hard-earned cash to a dealership, you’re building a level of mechanical confidence that no textbook can teach you. Don’t let the complexity of modern cars intimidate you into being a passive passenger in your own life. Grab your tools, keep that magnetic tray handy, and just get to work. You’ve got this.

    Frequently Asked Questions

    Do I need to replace the wiper linkage too, or is it definitely just the motor that's gone?

    Look, I’ve seen this a dozen times. If your wipers are moving super slow or making a grinding noise, it’s usually the motor. But if they’re moving at the right speed but just twitching or getting stuck in weird positions, that’s your linkage. If a mechanical arm is bent or a joint is totally seized, a new motor won’t fix a broken connection. Check the arms first; if they move freely by hand, stick to the motor.

    Is there a way to test the motor before I go out and buy a new one?

    Look, don’t just drop money on a new motor until you’re sure. Grab a multimeter and check for power at the connector first. If you’ve got juice hitting the plug when the switch is on but the motor’s still dead, then the motor’s definitely cooked. You can also try a quick 12V jump directly to the motor terminals—if it spins, your problem is actually in the wiring or the fuse, not the motor itself.

    How much do I need to worry about getting water in the electrical connectors while I'm working?

    Look, don’t stress too much, but don’t be reckless either. Getting a little splash is fine—it’s not like your car is going underwater. The real headache starts if you leave a connector sitting open and exposed for a long time, or if you plug something back in while it’s still soaking wet. Just keep a few clean rags handy. If things get damp, dry them out completely before reconnecting. It’s all about preventing corrosion.

  • Repairing a Small Windshield Chip

    Repairing a Small Windshield Chip

    I was pulling into the shop last Tuesday when I heard that unmistakable tink—the sound of a pebble deciding it wanted to live inside my glass. Most people see a little crater in their windshield and immediately think they need to drop a few hundred bucks at a glass shop for a full replacement. Honestly, it drives me crazy how shops try to upsell you on a whole new windshield when a simple windshield chip repair is all you actually need. You aren’t driving a high-end luxury tank; you’re driving a machine that just needs a little bit of TLC to stay functional.

    Look, I’m not here to sell you some overpriced professional service or give you a lecture on glass density. I’ve spent enough time under hoods and around broken parts to know that most of this stuff is way simpler than they want you to believe. I’m going to show you exactly how to tackle this yourself using a basic kit and a little patience. My goal is to make sure you walk away knowing how to handle it without getting ripped off by a mechanic who thinks you don’t know any better.

    Table of Contents

    Windshield Repair Kit vs Professional Service Who Wins

    Windshield Repair Kit vs Professional Service Who Wins

    Look, I get the temptation to grab a cheap kit from the auto parts store. When you’re looking at the cost of windshield chip repair, doing it yourself feels like a massive win for your wallet. If it’s just a tiny pit and you catch it early, a DIY kit can work. You just need to be meticulous with the windshield resin curing process—if you mess up the pressure or leave air bubbles, you’ve basically just made the damage permanent.

    But here’s the reality from someone who sees what happens in a shop: sometimes, you need a pro. If the chip is near the edge of the glass or looks like a “star,” a DIY kit won’t cut it. A technician does a proper damage assessment for auto glass to see if the structural integrity is actually compromised. I’ve seen guys try to save fifty bucks only to end up needing a total replacement because they didn’t realize the crack was already deep. If you’re unsure, get a professional auto glass safety inspection first. It’s better to pay a little now than to replace the whole damn windshield next week.

    A Quick Damage Assessment for Auto Glass Success

    A Quick Damage Assessment for Auto Glass Success

    Before you go diving into a DIY kit, you need to take a second to actually look at what you’re dealing with. I always tell people that a quick damage assessment for auto glass can save you a massive headache later. Run your finger near the chip—don’t press hard, obviously—to see if the edges feel jagged or if there’s a long crack branching out. If the damage is smaller than a quarter and doesn’t have long “legs” stretching across the glass, you’re usually in the clear for a home fix.

    However, if that chip looks more like a spiderweb or is sitting right in the driver’s direct line of sight, stop right there. At that point, you’re looking at more than just a simple fix; you’re looking at a potential safety issue. Preventing windshield cracks from spreading is much easier when the damage is fresh and contained. If the crack is already moving, no amount of resin is going to pull that glass back together, and you’ll be looking at a full replacement instead of a cheap patch job.

    Pro Tips to Keep That Crack from Spreading

    • Clean the area before you even touch it. If there’s grit or dirt stuck in that chip, your resin won’t seat properly, and you’ll end up with a visible scar instead of a fix. Just use a little compressed air or a soft brush—don’t go shoving a screwdriver in there.
    • Watch the temperature. If you’re working in a freezing garage or under a blistering sun, the glass is going to be stressed. Try to work in the shade and let the car sit at a normal temperature first so the resin flows the way it’s supposed to.
    • Don’t skip the curing time. I see people rush this all the time because they want to get back on the road. Once you hit it with the UV light or put it in the sun, leave it alone. Let that resin harden completely before you start buffing it out.
    • Keep the moisture out. If it’s raining or even just humid, avoid doing the repair. Water is the enemy here; if there’s moisture inside the chip, the resin won’t bond to the glass, and you’re basically just sealing in a puddle.
    • Use a piece of clear tape as a temporary shield. If you aren’t ready to do the repair right this second, slap some clear packing tape over the chip. It keeps the dirt out and stops the edges from catching more debris until you can actually get to it.

    The Bottom Line Before You Start

    Stop procrastinating; a tiny chip is cheap to fix now, but once it spiderwebs across your view, you’re looking at a massive bill for a full windshield replacement.

    If the damage is bigger than a quarter or sitting right in your line of sight, skip the DIY kit and go see a pro—some things just aren’t worth the risk of a cracked screen.

    Grab a decent repair kit and do the work yourself if the chip is small, but make sure you clean the area properly first, or you’ll just end up with a permanent, ugly scar in the glass.

    The Real Cost of Waiting

    “Look, I’ve seen it a hundred times in the shop: a guy walks in with a tiny little pit in his glass, ignores it for a month, and then drives over a pothole. Suddenly, that fifty-dollar fix turns into a six-hundred-dollar replacement. Don’t be that guy. Catch the chip while it’s small, fix it yourself, and keep that money in your pocket instead of the shop’s.”

    Nikolai·Osterman

    Don't Wait Until It's Too Late

    Don't Wait Until It's Too Late: Repair.

    Look, the bottom line is pretty simple: if you catch a chip early, you can usually handle it with a decent DIY kit for a fraction of what a shop will charge you. Just remember to assess the damage first—if that crack is already spidering out or hitting the edge of the glass, put the kit away and call a pro. You don’t want to mess around with a structural failure while you’re hitting highway speeds. Whether you choose the quick DIY route or decide to hand it over to a specialist, the most important thing is that you don’t ignore it. A tiny pit today is a massive, expensive headache tomorrow.

    At the end of the day, keeping your car in good shape shouldn’t feel like you’re being held hostage by a service advisor’s quote. I spent years watching people get overcharged for things they could have handled themselves with a little bit of focus and the right tools. Once you realize that most of these “scary” repairs are actually pretty manageable, you stop feeling intimidated by your own vehicle. Grab a kit, take control of your maintenance, and stop letting small issues turn into major money pits. You’ve got this.

    Frequently Asked Questions

    Can I actually fix a crack that’s already longer than a few inches, or is it too late for a DIY kit?

    Look, I’ll be straight with you: if that crack is already stretching out a few inches, you’re playing with fire. DIY kits are great for those little “bullseye” chips or tiny cracks, but once a crack starts traveling, it’s usually too far gone for a resin kit to stabilize it. If you try to patch a long crack, you’ll likely just end up with a messy, ugly line that still compromises your view. At that point, it’s time for a replacement.

    How long do I have to wait after fixing a chip before I can go through a car wash or drive in heavy rain?

    Look, I’ve seen too many people rush this and end up with a spiderweb crack because they were impatient. If you’re using a resin kit, give it at least 24 hours before hitting a car wash or driving through a downpour. You want that resin fully cured and bonded to the glass. If you hit it with high pressure or heavy rain too soon, you risk pushing moisture back into the chip and ruining the seal. Just wait.

    Is there a specific way to prep the glass so the resin actually sticks and doesn't just pop right back out?

    Look, if you don’t prep the spot, that resin is just gonna sit on the surface like a bead of water. First, grab some fine-grit sandpaper or even a tiny bit of glass polish to clear out any dirt or loose glass shards inside the pit. Then, hit it with some isopropyl alcohol on a microfiber cloth. You need it bone-dry and totally decontaminated. If there’s even a hint of grease or dust left, the bond’s gonna fail.

  • Lubricating Car Door Hinges

    Lubricating Car Door Hinges

    You’re probably thinking that that high-pitched screech every time you open your car door means you need to replace the entire latch assembly or spend a fortune at the dealership. Honestly? That’s a total scam. Most people assume a squeaky door is a sign of a mechanical failure, but nine times out of ten, you’re just dealing with a lack of basic door hinge lubrication. I remember helping my dad in the garage when I was a kid; he’d always tell me that a little bit of the right grease saves a lot of money and a massive headache later on. You don’t need to be a master mechanic to fix this; you just need to stop ignoring the warning signs.

    In this guide, I’m going to cut through the nonsense and show you exactly how to handle this yourself. I’ll walk you through the specific types of lubricants that actually work—and more importantly, the ones that will just turn your hinges into a sticky, dusty mess. No fluff, no expensive shop tools, just a straightforward way to get your doors swinging smooth again so you can stop feeling embarrassed every time you pull into a driveway.

    Table of Contents

    Guide Overview

    Total Time: 15-30 minutes
    Estimated Cost: $5-20
    Difficulty: Beginner

    Tools & Supplies

    • Screwdriver (to remove hinge pins if necessary)
    • Microfiber cloth (to wipe away excess lubricant)
    • Lubricant (Silicone spray, PTFE, or white lithium grease)
    • Paper towels (to catch drips)

    Step-by-Step Instructions

    • 1. First, grab a clean rag and some degreaser—or even just a bit of soapy water if you’re working with household stuff. You need to wipe down the hinge to get rid of all that old, crusty grit and road salt. If you just spray new lube over the old gunk, you’re basically just trapping the dirt inside, which’ll grind your metal down faster.
    • 2. Once it’s dry, take a close look at the hinge pins and the joints. If you see any actual rust forming, give it a light scrub with a wire brush. You want the surface to be as clean as possible so the lubricant can actually reach the moving parts instead of just sitting on top of a layer of oxidation.
    • 3. Now, pick your weapon. I always tell people to avoid the heavy, sticky stuff for this. Grab a can of white lithium grease or a high-quality silicone spray. Avoid the cheap stuff that smells like a chemical factory; you want something that stays put without turning into a dust magnet a week later.
    • 4. Apply the lubricant in small, controlled bursts. Don’t just hold the trigger down and soak the whole door; that’s how you end up with a massive mess on your paint. Aim for the pivot points and the seams where the metal actually slides against itself. Just a little bit goes a long way.
    • 5. This is the part most people skip, but it’s the most important: open and close the door repeatedly for about a minute. You need to work the grease into the tight gaps. If you hear the squeak start to fade, you’re doing it right. If it’s still screaming at you, you probably missed a spot and need to add a little more.
    • 6. Grab that rag again to wipe away any excess spray that’s pooling up. You don’t want liquid grease dripping down your door panel or getting all over your clothes when you get in the car. A clean finish is the sign of a job well done, and it keeps your garage from looking like a disaster zone.

    How to Stop Door Squeaking Without a Mechanic

    How to Stop Door Squeaking Without a Mechanic

    Look, I’ve seen plenty of people try to fix a noisy door by just spraying whatever they find in the junk drawer. If you’re thinking about using standard WD-40 to solve the problem, let me stop you right there. Most people don’t realize that WD-40 vs silicone lubricant is a massive debate in the shop for a reason. Standard WD-40 is a great cleaner and penetrant, but it evaporates fast and can actually strip away existing grease, leaving your hinges even drier than before. If you want a fix that actually lasts, you need to look for a silicone spray for hinges or a dedicated white lithium grease.

    Before you even touch the lube, you’ve got to deal with the grit. If you’re cleaning rusty door hinges, take a stiff brush or even an old toothbrush to scrub away the oxidation and dirt buildup first. If you just spray over the grime, you’re basically just creating a sticky, disgusting paste that’ll grind down the metal over time. A little bit of elbow grease now saves you from having to replace the whole assembly later. Just keep it simple: clean it, dry it, and then apply the right stuff.

    Choosing the Best Lubricant for Metal Hinges

    Choosing the Best Lubricant for Metal Hinges.

    Look, don’t just grab whatever oily junk is sitting in your junk drawer and hope for the best. I see people do this all the time, and it usually ends with a sticky, dust-covered mess that actually makes the problem worse. If you’re looking for the best lubricant for metal hinges, you need to understand the difference between a cleaner and a long-term fix. A lot of guys think a quick blast of standard WD-40 is the answer, but that stuff is mostly a solvent designed to displace moisture. It’ll stop the noise for a day, but it evaporates fast and leaves your metal parts bone-dry and vulnerable to more friction.

    For something that actually lasts, you want to go with a silicone spray for hinges or a high-quality white lithium grease. Silicone is great because it’s thin enough to seep into those tight gaps without making a massive mess, and it won’t attract as much grit and dirt as heavy oils do. If you’re dealing with older, crusty hardware, you might need to spend a minute cleaning rusty door hinges with a wire brush first. If you don’t clear that oxidation away, you’re just trapping the new grease under a layer of junk, and you’ll be back here fighting that squeak again in a week.

    Pro Tips to Keep the Squeak Away for Good

    • Don’t just spray and pray. A lot of people just hit the hinge with a can of WD-40 and call it a day, but that stuff evaporates fast. You want to actually get the lubricant into the pin, not just coat the outside.
    • Keep a rag handy. When you’re applying grease or oil, there’s always going to be a little bit of runoff. If you let that drip down your door or onto your paint, it’s going to attract dirt and turn into a nasty, grinding paste.
    • Clean the gunk out first. If your hinges are covered in years of road salt, dust, and old, dried-up grease, your new lubricant isn’t going to penetrate anything. Take a minute to wipe the old grit off before you add the new stuff.
    • Watch out for the “too much” trap. I’ve seen guys drown their hinges in grease thinking more is better. All you’re doing is creating a magnet for every piece of sand and debris on the road, which eventually wears the metal down faster.
    • Listen to the car. If you hear a tiny bit of friction or a faint creak, don’t wait until it sounds like a dying bird to fix it. A little maintenance now saves you from having to deal with a stiff, heavy door later.

    The Bottom Line

    Don’t overthink it; if your door is squeaking, it just needs a quick hit of the right lubricant and a little bit of movement to work its way in.

    Skip the heavy-duty grease that attracts dirt and grit; stick to a clean spray or a light oil so you aren’t making a mess of your door jamb.

    You don’t need to pay a shop minimum just to fix a noise—grab a can of lube, spend five minutes on it, and keep that extra cash in your pocket.

    Don't Overthink the Small Stuff

    A squeaky door isn’t a sign you need a professional; it’s just a sign you’re being lazy with your maintenance. Most people think they need a mechanic for every little noise, but honestly, five bucks worth of grease and five minutes of your time will save you a hundred-dollar headache later.

    Nikolai·Osterman

    Don't Overthink It

    Fixing squeaky doors: Don't Overthink It.

    Look, at the end of the day, fixing a squeaky door isn’t some high-level diagnostic nightmare like trying to trace a phantom electrical short in a modern ECU. You just need to grab the right lubricant—ideally something that won’t attract a bunch of grit and grime—clean off the old gunk, and apply it where it actually matters. Whether you’re dealing with a heavy SUV door or just a creaky cabinet, the principle is the same: clean it, lube it, and move on. It takes five minutes of your time, but it saves you from that constant, nagging sound that makes you feel like your gear is falling apart.

    I know it sounds small, but these little wins are exactly how you build confidence. Most people think they need to call a professional for every single thing that makes a noise, but I’m telling you, you’ve got this. Every time you handle a basic maintenance task yourself, you’re taking control back from the shops that want to charge you an hour of labor just to spray some silicone. Don’t let the small stuff intimidate you. Grab your tools, get your hands a little dirty, and realize that you’re more than capable of keeping your own stuff running smooth.

    Frequently Asked Questions

    How often do I actually need to do this before the squeak comes back?

    Honestly, it depends on how much you abuse your car. If you’re driving through salt and slush in the winter, that grime is going to eat your grease fast, so I’d check them every few months. If you’re just cruising in a dry climate, once or twice a year is plenty. Just listen to the car—if it starts whining at you again, don’t wait. Just grab the spray and hit it.

    Can I just use WD-40, or is that going to mess things up long-term?

    Look, I get why you’d reach for the blue and yellow can—it’s probably sitting right there on your workbench. But honestly? Don’t do it. Standard WD-40 is a solvent, not a long-term lubricant. It’ll clean out the gunk and stop the squeak for a day, but then it evaporates and leaves your hinges bone-dry. You’ll actually end up with more friction and more noise later. Stick to a real lithium grease or a silicone spray instead.

    What should I do if the hinge is already rusted solid and won't even move?

    Man, if it’s rusted solid, don’t go forcing it. You’ll just bend the hinge or snap a bolt, and then we’re talking a real headache. First, soak it in some heavy-duty penetrating oil—not just regular WD-40, get the stuff that actually eats rust. Let it sit for a good hour, maybe even overnight. Tap the hinge lightly with a hammer to help the oil seep in, then try to wiggle it. Patience wins here.

  • Fixing a Car Door Lock

    Fixing a Car Door Lock

    You’re probably staring at your door handle right now, wondering if you need to drop a few hundred bucks at the dealership just because the latch won’t budge. Most mechanics will try to tell you the entire actuator assembly is fried and needs a full replacement, but honestly? That’s usually a total exaggeration. I’ve spent way too many afternoons in my dad’s garage seeing people get talked into expensive repairs when the actual issue is just a bit of grit or a loose linkage. A little bit of door lock repair doesn’t require a master technician or a diagnostic computer; most of the time, it just takes a screwdriver and a little bit of grit to get it sorted.

    I’m not here to give you some textbook lecture or sell you on fancy, overpriced kits. I’m going to show you exactly how to strip things down, find the actual culprit, and get that lock clicking smoothly again without breaking the bank. We’re going to walk through the common failure points and the specific tools you’ll actually need to get the job done right. Let’s stop letting these small mechanical hiccups ruin your day and just fix it ourselves.

    Table of Contents

    Guide Overview

    Total Time: 30-60 minutes
    Estimated Cost: $0-20
    Difficulty: Beginner

    Tools & Supplies

    • Screwdriver (Phillips head for removing screws)
    • Lubricant (Graphite powder or silicone spray for moving parts)
    • Pliers (To grip or adjust small components)
    • Replacement screws (Small set if original are lost)
    • Cleaning cloth (To remove old grease and debris)

    Step-by-Step Instructions

    • 1. First things first, you gotta get inside the door. Pop that plastic trim panel off by using a trim removal tool or even a flathead screwdriver—just wrap the tip in some electrical tape so you don’t scuff up the paint or the plastic. Once the panel’s off, you’ll see a bunch of wires and some metal rods; just be careful not to yank them too hard or you’ll be looking at a much bigger headache.
    • 2. Now, you need to find the culprit. Most of the time, it’s either a disconnected rod or a dried-out actuator. Look for the metal linkages that connect your handle to the locking mechanism. If a rod has popped out of its little plastic clip, that’s your golden ticket right there. If it’s still connected but just feels limp, we’re likely looking at a mechanical failure inside the actuator itself.
    • 3. If you find a disconnected rod, don’t just shove it back in and call it a day. Check the plastic clips for cracks. If they’re busted, go grab some replacements from the auto parts store—they’re dirt cheap. Snap the rod back into the clip and give it a little wiggle to make sure it’s seated right before you start putting everything back together.
    • 4. If the rods are fine but the lock still won’t budge, you’re probably dealing with a dead actuator. This is the little motor that does the heavy lifting. You’ll need to unbolt the actuator assembly from the door frame. It’s usually held in by a couple of Torx or Phillips screws. Keep your magnetic tray handy here, because if you drop one of those screws into the bottom of the door cavity, you’ll be fishing for an hour.
    • 5. Once the old actuator is out, take a second to clean out any grit or old, nasty grease that’s built up in the housing. It’s a small step, but it makes a huge difference. Wipe everything down with a bit of cleaner and apply a fresh layer of lithium grease to the moving parts. This keeps things smooth and prevents the new part from wearing out prematurely.
    • 6. Swapping in the new actuator is pretty straightforward. Line it up with the existing rods, bolt it down, and make sure the connections are tight. Before you go through the trouble of snapping that door panel back on, test the lock a few times using both the interior handle and the key fob. You don’t want to realize you missed a step after you’ve already clipped all the plastic tabs back into place.
    • 7. Finally, once you’re sure it’s working, reattach the wiring harnesses and the door handle cables. Line up the trim panel, press firmly around the edges until you hear it click into place, and then screw the mounting bolts back in. Give it one last test, and you’re done. You just saved yourself a massive shop bill.

    Finding Stuck Door Lock Solutions Without the Professional Price Tag

    Finding Stuck Door Lock Solutions Without the Professional Price Tag

    Look, before you go calling an emergency lock repair service and dropping a couple hundred bucks just to have someone poke at your door, you need to realize that half the time, it’s just a buildup of grit and old, dried-out grease. Most of the time, I’m seeing people struggle with a jammed door latch simply because they haven’t done any real door hardware maintenance tips in years. If you can feel the mechanism moving but it just won’t “click,” it’s likely just gummed up. Grab a can of specialized dry lubricant—don’t use the heavy, sticky stuff—and try lubricating door lock mechanisms directly where the moving parts meet. It sounds simple, but it saves a massive headache.

    If the lubricant doesn’t do the trick, you might be looking at something more mechanical, like a failing actuator. If you hear a whirring sound but nothing happens, you’re probably looking at a car door actuator replacement. That’s a bit more involved, but honestly, if you can follow the steps I laid out earlier, you can handle it. Don’t let a small mechanical hiccup turn into a massive repair bill.

    The Truth About Fixing a Jammed Door Latch Yourself

    The Truth About Fixing a Jammed Door Latch Yourself

    Look, I’ve seen guys at the shop get totally overwhelmed because they think a jammed latch means they need a whole new door assembly. Most of the time, it’s just gunked-up debris or a tiny bit of corrosion inside the mechanism. Before you go tearing everything apart, try some lubricating door lock mechanisms with a high-quality dry graphite spray. Avoid the heavy grease stuff; it’ll just attract dust and turn into a sticky mess that makes the problem even worse in a few months.

    If the spray doesn’t do the trick, you’re probably looking at a mechanical failure inside the latch itself. This is usually where fixing a jammed door latch gets a bit more technical. You might need to pop the door panel to see if a cable has stretched or if a small spring has snapped. If you hear a clicking sound but nothing moves, it’s a sign that the internal components are shot. At that point, you aren’t just cleaning; you’re looking at a more serious fix, but even then, it’s way cheaper to do it in your driveway than to pay a shop’s hourly rate.

    Pro Tips to Save Your Sanity (and Your Wallet)

    • Stop spraying WD-40 into everything. I know it’s the first thing most people grab, but that stuff attracts dust and grime like a magnet, which eventually turns into a thick sludge inside your mechanism. Use a dedicated dry silicone lubricant instead; it does the job without making a mess later.
    • Get a decent set of screwdrivers before you start tearing things apart. Trying to force a cheap, stripped screwdriver into a door panel screw is the fastest way to turn a ten-minute fix into a three-hour nightmare of broken plastic.
    • Don’t forget to check the door actuator first. Sometimes the mechanical parts are fine, but the little motor that actually moves the lock is just dead. It’s a lot easier to swap a part than it is to rebuild an entire latch assembly.
    • Keep a small magnetic tray nearby, just like I do. Door locks involve tiny springs and little metal pins that love to disappear into the dark abyss of your car’s floor mats the second you drop them.
    • If you’re working on a modern car with a lot of electronics, disconnect the battery if you can. You don’t want to accidentally short out a window switch or a central locking module while you’re poking around the wiring harnesses inside the door.

    The Bottom Line on Fixing Your Own Locks

    Most of the time, a “broken” lock is just a dirty one; a little lubricant and some cleaning can save you a massive headache and a shop bill.

    Don’t go buying expensive replacement parts until you’ve actually checked the linkage and the actuator—it’s often a simple mechanical jam, not a dead component.

    You don’t need to be a master mechanic to do this, just grab a screwdriver, keep your parts organized, and don’t force anything if it feels stuck.

    ## The Real Cost of a Sticky Lock

    Most mechanics will try to sell you a whole new assembly when all you really need is a can of cleaner and ten minutes of your time. Don’t let them charge you a week’s worth of groceries just because a little bit of grit got into the mechanism.

    Nikolai·Osterman

    Don't Let a Sticky Lock Win

    Don't Let a Sticky Lock Win.

    Look, at the end of the day, fixing a door lock isn’t some high-level engineering feat that requires a master technician. Whether you were just dealing with a bit of grit in the mechanism that needed some penetrating oil or you actually had to swap out a busted actuator, you’ve done more than most people would. We covered how to diagnose the jam, the importance of using the right lubricant instead of whatever grease you find in the junk drawer, and how to avoid those massive locksmith fees. Just remember: if the latch feels crunchy or won’t catch, don’t force it with a screwdriver, or you’ll end up breaking something way more expensive than a simple spring.

    I know it can feel a bit intimidating when you’re staring at a door panel full of wires and clips, but that’s exactly how you learn. Every time you tackle a small job like this, you’re building the confidence to handle the bigger, scarier stuff under the hood later on. My dad always said that the best way to understand a machine is to get your hands a little dirty and see how it works for yourself. So, keep that magnetic tray handy, stay patient, and trust your gut. You’ve got this, and your wallet is definitely going to thank you for it.

    Frequently Asked Questions

    Is it actually safe to use WD-40 on my door locks, or am I just going to gunk everything up later?

    Look, I get why you’d reach for the WD-40; it’s probably the first thing in your junk drawer. But honestly? Don’t do it. It’s a solvent, not a long-term lubricant. It’ll loosen the grit for a second, but it eventually dries out and leaves this sticky residue that actually attracts more dust and dirt. You’ll end up with a bigger mess than when you started. Grab some dry graphite spray or a dedicated lithium grease instead.

    How do I know if the problem is just a dirty latch or if I actually need to buy a whole new lock assembly?

    Look, don’t go ordering a new assembly just yet. First, spray some cleaner into the latch and work the mechanism manually. If it starts moving freely after a bit of scrubbing, it was just gunked up with road grime and old grease. But, if you hear a grinding sound or the metal feels physically snapped/stuck regardless of the cleaning, that’s a mechanical failure. At that point, you’re looking at a replacement.

    Can I fix this without having to rip the entire interior door panel off, or is that part of the job no matter what?

    Look, I’ll be real with you: sometimes you can get lucky. If it’s just a bit of grit or a loose linkage, you might be able to spray some cleaner through the gaps or wiggle things around. But if the actual actuator or the latch mechanism is shot? Yeah, you’re going to have to pull that panel. I hate doing it as much as you do, but you can’t fix what you can’t see.

  • Replacing a Burnt Out Headlight Bulb

    Replacing a Burnt Out Headlight Bulb

    Ever had that moment where you’re driving home at night and suddenly realize one of your lights has just… quit? Most people panic and think they need to book a service appointment or, worse, pay a shop a ridiculous labor fee just to swap out a tiny piece of glass and wire. Let me tell you something: a headlight bulb replacement is one of those things that mechanics love to overcharge for, but it’s actually dead simple once you get past the intimidation factor. I remember my first time trying this on my dad’s old sedan; I spent twenty minutes sweating over a cramped engine bay, thinking I’d broken something permanent, only to realize I just needed to move a plastic clip.

    I’m not here to give you some textbook lecture or a list of overly complicated steps that only work on a professional lift. I’m going to show you the real-world way to get in there, swap that bulb, and get back on the road without breaking a sweat or your bank account. We’ll talk about the right way to handle the new bulb so you don’t burn it out immediately and how to navigate those tight spaces that make you want to quit. Let’s just get it done.

    Table of Contents

    Guide Overview

    Total Time: 15-45 minutes
    Estimated Cost: $15-50
    Difficulty: Beginner

    Tools & Supplies

    • Screwdriver (to remove trim or housing screws)
    • Work gloves (to prevent oil transfer to bulb)
    • Replacement headlight bulb (1 unit)
    • Microfiber cloth (1 unit)

    Step-by-Step Instructions

    • 1. First things first, kill the engine and make sure your lights are switched off. I can’t tell you how many times I’ve seen someone get a nasty shock or pop a fuse because they were fiddling with wiring while the electrical system was still live. Once you’re sure everything is powered down, pop the hood and locate the back of the headlight assembly.
    • 2. You’re going to see a plastic connector plugged directly into the bulb. Depending on your car, you might need to press a little tab or give it a quick twist to the left to unclip it. If it feels stuck, don’t force it like a maniac; just give it a gentle wiggle to work it loose so you don’t snap the plastic housing.
    • 3. Now, you need to get the old bulb out of its housing. Most of these use a spring clip or a twist-lock mechanism. If it’s a clip, just press it down and move it out of the way, and the bulb should slide right out. If it’s a twist-lock, just give it a quarter-turn counter-clockwise. If you’re working on an older car, you might need to reach a bit further into the fender, so don’t be afraid to get your hands a little dirty.
    • 4. Grab your new bulb, but here is the most important rule: never touch the glass with your bare fingers. I know it sounds weird, but the oils from your skin will bake onto the glass once the bulb gets hot, which causes it to burn out way faster than it should. If you accidentally touch it, just wipe it down with a bit of rubbing alcohol before you install it.
    • 5. Slide the new bulb into the socket and make sure it sits perfectly flush. If you have a twist-lock, turn it clockwise until it clicks into place. Once the bulb is seated, take that electrical connector you removed earlier and plug it back in. You should feel it “snap” or seat firmly, meaning you’ve got a solid connection that won’t vibrate loose while you’re driving down the highway.
    • 6. Before you go through the hassle of putting any plastic covers or shields back on, turn your headlights on to test them. It’s way easier to fix a loose connection now than it is after you’ve spent twenty minutes wrestling with a stubborn trim piece. If it lights up, you’re golden.
    • 7. Finally, put all the dust covers and clips back exactly where you found them. This keeps moisture and road grime from getting inside your headlight assembly, which is a total nightmare to clean out later. Once everything is snapped shut, you’re officially done—save yourself the shop fee and get back to your day.

    Mastering H11 Bulb Compatibility and Socket Inspection

    Mastering H11 Bulb Compatibility and Socket Inspection

    Before you even pop the hood, you need to be 100% sure about what you’re holding in your hand. I’ve seen guys waste twenty bucks and an hour of their time because they grabbed the wrong part. If your manual calls for an H11, don’t just assume it’s the same as the bulb sitting in your high beam. Checking your h11 bulb compatibility is the first rule of DIY car headlight repair; if the base doesn’t match the socket perfectly, you’re just spinning your wheels. Always double-check the markings printed on the old bulb before you toss it in the trash.

    Once you actually get to the socket, don’t just plug the new bulb in and call it a day. Take a second for a quick bulb socket inspection. Look for any signs of melting, discoloration, or that weird white crusty buildup that tells me there’s been moisture or heat issues. If the plastic looks fried, a new bulb won’t fix the underlying problem. It’s also a great time for some minor headlight housing cleaning if you see fogging inside. Getting this right now saves you from a massive headache—and a much more expensive repair bill—down the road.

    Low Beam vs High Beam Bulbs the Diy Truth

    Low Beam vs High Beam Bulbs the Diy Truth

    Look, one of the biggest mistakes I see people make when they’re diving into low beam vs high beam bulbs is assuming they’re interchangeable just because they look similar. They aren’t. Your low beams are your bread and butter for daily driving, usually requiring a more focused beam pattern, while your high beams are just there for that extra punch on dark backroads. If you grab an H11 when you actually needed a different spec, you aren’t just going to have dim lights—you might actually fry your connector or cause a fitment issue that turns a ten-minute job into a nightmare.

    While you’ve got the housing open, don’t just swap the glass and call it a day. This is the perfect time for some quick automotive lighting maintenance. Take a second to look inside the assembly for any signs of moisture or crusty residue. If the inside looks foggy, a little bit of headlight housing cleaning can make a massive difference in how much light actually hits the road. It’s all about making sure that new bulb is actually doing its job instead of just wasting energy behind a cloudy lens.

    Pro Tips to Save Your Hands (and Your New Bulbs)

    • For the love of everything, do not touch the glass of the new bulb with your bare fingers. The oils from your skin create hot spots on the quartz, which basically means that brand-new bulb is going to pop way sooner than it should. If you do touch it, wipe it down with some isopropyl alcohol before you seat it.
    • Keep a small magnetic tray—or even just a couple of old pill bottles—nearby to hold your clips and screws. There is nothing worse than being halfway through a job and realizing a tiny plastic retaining clip rolled under your workbench and vanished into the void.
    • Before you start tearing things apart, check your ground wires. I’ve seen people spend an hour swapping out perfectly good bulbs only to realize the actual problem was a corroded ground connection or a loose socket causing an intermittent circuit.
    • Don’t go cheap on the bulbs just to save a few bucks. I know those bargain-bin bulbs look tempting, but the build quality is usually trash, and you’ll end up doing this whole job again in three months when they burn out. Buy a decent brand; your future self will thank you.
    • Use a flashlight, not just your phone’s light. You need to actually see the orientation of the locking tabs and the condition of the rubber dust boot. If that boot isn’t seated perfectly, you’re letting moisture straight into your headlight housing, and that’s a much more expensive headache than a simple bulb swap.

    The Bottom Line Before You Close the Hood

    Don’t touch the glass—seriously. If you get even a tiny bit of oil from your fingers on that new bulb, it’s going to burn out way faster than it should, so keep it clean or use gloves.

    Double-check your bulb type before you drive to the parts store. There’s no point in getting halfway through the job only to realize you bought an H7 when your car needs an H11.

    If the socket looks burnt or melted, don’t just jam a new bulb in there. Take a second to check the wiring, because a bad connection will just kill your new bulb just as fast as the old one.

    The Real Cost of a Simple Fix

    “A mechanic is going to charge you an hour of labor just to twist a plastic socket, but once you realize how easy this actually is, you’ll realize you aren’t just saving money—you’re taking your car back.”

    Nikolai·Osterman

    Don't Leave It to Chance

    Don't Leave It to Chance: Headlight Bulb.

    At the end of the day, replacing a headlight bulb isn’t some high-level engineering feat; it’s just about being methodical. We covered how to double-check your bulb type so you don’t end up with a useless piece of glass in your hand, and we looked at why inspecting those sockets is just as important as the bulb itself. Most importantly, remember to never touch the glass with your bare fingers, or you’re basically setting yourself up for another failure down the road. If you took the time to verify your low beams versus your high beams and made sure the connections were tight, you’ve already done the heavy lifting that most people are too intimidated to try.

    I know it can feel a bit sketchy when you’re leaning over a fender with a flashlight, but that’s how you learn. Every time you finish a job like this without calling a tow truck or a mechanic, you’re gaining a bit of mechanical independence that nobody can take away from you. Don’t let the fear of a little grease or a confusing socket keep you in the dark—literally. Grab your tools, trust your gut, and keep that car running on your own terms. You’ve got this.

    Frequently Asked Questions

    Is it actually okay to touch the glass on the new bulb, or am I going to burn it out immediately?

    Look, I get why you’re hesitant, but here’s the deal: do not touch that glass with your bare hands. If you get even a tiny bit of skin oil on it, that’s going to create a hot spot when the bulb heats up. Eventually, the glass will stress and crack, or the bulb will just burn out way too early. If you do touch it, grab some isopropyl alcohol and a clean rag to wipe it down before installing.

    Why did my new bulb die after only a few weeks, and is there something wrong with my car's wiring?

    If your new bulb popped that fast, you probably touched the glass with your bare fingers. Skin oils create hot spots that crack the quartz, killing the bulb instantly. If the glass looks clean, check your wiring. A loose ground or a corroded socket causes voltage spikes that fry everything you plug in. Grab a multimeter and check for steady voltage; if it’s jumping around, your wiring—or the regulator—is definitely the culprit.
    Can I just swap in a brighter LED bulb, or am I going to mess up my headlight housing and get a ticket?

    Look, I get the temptation—stock halogen bulbs can feel like dim candles in a storm. But be careful. If you slap a cheap LED in a housing designed for halogen, the light pattern usually goes haywire, blinding oncoming drivers. That’s a fast track to a ticket and a pissed-off neighbor. If you want more light without the headache, look for “halogen-replacement” LEDs that actually mimic the original beam pattern. Don’t just chase brightness; chase visibility.

  • How to Replace a Serpentine Belt

    How to Replace a Serpentine Belt

    I was staring at my dad’s old sedan last weekend, listening to that high-pitched, rhythmic squeal that just eats at your nerves, when I realized how many people panic when they hear that sound. Most shops will see a chirping belt and immediately try to upsell you on a whole new tensioner assembly or some other expensive nonsense you don’t actually need. The truth is, a serpentine belt replacement isn’t some complex surgical procedure; it’s just a job that requires a steady hand and the right socket. I’ve spent enough time with grease under my fingernails to know that once you get past the intimidation factor, it’s actually one of the most straightforward ways to keep your car from leaving you dead in a parking lot.

    I’m not here to give you some textbook lecture or a list of fancy diagnostic tools you’ll never use. Instead, I’m going to walk you through the real-world process of swapping that belt out without breaking a sweat or your bank account. We’ll cover exactly how to find your tensioner, how to avoid those annoying little slips, and the one mistake most beginners make that ends up stripping their bolts. Grab your magnetic tray and let’s get to work.

    Table of Contents

    Guide Overview

    Total Time: 1-2 hours
    Estimated Cost: $30-70
    Difficulty: Beginner

    Tools & Supplies

    • Socket set and ratchet to loosen tensioner bolts
    • Breaker bar or long-handle wrench for extra leverage on tensioner
    • Serpentine belt routing diagram or smartphone for photos
    • Flashlight to see tensioner and pulleys clearly
    • Replacement serpentine belt (1)
    • Microfiber cloth for cleaning pulley grooves (1)

    Step-by-Step Instructions

    • 1. First thing you need to do is grab a flashlight and a diagram of your belt routing. Before you even touch a wrench, take a clear photo of how the belt wraps around the pulleys. If you don’t, you’re going to be staring at a confusing mess of rubber ten minutes from now and wondering where that one little tensioner pulley was supposed to go.
    • 2. Once you’ve got your photo, find the belt tensioner. It’s usually a spring-loaded arm that keeps the belt tight. You’ll likely need a long-handled ratchet or a breaker bar to get enough leverage here. Position your tool on the tensioner bolt and slowly apply pressure to compress the spring. Don’t go slamming it; you want a smooth, controlled movement so you don’t snap anything.
    • 3. While you’re holding that tensioner back with one hand, use your other hand to slide the old belt off the topmost pulley. Once it’s loose, let the tensioner snap back into place and get that old belt out of there. Check the belt one last time for any weird fraying or chunks missing—if it looks like that, you definitely made the right call replacing it.
    • 4. Now, grab your new belt and look at the ribs on the inside. You want to make sure those ribs line up perfectly with the grooves on every single pulley. I always take my time here because getting it off-center by even a millimeter can cause the belt to shred itself within the first few miles of driving.
    • 5. Start by looping the new belt around the largest pulley or the one that’s easiest to reach. Work your way around the engine, feeding it through the routing you photographed earlier. It’s a bit of a puzzle, but as long as you’re following your picture, you’ll eventually find the rhythm.
    • 6. The final stretch is the hardest part. You’ll need to rotate the tensioner one last time to create enough slack to slip the belt over the final pulley. This is where you might want to use a small pry bar or even a screwdriver to help guide the belt into the groove if it’s being stubborn. Once the belt is seated, let go of the tensioner and watch it settle.
    • 7. Before you go closing the hood, do a quick visual inspection. Make sure every single rib is sitting deep in its groove and that nothing looks crooked. If you have a second, start the engine just to let it idle for a minute. Listen for any squealing or slapping sounds—if it sounds smooth, you’re good to go.

    Spotting Worn Belt Cracks and Fraying Before They Fail

    Spotting Worn Belt Cracks and Fraying Before They Fail

    You don’t want to be the person stuck on the shoulder of a highway because your engine accessory drive belt decided to quit mid-commute. Usually, the car gives you a heads-up if you’re actually paying attention. Keep an eye out for serpentine belt symptoms like high-pitched squealing when you start the engine or a sudden loss of power steering. If you hear that chirping sound, it’s basically your car screaming for help.

    When you’re actually looking at the belt itself, grab a flashlight and get close. You’re looking for more than just surface dust; you want to spot actual worn belt cracks and fraying along the ribbed side. If you see chunks of rubber missing or deep cracks that stay open even when the belt is under tension, that thing is a ticking time bomb. While you’re down there, do a quick alternator pulley inspection too. If the pulley is wobbling or looks burnt, a brand-new belt won’t fix a mechanical issue that’s already chewing it up. Catching these small signs early is the difference between a quick weekend project and a massive repair bill.

    Mastering the Serpentine Belt Routing Diagram and Essential Tools

    Mastering the Serpentine Belt Routing Diagram and Essential Tools

    Before you even touch a wrench, you need to know exactly where everything goes. I’ve seen so many guys finish a job only to realize they’ve got a leftover belt or, worse, they’ve routed the engine accessory drive belt around the wrong tensioner. Don’t guess. Most cars have a serpentine belt routing diagram printed on a sticker right under the hood, but if yours is missing or faded, grab your phone and snap a high-res photo of the current setup before you loosen anything. It’s a lifesaver when you’re staring at a pile of pulleys trying to remember the exact path.

    As for your gear, don’t expect to get much done with just a standard screwdriver. You’re going to need a decent set of automotive belt replacement tools, specifically a long-handled breaker bar or a dedicated tensioner tool to get enough leverage to release the spring pressure. While you’ve got the belt off, do a quick alternator pulley inspection to make sure the bearings aren’t shot. If you’re seeing any wobble or hearing a grinding noise, that’s a sign you need to fix more than just the rubber.

    Pro Tips to Keep You From Making a Mess of It

    • Double-check that routing diagram one last time before you pull the old belt off. Once that thing is gone, it’s way easier to forget exactly how the tensioner wants it laid out, and nobody wants to be fighting a belt that’s sitting in the wrong groove.
    • Don’t just swap the belt and call it a day; take a quick look at your pulleys while you’re in there. If you see any wobble or hear a squeak coming from a bearing, replace the pulley now, otherwise, your brand new belt is gonna be dead in a month.
    • Use a long-handled breaker bar or a decent ratchet to get leverage on the tensioner. You don’t want to be straining your wrists or slipping and smashing your knuckles against the frame because you were trying to force it with a tiny tool.
    • Keep your hands clean of any oil or grease when you’re handling the new belt. Even a little bit of lubricant on the ribbed side can cause it to slip and squeal the second you fire the engine back up.
    • Once the new belt is on, start the car and let it idle for a minute while you watch it from a safe distance. If you see any jumping or hear a high-pitched chirp, shut it down immediately—you probably have a tensioner issue or the belt isn’t seated right.

    The Bottom Line on Your Belt

    Don’t wait for a loud squeal or a snapped belt to take action; if you see cracks or fraying during a routine check, swap it out immediately before it leaves you stranded.

    Keep your routing diagram handy and double-check it twice—getting the belt path wrong is a massive headache you don’t need.

    You don’t need a shop full of expensive gear to do this right, just a solid socket set, a bit of patience, and the guts to do it yourself.

    The Real Cost of Ignoring a Squeak

    A squealing belt isn’t just an annoying sound; it’s your car’s way of telling you that you’re about to be stranded on the shoulder of a highway. Don’t wait for it to snap and take your alternator or water pump down with it—spend twenty bucks on a new belt now so you don’t spend five hundred at the shop later.

    Nikolai·Osterman

    You've Got This

    Replacing a serpentine belt, You've Got This.

    Look, swapping a serpentine belt isn’t some high-level engineering feat; it’s just about being methodical. We covered how to spot those tiny cracks before they turn into a roadside nightmare, how to grab the right tensioner tools, and—most importantly—how to follow that routing diagram so you don’t end up with a handful of extra pulleys and a lot of regret. If you kept your workspace clean and double-checked that the belt is seated perfectly in every groove, you’ve already done the hard part. Just remember: don’t rush the final inspection. Take an extra minute to spin the components by hand and make sure everything moves smoothly before you turn the key.

    At the end of the day, the goal here isn’t just to fix a car; it’s to take back control. Every time you pick up a wrench and handle a repair yourself, you’re making sure you aren’t just another customer getting hit with a massive labor bill for something simple. It might feel intimidating the first time you’re staring down a crowded engine bay, but I promise you, the feeling of independence is worth every bit of grease under your fingernails. Keep practicing, keep learning, and stop letting the shops dictate what your car is worth. I’ll see you in the next one.

    Frequently Asked Questions

    How do I know if it's just the belt making that squealing noise or if one of my pulleys is actually shot?

    That squeal is annoying, but it’s basically your car’s way of screaming for help. To tell if it’s just the belt or a pulley, grab a spray bottle with a little water. While the engine’s running, lightly mist the belt. If the noise goes away instantly, the belt is likely the culprit. If the squeal stays the same or gets worse, you’re looking at a bad bearing in one of your pulleys.

    Do I really need to buy a brand-name belt, or can I grab a cheaper one from the local parts store?

    Look, I get it—every dollar counts when you’re maintaining a car. Honestly? You don’t need to drop a fortune on a “premium” brand name, but don’t just grab the absolute cheapest generic one on the shelf either. Stick to the reputable house brands at your local parts store. They’re usually made by the same people making the big names, just without the fancy box. Avoid the bottom-of-the-barrel stuff; it’ll squeal or snap way too soon.

    What happens if I accidentally let the tensioner snap back too fast while I'm swapping the belt?

    Look, I’ve been there. If that tensioner snaps back like a mousetrap, don’t panic, but don’t just ignore it either. The biggest risk is you snapping the internal spring or, even worse, bending the mounting bolt. If the tensioner feels “loose” or won’t hold steady after that, the internal mechanism is toast and you’ll need a new one. Just take a breath, check for any weird wobbles, and move slow next time.

  • Troubleshooting Car Fuses

    Troubleshooting Car Fuses

    You know that sinking feeling when your radio cuts out, your interior lights die, or your heated seats suddenly decide they’re retired, and you immediately assume it’s some massive, expensive electrical nightmare? Most shops will try to charge you a fortune just to look at it, but here’s the truth: nine times out of ten, you aren’t looking at a dead computer module, you’re just looking at a blown fuse. I remember working on my dad’s old sedan last summer; he thought the whole dash was fried, but a quick bit of fuse box repair saved us a massive headache and a whole lot of wasted cash.

    I’m not going to give you some textbook lecture or tell you to go buy a $500 diagnostic scanner. I’m going to show you how to actually trace the problem using basic tools you probably already have in your junk drawer. We’re going to walk through identifying the culprit, pulling the right fuses without snapping the plastic, and making sure you don’t accidentally cause a short while you’re at it. This is about getting back on the road without getting ripped off, one simple connection at a time.

    Table of Contents

    Guide Overview

    Total Time: 1-2 hours
    Estimated Cost: $10-50
    Difficulty: Intermediate

    Tools & Supplies

    • Voltage tester to ensure power is off
    • Screwdriver set for terminal screws
    • Flashlight for visibility inside the panel
    • Replacement fuses or circuit breakers matching exact amperage
    • Electrical tape for insulating any exposed wires

    Step-by-Step Instructions

    • 1. First things first, you gotta make sure you aren’t working on a live circuit. Kill the engine, pull the key, and if you’re working on anything major, disconnect the negative battery terminal. I’ve seen too many guys accidentally spark something they shouldn’t because they were in a rush, and trust me, that’s a headache you don’t need.
    • 2. Next, grab your owner’s manual and find the fuse box diagram. Most cars have one tucked under the dash or sitting right in the engine bay, usually under a plastic cover. Don’t just start pulling things out blindly; you need to match the symbol on the fuse to the one in the manual so you actually know which circuit you’re messing with.
    • 3. Now, pop the cover off and get your fuse puller—or if you’re like me and lost yours, a pair of needle-nose pliers will do. Look for the fuse that looks burnt or has that little metal bridge snapped inside. If it looks clear and the wire is intact, the fuse isn’t your problem, and you might be looking at a deeper wiring issue instead.
    • 4. Once you’ve identified the dead fuse, pull it straight out. This is where my magnetic parts tray comes in handy, because if you’re working in a cramped footwell, you don’t want that little guy rolling under your seat. Hold it up to the light to confirm it’s actually blown before you go buying replacements.
    • 5. Grab a new fuse that matches the exact same amperage as the old one. You’ll see numbers like 10, 15, or 20 printed on the top of the plastic. Whatever you do, do not put a 20-amp fuse in a slot meant for a 10-amp. If you do that, you’re basically turning your wiring harness into a heater, and that’s how you end up with a much more expensive repair.
    • 6. Slide the new fuse into the slot and make sure it’s seated firmly. Give it a little wiggle to ensure it’s got a solid connection. Once it’s in, put the cover back on, reconnect your battery, and fire the car up to see if your lights or radio are finally back in action.
    • 7. If the new fuse pops the second you turn the key, stop immediately. That means you don’t just have a bad fuse; you’ve got a short circuit somewhere in that line. At that point, you’ll need to start tracing the wires for any signs of fraying or melted insulation, or it might be time to call in a pro.

    Spotting Blown Fuse Symptoms Before They Leave You Stranded

    Spotting Blown Fuse Symptoms Before They Leave You Stranded

    You don’t always need a diagnostic scanner to know something is off; usually, your car starts acting weird long before it actually dies on you. One of the most common blown fuse symptoms is a sudden, localized death of a specific component. Maybe your radio cuts out mid-song, or your power windows suddenly feel like they’ve gone on strike. If a single accessory stops working while everything else stays normal, you’re likely looking at a single circuit that’s bit the dust.

    The tricky part is when things get intermittent. If your headlights flicker or your dash lights dance around when you hit a bump, you might be dealing with something more complex than a simple fuse. This is where automotive electrical troubleshooting gets a bit more involved. You have to figure out if it’s just a loose connection or if you’re actually dealing with a circuit breaker vs fuse situation where a component is constantly tripping due to a short. Pay attention to these little glitches—they’re your car’s way of telling you to check the box before you’re stuck on the shoulder of a highway.

    Mastering Automotive Electrical Troubleshooting Without a Mechanics Degree

    Mastering Automotive Electrical Troubleshooting Without a Mechanics Degree

    Look, you don’t need to spend four years in a classroom to figure out why your radio just died mid-song. Most people see a dead component and immediately think the whole system is fried, but that’s usually just panic talking. When you’re diving into automotive electrical troubleshooting, the trick is to stop guessing and start tracing. Before you start ripping wires out, grab your owner’s manual to find the fuse box location guide for your specific make and model. It sounds basic, but I’ve seen guys spend an hour hunting for a panel that was literally right under the driver’s side dash the whole time.

    Once you’ve found the box, don’t just play “musical chairs” with fuses from different circuits. That’s a quick way to fry something expensive. Instead, get comfortable testing fuses with a multimeter. A simple continuity test will tell you instantly if that little metal bridge inside is actually broken or if you’re dealing with a deeper wiring issue. If you find yourself staring at a mess of colors and can’t make sense of it, pull up a digital automotive wiring diagram on your phone. It’s basically a map for your car’s nervous system, and it’ll save you a massive headache.

    Pro Tips to Keep Your Electrical System From Going Haywire

    • Stop using jumper wires to bypass a fuse. I’ve seen guys try to “fix” a blown fuse with a piece of wire just to get home, but all that does is turn a cheap fuse into a melted wiring harness or a dead ECU. If it blew, there’s a reason.
    • Always double-check the amperage. Don’t just grab the nearest fuse because it fits the slot. If your manual calls for a 15-amp and you shove a 30-amp in there, you aren’t “fixing” anything—you’re just waiting for something expensive to catch fire.
    • Keep a spare set of fuses in your glovebox or that magnetic tray I’m always carrying. There is nothing worse than being stuck in a parking lot at night because your radio or headlights decided to quit, and you don’t have a replacement handy.
    • Look for the “why” behind the pop. If you replace a fuse and it blows again immediately, stop messing around. You’ve got a short circuit somewhere in that line, and you need to trace the wire before you keep burning through fuses like they’re candy.
    • Use a fuse puller, not your fingernails or a pair of needle-nose pliers if you can help it. You don’t want to be digging around in a cramped, plastic fuse box and accidentally snapping the housing or bending the pins. It’s a five-dollar tool that saves a lot of headache.

    The Bottom Line on Your Fuse Box

    Don’t let a dead radio or a dim headlight freak you out; nine times out of ten, it’s just a single cheap fuse that bit the dust, not some massive electrical failure.

    Get yourself a decent multimeter and a cheap fuse puller—having the right tools stops you from fishing around with screwdrivers and accidentally shorting something else out.

    If you swap a fuse and it pops again immediately, stop messing around and find the actual short in the circuit, otherwise you’re just wasting money and time.

    ## The Truth About Electrical Gremlins

    “Most people see a dead headlight or a wonky radio and think their car is dying, but half the time, it’s just a two-dollar piece of plastic that gave up the ghost. Don’t let a shop charge you a hundred bucks an hour just to find something you could’ve solved with a single fuse puller and five minutes of your time.”

    Nikolai·Osterman

    Don't Let a Little Spark Scare You Off

    Don't Let a Little Spark Scare You Off

    At the end of the day, fixing a fuse box isn’t some dark art reserved for guys in lab coats. We’ve covered how to spot the symptoms before you’re stuck on the shoulder of a highway, how to use a multimeter to actually see the problem, and how to swap out those blown fuses without turning your entire dashboard into a mess. Just remember: always double-check your diagram, never, and I mean never, use a wire to jump a circuit, and make sure you’re replacing a fuse with the exact same amperage. If you follow those steps, you’ve already done more than most drivers ever bother to do.

    I know it can feel intimidating when you first pop that cover and see a maze of wires and plastic, but I promise you, it’s manageable. Every time you solve a problem like this yourself, you’re taking a piece of control back from the shops that want to charge you three hundred bucks for a ten-cent part. Keep that magnetic tray handy, stay patient, and trust your gut. You’ve got the tools and you’ve got the knowledge now. Go get it done.

    Frequently Asked Questions

    If I replace a fuse and it blows again immediately, does that mean I've got a short in the wiring?

    Yeah, you hit the nail on the head. If that new fuse pops the second you turn the key, you’ve definitely got a short circuit. The fuse is doing its job—it’s sacrificing itself to stop the wiring from melting or starting a fire. Don’t just keep throwing fuses at it; you’re wasting money. You need to trace the circuit and find where the insulation is rubbed raw or where a wire is touching metal.

    Can I use a fuse with a higher amperage rating if I can't find the exact match in my kit?

    Absolutely not. Don’t even think about it. I’ve seen guys try to “up” a fuse because they’re too lazy to run to the parts store, and that’s how you end up melting your wiring harness or starting a fire. A fuse is there to be the weakest link for a reason. If you can’t find the exact amperage, stop. Don’t risk your car’s electrical system just to save a twenty-minute trip.

    How do I tell if the actual fuse box housing is melted or damaged versus just having a bad fuse?

    Look, if it’s just a bad fuse, everything’s going to look normal once you pull the cap. But if you see any discoloration, charring, or—worst case—the plastic looks like it’s actually slumped or bubbled, you’re dealing with a melted housing. That usually means a loose connection or a short created way too much heat. If the socket itself looks toasted, don’t just swap the fuse; you’ve got a bigger electrical issue on your hands.