Category: Repairs

  • How to Install a New Fender Liner

    How to Install a New Fender Liner

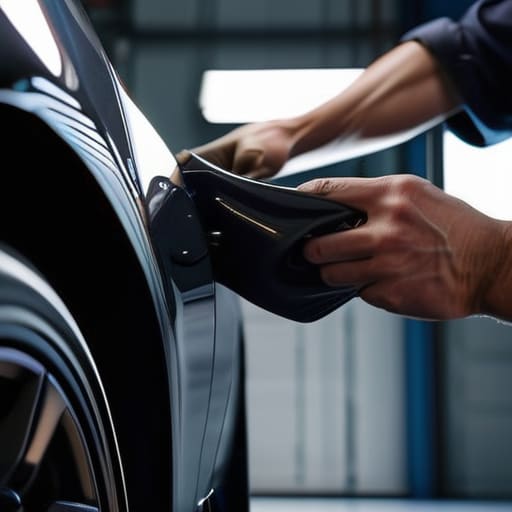
    You ever hear a shop guy tell you that a cracked plastic shield means you need to bring the car in for a “specialized inspection” and a couple hundred bucks in labor? Honestly, that’s a total scam. I spent my Saturday morning under a beat-up Silvia, digging through road salt and grime, just to prove how simple a fender liner replacement actually is. Most people see that flapping piece of plastic and think it’s some high-tech component, but it’s really just a glorified splash guard. If yours is shredded from hitting a curb or just rotting away from old age, don’t let a mechanic talk you into a massive bill for something you can easily handle in your own driveway.

    I’m not going to give you some textbook lecture or a list of tools you can’t find at a local hardware store. Instead, I’m going to walk you through the actual, greasy reality of getting the old one out and the new one clipped in tight. I’ll show you exactly where those annoying plastic clips hide and how to avoid stripping those fragile screw holes that drive me crazy every time I work on a modern engine bay. Let’s get to work.

    Table of Contents

    Guide Overview

    Total Time: 1-2 hours
    Estimated Cost: $30-150
    Difficulty: Beginner

    Tools & Supplies

    • Socket set and ratchet to remove wheel bolts
    • Screwdriver (Phillips or flathead) to remove plastic clips
    • Trim removal tool to pry plastic fasteners without damage
    • Jack and jack stands to lift the vehicle safely
    • New fender liner compatible with vehicle make/model
    • Replacement plastic push pins or rivets if originals are lost

    Step-by-Step Instructions

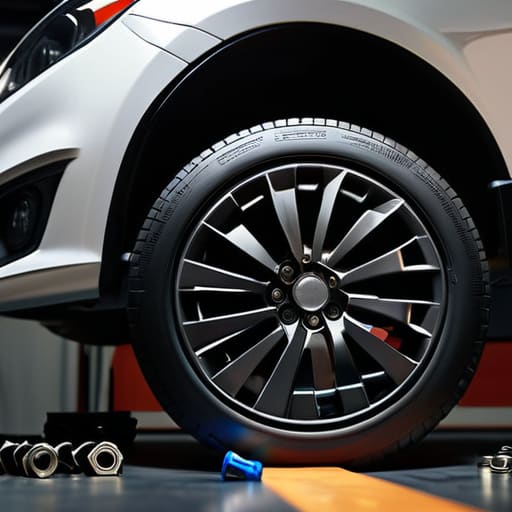
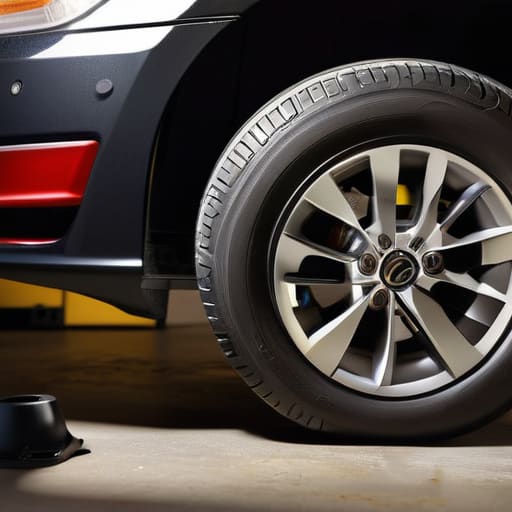
    • 1. First things first, you gotta get the car up and stable. Don’t even think about crawling under there while it’s just sitting on the pavement. Grab your floor jack, lift the side you’re working on, and always use jack stands to secure it. Once it’s steady, pull the wheel off so you actually have room to move. It’s way easier to see what you’re doing when you aren’t fighting for space against a tire.
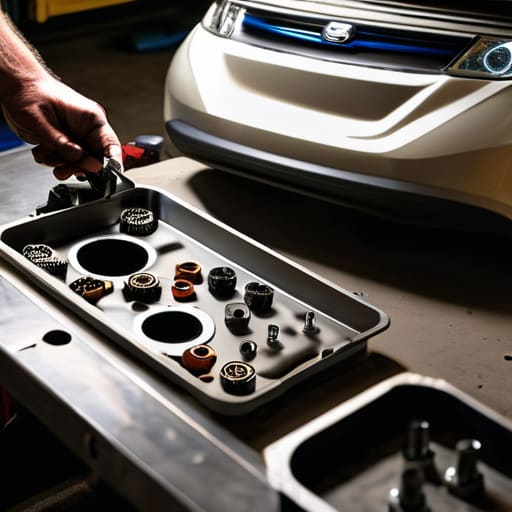
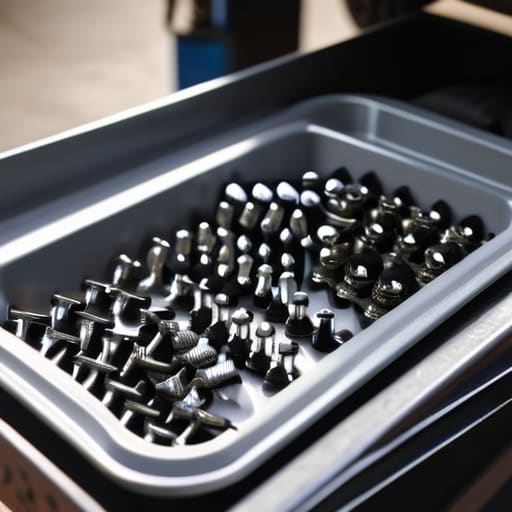
    • 2. Now, grab your screwdriver or a socket set—depending on what your car uses—and start hunting for the fasteners. Most of these plastic liners are held on by a mix of plastic push pins and small bolts. I usually keep my magnetic parts tray handy for this part because those little clips love to vanish into the gravel the second you pop them loose. Just go around the edge and pull them all out.
    • 3. Once the fasteners are out, you’ll probably notice the liner is still clinging to the bumper or the wheel well. This is where people usually get frustrated and start yanking. Don’t do that; you’ll just snap a mounting tab on your bumper and end up with a much bigger headache. Instead, gently wiggle the liner back and forth to break it free from the clips. If it feels stuck, check for a hidden screw you might have missed.
    • 4. Pull the old, beat-up liner completely out of the way and take a second to look at the area behind it. Since you’ve already got everything apart, check for any loose wiring or debris that might have gotten trapped back there. It’s the perfect time to make sure nothing else is hanging by a thread before you move on to the new part.
    • 5. Grab your new liner and start lining up the holes with the mounting points on the chassis. It’s a bit of a puzzle, but don’t rush it. I find it easiest to start with one or two bolts at the top or the back to anchor it in place. This keeps the liner from flopping around while you try to reach the other side.
    • 6. Once the liner is seated properly, go back around and reinstall all those push pins and bolts you collected earlier. Make sure everything is snug but not over-tightened. If you crank down on those plastic clips too hard, they’ll just crack, and you’ll be right back where you started.
    • 7. Finally, put your wheel back on, lower the car, and give it a quick once-over. I like to give the liner a little shake to make sure nothing is rattling. If it stays put, you’re golden. You just saved yourself a trip to the shop and a massive headache at the service desk.

    Mastering Automotive Splash Guard Installation Yourself

    Mastering Automotive Splash Guard Installation Yourself.

    One thing I’ve learned from working in the shop is that most people treat these plastic pieces like they’re disposable, but they’re actually vital for preventing road debris damage to your engine bay and sensitive wiring. If you’re just slapping a new liner in, don’t be lazy with the hardware. I always tell people to grab a fresh pack of wheel arch liner fasteners before they even start. Using old, brittle clips that have been through heat cycles and road salt is a recipe for a rattling mess. If a clip looks even slightly stressed, just toss it.

    When you’re actually getting into the weeds of the automotive splash guard installation, pay close attention to how the liner seats against the metal fender. If it’s not flush, it’ll catch the wind at highway speeds and eventually tear itself right off. I usually take a second to wipe down the mounting points with a rag to make sure there’s no grit or buildup. Getting those fender liner clips and screws seated perfectly is the difference between a job that looks professional and one that looks like a hack job.

    Securing Wheel Arch Liner Fasteners for Good

    Securing Wheel Arch Liner Fasteners for Good

    Here’s the thing about wheel arch liner fasteners: they’re usually the first things to go, and they’re cheap to replace, so don’t be stingy with them. I’ve seen so many guys try to reuse old, brittle clips just to save five bucks, only to have them snap off halfway through the job. If your clips look even slightly chewed up or discolored from heat, just toss them. Buying a fresh pack of fender liner clips and screws is way better than fighting with a piece of plastic that refuses to stay seated.

    When you’re actually snapping them back in, don’t just force them. If you feel resistance, stop. You’re likely misaligned, and forcing it is a great way to crack the new liner. I always make sure the liner is tucked firmly into the bumper edge before I tighten anything down. Getting that tension right is the secret to preventing road debris damage later on. If the liner is even slightly loose, it’ll flap against your tire at highway speeds, and that vibration will drive you crazy. Tighten them until they’re snug, but don’t over-torque them, or you’ll just strip the plastic housing.

    Pro Tips to Keep Your New Liner from Flying Off

    • Don’t just reuse those old, crusty plastic clips. If they look even a little bit stressed or white, toss them. Grab a handful of new ones from the auto parts store; it’s a cheap way to make sure your liner actually stays put next time you hit a pothole.
    • Before you start pulling everything apart, take a quick photo of how the liner sits against the bumper. It sounds extra, but once you’ve got ten different screws and clips spread out on your magnetic tray, you’ll be glad you have a reference for exactly where that edge is supposed to tuck.
    • If you’re struggling to reach a stubborn screw deep in the wheel well, don’t go hunting for a massive socket set. A long, slim screwdriver or a small ratchet with an extension is your best friend here. You need to be able to get into those tight gaps without smashing your knuckles against the frame.
    • Watch out for the “hidden” fasteners. Most people think it’s just the obvious clips around the edge, but there’s often a screw tucked up high near the headlight or down low by the frame. If the liner feels loose after you’re “done,” you probably missed one of those sneaky ones.
    • Give the liner a quick wipe down with some cleaner before you snap it into place. If there’s a bunch of road grime or grit trapped between the liner and the body, it can cause weird vibrations or even rubbing sounds while you’re driving. Clean surfaces make for a much tighter fit.

    The Bottom Line on Your Fender Liners

    Don’t wait for the liner to fly off on the highway; if you see cracks or loose clips, swap it out now before it starts damaging your tire or wiring.

    Stop reusing those old, brittle plastic clips—grab a handful of new ones from the auto parts store so your new liner actually stays put.

    You don’t need a lift to do this, just a decent screwdriver set and a bit of patience to navigate around the wheel well.

    ## Don't Let a Piece of Plastic Dictate Your Repair Bill

    “A cracked fender liner isn’t just an eyesore; it’s an invitation for road salt and debris to chew up your expensive engine components. Don’t let a mechanic charge you a hundred bucks just to clip some plastic back into place—grab a screwdriver and handle it yourself.”

    Nikolai·Osterman

    Don't Let a Little Plastic Hold You Back

    Don't Let a Little Plastic Hold You Back

    At the end of the day, replacing a fender liner isn’t some high-level engine rebuild that requires a specialized shop and a massive invoice. We covered how to identify the damage, the right way to seat those clips so they don’t rattle, and how to make sure those fasteners actually stay put next time you hit a pothole. It really just comes down to being methodical. If you took the time to clean out the debris and double-check your mounting points, you’ve already done more than most drivers would bother with. Just remember: don’t force the plastic if it isn’t lining up right—usually, that means a clip is just slightly out of place or you’ve got a bit of road grime in the way.

    I know it can feel intimidating when you’re staring down at a pile of new parts and a messy wheel well, but that feeling goes away the second you tighten that last screw. Every time you handle a repair like this, you’re taking a little more control over your ride and your wallet. You’re proving that you don’t need to be a master tech to maintain your own machine. So, grab your magnetic tray, get back under there, and finish the job. Once you realize how simple these small wins are, you’ll start looking at your car differently—not as a mystery, but as something you actually understand.

    Frequently Asked Questions

    Can I just use zip ties to hold the liner in place if I can't find the original plastic clips?

    Look, I get it. You’re in the driveway, it’s getting dark, and those specific OEM clips are nowhere to be found. Can you use zip ties? Yeah, in a pinch, they’ll hold. But honestly? It’s a temporary fix. Zip ties can vibrate loose or even slice through the plastic liner over time. If you can’t find the originals, just grab a cheap pack of universal trim clips online. It’ll save you a massive headache later.

    How do I know if the liner is actually broken or if it's just a loose screw causing that annoying rattling sound?

    Look, don’t go buying a new liner just yet. Grab a flashlight and a screwdriver first. If you can wiggle the plastic with your hand and it feels solid, it’s probably just a loose clip or a screw that backed out. But, if you see actual cracks, or if the plastic is flapping against your tire like a loose flag, that’s a break. If it’s torn, it’s toast—time to swap it.

    Do I need to take the whole wheel off to get to the fasteners, or is there a way to do this without pulling the tire?

    Look, I get it—pulling a whole wheel is a massive pain and adds an extra hour to the job. Honestly, you can usually avoid it. If you’ve got a decent flashlight and maybe a flexible extension for your ratchet, you can reach most of those fasteners by just turning the steering wheel all the way to one side. It gives you way more room to work. Only pull the wheel if you’re stuck.

  • How to Locate and Fix an Exhaust Leak

    How to Locate and Fix an Exhaust Leak

    There’s nothing quite like that sudden, rhythmic ticking sound that starts creeping up from under your floorboards every time you hit the gas. I remember the first time I heard it on my old project car; I was convinced I’d blown a gasket and was looking at a massive repair bill. Most shops will see that sound and immediately try to sell you a brand-new, high-priced catalytic converter or a full manifold replacement just to pad their margins. But here’s the truth: a lot of times, a simple exhaust leak repair is way less intimidating—and way cheaper—than the guys in the clean jumpsuits want you to believe.

    I’m not here to give you some textbook lecture or a list of parts you don’t actually need. I’ve spent enough time under greasy chassis to know that most of these issues come down to a rusted bolt or a cracked flange that you can tackle with a basic socket set and some patience. I’m going to walk you through how to pinpoint exactly where that leak is coming from and how to patch it up yourself. My goal is to get you back on the road without you feeling like you just got ripped off at the dealership.

    Table of Contents

    Spotting Exhaust System Symptoms Before They Get Costly

    Spotting Exhaust System Symptoms Before They Get Costly

    If you’re hearing a sound that wasn’t there during your last commute, don’t just crank the radio to drown it out. Most people ignore a ticking or roaring noise, thinking it’s just an old car acting up, but that’s usually the first sign of trouble. One of the biggest red flags I see in the shop is a sudden car exhaust smell in cabin while you’re sitting at a red light. If you can smell that sulfurous, burnt scent through your vents, you aren’t just dealing with a nuisance; you’re dealing with a serious carbon monoxide danger vehicle situation. That gas doesn’t care if you’re driving a brand-new SUV or my old project tuner—it gets into your lungs, and that’s not something to mess with.

    Beyond the smell, pay attention to how your engine feels. If the car feels sluggish or you notice a weird vibration under your feet, you might be looking at something more serious like a cracked manifold. Sometimes it’s just a simple fix, but if you wait too long, a tiny crack can turn into a massive job like an exhaust manifold bolt replacement, which is a total headache. Catching these symptoms early is the difference between a quick fix and a massive bill.

    The Truth About That Scary Car Exhaust Smell in Cabin

    The Truth About That Scary Car Exhaust Smell in Cabin

    If you’re sitting at a red light and suddenly notice a weird, acrid scent drifting through your vents, don’t just roll down the windows and pretend it’s fine. That car exhaust smell in cabin is your car’s way of screaming that something is wrong. It’s not just a nuisance; it’s a massive red flag. When you smell that stuff inside, it means gases that should be exiting out the tailpipe are finding a way into your passenger compartment.

    The reality is that this isn’t just a bad smell—it’s a serious carbon monoxide danger vehicle issue. Carbon monoxide is colorless and odorless on its own, so if you’re smelling the sulfur or the heavy fumes, you’re already breathing in the byproduct. This usually happens because of a crack in the manifold or a failing gasket. I’ve seen people ignore this for weeks, thinking it’s just a “quirk” of an old car, but you’re essentially inhaling engine waste while you drive. If you catch it early, you might just be looking at a simple gasket swap rather than a massive headache later.

    Don't Get Ripped Off: 5 Ways to Tackle the Leak Yourself

    • Grab a soapy water spray bottle. If you can safely run the car for a minute, spray some soapy water on the exhaust pipes; if you see bubbles popping, you’ve found your leak without needing a fancy smoke machine.
    • Check your manifold bolts first. A lot of times, it’s not a broken pipe, it’s just a loose or snapped bolt on the manifold that’s letting air escape, and that’s a much easier fix than replacing the whole assembly.
    • Don’t just slap on some cheap putty. If you’re using exhaust sealant, make sure the surface is ground down to bare metal first; if you apply it over grease or old rust, it’s going to flake off in ten minutes.
    • Get yourself a decent set of penetrating oil. Before you even think about turning a wrench on those rusted-out clamps, soak them overnight. If you try to force a frozen bolt, you’re just going to snap it and turn a simple fix into a nightmare.
    • Watch out for the flex pipe. If the leak is coming from that braided section, don’t bother trying to patch it with tape—it’s a moving part. You’re better off just swapping the whole flex pipe section out so you aren’t back under the car next week.

    Quick Lessons Before You Get Under the Car

    Don’t wait for a massive repair bill; if you hear a new ticking or roaring sound, it’s probably just a small leak that you can catch early.

    If you start smelling exhaust inside the cabin, stop driving immediately—it’s not just annoying, it’s actually dangerous for you.

    You don’t need to be a master mechanic to handle basic leaks, but you do need to grab the right tools and some patience so you don’t strip a bolt.

    ## Don't Let a Small Crack Break Your Bank

    “An exhaust leak isn’t just some annoying noise; it’s your car telling you something is wrong before it turns into a massive repair bill. Most shops will try to sell you a whole new system, but usually, all you really need is a bit of patience, the right sealant, or a fresh gasket to get back on the road.”

    Nikolai·Osterman

    Don't Let a Small Leak Break Your Bank

    Don't Let a Small Leak Break Your Bank

    Look, fixing an exhaust leak isn’t some impossible feat of engineering. We’ve covered how to listen for those telltale rattles, identify that nasty sulfur smell creeping into your cabin, and pinpoint exactly where the gas is escaping. Whether it’s a blown manifold gasket or just a rusted-out flange that needs a new bolt, the key is to act before the leak gets bigger. If you catch it early, you’re looking at a simple weekend project with a wrench and some sealant. If you wait, you’re looking at a massive repair bill and potentially damaging your engine’s sensors. Just stay ahead of the noise and keep those eyes peeled.

    At the end of the day, I don’t want you to feel intimidated by what’s under your hood. Mechanics are going to try to tell you that every little hiss requires a trip to the shop, but most of the time, you’ve got this. It’s about having the right tools, a bit of patience, and the guts to get your hands dirty. Once you patch that leak and hear your engine running smooth and quiet again, you’ll realize you didn’t need a master technician to do it—you just needed to trust your own hands. Now, grab your gear and get to work.

    Frequently Asked Questions

    Can I just use some high-temp sealant to patch a hole, or is that just a temporary band-aid?

    Look, I’ll be straight with you: sealant is a band-aid. It’s fine if you’re stuck on the side of the road or just need to limp the car to a shop, but don’t expect it to last. The vibration and heat cycles will eventually crack that patch right off. If you want a real fix that won’t leave you stranded, you’ve gotta patch the metal or swap the section. Don’t let a cheap fix become a costly mistake.

    How do I know if the leak is in the manifold or further down the pipe without taking everything apart?

    The easiest way to tell without tearing the whole thing down is to listen to the rhythm. If you hear a sharp, rapid tapping or “ticking” sound that gets faster as you rev the engine, that’s almost always your exhaust manifold. Manifold leaks happen right at the engine block where pressure is highest. If it’s more of a low, heavy rumble or a loud roar coming from under the car, the leak is further down the pipe.

    Is it actually dangerous to keep driving with a small leak, or can it wait until my next paycheck?

    Look, I get it—money is tight and sometimes you just need to make it to payday. But honestly? Don’t gamble with it. Even a “small” leak means exhaust gases, including carbon monoxide, can seep into your cabin. It’s not just about a loud noise; it’s about your health. If you can’t fix it today, at least crack a window and keep the fresh air moving. Don’t push your luck.

  • Fixing Power Steering Rack Issues

    Fixing Power Steering Rack Issues

    I was under a lifted ’98 Silvia last Tuesday when a customer’s quote for a steering rack repair came across my desk. The shop manager wanted to charge him nearly two grand just to swap the assembly, claiming it was “too complex” for a DIYer. Honestly, it makes my blood boil. Most shops love to treat a steering issue like a death sentence for your bank account, but they’re usually just overcomplicating a job that really just requires a decent set of sockets and some elbow grease. You don’t need a master technician’s certification to realize that most of these “catastrophic” failures are just worn-out boots or a simple leak that you can fix yourself.

    Look, I’m not going to feed you some sanitized, textbook version of how this goes down. I’m going to give you the straight truth from someone who spends his days covered in grease and his nights turning wrenches on my own projects. I’ll walk you through the actual process of a steering rack repair, from diagnosing the play in your wheel to the moment you finally tighten that last bolt. My goal is to make sure you walk away knowing exactly what’s happening under your hood so you never get ripped off again.

    Table of Contents

    Decoding Steering Rack Symptoms Before They Get Costly

    Decoding Steering Rack Symptoms Before They Get Costly

    You don’t want to wait until you’re stranded on the shoulder of a highway to realize something is wrong with your steering. Most of the time, your car will try to tell you something is up through those early steering rack symptoms. I usually tell my friends to listen for a whining or groaning sound when they turn the wheel. If that sound is accompanied by a heavy, sluggish feeling in the steering wheel, you might be looking at a power steering pump failure, but it could also be a leak in the rack itself.

    Another big red flag is seeing fluid puddling under your front end or noticing a weird “clunking” sensation when you hit a bump. If you’re hearing metal-on-metal grinding, it’s time for some serious steering rack noise diagnosis. Sometimes, it’s just a matter of a quick steering rack seal replacement to stop a leak, but if you ignore it, you’ll end up having to replace the whole unit. Catching these small issues early is the difference between a cheap fix and a massive bill at the shop.

    Mastering Steering Rack Noise Diagnosis With Your Own Ears

    Mastering Steering Rack Noise Diagnosis With Your Own Ears

    One thing I’ve learned working in the shop is that your ears are actually better than most cheap OBD scanners when it comes to the steering system. If you’re sitting in the driver’s seat and hear a high-pitched whine every time you turn the wheel, don’t immediately assume you need to replace steering rack assembly and drop a thousand bucks. Often, that whine is actually a sign of a power steering pump failure or just low fluid levels. You need to distinguish between a mechanical grind coming from the rack itself and a hydraulic scream coming from the pump.

    If the noise sounds more like a rhythmic clicking or clunking specifically when you’re hitting bumps or turning sharply, that’s a different story. That’s usually the internal gears or the mounting bushings playing up. I always tell people to try and isolate the sound: turn the engine off and move the wheel. If it’s silent, it’s likely hydraulic. If it still makes a “clack,” you’re looking at a mechanical issue within the rack. Getting the hang of steering rack noise diagnosis early can save you from a massive headache down the road.

    Pro Tips to Save Your Sanity (and Your Wallet) During the Swap

    • Don’t just wing it with any old fluid; check your manual for the specific power steering fluid your rack calls for, because using the wrong stuff is a fast track to blowing out your new seals.
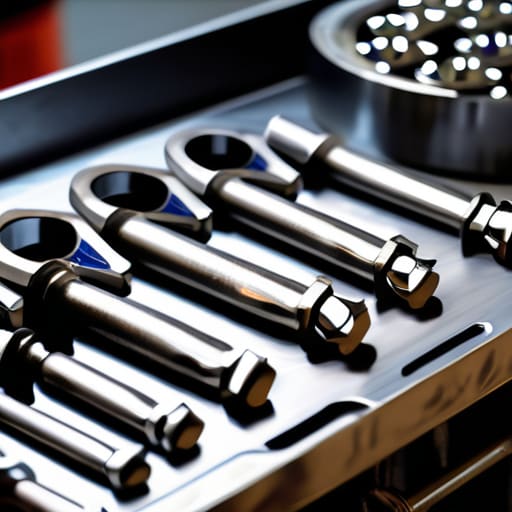
    • Grab a decent set of flare nut wrenches before you start, because using a standard open-end wrench on those hydraulic lines is the easiest way to strip a fitting and turn a simple job into a nightmare.
    • Keep your magnetic parts tray handy—seriously, I can’t tell you how many times I’ve lost a critical mounting bolt in the dark abyss of a wheel well because I wasn’t being careful.
    • Before you pull the old rack out, take a bunch of photos of the tie rod connections and sensor wiring; once everything is disconnected, your brain is going to forget exactly how those lines were routed.
    • When you’re reinstalling, make sure you’re bleeding the air out of the system properly by turning the wheel lock-to-lock several times while the engine is off, or you’ll be stuck with a loud, shuddering mess.

    The Bottom Line on Your Steering

    Don’t ignore the warning signs; if your wheel is vibrating or making weird noises, catching it early can save you from a massive repair bill later.

    You don’t always need a shop to diagnose the issue—pay attention to how the car feels and listens, and you’ll know if it’s a simple fix or something more serious.

    Most steering rack issues aren’t a death sentence for your car, as long as you have the right tools and don’t let a small leak turn into a total system failure.

    ## The Truth About Steering Issues

    Most shops will try to tell you a leaking steering rack is a “replace-only” job that’ll cost you a grand, but half the time, it’s just a worn seal or a loose mounting bolt that a little grease and the right wrench can fix.

    Nikolai·Osterman

    Don't Let the Shop Overcharge You

    Don't Let the Shop Overcharge You.

    At the end of the day, fixing your steering rack isn’t some mysterious black box that only a master technician can touch. We’ve walked through the warning signs—from that annoying fluid leak on your driveway to the weird clunking sounds that keep you up at night—and you now know how to actually listen to what your car is telling you. Whether it’s a simple seal replacement or a full rack swap, the key is catching the issue early. If you wait until your steering feels like you’re driving through wet cement, you’re not just looking at a repair; you’re looking at a massive headache and a much bigger bill.

    I know it feels intimidating when you’re staring at a heavy component under your chassis, but don’t let that stop you. I’ve spent countless weekends covered in grease, and I promise you, the feeling of finally getting that steering wheel smooth and responsive again is worth every bit of the struggle. You don’t need a fancy degree or a million-dollar lift to take control of your machine. Grab your tools, keep your parts organized, and just take it one bolt at a time. You’ve got this, and your wallet will definitely thank you later.

    Frequently Asked Questions

    Do I really need to replace the whole rack, or can I just fix a leaking seal myself?

    Look, it depends on how bad the damage is. If it’s just a weeping seal and the fluid level is holding steady, you might be able to swap the seal out and save a ton of cash. But if the internal gears are notched or the shaft is pitted, a new seal won’t do squat—it’ll just leak again in a week. If the steering feels notched or heavy, just bite the bullet and replace the whole rack.

    How can I tell if the issue is actually my power steering pump and not the rack?

    Look, it’s easy to blame the rack when things feel off, but don’t jump the gun. If you’re hearing a high-pitched whine that changes pitch when you turn the wheel, that’s usually your pump screaming for help, not the rack failing. Also, check your fluid. If it looks like burnt coffee or you see bubbles in the reservoir, your pump is likely struggling. If the steering is just “heavy” or vague, then we start looking at the rack.

    Is it safe to keep driving if my steering just feels a little "mushy" for a few more days?

    Honestly? I wouldn’t risk it. If your steering feels “mushy,” you’re likely losing pressure in your power steering system or dealing with air in the lines. That’s a huge red flag. It might feel fine for a few miles, but if a seal blows or a hose snaps while you’re mid-turn, you’re going to lose control fast. Check your fluid levels right now, but please, don’t treat this like a “wait and see” situation.

  • When and How to Flush Transmission Fluid

    When and How to Flush Transmission Fluid

    I remember sitting on a cold concrete floor last Tuesday, watching a customer’s face go pale as the service advisor quoted him two grand for a “mandatory” transmission fluid flush. It’s the same old story: shops see a little hesitation in your gear shifts and immediately try to drain your bank account instead of just fixing the problem. Honestly, it drives me crazy how some places treat a routine transmission fluid flush like it’s some kind of high-tech miracle surgery that only a specialist can touch.

    Look, I’m not here to sell you on some expensive shop package or give you a textbook lecture. My goal is to give you the straight truth about what’s actually happening inside your gearbox and when you actually need to step in. I’ll show you how to tell if your fluid is actually shot or if you’re being played, and I’ll walk you through the process so you can handle it yourself. You don’t need a master technician’s certification to take control of your own maintenance; you just need the right info and a bit of grit.

    Table of Contents

    How to Spot the Signs of Old Transmission Fluid

    How to Spot the Signs of Old Transmission Fluid

    The easiest way to tell if your fluid is toast is to pull the dipstick and actually look at it. If it looks like bright, translucent red cherry juice, you’re usually in the clear. But if it’s come out looking like dark coffee or even burnt toast, that’s a massive red flag. You might also notice a heavy, acrid smell—that’s the scent of friction and heat, which means your fluid has lost its ability to protect your gears.

    Beyond just the color, pay attention to how the car actually feels when you’re driving. If you notice the engine revving up but the car isn’t moving immediately, or if you feel a nasty shudder when shifting from park to drive, you’re seeing the signs of old transmission fluid in real-time. Sometimes it’s a slow slip, and other times it’s a violent jerk that makes you wince. If your gear changes aren’t smooth anymore, don’t just ignore it; that’s your car telling you that your automatic transmission maintenance has been neglected for far too long.

    Transmission Fluid vs Gear Oil Know the Difference

    Transmission Fluid vs Gear Oil Know the Difference

    Look, I’ve seen guys at the shop grab a bottle of gear oil for an automatic, and that’s a one-way ticket to a massive repair bill. It’s a common mistake, but you’ve gotta know that transmission fluid vs gear oil isn’t just a minor detail—it’s everything. Transmission fluid is designed to handle the complex hydraulic pressures and friction inside an automatic system, acting as both a lubricant and a way to shift gears. Gear oil, on the other hand, is much thicker and is meant for manual gearboxes or differentials where you don’t have those intricate valve bodies to worry about.

    If you try to swap them, you’re basically asking for your transmission to shred itself from the inside out. When you’re looking into preventative gearbox care, you have to be specific about what your owner’s manual calls for. Whether you’re doing a simple drain and fill or a more thorough service, using the wrong spec is a rookie mistake that can turn a cheap maintenance job into a total replacement.

    5 Things I Wish I Knew Before I Touched My Transmission

    • Don’t just drain and fill if you’re planning a full flush; most of the old, nasty fluid stays trapped in the torque converter, so you need to make sure you’re actually cycling the new stuff through the whole system.
    • Check your owner’s manual before you go rogue with a shop kit—some modern transmissions are super sensitive to fluid types, and if you put the wrong spec in, you’re basically asking for a massive repair bill.
    • Keep a close eye on the color during the process; if the fluid coming out looks like burnt coffee or has tiny metal flakes floating in it, stop immediately because that’s a sign your internals are already toast.
    • Grab a decent drain pan and a funnel that actually fits—trust me, there is nothing more frustrating than trying to clean up spilled ATF in a driveway while you’re halfway through a job.
    • Don’t skip the level check once everything is warmed up; transmission fluid expands when it gets hot, so you’ve got to check it at the right temperature to make sure you haven’t overfilled it or left it running dry.

    The Bottom Line on Your Transmission

    Stop waiting for the “Check Engine” light; if your shifts feel sluggish or the fluid looks like burnt coffee, you need to act before you’re looking at a total rebuild.

    Don’t get intimidated by the jargon—a fluid flush isn’t some high-level surgery, it’s just a routine maintenance task that keeps your gears from grinding themselves to death.

    Always double-check your owner’s manual for the specific fluid type your car needs, because using the wrong stuff is the fastest way to turn a cheap DIY job into a massive headache.

    ## Stop Ignoring the Smell

    “If your fluid looks like burnt coffee and smells like a bonfire, don’t wait for the shop to tell you it’s time for a rebuild. A simple flush is a lot cheaper than a new transmission, and honestly, it’s one of those jobs you can knock out yourself if you’ve got the right tools and a little patience.”

    Nikolai·Osterman

    Don't Wait for the Warning Lights

    Don't Wait for the Warning Lights.

    Look, at the end of the day, keeping your transmission healthy isn’t some high-level mystery. You just need to know how to spot that burnt smell, understand that gear oil and transmission fluid are definitely not interchangeable, and keep an eye on how your car shifts. If you’re noticing slips or delayed engagement, don’t just ignore it and hope it goes away. A simple fluid flush is one of the cheapest ways to prevent a massive, multi-thousand dollar repair bill down the road. Most of the time, it’s just about staying ahead of the wear and tear before it turns into a total mechanical nightmare.

    I know it can feel intimidating when you first pop the hood and see a mess of hoses and sensors, but don’t let that stop you. You don’t need to be a master technician to take control of your own machine. Grab your tools, take your time, and remember that every time you do a job yourself, you’re learning something new and saving yourself from getting ripped off. Your car is an investment, so treat it like one. Once you get the hang of these basics, you’ll realize that you’ve got this.

    Frequently Asked Questions

    Is it actually safe to flush my transmission if it's already got high mileage, or am I just asking for trouble?

    Look, I get why you’re nervous. There’s this old-school rule that if you touch a high-mileage transmission, it’ll die immediately. Honestly? That’s mostly a myth, but there’s a catch. If your fluid is nasty, a high-pressure flush can dislodge gunk that was actually helping your worn-out clutches grab. My advice: don’t do a high-pressure flush on a neglected rig. Just do a simple drain and fill. It’s safer and gets the job done without the risk.

    Do I really need to do a full machine flush, or is a simple drain and fill enough to get the job done?

    Look, don’t let anyone pressure you into a massive machine flush right away. Honestly, if your fluid is just looking a bit dark, a simple drain and fill is usually plenty. Those machines can sometimes be too aggressive and actually kick up old debris that clogs your valve body. I usually stick to a drain and fill to keep things safe. If you’re really worried, just do a few of those over a few months.

    How do I know if I should be using a standard ATF or if my car requires a specific synthetic blend?

    Look, don’t ever guess on this. If you grab the wrong fluid, you’re asking for a massive repair bill. The only way to know for sure is to check your owner’s manual or look at the dipstick—it usually has the spec stamped right on it. Most modern cars are super picky about synthetic blends because of those complex valve bodies. If it calls for a specific spec, stick to it. Don’t let a “universal” bottle trick you.

  • Replacing a Faulty Starter Motor

    Replacing a Faulty Starter Motor

    You’re sitting in your driveway, turning the key, and all you get is that pathetic, hollow click-click-click that tells you your car is officially dead. Most people hear that sound and immediately start sweating about a massive repair bill, thinking they need to tow the car straight to a dealership just to get a quote. But here’s the truth: a dead starter isn’t a death sentence for your car, and it definitely shouldn’t be a death sentence for your bank account. A starter motor replacement might feel intimidating when you’re staring at a silent engine, but once you realize it’s mostly just a few bolts and some basic wiring, that fear disappears.

    I’ve spent enough time under grease-stained hoods to know that the “experts” love to make simple jobs sound like rocket science just to justify their labor rates. I’m not here to give you some polished, textbook lecture; I’m going to show you how to actually get this done with the tools you probably already have in your garage. We’re going to walk through the entire starter motor replacement process step-by-step, from disconnecting the battery to getting that new unit bolted in tight. No fluff, no unnecessary upsells—just the straight facts so you can get back on the road.

    Table of Contents

    Guide Overview

    Total Time: 1-3 hours
    Estimated Cost: $150-$400
    Difficulty: Intermediate

    Tools & Supplies

    • Socket set and ratchet for removing bolts
    • Wrench set for electrical connections
    • Jack and jack stands for vehicle lifting
    • Screwdriver for securing battery terminals
    • New starter motor 1 unit
    • Dielectric grease 1 small tube

    Step-by-Step Instructions

    • 1. First thing’s first, you gotta disconnect the battery. Don’t skip this part unless you want to see a shower of sparks when you touch that starter terminal. Use a wrench to loosen the negative terminal first, tuck it aside so it isn’t touching anything, and then you’re safe to work.
    • 2. Get the car up and secure. If you’re working from underneath, don’t just trust a cheap jack; use proper jack stands to prop the car up. I’ve seen too many guys get hurt because they thought they were “good enough” with just the hydraulic lift. Once it’s stable, crawl underneath and get a clear view of where that starter is hiding.
    • 3. Now, start by disconnecting the electrical connections. You’ll see a heavy-duty cable bolted to the starter and a smaller wire—usually the solenoid wire. Use your socket set to loosen them, and keep that magnetic tray handy to catch the small nuts and washers so they don’t roll into the abyss of your driveway.
    • 4. It’s time to tackle the mounting bolts. These are usually the beefiest bolts holding the unit to the transmission housing. Depending on your engine layout, you might have to wiggle things around or move a heat shield out of the way. Just take your time and don’t force it if it feels stuck; sometimes a little bit of penetrating oil is your best friend here.
    • 5. Once those bolts are out, physically pull the old starter out. It’s usually a bit heavy and might be covered in road grime and oil, so watch your grip. While it’s out, take a second to inspect the mounting surface on the engine to make sure there isn’t any junk or corrosion preventing a clean fit for the new one.
    • 6. Grab your new starter and line it up with the mounting holes. It’s a bit of a puzzle sometimes, especially in tight engine bays, but once you get the first bolt started by hand, the rest usually follow. Hand-threading the bolts is crucial here so you don’t cross-thread them, which is a massive headache you definitely want to avoid.
    • 7. Tighten everything back down, starting with the mounting bolts and then moving to the electrical wires. Make sure those connections are snug and clean so you don’t deal with intermittent starting issues later. Once it’s all bolted up, reconnect your battery, hop in the driver’s seat, and give it a turn to make sure you’re back in business.

    Diagnosing a Dead Engine Without the Mechanics Guesswork

    Diagnosing a Dead Engine Without the Mechanics Guesswork

    Before you go buying parts, you need to make sure it’s actually the starter and not just a bad connection. I’ve seen so many people waste money on a brand-new unit when the real culprit was just a crusty connection. Start with a quick battery terminal corrosion check; if you see that white, fuzzy buildup, your electricity isn’t flowing right, and no amount of new hardware will fix that. Grab a multimeter if you have one, because automotive electrical system troubleshooting is way more reliable than just listening to a clicking sound and guessing.

    If the terminals are clean and the battery is holding a solid charge, then you’re likely looking at actual starter motor symptoms and causes. Listen closely when you turn the key. A single, loud “clack” usually means the solenoid is trying to engage but the motor itself is toast. If you get a rapid-fire clicking, it might still be low voltage. Don’t rush into diagnosing a dead engine by assuming the worst—check your ground wires first. Most of the time, it’s just a loose connection or a dying cell, not a total mechanical failure.

    Essential Automotive Tools for Starter Replacement You Already Own

    Essential Automotive Tools for Starter Replacement You Already Own

    You don’t need to go out and drop a few hundred bucks on a professional rolling tool chest just to get this job done. Most of the stuff you’ll need is probably already sitting in a plastic bin in your garage. A solid set of sockets—specifically a deep socket set—and a decent ratchet are your bread and butter here. Since I’m usually working in tight spaces under the manifold, I can’t stress enough how much a small 1/4-inch drive ratchet helps when you’re fighting for clearance. Also, grab a good pair of work gloves; those starter housings can get pretty nasty and sharp.

    Before you even touch a wrench, do a quick battery terminal corrosion check. I’ve seen way too many people tear their whole engine bay apart only to realize they just had a layer of white crust preventing a solid connection. While you’re at it, make sure you have a multimeter handy for some basic automotive electrical system troubleshooting. It’s a cheap tool that saves you from the headache of replacing a perfectly good part because you misdiagnosed a simple voltage drop.

    Pro-Tips to Keep Your Knuckles From Getting Battered

    • Disconnect the negative battery terminal before you even touch a wrench. I’ve seen too many guys accidentally bridge the connection and see a shower of sparks that’ll ruin their day—and their starter.
    • Use a jack and jack stands to get some decent light, but don’t trust a hydraulic floor jack alone while you’re under there. You need a stable, solid base so you aren’t fighting the car and the bolt at the same time.
    • Take a photo of the wiring before you unhook anything. Modern sensor-heavy engines can have some weirdly routed cables, and once those terminals are off, it’s easy to forget exactly how they were seated.
    • Grab a can of penetrating oil and give those mounting bolts a good soak a few minutes before you start. If you’re working on an older car, those bolts are likely seized, and trying to force them without prep is a one-way ticket to snapping a stud.
    • Don’t forget to check your battery terminals for corrosion while you’re in there. If you’re replacing a starter because the car won’t crank, you might just have a bad connection at the battery that’s making you do way more work than necessary.

    The Bottom Line on Swapping Your Starter

    Don’t jump the gun and buy a new starter until you’ve actually confirmed it’s the culprit—sometimes a loose battery terminal or a bad ground wire is playing tricks on you.

    Most of the heavy lifting is just about getting to the unit and managing those heavy-duty cables; once you’ve got the bolts loose, the actual swap is pretty straightforward.

    Save your cash by doing this yourself, but don’t skip the safety steps—always disconnect that negative battery terminal first so you aren’t dealing with accidental sparks while you work.

    ## The Real Cost of a No-Start

    “Most shops will charge you three hours of labor just to diagnose a clicking sound, but once you realize a starter is just a bolt-on component, you realize you’re not just saving money—you’re taking your car back.”

    Nikolai·Osterman

    Getting Back on the Road

    Replacing a starter, getting back on the road.

    At the end of the day, swapping out a starter isn’t some mystical feat of engineering; it’s just a matter of staying organized and having the right gear. We went over how to narrow down the symptoms so you aren’t chasing ghosts, the specific tools you need to pull the job off, and the actual physical steps to get that old unit out and the new one in. If you kept your battery terminals clean and made sure you didn’t lose any of those small bolts in the driveway, you’ve already done the hard part. Just remember to double-check your connections before you try to crank it, because nothing kills the vibe faster than a job half-done.

    I know it can feel intimidating when you’re staring down a greasy engine bay with a pile of parts staring back at you, but don’t let that stop you. Every time you turn a wrench and solve a problem yourself, you’re taking power back from the shops that want to charge you three hours of labor for a thirty-minute fix. You don’t need a fancy certification to take ownership of your machine. Keep your tools organized, keep your head level, and just keep turning. You’ve got this.

    Frequently Asked Questions

    Is it possible that my battery is actually dead and I'm just assuming it's the starter?

    Look, I’ve seen this a thousand times at the shop. You’re convinced it’s the starter, but it’s actually just a lazy battery. Before you go tearing into the engine bay, check your lights or try a jump start. If the car cranks normally with a jump, your starter is fine and your battery’s just toast. Don’t waste money replacing a working starter when you really just need a fresh cell.

    Do I need to drop the entire transmission to get to the starter, or can I reach it from the top?

    Look, I get the anxiety—the idea of pulling a whole transmission sounds like a nightmare. But for most cars, you definitely don’t need to drop it. Usually, the starter is tucked away near the bottom where the engine meets the bellhousing. You’ll mostly be fighting for space and working around the frame or exhaust. Just grab a good flashlight and maybe a swivel socket; once you see the mounting bolts, you’ll realize it’s just a tight squeeze, not a transmission swap.

    How do I know if I should just replace the solenoid instead of buying a whole new starter motor?

    Look, it’s tempting to just swap the solenoid to save a few bucks, but it’s a gamble. If you hear a loud “click” but the engine won’t turn, it might just be the solenoid. But if you’re getting grinding noises or the starter smells burnt, the whole unit is toast. Honestly? On most modern cars, the solenoid is integrated into the starter anyway. Don’t waste your time chasing a cheap fix if the motor itself is dying.

  • How to Identify and Replace a Wheel Bearing

    How to Identify and Replace a Wheel Bearing

    You hear that low, rhythmic growl every time you hit forty, and your first instinct is to head straight to the dealership to get a massive quote. Most mechanics will try to tell you that a wheel bearing replacement is some high-level, specialized procedure that requires a heavy-duty lift and a master tech, but honestly? That’s mostly just a way to pad the invoice. I remember the first time I heard that grinding noise on my old Silvia; I was terrified I’d broken something expensive, but once I got under there with my socket set, I realized it was just a matter of patience and the right leverage.

    I’m not here to give you some polished, textbook lecture that ignores the reality of a greasy driveway. In this guide, I’m going to walk you through the actual process of a wheel bearing replacement using the same straightforward methods I use at the shop. I’ll show you which tools are actually worth your money, how to avoid the common mistakes that leave you stranded with a car on jack stands, and how to stop the noise for good without emptying your bank account.

    Table of Contents

    Guide Overview

    Total Time: 2-4 hours
    Estimated Cost: $80-200
    Difficulty: Intermediate

    Tools & Supplies

    • Floor jack and jack stands to lift and secure the vehicle
    • Lug wrench to remove the wheel bolts
    • Socket set and breaker bar to loosen large axle nuts
    • Torque wrench to tighten bolts to manufacturer specifications
    • Hub puller or slide hammer if the bearing is seized
    • Replacement wheel bearing/hub assembly (1 unit)
    • Anti-seize lubricant (small tube)
    • Brake cleaner (1 can)

    Step-by-Step Instructions

    • 1. First things first, you gotta get the car up and secure. Don’t be that person who relies on just a single jack; grab some jack stands and get the vehicle stable before you even think about getting under there. Once the car is steady, use your lug wrench to loosen the wheel bolts while the tire is still on the ground—it’s way easier to break them loose when there’s no resistance from the wheel spinning.
    • 2. Get the wheel off and clear your workspace. Once you’ve jacked the car up high enough to work comfortably, finish unscrewing those bolts and pull the wheel off. I always like to slide the wheel under the frame near the jack as a backup safety measure just in case something slips. Now, take a rag and wipe down the area around the hub so you aren’t working in a pile of old road grime and grit.
    • 3. Now we get to the messy part: getting the old bearing out. You’ll need to remove the brake caliper and the rotor first—just make sure you secure the caliper with a bungee cord or a wire so it doesn’t hang by the rubber brake line, otherwise, you’re looking at a much more expensive repair. Once the rotor is out of the way, you’ll see the hub assembly. Depending on your car, you might have to unbolt the spindle or use a heavy-duty puller to pop the old unit out of the knuckle.
    • 4. Clean everything up before the new part goes in. This is where people get lazy and end up with a noisy bearing a month later. Take some brake cleaner and a wire brush to the knuckle where the new bearing sits. You want that surface to be completely smooth and free of rust so the new bearing seats perfectly. If there’s any debris left in there, the new part won’t sit flush, and you’ll be doing this whole job over again.
    • 5. Slide the new bearing into place. Line it up carefully and give it a firm press into the knuckle. If it’s a press-in style, you might need a hydraulic press, but if it’s a bolt-on hub assembly like most modern cars, just line up the holes and start threading your bolts by hand. Never use an impact wrench to start the bolts; you want to make sure they’re threading in straight so you don’t cross-thread the new hardware.
    • 6. Reassemble the brakes and torque it down. Put your rotor back on, reinstall the caliper, and make sure everything is tight. Once the hub is secure, pop the wheel back on and hand-tighten the lug bolts. Finally, lower the car back to the ground and use a torque wrench to tighten those bolts to the factory spec. If you don’t tighten them properly, you’re asking for vibrations or, worse, a wheel coming loose on the highway.

    Listen Closely Spotting Those Warning Wheel Bearing Symptoms

    Listen Closely Spotting Those Warning Wheel Bearing Symptoms

    Most people wait until they hear a loud, rhythmic growling sound before they even think about checking their hubs, but by then, you’re usually looking at a much bigger headache. If you notice a humming or droning noise that seems to change pitch when you’re turning or shifting weight in a corner, that’s a massive red flag. One of my favorite ways to figure out if it’s actually the bearing is to safely sway the car slightly while driving; if the sound gets louder when you veer left, the right side is likely the culprit. Knowing how to diagnose bad wheel bearings early can save you from a much more expensive job later on.

    You should also keep an eye out for any weird vibrations in the steering wheel or a feeling that the car is “wandering” on the road. Sometimes, a failing bearing can even cause the wheel to feel loose or shaky, which is a serious car maintenance safety issue you can’t afford to ignore. If you feel any play in the wheel when you jack the car up and grab the tire at the 12 and 6 o’clock positions, it’s time to stop driving and start wrenching.

    The Right Gear Essential Wheel Bearing Replacement Tools

    The Right Gear Essential Wheel Bearing Replacement Tools

    Look, you can try to wing it with whatever’s lying around in your junk drawer, but you’re going to end up stripping a bolt or, worse, hurting yourself. For a proper hub unit installation, you really need a solid set of heavy-duty sockets and a decent breaker bar to crack those stubborn axle nuts loose. I always keep my magnetic parts tray handy because once you start pulling those old clips and bolts, they will disappear into the garage floor if you aren’t careful.

    If you’re dealing with a more complex setup, don’t skip having a dedicated puller or a hydraulic press if the job calls for it. Also, make sure you’ve got a good way to handle brake rotor removal—sometimes a few taps with a rubber mallet is all it takes, but a dedicated puller saves a lot of frustration. Most importantly, don’t forget the basics of car maintenance safety; always jack the car up on solid jack stands, never just a floor jack. Getting the right wheel bearing replacement tools ahead of time means you won’t be stuck halfway through the job, staring at a half-disassembled car and wishing you’d gone to the hardware store.

    Pro Tips from the Shop Floor: Don't Make These Rookie Mistakes

    • Don’t skip the penetrating oil. Seriously. If you try to wrestle a rusted-out hub assembly without soaking it in some PB Blaster or Liquid Wrench overnight, you’re going to end up fighting a losing battle and potentially snapping a bolt.
    • Use a torque wrench for the final tighten. I see guys doing this all the time—just cranking the lug nuts or the hub bolts until they “feel” tight. That’s how you warp your rotors or, worse, have a wheel come loose on the highway. Do it by the book.
    • Clean your mating surfaces like your life depends on it. Before you pop that new bearing in, grab a wire brush and make sure the knuckle is spotless. If there’s old grit or rust trapped between the new part and the car, you’re basically asking for vibration issues down the road.
    • Watch out for the ABS sensor. These things are fragile and usually sit right near the bearing you’re messing with. If you’re being too aggressive with your hammer or pry bar, you can snap that sensor in half, and suddenly a simple bearing swap turns into a massive electrical headache.
    • Check the other side while you’re at it. If the bearing on your front left is shot, the one on the right isn’t far behind. It’s much easier to do both at once while you’ve already got the jack and the tools out than it is to do the whole job twice.

    The Bottom Line on Swapping Bearings

    Don’t wait for the noise to turn into a vibration; if you hear that grinding, your bearing is already on its way out and it’s way cheaper to fix it now than to deal with a wheel locking up later.

    You don’t need a master tech certification, but you do need the right tools—don’t try to wing it with a cheap socket set if you want to avoid rounding off bolts or stripping parts.

    Take your time and stay organized; keep your bolts in a tray and double-check your torque specs so you can drive away knowing the job was actually done right.

    ## Don't Let a Small Noise Become a Big Bill

    Most shops will try to tell you a grinding hub is a major job that requires a specialist, but honestly? If you’ve got a decent socket set and a little patience, you’re already halfway there. Don’t let a noisy bearing scare you into an expensive repair bill you could’ve handled yourself in your own driveway.

    Nikolai·Osterman

    Don't Let a Noisy Hub Slow You Down

    Don't Let a Noisy Hub Slow You Down.

    Look, swapping out a wheel bearing isn’t exactly a walk in the park, but it’s definitely not rocket science either. Once you’ve identified that annoying grinding or humming sound and grabbed the right tools—especially that heavy-duty torque wrench—the rest is just about following the process. You’ve got to be careful with the hub assembly and make sure everything is seated perfectly, but if you take your time and don’t rush the torque specs, you’re going to be fine. Just remember to double-check your work before you go tearing out of the driveway; there’s nothing worse than realizing you left a bolt loose halfway through your commute.

    At the end of the day, I want you to realize that you are more capable than any service advisor trying to sell you a “premium package” for a job you just did yourself. Every time you get under a car and actually solve a problem, you’re taking back control of your wallet and your machine. It might be messy, and you’ll probably end up with a little more grease on your hoodie than you intended, but that’s just part of the process. Keep turning wrenches and trust your hands—you’ve got this.

    Frequently Asked Questions

    Do I need to replace the hub assembly entirely, or can I just swap out the bearing itself?

    Look, this is where things get a little tricky depending on what you’re driving. On a lot of modern cars, the bearing is pressed into a hub assembly that’s basically one sealed unit. In those cases, it’s way easier to just swap the whole assembly—it saves you a massive headache with a hydraulic press. But if you’ve got an older setup or a specific design, you can swap just the bearing. Check your manual first.

    How do I know if it's actually the wheel bearing making that noise and not my brake pads or a CV axle?

    It’s easy to get confused because everything under the car sounds like a mess when it’s moving. Here’s the trick: if the noise changes pitch when you gently veer left or right in an empty parking lot, it’s almost definitely a bearing. Brake squeal is usually high-pitched and constant, while a bad CV axle usually clicks specifically when you’re turning sharply. If it’s a low hum that gets louder with speed, it’s your bearing.

    Is it safe to keep driving for a few days if I hear a slight hum, or am I risking a wheel actually locking up?

    Look, I get it—you’ve got stuff to do and don’t want to deal with a project mid-week. But honestly? Don’t push it. A slight hum is basically your car’s way of saying “hey, I’m failing.” If that bearing gets too hot or the internal play gets bad enough, it can seize or even cause the wheel to wobble and lose contact with the road. It’s better to swap it now on your terms than on the highway.

  • Symptoms and Steps for Head Gasket Repair

    Symptoms and Steps for Head Gasket Repair

    I remember sitting on my garage floor last summer, staring at a puddle of milky, sludge-looking coolant and feeling that sick pit in my stomach. My buddy told me I’d need to shell out three grand at a dealership just to look at it, but I knew better. Most shops try to make a head gasket repair sound like some high-level surgical procedure that only a guy in a clean white lab coat can handle. They see a little white smoke or a rising temp gauge and immediately start talking about total engine replacement to pad their margins. It’s a total scam, and honestly, it’s exhausting.

    Look, I’m not here to give you some textbook lecture or a list of “professional recommendations.” I’m going to show you how to actually get your hands dirty and tackle this job without losing your mind or your entire savings account. I’ll walk you through the real-world grit of a head gasket repair, from the specific torque specs you can’t afford to mess up to the little tricks I use to keep my bolts from snapping. We’re going to do this right, the honest way.

    Table of Contents

    Watch for These Engine Coolant Leak Symptoms

    Watch for These Engine Coolant Leak Symptoms.

    The first thing you’ll probably notice isn’t a massive puddle on your driveway, but a weird, sweet smell wafting through your vents while you’re driving. That’s a dead giveaway for engine coolant leak symptoms. If you catch it early, you might just be looking at a cracked hose, but if that sweet scent is accompanied by white, billowy smoke coming out of your exhaust, you’re likely dealing with something much heavier. That smoke is usually steam, meaning your coolant is getting cooked inside the engine where it doesn’t belong.

    Keep a close eye on your temp gauge, too. If it starts creeping toward the red zone even when you aren’t pushing the car hard, you’re looking at a potential cooling system failure. Another huge red flag is finding “milky” looking oil on your dipstick. If your oil looks like a chocolate milkshake, it means coolant is mixing with your lube, which is a massive warning sign of a blown gasket. Don’t ignore these cues; catching them before the engine overheats completely can save you from a much more expensive nightmare.

    Is Combustion Gas in Coolant Ruining Your Day

    Is Combustion Gas in Coolant Ruining Your Day?

    If you’ve ever popped your radiator cap (when the engine is cold, obviously) and seen a bunch of bubbles dancing around like your coolant is carbonated, you’ve got a problem. That’s a classic sign of combustion gas in coolant leaking into your cooling system. Basically, the seal that’s supposed to keep the fire in the cylinders and the liquid in the passages has failed. It’s not just a minor annoyance; it’s a direct indicator that your engine’s internal pressure is fighting against your cooling system, which can lead to a total cooling system failure if you keep driving.

    Once those gases get in there, they don’t just sit there; they displace the fluid and create air pockets. This means your engine can’t regulate its temperature properly, even if your gauge looks fine for a few minutes. If you start noticing a sweet, milky sludge under the oil cap or a sudden drop in pressure, don’t ignore it. These are major signs of a blown head gasket that require you to stop immediately. You’re looking at more than just a leak; you’re looking at a breakdown of the engine’s core integrity.

    Pro Tips to Keep Your Head Gasket Job from Turning Into a Nightmare

    • Don’t skip the surface prep; if there’s even a tiny bit of old gasket material or crust left on the engine block, your new seal is going to fail before you even turn the key.
    • Grab a torque wrench and actually use it—tightening head bolts by “feel” is a one-way ticket to a warped head and a wasted afternoon.
    • Always check your cylinder head for cracks or warping before you even think about putting the new gasket on; there’s no point in a perfect install if the metal itself is shot.
    • Keep your workspace organized with a magnetic tray—you do not want to be hunting for a specific bolt in a pile of grease while you’re halfway through a teardown.
    • When you’re putting it all back together, make sure you follow the specific tightening sequence in your manual; doing it out of order can bend the head and ruin everything.

    The Bottom Line on Your Head Gasket

    Don’t ignore the milky residue in your oil or the sweet smell of coolant; by the time you see those signs, the damage is already moving fast.

    You don’t necessarily need a master mechanic to fix this, but you absolutely need a decent torque wrench and a clean workspace to get it right.

    Catching a small leak early can save you from a total engine meltdown and a repair bill that’ll cost more than the car is worth.

    ## The Reality of the Repair

    “A blown head gasket sounds like a death sentence for your engine, and shops will definitely try to sell it to you that way, but honestly? It’s just a massive, messy puzzle of bolts and torque specs. If you’ve got the patience to stay organized and the right socket set, you can save yourself a couple of grand and do it right yourself.”

    Nikolai·Osterman

    Don't Let It Beat You

    Don't Let It Beat You: Engine Leaks

    Look, I know seeing milky coolant or finding combustion gases in your reservoir feels like a punch to the gut. It’s easy to assume your engine is basically a paperweight at that point, but remember what we covered: spotting those leaks early and understanding the symptoms can be the difference between a weekend project and a total engine replacement. If you’ve checked your fluids and confirmed the head gasket is the culprit, you’ve already done the hardest part, which is diagnosing the truth. It’s not about magic; it’s just about recognizing the signs and not ignoring that sweet smell of burning coolant before things get catastrophic.

    At the end of the day, a head gasket repair is a heavy lift, but it’s far from impossible. You might spend a few hours sweating over a torque wrench or fighting with a stubborn bolt, but there is nothing quite like the feeling of turning the key and hearing that engine purr back to life because you were the one who fixed it. Don’t let the big shops intimidate you into thinking you aren’t capable. Grab your tools, keep your workspace organized, and just take it one step at a time. You’ve got this.

    Frequently Asked Questions

    Can I actually fix this with a head gasket sealer, or am I just wasting my money?

    Look, I’ll be straight with you: most of the time, you’re just throwing money down the drain. Those sealers are basically a Hail Mary. If you’ve got a tiny, microscopic weep, maybe you’ll get lucky and buy yourself some time. But if you’ve actually got combustion gases bubbling in your coolant like we talked about, that sealer isn’t going to hold. Don’t waste your cash trying to patch a wound that needs stitches.

    How do I know if I need to replace the whole gasket or if it's just a minor issue with a hose or the water pump?

    Look, don’t jump straight to the worst-case scenario. If you see coolant pooling on the ground, check your hoses and the water pump first—those are easy, cheap fixes. But if you’re seeing white smoke from the exhaust or your oil looks like a chocolate milkshake, that’s your head gasket screaming for help. A leaking hose is just a nuisance; a blown gasket is a whole different beast that requires getting into the engine.

    Is it worth trying to do this myself, or am I going to end up making things way worse?

    Look, I’ll be straight with you: a head gasket isn’t a weekend oil change. It’s a heavy lift that requires precision and a lot of patience. If you’re someone who follows instructions to a T and has a decent set of torque wrenches, you can absolutely do this and save a massive chunk of change. But if you tend to rush or “wing it,” you might turn a repair into a total engine replacement. Take it slow.

  • How to Fix a Leaking Radiator

    How to Fix a Leaking Radiator

    I remember sitting on my dad’s oil-stained concrete floor when I was ten, watching him stare at a cracked plastic tank on an old Corolla. The mechanic at the shop down the street had told him he needed a whole new cooling system, a quote that would’ve cost more than the car was worth. That’s when I realized that most shops try to make radiator repair sound like some high-level science experiment just to pad their invoices. Truth is, if you’ve got a leak or a clogged core, you aren’t looking at a mechanical mystery; you’re just looking at a fixable problem that doesn’t require a specialized degree to solve.

    I’m not here to give you some textbook lecture or sell you on expensive, proprietary fluids you don’t actually need. I’m going to walk you through the actual, greasy reality of how to diagnose a leak and handle the radiator repair yourself without blowing your paycheck. My goal is to give you the straight talk on which tools you actually need to grab from your toolbox and how to avoid the common mistakes that turn a quick fix into a weekend nightmare.

    Table of Contents

    Spotting the Signs of a Failing Radiator Early

    Spotting the Signs of a Failing Radiator Early

    Before you end up stranded on the shoulder of a highway with smoke pouring out of your hood, you’ve got to learn how to listen to what your car is telling you. One of the most obvious signs of a failing radiator is a sweet, sickly smell coming from under the hood—that’s your coolant leaking and hitting a hot engine component. If you notice a puddle of bright green, orange, or pink fluid on your driveway after the car’s been sitting overnight, don’t just ignore it. That’s not just a mess; it’s a warning that your system is losing the pressure it needs to keep things stable.

    Keep a close eye on your temperature gauge, too. If you see that needle creeping toward the red zone during stop-and-go traffic, your engine is fighting to stay cool. Sometimes it’s just a bad thermostat, but more often than not, it’s a sign that your engine cooling system maintenance has been neglected for too long. If you catch these small leaks or temperature spikes early, you might just save yourself from a massive repair bill or, worse, a warped engine block.

    Mastering the Art of a Pro Automotive Coolant Flush

    Mastering the Art of a Pro Automotive Coolant Flush

    Once you’ve confirmed the radiator isn’t physically cracked, it’s time to tackle the actual automotive coolant flush. Don’t just drain the old stuff and pour in new fluid; that’s how you end up with sludge sitting at the bottom of your engine block. You need to get that old, acidic liquid completely out. I usually start by warming up the engine just enough so the fluid flows easily, then I drain it into a catch pan. If the old coolant looks like muddy water or has chunks in it, you might need to run a distilled water cycle through the system a couple of times to really scrub the internals clean.

    After you’ve cleared out the gunk, you’re ready for the refill. This is where most people mess up by leaving air pockets trapped in the lines. I always recommend a slow pour and a bit of patience while the car idles to let the air bleed out. While you’re at it, take a quick look at your hoses; if they feel spongy or look cracked, go ahead and do a radiator hose replacement now while the system is already drained. It’s way cheaper to swap a $20 hose today than to deal with a blown engine tomorrow.

    Pro Tips to Save Your Engine (and Your Wallet)

    • Never, and I mean never, open a radiator cap while the engine is hot. You’ll end up with a face full of boiling coolant, and trust me, that’s a way more painful repair than anything else we’re talking about today.
    • When you’re replacing a hose, don’t just eyeball it. Make sure you’re using the right diameter and check for any kinks. A pinched hose is just a slow-motion death sentence for your cooling system.
    • Get yourself a decent pressure tester. It’s a cheap tool that pays for itself instantly because it lets you find those tiny, annoying leaks that are hiding in plain sight before they turn into a full-blown overheat.
    • Don’t go cheap on the coolant. Mixing different types or using old-school water can mess up the pH balance and start eating away at your water pump from the inside out. Stick to what your owner’s manual says.
    • Keep a close eye on your radiator cap. If the seal looks cracked or the spring feels weak, just swap it out. It’s a tiny, cheap part, but a bad cap can prevent your system from holding the pressure it needs to work right.

    The Bottom Line on Keeping Your Engine Cool

    Don’t wait for steam to start pouring out of your hood; if you see even a tiny puddle of bright-colored fluid under your car, deal with it immediately before it turns a cheap fix into a blown head gasket.

    Stop using just plain tap water to top off your coolant; it’s full of minerals that’ll gunk up your system and eat away at your radiator from the inside out.

    You don’t need a shop’s specialized pressure tester to know something is wrong—trust your gut and your eyes, and if things look crusty or leaking, grab your tools and get ahead of the problem.

    The Real Cost of Ignoring Your Coolant

    A mechanic will charge you a fortune to replace a warped head gasket because you let a $20 radiator leak go ignored for too long. Don’t let your pride or a little bit of hesitation turn a simple fix into a total engine rebuild.

    Nikolai·Osterman

    Don't Let a Small Leak Turn into a Big Bill

    Don't Let a Small Leak Turn into a Big Bill.

    Look, at the end of the day, keeping your cooling system in check isn’t some mystical science. We’ve covered how to catch those early warning signs like sweet-smelling leaks or rising temp gauges, and we walked through the actual process of a proper coolant flush. It’s really just about staying ahead of the game. If you catch a hairline crack in a hose or a bit of sludge in the radiator before it turns into a massive overheat, you’ve already won half the battle. Don’t wait until you’re stranded on the shoulder with steam pouring out from under your hood to realize something was wrong. Just keep an eye on your levels and trust your gut when things don’t feel right.

    I know it can feel intimidating when you first pop the hood and see all those hoses and clamps, but I promise you, you’re more capable than you think. Every time you pick up a wrench and tackle a repair yourself, you’re taking the power back from the big shops that thrive on overcharging people for simple fixes. It’s not just about saving a few bucks—it’s about the confidence of knowing exactly what’s happening inside your own machine. So, grab your tools, keep that magnetic tray handy, and get to work. Your car will thank you, and your wallet definitely will too.

    Frequently Asked Questions

    Is it actually safe to mix different types of coolant, or am I going to gunk up my whole system?

    Look, I’ve seen guys try to save a few bucks by mixing whatever’s on sale, and it’s a disaster waiting to happen. Different coolants use different chemical additives—some are silicates, some are organic acids. When you mix them, they can react and create a thick, nasty sludge that clogs your heater core and radiator. Don’t risk it. If you’re switching types, flush the whole system thoroughly first. It’s not worth the headache.

    How do I know if I just need a new hose versus the entire radiator being shot?

    Look, don’t go dropping hundreds on a new radiator if you don’t have to. If you see a puddle that looks like clear or colored water and the leak is coming from a soft, squishy spot on a rubber line, it’s probably just a hose. But if the leak is coming from the metal fins or the plastic side tanks are cracked, that radiator is shot. Check the pressure; if the hose holds, swap it.

    Can I just patch a small leak with some sealant, or is that just a temporary band-aid that'll end up blowing my engine?

    Look, I’ll be straight with you: sealant is a band-aid, not a cure. It might stop a drip for a few days, but it’s risky. Those additives can gunk up your heater core or clog the tiny passages in your radiator, turning a cheap fix into a massive headache. If you’re in a pinch to get home, fine, but don’t rely on it. Patch it if you have to, but plan to replace the part ASAP.

  • Troubleshooting and Repairing a Manual Clutch

    Troubleshooting and Repairing a Manual Clutch

    I remember sitting on my dad’s oil-stained concrete floor when I was twelve, watching him stare down a slipping transmission like it was a personal insult. He wasn’t a master mechanic with a fancy degree; he just had a set of wrenches and a refusal to let a machine win. Most shops will see you coming a mile away and try to quote you three grand for a “total system overhaul” the second they hear your pedal feels spongy. But here’s the truth: a lot of what they call complex clutch repair is really just about knowing which bolt is fighting you and having the grit to stay under the car until it’s done.

    I’m not here to give you some textbook lecture or sell you on expensive, specialized diagnostic software you’ll never use. My goal is to walk you through the actual, greasy reality of doing the work yourself. I’m going to show you how to identify the real culprits—whether it’s a worn pressure plate or a failing slave cylinder—and how to tackle the clutch repair process without losing your mind or your entire savings account.

    Table of Contents

    Spotting Worn Clutch Disc Signs Before They Fail

    Spotting Worn Clutch Disc Signs Before They Fail

    You don’t have to wait for your car to leave you stranded on the shoulder of the highway to know something is wrong. Usually, your car will start giving you little warnings long before the pedal hits the floor. One of the most obvious worn clutch disc signs is that “slipping” feeling. If you’re cruising at a steady speed and you step on the gas, but the engine RPMs jump up without the car actually accelerating faster, your clutch is struggling to grip. It’s basically like trying to run on ice; all that power is being wasted because the friction material is too thin to do its job.

    Another thing to watch for is how the pedal feels under your foot. If you’re noticing weird clutch engagement issues, like the biting point suddenly moving way up toward the top of the pedal travel, that’s a massive red flag. You might also catch a distinct burning smell—sort of like burnt toast or old brake pads—whenever you’re sitting in stop-and-go traffic. Don’t ignore that scent. It’s your car’s way of telling you that the friction material is literally cooking itself.

    Solving Common Clutch Engagement Issues Yourself

    Solving Common Clutch Engagement Issues Yourself

    If your pedal feels spongy or won’t stay in gear, don’t immediately assume you need a whole new kit. A lot of the time, you’re actually looking at clutch hydraulic system troubleshooting rather than a mechanical failure of the disc itself. Check your master and slave cylinders for leaks first. If there’s fluid weeping around the seals, that’s your culprit. Sometimes, all it takes is a simple bleed to get the air out of the lines and restore that firm, responsive feel you’re looking for.

    On the other hand, if the pedal is sticking or feels incredibly heavy, you might be dealing with a cable issue or a failing pressure plate. I’ve seen plenty of people panic thinking they need a massive automotive drivetrain repair job when they really just had a frayed adjustment cable. Take a second to inspect the linkage and ensure everything is moving freely without grit or old, dried-up grease holding it back. It’s usually just a matter of cleaning things up and getting the tension back to where it belongs.

    Pro Tips to Save Your Clutch (and Your Wallet)

    • Don’t ride the pedal. I see people do this all the time—just resting their foot on the clutch pedal while they drive. It creates constant friction that wears down the disc way faster than it should. Keep your foot off unless you’re actually shifting.
    • Invest in a decent torque wrench. When you’re bolting that pressure plate back down, “eyeballing it” is a recipe for disaster. If you don’t tighten those bolts evenly and to the right spec, you’re going to end up with a warped plate and a massive headache.
    • Always replace the throw-out bearing while you’re in there. If you’ve already gone through the trouble of pulling the transmission to get to the clutch, don’t be cheap. That bearing is usually cheap, and if it fails in six months, you’re paying for the same labor all over again.
    • Clean your surfaces properly. Before you drop the new disc in, make sure the flywheel and pressure plate are spotless. Any leftover oil or old residue will cause the new clutch to slip immediately, and you’ll be right back where you started.
    • Check your hydraulic fluid levels. Sometimes it’s not even the clutch itself that’s the problem; it’s a leak in the master or slave cylinder. Before you tear the whole thing apart, check your fluid and look for air bubbles in the line. It might save you hours of unnecessary work.

    Don't Let a Clutch Job Break Your Bank

    Pay attention to those early warning signs like slipping or a spongy pedal; catching a worn disc early can save you from a much more expensive repair down the line.

    Most engagement issues are just simple fixes involving your linkage or hydraulics, so don’t let a shop talk you into a full replacement before you’ve checked the basics.

    You don’t need a master technician’s certification to swap a clutch—just get the right socket set, clear your schedule, and take it one bolt at a time.

    ## The Truth About the Clutch

    Most shops will tell you a slipping clutch is a death sentence for your wallet, but honestly? It’s just a matter of getting the right jack stands, a decent socket set, and not letting the fear of a greasy mess stop you from doing it yourself.

    Nikolai·Osterman

    Don't Let the Shop Fleece You

    Don't Let the Shop Fleece You.

    Look, fixing a clutch isn’t some impossible feat reserved for master techs with specialized degrees. We’ve covered how to listen for those telltale slipping sounds, how to identify a worn disc before you’re stranded on the shoulder, and how to troubleshoot engagement issues that usually just require a bit of adjustment. If you can recognize the symptoms early and keep a basic set of sockets within reach, you’re already ahead of most drivers. The goal is to catch these problems while they’re still manageable so you aren’t facing a massive, unexpected repair bill when your car finally decides to quit on you.

    At the end of the day, my goal is to make sure you feel confident when you pop that hood. It’s easy to get intimidated by the complexity of modern drivetrains, but most of the time, it really just comes down to having the right tool and a little bit of patience. Don’t let a mechanic convince you that a simple repair is a total nightmare just to pad their invoice. Grab your magnetic tray, get under the car, and take control of your own ride. You’ve got this.

    Frequently Asked Questions

    Do I really need to replace the entire clutch assembly, or can I just swap out the disc and pressure plate?

    Look, I get the temptation to just swap the disc and pressure plate to save some cash, but honestly? It’s usually a trap. If you’ve already gone through the massive headache of pulling the transmission, you might as well do it right. Replacing the whole assembly—including the throw-out bearing and flywheel resurfacing—means you won’t be back under the car in six months. Don’t do the same job twice. Just do the whole kit.

    How do I know if my slave cylinder is the actual problem instead of the clutch itself?

    Look, don’t go dropping hundreds on a whole clutch kit just yet. If your pedal feels spongy or stays stuck to the floor, it’s usually hydraulic, not mechanical. Check your slave cylinder first. If you see fluid leaking around the seal or the pedal feels “mushy” without any slipping, that’s a dead giveaway. I always check the fluid level in the reservoir first—if it’s low, you’ve got a leak, and that’s your culprit.

    Is it worth trying to fix a slipping clutch, or am I just wasting my time and money?

    Look, I’ll be straight with you: if the clutch is slipping, the friction material is toast. You can’t “fix” a worn disc with a spray can or a quick adjustment; you have to replace it. Is it worth it? Absolutely. Replacing the assembly yourself saves you hundreds in labor costs. If you’ve got the tools and a jack, don’t waste money on a shop just to have them tell you what I’m telling you.

  • Steps for Replacing a Faulty Alternator

    Steps for Replacing a Faulty Alternator

    You ever notice how your dashboard lights start acting possessed right before your car decides it’s done for the day? Most people see that dimming headlight or flickering dash and immediately think they need to drop a thousand bucks at a dealership for an alternator replacement. Honestly, that’s just a massive money grab. I remember my first week at the shop, watching a guy freak out because his car died at a red light, only to realize it was just a loose terminal and a tired alternator. It’s not some high-level electrical wizardry; it’s just a part that wears out, and it’s way easier to swap than the service advisors want you to believe.

    I’m not here to give you some textbook lecture or sell you on fancy diagnostic computers you don’t need. I’m going to walk you through the real-world process of an alternator replacement using the same logic I use when I’m working on my own Japanese tuners in the garage. I’ll show you exactly which bolts to watch out for, how to avoid frying your ECU, and how to get the job done without getting ripped off. Let’s get to work.

    Table of Contents

    Guide Overview

    Total Time: 1-3 hours
    Estimated Cost: $100-$300
    Difficulty: Intermediate

    Tools & Supplies

    • Socket set and ratchet for removing mounting bolts
    • Wrench set for electrical terminals and belt tensioners
    • Screwdriver for securing electrical connectors or clips
    • Pliers for adjusting or removing serpentine belt tensioners
    • New alternator compatible with your vehicle model
    • Multimeter to test voltage before and after installation

    Step-by-Step Instructions

    • 1. First things first, you need to disconnect the battery. I can’t stress this enough—if you start messing with the alternator while the battery is still hooked up, you’re asking for a massive spark or a blown fuse. Use a wrench to loosen the negative terminal first, pull it off, and tuck it aside so it can’t touch the post.
    • 2. Next, you’ve gotta clear a path. Depending on what you’re driving, you might need to move some plastic trim or even pull a belt shield out of the way. I usually grab my flashlight and inspect the area to make sure I’m not going to smash my knuckles on a radiator hose or an air intake tube while I’m working.
    • 3. Now, get ready to loosen the serpentine belt. You’ll need a long-handled wrench or a breaker bar to rotate the tensioner pulley. Once you apply enough pressure to release the tension, slide the belt off the alternator pulley. Don’t let the belt snap back and hit you; keep a steady hand and guide it so it doesn’t get tangled in the fan.
    • 4. Unplug the electrical connections. You’ll see a heavy-gauge wire bolted to the back of the alternator and a smaller plastic wiring harness. Use a socket to remove the nut on the main power wire, then carefully unclip the plastic connector. If that connector feels brittle or stuck, don’t force it—just give it a little wiggle until it pops free.
    • 5. It’s time to unbolt the old unit. Most alternators are held in place by two or three long bolts. I like to keep my magnetic parts tray right next to me so these bolts don’t end up lost in the bottom of the engine bay. Loosen them in stages so the alternator doesn’t tilt and pinch your fingers.
    • 6. Pull the old alternator out and get your new one ready. Before you drop the new one in, take a second to wipe down the mounting surface with a clean rag. You don’t want any old grime or grit getting trapped between the new unit and the engine block, as that can cause vibrations later on.
    • 7. Reverse the whole process to get back on the road. Bolt the new alternator in, reconnect your wires, and then use that tensioner to slide the belt back over the pulley. Once everything is tight, reconnect the battery and start the engine. If you hear a smooth hum instead of a screeching belt, you’ve nailed it.

    Spotting the Truth Common Alternator Symptoms and Signs

    Spotting the Truth Common Alternator Symptoms and Signs

    Look, most people wait until they’re stranded in a dark parking lot before they even think about their charging system. By then, it’s usually too late. You need to pay attention to the little things before they turn into a massive headache. If you notice your headlights getting dim or your dashboard lights flickering like a bad horror movie, that’s a huge red flag. Another dead giveaway is a battery that looks brand new but keeps dying overnight. That’s usually because the alternator isn’t actually pushing enough juice back into the cells while you drive.

    If you want to be certain before you start tearing things apart, don’t just guess. Grab a multimeter and learn how to test alternator with multimeter settings. You’re looking for a steady reading—usually between 13.5 and 14.5 volts while the engine is running. If the numbers are jumping all over the place or staying low, you’ve found your culprit. It’s much better to catch these alternator symptoms and signs early than to find yourself staring at a dead engine when you’re already late for work.

    How to Test Alternator With Multimeter and Voltage Regulator Testing

    How to Test Alternator With Multimeter and Voltage Regulator Testing

    Before you go tearing everything apart, you need to be 100% sure the alternator is actually the culprit. I’ve seen guys spend three hours on a teardown only to realize they just had a loose battery terminal. To do this right, you’ll need to know how to test alternator with multimeter settings. Set your meter to DC volts, connect the leads to the battery terminals, and start the engine. You’re looking for a steady reading between 13.5 and 14.7 volts. If that number stays low or fluctuates wildly while the engine is running, you’ve definitely got a problem.

    If the voltage is steady but your lights are still flickering or dimming, you might be looking at a specific issue with voltage regulator testing. The regulator is what keeps the output consistent, and when it fails, it can cook your battery or leave you stranded. It’s a common headache in automotive electrical system repair, but catching it early saves you from a much bigger bill later. Just keep your multimeter steady and watch those numbers—they don’t lie.

    Pro-Tips to Keep You From Making a Mess of the Job

    • Don’t skip the battery disconnect. Seriously. You’re working right next to the main power source, and if your wrench slips and touches the frame while you’re loosening the B-terminal, you’re going to see some nasty sparks and potentially fry your ECU.
    • Grab a can of electrical contact cleaner before you start. While you’ve got the old unit out, spray down those connector pins. Most of the “broken” alternators I see in the shop are actually just dealing with crusty, corroded connections that are killing the signal.
    • Keep your magnetic parts tray handy—I keep mine in my back pocket for a reason. Between the mounting bolts and the smaller wiring clips, it’s way too easy to drop a bolt into the deep recesses of the engine bay where you’ll never find it again.
    • Check your drive belt while you’re in there. If you’re already going through the trouble of stripping the belt to get the alternator out, check it for cracks or glazing. It’s better to spend twenty bucks on a new belt now than to have it snap on the highway next week.
    • Double-check your mounting bolts’ torque. You don’t want them loose enough to vibrate out, but you also don’t want to go overboard and strip the threads in the engine block. Just get them snug and solid, then move on.

    The Bottom Line on Swapping Your Alternator

    Don’t just guess based on a dim dashboard light; use a multimeter to confirm the alternator is actually the culprit before you start tearing things apart.

    Most of the “scary” part of this job is just managing the battery connection and keeping track of your bolts—keep that magnetic tray handy so you don’t lose them.

    You don’t need to pay a shop’s massive labor markup for this; if you’ve got the basic tools and a little patience, you can get this done in your own driveway.

    ## The Real Cost of Hesitation

    Most shops will try to sell you a whole new charging system when all you really need is a new alternator and twenty minutes of your time. Don’t let a little bit of electrical fear turn a simple fix into a massive bill; once you’ve got the right socket in your hand, the car is yours again.

    Nikolai·Osterman

    Getting Back on the Road

    Getting Back on the Road after repairs.

    Look, swapping out an alternator might seem like a massive headache when you first see those wires and bolts, but we just broke it down. You learned how to spot the warning signs like dimming headlights or a dying battery, how to use a multimeter to confirm the culprit, and the actual steps to get that old unit out and the new one in. Just remember to keep your workspace clean and double-check your connections before you even think about turning that key. If you took your time and didn’t rush through the testing phase, you’ve already done the hardest part of the job.
    At the end of the day, the goal isn’t just to fix a car; it’s about knowing that you aren’t at the mercy of a shop’s high hourly rate for something you could have done in your own driveway. Every time you pick up a wrench and tackle a job like this, you’re building a level of confidence that no textbook can teach you. Don’t let the complexity of modern engines intimidate you. Grab your tools, keep your head down, and remember that you are more than capable of maintaining your own ride. I’ll see you in the next one.

    Frequently Asked Questions

    If I replace the alternator and my lights are still dim, could it be a bad ground wire or the battery itself?

    Honestly, yeah, it definitely could be. If you just swapped the alternator and your lights are still dim, don’t go buying another one just yet. You’re likely looking at a bad ground wire or a dying battery. If that ground connection is corroded or loose, the electricity can’t flow properly, no matter how good the new alternator is. Check your battery terminals for crusty buildup first—it’s a simple fix that saves a lot of headache.

    Do I really need to replace the serpentine belt at the same time, or can I just reuse the old one?

    Look, I get the temptation to save a few bucks, but honestly? Just swap the belt too. If you’re already in there pulling the alternator, you’ve done 90% of the hard work. It’s a cheap part, and if that old belt snaps or slips a week from now, you’re right back to square one, covered in grease, doing the whole job again. Do it once, do it right.

    Is it safe to just jump-start my car to get to the parts store, or am I going to fry my ECU?

    Look, I get the panic—you’re stuck and just want to move. You can jump-start it to get to the parts store, but don’t go driving around like that. If your alternator is totally shot, that jump-start is just a temporary band-aid. The second you disconnect the donor car, your battery is on its own. If the voltage drops too low or spikes weirdly while you’re driving, you’re definitely risking your ECU. Get it to the shop, then stop.