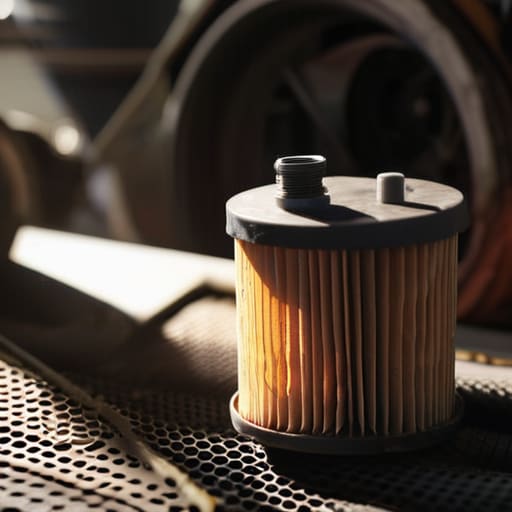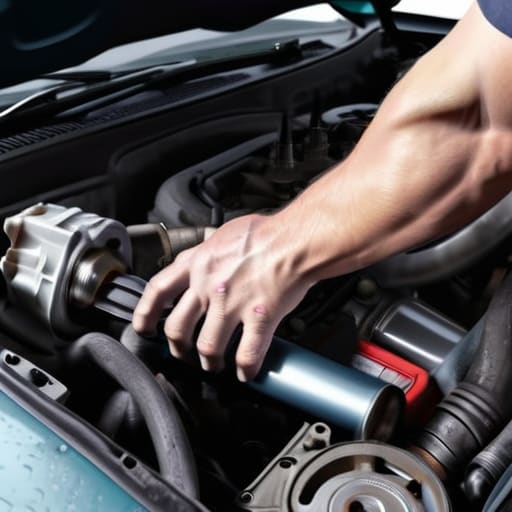
Category: Repairs

  • How to Replace Vehicle Shock Absorbers

    How to Replace Vehicle Shock Absorbers

    I remember helping my dad in the garage when I was ten, and even back then, I could tell when a car was acting “off.” Most people think that once your ride starts feeling like a boat on a choppy lake, you’re looking at a massive repair bill and a week at the shop. They get intimidated by the idea of shock absorber replacement, thinking it’s some high-level suspension surgery that requires a specialized degree. But honestly? Most shops will try to upcharge you for “suspension tuning” or extra labor that you just don’t need. It’s usually just a matter of getting your hands dirty and doing the work yourself.

    I’m not here to give you some polished, textbook manual that makes things sound harder than they actually are. I’m going to walk you through the real, gritty process of shock absorber replacement using the same logic I use when I’m working on my own vintage tuners. I’ll tell you which bolts are going to be a nightmare, which tools are actually worth your money, and how to avoid the common mistakes that turn a quick afternoon job into a total headache. Let’s get to work.

    Table of Contents

    The Real Signs of Worn Shocks You Cant Ignore

    The Real Signs of Worn Shocks You Cant Ignore

    Look, your car will usually tell you when something is wrong, but most people just turn up the radio to drown out the noise. The most obvious signs of worn shocks usually show up when you hit a pothole or a speed bump and your car keeps bouncing like a trampoline for a few seconds afterward. A healthy suspension should soak up the impact and settle immediately. If you feel like you’re riding on a boat in choppy water, your dampers are likely shot.

    Another thing to watch for is how the car behaves during braking or cornering. If the front end dives hard every time you hit the brakes, or if the back end feels loose and wanders when you’re taking a turn, you’re looking at serious issues with your vehicle handling and stability. You might even notice “oil weeping” on the body of the shock itself—if it looks wet and greasy, that’s a dead giveaway that the internal seals have failed. Don’t wait until you’re fighting the steering wheel just to stay in your lane; catch these damaged shock symptoms early before they start eating through your tires.

    Strut vs Shock Absorber Difference Knowing Your Machine

    Strut vs Shock Absorber Difference Knowing Your Machine

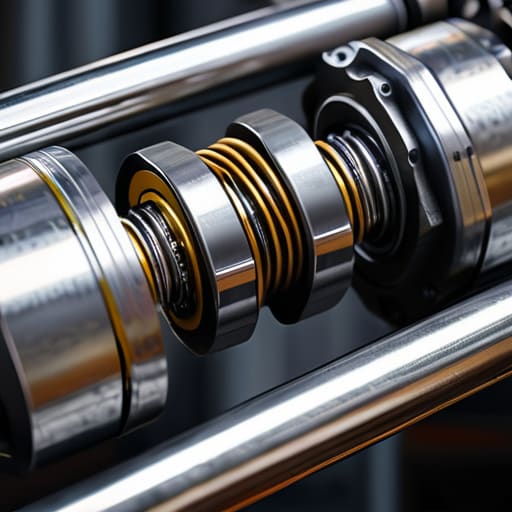
    Look, I see this mistake all the time in the shop: people use the terms interchangeably, but if you go ordering parts without knowing the difference, you’re going to end up with a headache and a car that won’t sit right. The simplest way to wrap your head around the strut vs shock absorber difference is to look at how they’re built. A shock absorber is basically just a hydraulic cylinder that dampens movement; it doesn’t support the weight of your car on its own. You need a spring working alongside it to keep you off the pavement.

    A strut, on the other hand, is a much more complex piece of hardware. It’s a structural part of your suspension that combines the shock, the spring, and a mounting point into one single unit. Because struts actually hold the vehicle up, they play a massive role in your overall vehicle handling and stability. If you’re dealing with certain damaged shock symptoms, you need to figure out if you’re just swapping a component or if you’re rebuilding the entire structural assembly. Get it wrong, and you’re just wasting time and money.

    Pro Tips to Save Your Knuckles (and Your Wallet)

    • Don’t try to wing it with cheap, unbranded parts. I’ve seen guys buy the absolute cheapest shocks they can find online just to save twenty bucks, only to have them leak or feel like garbage within a month. Stick to brands that actually know what they’re doing.
    • Get yourself a decent spring compressor before you start. Trying to DIY a strut without one is a recipe for a trip to the ER, and trust me, no “save” is worth a steel spring snapping toward your face.
    • Always replace them in pairs. If your front left is shot, the front right isn’t far behind. If you only swap one side, your car is going to handle like a shopping cart with a bad wheel, and you’ll be fighting the steering wheel every time you hit a corner.
    • Keep your magnetic tray handy. I can’t tell you how many times I’ve spent twenty minutes crawling under a chassis looking for a single 14mm bolt that decided to hide in the grease. Keep your hardware in one spot so you aren’t hunting for it mid-job.
    • Take photos of everything before you take it apart. Modern engine bays and suspension setups are crowded. If you forget how a specific clip or bracket was oriented, a quick photo from when you started will save you a massive headache when you’re trying to put it all back together.

    The Bottom Line on Your Suspension

    Don’t wait for a total failure; if your car feels like a boat on the highway or you’re seeing oil leaking down the side of the shock, it’s time to swap them out.

    Make sure you know exactly what’s under your car—replacing a simple shock is a totally different job than dealing with a full strut assembly.

    You don’t need a massive shop setup to do this, just the right tools, a bit of patience, and the guts to get your hands dirty.

    ## Don't Let a Bouncy Ride Drain Your Wallet

    Most shops will try to tell you your whole suspension is shot just to pad the bill, but half the time, you’re really just looking at a couple of worn-out shocks that need a quick swap. Don’t let a little extra bounce scare you off; once you get the right tools and stop overthinking it, you’ll realize you’ve been overpaying for a fix you could’ve done yourself in an afternoon.

    Nikolai·Osterman

    Wrapping It All Up

    Wrapping It All Up: Replacing car shocks.

    Look, at the end of the day, replacing your shocks isn’t some impossible feat of engineering. We’ve covered the red flags—like that annoying nose-dive when you hit the brakes or the constant bouncing that makes your stomach turn—and we cleared up the whole strut versus shock confusion. Once you’ve got your tools laid out and you know exactly which part you’re dealing with, the hardest part is already over. Just remember to double-check your torque specs and don’t rush the process. If you can spot a leak or hear a clunk, you’ve already done the heavy lifting by identifying the problem; the rest is just getting your hands dirty.

    I know it feels intimidating when you’re staring at a pile of heavy suspension components and a greasy underside, but don’t let that stop you. Every time you finish a job like this, you’re taking a piece of control back from the shops that try to overcharge you for simple labor. You don’t need a fancy certification to realize that you are capable of maintaining your own ride. So, grab your magnetic tray, clear some space in the driveway, and just start. Your car—and your wallet—will definitely thank you for it.

    Frequently Asked Questions

    Do I really need to replace the shocks on both sides at once, or can I just do one when I have the cash?

    Look, I get it. Parts aren’t cheap, and sometimes you’re just trying to make the month work. But honestly? Do both sides at once. If you only swap one, you’re basically putting a brand-new spring on one side and a tired, worn-out one on the other. It messes with your car’s balance and can actually throw off your handling. Save yourself the headache and the extra trip to the jack; just do the pair.

    Is it worth trying to rebuild my old shocks, or am I just wasting my time when I could just buy new ones?

    Look, I get the temptation to save a few bucks by rebuilding them, especially if you’re working on a classic. But honestly? Most of the time, you’re just chasing your tail. Unless you’ve got a specific set of vintage parts that aren’t made anymore, just buy new ones. Modern shocks are way more consistent, and your time is worth more than the few dollars you’ll save playing chemist with old oil and seals.

    What kind of tools am I actually going to need to get this job done without stripping a bolt or losing my mind?

    Look, don’t go buying a $500 tool kit for this. You really just need a solid socket set—get the metric ones, most modern cars aren’t using SAE anymore—and a decent breaker bar for those stubborn mounting bolts. Grab some penetrating oil like PB Blaster; spray it on the day before or you’ll be fighting rust for hours. Oh, and a jack and jack stands are non-negotiable. Never, ever work under a car held up by just a jack.

  • Replacing Worn Tie Rod Ends

    Replacing Worn Tie Rod Ends

    Ever feel like your car is trying to fight you every time you hit a pothole? If your steering feels loose, shaky, or like it’s wandering all over the road, don’t let a shop talk you into a massive labor bill just because they say it’s “complex.” Most mechanics will try to make a simple steering tie rod replacement sound like rocket science, but the truth is, it’s mostly just about fighting a stubborn bolt and having the right leverage. I remember the first time I tried this on my old project car; I spent an hour cursing a rusted nut, but once I realized I just needed a better breaker bar and a little bit of patience, the whole thing clicked.

    I’m not here to give you some textbook lecture or a list of fancy diagnostic tools you can’t afford. I’m going to walk you through the actual, grease-under-your-fingernails process of getting those old rods out and the new ones in. We’ll cover exactly what you need to get the job done safely and, more importantly, how to avoid the common mistakes that end up wasting your afternoon. Let’s get to work.

    Table of Contents

    Guide Overview

    Total Time: 1-3 hours
    Estimated Cost: $40-150
    Difficulty: Intermediate

    Tools & Supplies

    • Socket set and ratchet for removing bolts
    • Ball joint separator or pickle fork to disconnect tie rod
    • Penetrating oil (e.g., WD-40) to loosen rusted threads
    • Torque wrench to tighten new hardware to spec
    • Jack and jack stands for vehicle lifting
    • Inner or outer tie rod end (depending on repair) 1 unit
    • Cotter pins (if applicable) 1-2 units
    • Threadlocker (e.g., Loctite) 1 small tube

    Step-by-Step Instructions

    • 1. First things first, get the car on the ground and jack it up. Don’t even think about working under a car supported only by a jack; you need to set it on jack stands for safety. Once it’s stable, take the wheel off so you actually have room to move. If you’re working on a tight subframe, you might need to turn the steering wheel slightly to give yourself a better angle to reach the components.
    • 2. Locate the tie rod end where it connects to the steering knuckle. You’ll see a rubber boot protecting the joint, and you’ll need to loosen the lock nut that holds everything in place. Grab a wrench and back that nut off until it’s no longer tight against the stud. If it’s rusted on there—and let’s be real, it probably is—give it a good spray of penetrating oil and let it sit for a few minutes.
    • 3. Now comes the part most people dread: breaking the tie rod free from the knuckle. You can try to hammer it out, but honestly, a tie rod puller is your best friend here. If you don’t have one, you can use a heavy mallet to tap the side of the knuckle, but be careful not to damage anything else. You want that stud to pop out of the hole smoothly without you having to fight it for an hour.
    • 4. Once the old end is disconnected, unscrew the remaining part of the tie rod from the inner sleeve. You’ll likely need a deep socket or a specialized tool for this, as these things can be stubborn as hell. If it’s not budging, don’t just manhandle it; use a bit more penetrant and keep tapping it until the threads finally start to move.
    • 5. Take your new tie rod end and thread it onto the inner tie rod. Before you tighten it down, take a second to look at the old part versus the new one to make sure they actually match. Once you’re sure, thread the new part on by hand first to avoid cross-threading, which is a mistake you definitely don’t want to make.
    • 6. Tighten everything down until it’s snug, making sure the lock nut is secured properly against the tie rod end. You want it tight enough that it won’t vibrate loose, but don’t go over-torquing it like you’re trying to snap the bolt. Once it’s secure, pop the wheel back on and lower the car.
    • 7. Here is the one part you cannot skip: you must get an alignment immediately after this. Since you just messed with the steering geometry, your wheels are definitely going to be pointing in slightly different directions. If you skip this, you’ll be burning through a brand-new set of tires in a matter of weeks, and that’s money straight down the drain.

    Spotting Worn Tie Rod Signs Before They Break

    Spotting Worn Tie Rod Signs Before They Break

    You don’t always have to wait for a loud clunk to know something is wrong. Usually, your car will try to tell you something is up through the steering wheel. If you notice the car drifting to one side when you’re on a flat road, or if the wheel feels like it’s “hunting” for a center point, you’re likely looking at worn tie rod signs. I’ve seen plenty of guys ignore that slight shimmy in the steering wheel, only to end up with a much more expensive headache later.

    Another big giveaway is uneven tire wear. If you look closely at your tread and see it’s wearing down more on one side than the other, your steering linkage components are probably shot. This isn’t just about a bumpy ride, either; it’s a major part of automotive suspension maintenance that affects your safety. If you catch these issues early, you can avoid a total failure that could leave you stranded. Just keep an ear out for any clicking or popping when you turn the wheel—that’s usually the final warning before you’re looking at a much bigger repair bill.

    The Truth About Steering Rack Symptoms and Suspension Repair

    The Truth About Steering Rack Symptoms and Suspension Repair

    Here’s the thing: sometimes you’ll swap those tie rods and think you’ve fixed the problem, only to realize the issue is actually deeper in the system. If you’re still feeling a weird shudder or a “clunk” when you hit a bump, you might be dealing with more serious steering rack symptoms. It’s easy to blame the easiest part, but if the internal gears of the rack are shot, no amount of new tie rods is going to save your steering feel. I’ve seen plenty of guys waste money on small parts when the real culprit was a failing rack.

    You also need to keep an eye on the rest of your front end suspension repair needs. If your ball joints or control arm bushings are trashed, they’re going to chew through your new tie rods in no time. It’s all connected. Once you finish the job, don’t skip the wheel alignment importance—if your toe-in is even slightly off, you’ll be back in my shop with unevenly worn tires before the month is out. Just take the extra time to do it right.

    Pro Tips to Save Your Sanity (and Your Knuckles)

    • Don’t skip the penetrating oil. Seriously, spray your tie rod ends with some PB Blaster or Liquid Wrench a good hour before you even touch them. If you try to muscle a seized nut without it, you’re probably going to end up stripping the bolt or snapping something.
    • Get a dedicated tie rod end puller. You might think you can just hammer it off, but you’ll likely end up bruising your knuckles or damaging the steering rack. A cheap puller from the local parts store will save you a massive headache and a lot of swearing.
    • Count your turns on the jam nut. Before you loosen anything, make sure you know exactly where that nut is sitting. It’s not a perfect science, but keeping the new part as close to the old setting as possible means your car won’t feel like it’s drifting into the next lane the second you pull out of the driveway.
    • Keep your magnetic tray handy. I know I always have mine in my back pocket, but you’ll need it. Those tiny cotter pins and lock nuts have a nasty habit of bouncing off the driveway and disappearing into the grass the second you drop them.
    • Book an alignment immediately after you’re done. Even if you’re careful, you’ve messed with the geometry of the steering. If you don’t get a professional alignment right away, you’re going to chew through a brand-new set of tires in no time, and that’s just throwing money away.

    The Bottom Line on Fixing Your Steering

    Don’t wait for a total failure; if you’re feeling vibration in the wheel or seeing uneven tire wear, your tie rods are already screaming for help.

    You don’t need a massive shop setup to do this—just get a decent set of wrenches, a ball joint separator, and enough patience to not strip your bolts.

    Replacing the part is only half the battle—once you’ve swapped the rods, get your alignment checked immediately so you don’t shred your tires in a week.

    ## The Real Cost of Ignoring the Shake

    “Most shops will try to tell you your whole front end is shot just to pad the bill, but usually, it’s just a worn-out tie rod. Don’t let them scare you—if you can hold a wrench and keep your head straight, you can fix this yourself and keep that extra couple hundred bucks in your pocket.”

    Nikolai·Osterman

    Wrapping It All Up

    Wrapping It All Up with wheel alignment.

    Look, swapping out those tie rods isn’t some mystical feat reserved for master techs with specialized diagnostic computers. If you kept an eye out for that loose steering feel or the uneven tire wear we talked about, you’ve already done the hardest part, which is catching the problem early. Just remember that once you’ve got the new parts seated and everything is torqued down to spec, you aren’t quite finished. You absolutely have to get an alignment immediately after, or you’ll just end up wrecking your new tires in a matter of weeks. It’s a simple process, but you can’t afford to skip that final step if you want the job done right.

    At the end of the day, the biggest hurdle isn’t the wrenching—it’s the hesitation. It’s easy to let a shop talk you into a massive bill because you’re afraid of making a mistake under the car, but I promise you, you’re more capable than you think. Every time you get your hands dirty and successfully fix something yourself, you’re taking back control of your ride and your wallet. Don’t let the fear of a little grease stop you from owning your maintenance. Grab your tools, stay focused, and just get to work.

    Frequently Asked Questions

    Do I really need to get an alignment immediately after swapping the tie rods, or can I wait a few weeks?

    Look, I’ll be real with you: don’t wait a few weeks. Even if you’re super careful with your measurements, you’re almost definitely going to throw your toe-in or toe-out off by a fraction. If you keep driving like that, you’re just going to chew through a brand-new set of tires in no time. It’s a waste of money. Get the alignment done right away so you don’t end up paying for more than just the tie rods.

    Is there a way to tell if it's just the inner tie rod that's shot, or do I have to replace the whole assembly?

    Look, you definitely don’t need to swap the whole assembly if it’s just the inner rod. Here’s the trick: if you’ve got the outer tie rod feeling tight and solid, but you can feel play or a “clunk” coming from deeper inside the boot, it’s likely the inner. I usually grab a pry bar to check the movement—if the shaft moves independently of the steering rack, that inner rod is shot. Swap just the part, save the cash.

    Can I use a standard ball joint separator, or am I going to need a specific puller to get these out without stripping anything?

    Look, you can definitely use a standard ball joint separator, but don’t go at it like a caveman. If you’re just hammering away with a heavy mallet, you’re asking for stripped threads or a bent stud. I usually grab a decent pickle fork for the quick stuff, but if it’s being stubborn, a dedicated press-style puller is worth the extra few bucks. It saves your knuckles and keeps the hardware intact.

  • How to Replace a Fuel Filter

    How to Replace a Fuel Filter

    I was staring at a customer’s sedan last Tuesday, watching him shake his head because the car was stuttering every time he hit forty miles per hour. He’d already been quoted a ridiculous price at the dealership for a “complex fuel system overhaul,” but I knew better. Most shops love to make a simple fuel filter replacement sound like some high-level surgical procedure just to pad their labor hours. Truth is, that clogged little canister is probably the only thing standing between him and a smooth ride, and it doesn’t take a master technician to swap it out.

    I’m not here to give you some textbook lecture or sell you on expensive specialty equipment you’ll never use again. My goal is to walk you through the real-world process of getting this done in your own driveway without getting soaked by a service advisor. I’ll show you exactly which tools you actually need, how to avoid the messy spills that usually ruin a Saturday, and the little tricks I learned in my dad’s garage to make sure everything clicks into place perfectly the first time.

    Table of Contents

    Guide Overview

    Total Time: 30-60 minutes
    Estimated Cost: $15-50
    Difficulty: Beginner

    Tools & Supplies

    • Socket set and ratchet for mounting bolts
    • Screwdrivers for hose clamps
    • Pliers for spring clamps
    • Drain pan to catch residual fuel
    • Replacement fuel filter (vehicle specific)
    • Nitrile gloves for skin protection
    • Shop rags for cleaning spills

    Step-by-Step Instructions

    • 1. First things first, you need to relieve the fuel pressure. If you just yank those lines off, you’re going to end up with a face full of gasoline, and trust me, that’s a mess nobody wants. Find your fuel pump fuse in the box under the hood or dash, pull it, and then crank the engine until it stalls out. This ensures the lines are actually empty before you start messing with them.
    • 2. Once the pressure is gone, get your car up on jack stands or a lift. Don’t even think about crawling under there with just a jack; I’ve seen too many close calls. Locate the filter—it’s usually tucked along the frame rail or near the tank—and clear out any junk or debris around it. I always keep a rag handy because even with the pressure relieved, things get a little messy.
    • 3. Now, grab your tools. You’ll likely need a pair of fuel line disconnect tools if you’re working on something newer, or just a good set of wrenches if it’s an older setup. Carefully unclip the fittings from the old filter. If a connection feels like it’s going to snap, don’t force it; give it a little wiggle and try again. You want to be careful not to bend any of the metal lines.
    • 4. Once the old filter is out, take a second to inspect the lines for any cracks or heavy corrosion. If the lines look like they’re about to crumble, this is your chance to fix that before you put the new part on. Grab your new filter and check the flow direction—most of them have an arrow stamped on the housing. If you put it in backward, you’re going to have a bad time.
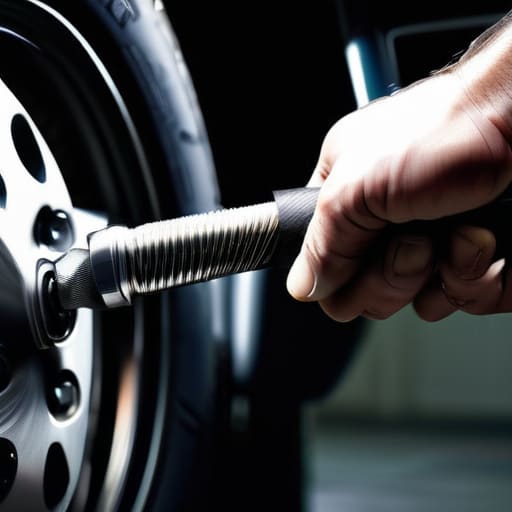
    • 5. Slide the new filter into place and reconnect your lines. Make sure you hear that satisfying click from the quick-connect fittings so you know they’re seated right. If you’re using clamps, tighten them down firmly but don’t go overboard; you don’t want to crush the line, just make sure it’s tight and secure.
    • 6. Before you lower the car, you’ve gotta put everything back to life. Pop that fuel pump fuse back in, then turn your ignition to the “on” position without actually starting the engine. Do this a few times to let the pump prime the system and push fuel through the new filter. It’s a simple way to check for leaks before you actually fire the engine up.
    • 7. Finally, start the car and let it idle for a minute while you watch for leaks. Keep your flashlight handy and check every single connection point you just touched. If everything stays dry, you’re golden. You just saved yourself a couple hundred bucks in labor, and your engine is going to run a whole lot smoother for it.

    Spotting the Signs of a Clogged Fuel Filter Before It Fails

    Spotting the Signs of a Clogged Fuel Filter Before It Fails

    You don’t always have to wait for the car to die on the side of the highway to know something is wrong. Usually, your car will start throwing little hints at you first. If you notice your engine stumbling or feeling sluggish when you step on the gas, you’re likely looking at fuel pump performance issues caused by a filter that’s too choked with grit to let anything through. It’s a common symptom—the car just feels like it’s fighting you every time you try to merge onto the highway.

    Another big red flag is when your car struggles to start or idles like it’s about to stall out. If you’re constantly having to crank the engine just to get it to catch, it’s a sign that the flow is restricted. I’ve seen plenty of people mistake this for a bad battery or a starter issue, but often, it’s just basic engine performance troubleshooting that leads right back to a dirty filter. Pay attention to these little hiccups; catching them early means you won’t end up having to replace a much more expensive fuel pump later on.

    Engine Performance Troubleshooting Without the Expensive Shop Fees

    Engine Performance Troubleshooting Without the Expensive Shop Fees

    Look, if your car feels sluggish or keeps stumbling when you hit the gas, don’t immediately assume you’re looking at a dead fuel pump. Before you drop hundreds on a new pump, you need to do some basic engine performance troubleshooting yourself. A lot of times, the issue isn’t a massive mechanical failure; it’s just a restriction in the flow. If you notice the engine hesitating under load, it’s a huge red flag that you might be dealing with fuel pump performance issues caused by nothing more than a dirty filter.

    Instead of letting a shop run a diagnostic scan that costs more than your weekend budget, grab a pressure gauge—it’s one of those essential fuel system maintenance tools every DIYer should own. By checking the pressure at the rail, you can tell if the blockage is upstream or if the pump itself is actually dying. Sometimes, just doing a quick fuel line inspection steps routine—checking for kinks or leaks—is all it takes to find the culprit. Don’t let them talk you into a whole new system when a simple swap is all you really need.

    Pro Tips to Save Your Sanity (and Your Wallet)

    • Don’t forget to relieve the fuel pressure before you touch a single line. If you just yank that filter out without depressurizing the system, you’re going to end up with a face full of gasoline, and that’s a mess nobody wants in their driveway.
    • Grab a couple of new O-rings or gaskets if your kit doesn’t come with them. I’ve seen guys finish a whole job only to realize they have a tiny, annoying leak because they tried to reuse an old, flattened seal. It’s not worth the extra trip to the parts store.
    • Keep a dedicated drain pan and some shop rags right next to you. Even if you do everything by the book, a little bit of fuel is going to spill. Trust me, once you get it on your hoodie, that smell stays with you for days.
    • Use a flashlight—and I don’t mean your phone. When you’re reaching into those tight engine bays or under the chassis, you need a real light to see if those quick-connect clips are actually seated properly. If they aren’t clicked in, they’re coming loose.
    • Double-check your part number against your VIN. I’ve seen plenty of rookies get halfway through a job only to realize they bought a filter for a different engine trim. It’s a massive headache that’ll leave your car sitting on jack stands for hours.

    The Bottom Line on Fuel Filters

    Don’t wait for your car to start sputtering on the highway; if you’re noticing sluggish acceleration or rough idling, your filter is probably already crying for help.

    You don’t need a fancy shop setup to get this done—just grab a decent wrench, a couple of fuel line disconnect tools, and a clean workspace to avoid making a mess.

    Swapping this part yourself is one of the easiest ways to save a couple hundred bucks and keep your engine running smooth without getting ripped off by a service advisor.

    ## Don't Let a Cheap Part Kill Your Engine

    A clogged fuel filter is one of those things that’ll make you think your entire fuel system is shot, but usually, it’s just a ten-dollar part that’s been ignored for too long. Don’t let a shop talk you into a massive repair bill when all you really needed was a fresh filter and twenty minutes of your time.

    Nikolai·Osterman

    Wrapping It All Up

    Wrapping It All Up: fuel filter replacement.

    At the end of the day, replacing your fuel filter isn’t some high-level engineering feat that requires a master technician’s license. We’ve covered how to catch those early warning signs like stumbling at idle or that annoying hesitation when you hit the gas, and we walked through the actual process of getting the job done. Just remember: keep your workspace clean, make sure you’ve got the right fittings, and don’t rush the connections. If you follow the steps and keep your tools organized, you’ve just saved yourself a massive headache and a much larger bill at the dealership.

    I know it can feel intimidating when you’re staring at a dirty engine bay for the first time, but honestly, that’s how everyone starts. Every time you pick up a wrench and actually fix something yourself, you’re taking the power back from the shops that try to upcharge you for the simple stuff. Don’t let the fear of making a mistake keep you from learning. Grab your gear, stay patient, and trust your hands. Once you get this filter swapped out, you’ll realize that you’re more than capable of keeping your own ride on the road.

    Frequently Asked Questions

    How do I know if my car has an inline filter or if it's built right into the fuel pump assembly?

    Honestly, the easiest way to tell is to pop the hood and look at your fuel lines. If you see a small, cylindrical canister sitting right in the line between the tank and the engine, that’s your inline filter. If the lines go straight from the tank to the engine without anything in between, it’s almost certainly built into the pump assembly inside the tank. If you’re still unsure, just check your service manual—don’t guess.

    Is it safe to do this job in my driveway, or do I need a specialized setup to deal with the fuel pressure?

    Look, you don’t need a hydraulic lift or a professional bay to do this. Your driveway is perfectly fine, but don’t get sloppy. Since you’re messing with the fuel system, there’s going to be pressure and some spilled gas. Keep a fire extinguisher nearby, work in a well-ventilated area, and for the love of everything, make sure you depressurize the system before you crack any lines. Just be smart and stay focused.

    Once I swap the filter, do I need to do anything special to prime the system so I don't damage the injectors?

    Yeah, you definitely don’t want to just crank the engine and hope for the best. If the lines are dry, you’re forcing the fuel pump to work way harder than it should, which is a headache you don’t need. The easiest way? Turn your key to the “ON” position without actually starting the car. You’ll hear that faint hum from the pump—that’s it priming. Do that a few times, then go for it.

  • Replacing a Leaking Clutch Slave Cylinder

    Replacing a Leaking Clutch Slave Cylinder

    I was under a beat-up Civic last Tuesday, grease up to my elbows, when I heard that dreaded, hollow thud from the pedal assembly. My customer had been told by a shop that he needed a whole new hydraulic system overhaul because his clutch felt like mush, and they were quoting him enough money to buy a decent used car. It’s total nonsense. Most of the time, you’re just looking at a failing clutch slave cylinder, and honestly, it’s one of those fixes that makes people panic way more than they should.

    I’m not here to sell you on some expensive, over-complicated diagnostic service that you don’t actually need. My goal is to give you the straight truth about how to spot a bad clutch slave cylinder and, more importantly, how to swap it out without breaking the bank. I’ve spent enough time in the garage to know that if you have the right wrench and a little bit of patience, you can handle this yourself. Let’s get into the actual grit of the repair so you can stop worrying and start driving.

    Table of Contents

    Spotting the Symptoms of Failing Slave Cylinder Early

    Spotting the Symptoms of Failing Slave Cylinder Early

    The first thing you’re going to notice is a change in your clutch pedal feel. It might start feeling “spongy,” like you’re stepping on a marshmallow instead of a solid mechanical component, or it might suddenly go completely limp and stay stuck to the floor. If you feel like you have to pump the pedal a few times just to get the car to shift properly, that’s a massive red flag. These clutch engagement issues usually mean the internal seals are starting to give up the ghost, and the pressure isn’t being distributed where it needs to go.

    Keep a sharp eye on the ground where you park, too. If you spot a small puddle of oily fluid near the transmission housing, you’re likely looking at a clutch hydraulic system failure in the making. Most of the time, it’s not a massive explosion of fluid, but rather a slow, sneaky leak that catches people off guard. Catching these symptoms early is the difference between a quick afternoon in the driveway and being stranded on the side of the road waiting for a tow truck.

    Why Your Clutch Pedal Feel Suddenly Changes

    Why Your Clutch Pedal Feel Suddenly Changes

    If your pedal suddenly feels “mushy” or like you’re stepping into a bowl of oatmeal, that’s a massive red flag. Usually, when you press down, there’s a crisp, consistent resistance that tells you the system is pressurized and ready to work. But when you start experiencing clutch engagement issues, like the pedal staying stuck to the floor or feeling way too light, it’s a sign that the internal seals are likely shot. It’s not just a minor annoyance; it’s a direct indicator that your hydraulic pressure is bleeding off somewhere it shouldn’t be.

    I’ve seen plenty of guys ignore this, thinking they just need a more aggressive foot, but you can’t muscle your way through a clutch hydraulic system failure. If the pressure isn’t hitting the piston correctly, the lever isn’t moving the fork, and you’re basically just playing with a heavy piece of metal. Once that clutch pedal feel goes wonky, you’re usually on borrowed time before the car refuses to shift into gear entirely. Don’t wait until you’re stranded at a light to figure this out.

    Pro Tips for Dealing with a Dying Slave Cylinder

    • Don’t just top off the fluid and call it a day. If your reservoir is getting low, you’ve got a leak somewhere. Replacing the cylinder is the real fix; just adding more fluid is just masking a problem that’s going to leave you stranded eventually.
    • Grab a decent set of flare nut wrenches. Most of the hydraulic lines connected to the slave cylinder use soft metal fittings that strip way too easily if you try to use a standard open-end wrench. Trust me, your knuckles will thank you.
    • Keep your workspace clean. Even a tiny speck of dirt getting into the hydraulic line during a swap can clog the seals or cause the new cylinder to fail prematurely. It’s a small detail, but it’s the difference between a one-time fix and a headache.
    • Bleed the system thoroughly. Air is the enemy of a smooth clutch. If you feel a “spongy” pedal after your repair, you probably still have air bubbles trapped in the line. You’ll need to pump the pedal or use a vacuum bleeder to get it perfect.
    • Check the master cylinder too. If you put in a brand new slave cylinder and the pedal still feels garbage, the issue might actually be the master cylinder up by your foot. It’s better to know now so you don’t waste time chasing the wrong part.

    The Bottom Line on Your Clutch

    If your pedal feels mushy or you’re seeing fluid pooling near the transmission, don’t ignore it—that’s your slave cylinder telling you it’s about to give up.

    You don’t need a massive shop setup to swap this part; just get yourself a decent jack, some stands, and a little patience to avoid a headache.

    Catching a leak early can save you from a total breakdown on the side of the road and keeps you from getting hit with a massive repair bill at a shop.

    The Truth About That Spongy Pedal

    Most shops will try to tell you your whole clutch assembly is shot, but nine times out of ten, it’s just a cheap slave cylinder acting up. Don’t let them talk you into a massive bill when a little bit of hydraulic pressure and a basic wrench could fix the whole problem.

    Nikolai·Osterman

    Don't Let a Small Leak Stall You Out

    Don't Let a Small Leak Stall You Out.

    Look, at the end of the day, a failing clutch slave cylinder isn’t some mysterious engine failure that requires a master technician and a massive invoice. If you’ve been noticing a mushy pedal, seeing fluid pooling near the transmission, or struggling to get into gear, you’ve already done the hard part by identifying the problem. Just remember that it usually comes down to a simple hydraulic leak or a worn-out seal. Once you’ve grabbed your basic wrenches and a little bit of brake cleaner, you’re well on your way to getting that pressure back where it belongs. Don’t ignore those early warning signs, because a small leak today can turn into a total pedal failure when you’re stuck in traffic tomorrow.

    I know it can feel intimidating when you’re staring at a greasy mess under the chassis, but honestly, you’ve got this. Every time you tackle a job like this, you’re becoming more self-reliant and less dependent on whatever the shop tries to charge you. It’s about that satisfaction of the first smooth shift after you’ve tightened that last bolt yourself. Keep your tools organized, keep that magnetic tray handy, and just take it one step at a time. You don’t need a fancy certification to take control of your ride; you just need the grit to get your hands dirty.

    Frequently Asked Questions

    Can I just top off the clutch fluid and keep driving, or is that asking for trouble?

    Look, I get the temptation to just top it off and keep rolling, but honestly? You’re just putting a band-aid on a bullet wound. If your fluid level is dropping, you’ve got a leak somewhere. Topping it off might buy you a few miles, but eventually, you’ll lose pressure entirely and end up stranded mid-intersection. Don’t risk it. Find the leak, fix the seal, and save yourself the massive headache later.
    Do I really need to replace the whole master cylinder too, or can I just swap out the slave cylinder?

    Look, I get why you’re asking—you want to save the cash. If the master cylinder is still holding pressure and isn’t leaking, you can definitely just swap the slave. But honestly? If one’s gone, the other’s usually right behind it. They share the same fluid, and if your fluid’s been old and nasty, it’s probably eaten away at the seals in both. If you can afford it, do both. It saves you a second headache later.

    How much of a mess am I actually looking at when it comes to bleeding the air out of the system?

    Honestly? It’s more of a “wet” mess than a “disaster” mess. If you’re doing this right, you’ll have some brake fluid splashing around the bleeder screw and dripping down the housing. It’s thin, oily, and eats paint if you’re not careful, so grab a rag and maybe some brake cleaner to wipe things down afterward. Just don’t expect it to stay clean—it’s part of the job.

  • How to Measure Tire Tread Depth

    How to Measure Tire Tread Depth

    I saw a guy at the shop last week getting quoted a ridiculous fee just for a “comprehensive tire safety inspection.” Honestly, it makes my blood boil. They try to act like tread depth measurement is some kind of high-tech science that requires a specialized computer or a certified specialist to understand. It’s not. Most of the time, you’re just paying for a guy in a clean uniform to squint at your rubber for thirty seconds and tell you what you already know. You don’t need to hand over your paycheck just to find out if your tires are actually safe for a rainy drive home.

    I’m not here to sell you on fancy gadgets or expensive shop services. My goal is to show you how to get an honest reading on your tires using stuff you probably already have in your junk drawer. I’ll walk you through the quick, dirty, and most importantly, accurate ways to check your tread so you can make your own decisions. No fluff, no jargon—just the straight truth about what’s actually happening between your car and the road.

    Table of Contents

    The Quick Penny Test for Tires You Can Do Now

    The Quick Penny Test for Tires You Can Do Now

    Look, you don’t need to go out and buy some fancy digital gauge to know if your rubber is shot. If you’re standing in your driveway and feeling a little uneasy about how your car handles in the rain, just grab a penny from your cup holder. Take that penny, flip it so Lincoln’s head is facing down, and shove it into one of the grooves in your tire.

    If you can see the top of Lincoln’s head, your tread is too shallow. That’s a massive red flag for wet traction safety because you’ve lost the ability to channel water away from the contact patch. When that tread gets too thin, you’re basically driving on slicks, which is a recipe for hydroplaning the second you hit a puddle.

    I tell my friends all the time: don’t wait for a mechanic to tell you you’re unsafe just to upsell you a full set. This little penny test for tires is the fastest way to check your status. If the coin sits deep in the groove, you’re likely fine for now, but if it’s sitting flush, it’s time to start shopping for replacements.

    Understanding Tire Tread Depth Standards Without the Fluff

    Understanding Tire Tread Depth Standards Without the Fluff

    Look, you don’t need to memorize a textbook to understand why these numbers matter. Most shops will talk to you about tire tread depth standards like they’re some kind of secret code, but it’s actually pretty straightforward. Basically, the deeper those grooves are, the better your car can pump water out from under the rubber. When that rubber gets too thin, you lose that vital contact with the road, and that’s when things get sketchy.

    If you want to be precise, most modern tires have built-in tire replacement indicators—little raised bumps sitting inside the grooves. When the tread wears down level with those bumps, you’re officially out of time. It’s not just about saving money on a new set; it’s about hydroplaning prevention. If you’re driving through a heavy downpour and your tires are bald, you aren’t driving anymore—you’re just floating. Keeping an eye on this is one of the easiest ways to keep your daily driver from turning into a literal sled on a wet highway.

    Pro Moves to Keep Your Tires from Failing You

    • Don’t just check one spot; walk around the whole tire and check the inner and outer edges, because uneven wear usually means your alignment is trashed.
    • Grab a dedicated tread depth gauge if you can swing it—it’s way more accurate than a penny and costs less than a decent lunch.
    • Keep an eye out for “wear bars” tucked into the grooves; if the tread is flush with those little bumps, stop driving and go get new rubber immediately.
    • Check your tread depth after a long drive when the tires are warm, as sometimes heat can slightly change how the rubber sits, though it’s mostly to get you in the habit of inspecting them regularly.
    • Watch for uneven patterns like cupping or scalloping while you’re measuring, because that tells you more about your suspension health than the actual depth does.

    The Bottom Line on Your Tread

    Don’t overcomplicate it—if you can see the top of Lincoln’s head in a penny, your tires are toast and you need to shop for new ones immediately.

    Keep an eye on those wear bars; if the tread is flush with those little bumps in the grooves, you’re riding on a prayer and losing grip.

    Checking your tread isn’t just about avoiding a fine; it’s about making sure you actually have enough traction to stop when things get sketchy on a wet road.

    Don't Let a Cheap Set of Tires Cost You a Total Write-off

    Most people think they’re fine until they’re hydroplaning on the highway, but checking your tread isn’t some complex diagnostic—it’s just about not being lazy with a penny so you don’t end up paying for a wreck instead of a new set of rubber.

    Nikolai·Osterman

    Don't Leave It to Chance

    Check tire tread: Don't Leave It to Chance.

    Look, at the end of the day, checking your tread isn’t some complicated diagnostic procedure that requires a high-end scanner. Whether you’re using the old-school penny trick or grabbing a dedicated depth gauge from your toolbox, the goal is the same: knowing exactly where you stand before the weather turns or the highway gets busy. You’ve learned how to spot the wear patterns, how to read the legal limits, and most importantly, how to trust your own eyes instead of just blindly trusting whatever a service advisor tells you at the counter. Keep an eye on those grooves, and don’t ignore the warning signs just because you’re in a rush.

    My dad always used to say that the best way to save money on a car is to stop treating it like a mystery box and start treating it like a machine you actually understand. You don’t need to be a master technician to take ownership of your safety, and you definitely don’t need to pay someone else to tell you your tires are fine when they clearly aren’t. Grab your tools, spend five minutes in your driveway, and take control of your ride. Once you start doing these small, basic checks yourself, you’ll realize that most of what people call “car trouble” is really just a lack of simple maintenance.

    Frequently Asked Questions

    Is it enough to just check one spot on the tire, or do I need to measure all around it?

    Look, checking just one spot is a rookie mistake. I’ve seen guys pass a tire because the center looked fine, only to have the outer edge shred a week later. Tires don’t wear evenly—you might have great tread in the middle but zero grip on the shoulders due to alignment issues. Grab your gauge and check a few spots around the circumference. If one area is bald, the whole tire is toast.

    My tires still have some tread left, but they look cracked or worn on the sides—is that still a problem?

    Yeah, that’s a massive red flag. If the sidewalls are cracking, you’re looking at dry rot. It doesn’t matter if you’ve got plenty of tread left in the middle; those cracks mean the rubber is breaking down and losing its structural integrity. A blowout on the highway is way more dangerous than a worn-out tread. Honestly, if I see sidewall cracking on a car in my bay, I’m telling the customer to swap them out immediately.

    Do I really need to buy one of those little plastic depth gauges, or is the penny trick actually reliable?

    Look, if you’re just doing a quick check in your driveway, the penny trick is totally fine. It gives you a solid “yes” or “no” on whether you’re hitting that danger zone. But if you’re serious about your build or trying to squeeze every last mile out of a set of high-performance rubber, grab a $5 plastic gauge. It’s way more precise than a coin, and honestly, it’s worth it for the peace of mind.

  • How to Change Differential Fluid

    How to Change Differential Fluid

    You hear that high-pitched whine coming from under your rear axle every time you hit highway speeds, and your first instinct is to check your bank account to see how much a shop is going to charge you to “diagnose” it. Most mechanics will try to tell you that a differential issue is a massive, expensive job involving gears and housing replacements, but half the time, you’re just looking at a neglected differential fluid change. I remember working on my old buddy’s S13 back in the garage; the rear end sounded like a blender full of marbles, and he was terrified it was totaled. Turns out, the fluid was so old and gritty it looked like black sludge, and a simple swap fixed the whole mess.

    I’m not here to give you some textbook lecture or sell you on fancy, overpriced additives you don’t need. I’m going to show you exactly how to tackle a differential fluid change using nothing more than a basic socket set, a pump, and a little bit of patience. We’re going to walk through the drain and fill process step-by-step so you can stop worrying about that noise and start saving your hard-earned money.

    Table of Contents

    Guide Overview

    Total Time: 1-2 hours
    Estimated Cost: $40-80
    Difficulty: Beginner

    Tools & Supplies

    • Socket set and ratchet for drain/fill plugs
    • Fluid pump or hand sprayer for filling
    • Drain pan to catch old fluid
    • Funnel to prevent spills
    • Differential gear oil (check manual for weight/spec) 1-3 quarts
    • Replacement crush washers or gaskets for plugs

    Step-by-Step Instructions

    • 1. First things first, get the car up on some sturdy jack stands. Don’t even think about working under a car held up by just a floor jack; I’ve seen too many close calls in the shop, and it’s not worth the risk. Make sure the surface is level so the fluid doesn’t all slosh to one side when you open it up.
    • 2. Locate your drain plug on the bottom of the differential housing. Grab your socket wrench and get that plug loosened, but keep a drain pan ready right underneath. This stuff is usually thick, dark, and smells like burnt metal, so try not to get it on your clothes—it’s a nightmare to wash out.
    • 3. Once the old, gritty fluid has finished dripping out, take a second to inspect the drain plug itself. Check the washer or gasket for any signs of damage; if it looks flattened or cracked, just swap it out for a new one to prevent any slow leaks later on.
    • 4. Now, find your fill plug—this is usually higher up on the housing. Before you even touch it, make sure you can actually get it loose. I always recommend loosening the fill plug first before you drain the old stuff, because if you drain the fluid and then realize your fill plug is seized tight, you’re stuck with a car that won’t move.
    • 5. Clean the area around the fill hole with some brake cleaner so you aren’t pumping dirt straight into your gears. Grab a fluid pump—you can get a cheap hand pump at any parts store—and start pumping in your fresh gear oil. Keep going until the fluid starts oozing back out of the fill hole; that’s your signal that it’s properly full.
    • 6. Wipe away the excess oil, thread your fill plug back in by hand to avoid cross-threading, and then snug it up with your wrench. Don’t go overboard with the torque, but make sure it’s tight enough to seal.
    • 7. Finally, give the area a quick once-over with a rag to make sure there are no drips, lower the car back to the ground, and take it for a short spin. Listen closely for any weird whining or grinding; if everything sounds smooth, you just saved yourself a massive shop bill.

    Spotting Changing Gear Oil Symptoms Before They Break You

    Spotting Changing Gear Oil Symptoms Before They Break You

    If you start hearing a high-pitched whine or a low growl coming from under your rear end when you’re accelerating, pay attention. That’s usually your car screaming for help. One of the most obvious changing gear oil symptoms is a sudden change in noise, especially during turns or under heavy load. If it sounds like there’s gravel spinning in a blender, your oil has likely lost its ability to lubricate those heavy gears, and you’re looking at serious metal-on-metal contact.

    You also need to keep an eye out for any weird smells or visible messes. If you catch a scent of burnt toast while driving, or if you see dark, oily spots on your driveway, you might be dealing with a differential leak repair situation sooner rather than later. Don’t just ignore a small drip; once the level drops too low, the heat buildup will shred your internals in no time. Keeping an eye on these red flags is way cheaper than replacing an entire housing.

    Getting the Right Viscosity of Gear Oil Without the Bs

    Getting the Right Viscosity of Gear Oil Without the Bs

    Look, when you walk into an auto parts store, the sheer amount of options for gear oil can feel like a total scam. You’ll see bottles ranging from 75W-90 to 80W-140, and most people just grab the cheapest one on the shelf. That’s a massive mistake. You need to check your owner’s manual or the sticker under your hood to find the exact viscosity of gear oil your manufacturer specifies. If you put oil that’s too thick in a modern diff, you’re going to deal with sluggish performance; too thin, and you aren’t getting the protection those heavy gears need.

    While you’re at it, don’t just guess how much you need to buy. Always check your differential fluid capacity before you start the job. There is nothing worse than being halfway through a service, covered in grease, only to realize you’re a quart short and have to drive back to the store. I usually grab one extra bottle just to be safe. It’s a small price to pay to ensure your automotive drivetrain maintenance is actually done right the first time.

    Pro-Tips From the Shop Floor (Things I Wish I Knew Sooner)

    • Always crack the fill plug before you touch the drain plug. Trust me on this one. If you drain all that old oil and then realize your fill plug is seized or stripped, you’re stuck with a car that can’t move. Get that fill hole open first so you know you can actually get the new stuff back in.
    • Don’t cheap out on the pump. Trying to squeeze a heavy bottle of gear oil into a tiny differential hole by hand is a nightmare that’ll end with oil all over your driveway and your clothes. Grab a cheap hand pump; it’ll save you a massive headache and a lot of cleanup.
    • Check your seals while you’re down there. Since you’re already under the car and everything is clean, take a second to look at the pinion seal and the axle seals. If you see any weeping or wetness, it’s way better to fix a leaky seal now than to deal with a dry differential later.
    • Use a magnetic drain plug if you can. Most of the time, the metal shavings you see on the old plug are just normal wear, but if you see actual chunks or “glitter” that looks like heavy metal, stop right there. That’s a sign of internal damage, and you might need more than just a fluid change.
    • Don’t overfill it. It’s tempting to keep pumping until it won’t take anymore, but you just want it to a level where it’s right at the bottom of the fill hole. Too much pressure from excess fluid can actually blow out your seals, and nobody wants to deal with that mess.

    The Bottom Line on Your Differential

    Don’t wait for a loud whine or grinding noise to act; if your gear oil looks like sludge or smells burnt, swap it out immediately to save yourself a massive repair bill.

    Stop guessing on the specs—check your owner’s manual or the differential housing itself to make sure you’re using the exact viscosity required for your gears.

    You don’t need a shop setup to do this right, just a decent pump, the right oil, and a little patience to make sure you don’t end up with a mess on your driveway.

    The Real Cost of Neglect

    “Most people wait until they hear that metal-on-metal grinding sound before they even think about their differential, but by then, you aren’t just paying for a fluid swap—you’re paying for a whole new gear set. Don’t let a ten-dollar bottle of oil turn into a thousand-dollar nightmare just because you were too busy to check it.”

    Nikolai·Osterman

    Don't Leave It to Chance

    Don't Leave It to Chance: Differential Maintenance

    Look, at the end of the day, changing your differential fluid isn’t some complex mystery that requires a master technician. You just need to keep an eye out for those weird whines, make sure you aren’t using the wrong viscosity, and actually get the job done before the metal starts grinding itself into dust. It’s a simple process of draining the old, gritty sludge and replacing it with fresh oil that actually does its job. If you follow the steps and keep your workspace clean, you’ve just saved yourself a massive headache and a much larger bill at the shop. Just remember to double-check your fill plug before you start driving, or you’ll be wishing you’d spent five more minutes on the job.

    I know it can feel intimidating when you’re staring down at a messy underside of a car, but that’s how everyone starts. Every pro I know—even the guys with thirty years under their belts—once had to figure out which bolt does what. Don’t let a little bit of grease or a confusing manual keep you from taking control of your own machine. Once you get this done, you’ll realize that most car maintenance is just about having the right tools and the guts to try. You’ve got this, so go out there, get your hands dirty, and keep that drivetrain running smooth.

    Frequently Asked Questions

    How do I know if I need to add a friction modifier or if just standard gear oil is fine?

    Look, if you’ve got a standard open differential, don’t overcomplicate it—just stick to the gear oil. You only need to worry about friction modifiers if you’re running a limited-slip differential (LSD). If you hear that annoying chatter or “groaning” when you’re making tight turns, that’s your signal that the LSD needs that extra additive to help the clutch packs slide smoothly. If it ain’t chirping, don’t go throwing extra stuff in there.

    Is it actually okay to just drain and fill, or do I need to do a full flush to get the old gunk out?

    Look, I get why you’re asking. It feels like you’re leaving half the dirty stuff behind. But honestly? A drain and fill is usually plenty. Most of the “gunk” is just heavy metal particles that settle at the bottom anyway. Unless you’re dealing with a massive leak or a total mechanical failure, don’t stress about a full flush. Just do a clean drain, fill it up, and change it again in a few hundred miles if you’re really worried.

    How can I tell if my differential seals are actually leaking or if it's just some surface seepage?

    Look, there’s a big difference between “sweating” and actually leaking. If you just see a thin film of grime or dust stuck to the housing, that’s usually just surface seepage—basically just oil misting out and catching dirt. But if you see actual wet droplets, or if you find fresh oil dripping onto your driveway or smelling burnt on the exhaust, that’s a real leak. Clean the area first; if it stays dry, you’re good.

  • Replacing Common Automotive Sensors

    Replacing Common Automotive Sensors

    I was under a beat-up Corolla last Tuesday when I heard it—that specific, hollow clicking sound that usually means a sensor has finally given up the ghost. My customer had been told by a big-name dealership that a full engine overhaul was necessary because of a “complex electrical failure,” but I knew better. Most shops see a check engine light and immediately try to sell you the whole kitchen sink, when usually, a simple sensor replacement is all it actually takes to get you back on the road. It’s honestly frustrating how many people get talked into paying thousands for repairs that are actually pretty straightforward if you just know where to look.

    I’m not here to give you a lecture or some textbook theory that doesn’t work in a real garage. My goal is to walk you through the actual process of a sensor replacement using the same logic I use when I’m working on my own tuners. I’ll show you which tools you actually need, which bolts are going to be a pain in the neck, and how to avoid the common mistakes that turn a quick fix into a weekend nightmare. You don’t need a mechanic’s degree to handle this; you just need a little bit of patience and the right info.

    Table of Contents

    Spotting Real Automotive Sensor Symptoms Early

    Spotting Real Automotive Sensor Symptoms Early.

    Most people wait until their car completely dies on the side of the highway before they even look under the hood, but you can usually hear the warning signs long before that. You might notice some weird engine performance issues, like a sudden stumble when you’re merging onto the freeway or a rough idle while you’re sitting at a red light. Sometimes it’s even more subtle—maybe your gas mileage just tanked out of nowhere, or the car feels like it’s lagging when you step on the gas. These aren’t just random quirks; they’re often the first red flags of a component starting to fail.

    If you want to get ahead of the game, you really need to get comfortable with some basic OBD-II scanner usage. Don’t let the tech intimidate you; plugging one in is way easier than most people think, and it’ll tell you exactly which part is acting up. Instead of guessing and throwing money at parts you don’t need, catching these small glitches early means you’re preventing a massive repair bill down the road. It’s much better to deal with a single wonky sensor now than to face a total engine meltdown later.

    Mastering Obd Ii Scanner Usage for Truth

    Mastering Obd Ii Scanner Usage for Truth.

    Look, you don’t need to spend a fortune at the dealership just to figure out what’s wrong. Most shops will charge you a hefty diagnostic fee just to plug in a tool, but mastering OBD-II scanner usage is how you take that power back. When that Check Engine light pops up, don’t just panic. Plug the scanner into the port under your dash and look for the specific P-code. That code is basically the car’s way of pointing a finger at the problem. Instead of guessing, you’re getting a direct lead on exactly which component is acting up.

    The real trick is knowing that a code doesn’t always mean a part is dead; sometimes it’s just a ghost in the system. I’ve seen plenty of people jump straight into a massive repair job when they really just needed to clean a connector or check a ground wire. Use the scanner as a starting point for diagnosing engine sensor failure, not a final verdict. If you cross-reference that code with a quick search, you’ll save yourself a ton of headache and avoid paying for parts you don’t actually need.

    Pro Tips for Swapping Sensors Without Losing Your Mind

    • Don’t just eyeball the part number; grab your phone and double-check the exact sensor code against the new one before you even start unscrewing anything. Getting the wrong spec is a fast way to waste a Saturday.
    • Use a little bit of penetrating oil on those old, crusty bolts a few minutes before you try to turn them. If you fight a seized sensor bolt without prep, you’re going to end up snapping it, and then we’re talking a much bigger headache.
    • Keep your workspace clean and use my favorite trick—a magnetic parts tray. If you drop a tiny sensor clip or a single mounting bolt into the dark abyss of an engine bay, you’re going to be cursing for the next hour.
    • When you’re plugging the new sensor in, listen for that subtle “click.” If you don’t feel it seat properly, you might leave a gap that lets moisture in, which’ll just trigger the same error code you’re trying to fix.
    • Clean the wiring harness connectors with some electronic cleaner while you’ve got the old one out. There’s no point in putting a brand-new sensor in if the plug it connects to is covered in oil and grime.

    The Bottom Line on Sensors

    Don’t just swap parts because a code popped up; always double-check your wiring and connections first, because a loose plug is a lot cheaper to fix than a brand-new sensor.

    Invest in a decent set of socket extensions and a multimeter—having the right tools makes the difference between a twenty-minute job and a two-hour headache.

    Trust your gut and the data, not just what a shop tells you; if a sensor is acting up, you can usually diagnose and fix it yourself without getting hit by a massive labor bill.

    ## The Truth About Modern Sensors

    “Mechanics love telling you a bad sensor means you need a whole new module or a trip to the dealership, but most of the time, it’s just a dirty connection or a ten-dollar part that’s been doing its job for too long. Don’t let a little warning light bully you into a massive repair bill; grab your scanner, find the fault, and take it back.”

    Nikolai·Osterman

    Don't Let the Dashboard Scare You

    Don't Let the Dashboard Scare You.

    Look, replacing a sensor isn’t some dark art reserved for master techs with thirty years under their belts. We’ve covered how to listen to what your car is actually telling you through those weird symptoms, and how to use an OBD-II scanner to stop the guessing games. Once you’ve identified the culprit and grabbed the right socket from your kit, the hardest part is already behind you. It really just comes down to staying organized—keep those bolts in your magnetic tray so you aren’t hunting for them later—and making sure you don’t rush the job. If you can spot the error and confirm the code, you’ve already done more than most people ever bother to do.

    At the end of the day, my goal is to make sure you feel confident the next time that Check Engine light pops up on your dash. Don’t let a little bit of plastic and wiring intimidate you into handing over a massive repair bill to a shop that’s just looking to pad their margins. Most of the time, you’re just one part away from having a perfectly smooth ride again. Grab your tools, take a breath, and just get to work. You’ve got this, and your wallet will definitely thank you for it.

    Frequently Asked Questions

    Is it actually worth buying a cheap scanner, or am I just wasting money on junk that won't give me real data?

    Look, I get the temptation to grab those $20 Bluetooth dongles off Amazon, but honestly? You’re usually just buying a paperweight. If you want to actually diagnose something instead of just reading “Check Engine” codes, you need a tool that can show you live data streams. A cheap scanner might tell you a sensor is acting up, but a decent mid-range one will show you the actual voltage drop. Don’t waste your cash on junk.

    How do I know if it's actually the sensor that's shot and not just some old, crusty wiring causing the issue?

    That’s the million-dollar question. Honestly, I’ve seen shops charge for a brand-new sensor when all they really needed was a can of contact cleaner and some electrical tape. Before you go buying parts, grab a multimeter. Check for continuity and see if the wires are actually sending a signal. If the wiring looks frayed or the harness is pinched, fix that first. Don’t let a loose connection trick you into wasting money.

    Can I just clean the sensor with some spray to fix the error code, or is a full replacement the only way to go?

    Look, I get the temptation to just spray some cleaner on it and hope for the best, but it’s a gamble. If it’s just a little carbon buildup, a specialized cleaner might buy you some time. But if the internal element is shot or the wiring is fried, you’re just masking a dead part. Don’t waste your weekend chasing a ghost; if the code stays after a cleaning, just bite the bullet and replace it.

  • Steps for Replacing a Water Pump

    Steps for Replacing a Water Pump

    I remember sitting in my dad’s garage last summer, staring at a puddle of neon-green coolant spreading across the concrete like a crime scene. My neighbor had just been quoted a grand just to look at his engine, claiming a “complex cooling system overhaul” was necessary. I pulled my magnetic tray out of my back pocket, looked at the leaking seal, and realized the truth: most shops try to turn a standard water pump replacement into a nightmare just to pad their invoices. It’s not some high-level wizardry that requires a master technician; it’s just a matter of getting the right tension on your belt and not losing your cool when a bolt gets stubborn.

    I’m not here to give you some textbook lecture or a list of fancy tools you can’t afford. I’m going to walk you through this job exactly how I do it at the shop—straight talk, no fluff, and zero gatekeeping. We’re going to cover how to spot the early warning signs, the specific steps for a clean water pump replacement, and the one mistake most beginners make that leads to a massive leak ten miles down the road. Let’s get your hands dirty and save you some serious cash.

    Table of Contents

    Guide Overview

    Total Time: 2-4 hours
    Estimated Cost: $40-150
    Difficulty: Intermediate

    Tools & Supplies

    • Socket set and ratchet for removing bolts
    • Screwdrivers for hose clamps
    • Pliers for tensioning clamps
    • Drain pan to catch coolant
    • New water pump compatible with vehicle
    • Engine coolant/antifreeze 1-2 gallons
    • Replacement gasket or sealant 1 unit

    Step-by-Step Instructions

    • 1. First things first, you gotta make sure the engine is completely cold. Don’t even think about cracking a radiator hose if you just got home from a drive; you’ll end up with a face full of boiling coolant, and trust me, that’s a bad way to spend a Saturday. Once it’s cool, jack up the car and get it on some solid jack stands. Never, and I mean never, work under a car supported only by a hydraulic jack.
    • 2. Drain the old coolant. Find your radiator petcock (that little drain plug at the bottom) and pop it open. Have a drain pan ready because it’s going to be a mess. I usually keep an old plastic bin handy to catch the overflow so I don’t end up with puddles of pink sludge all over my garage floor. Once the flow slows down to a trickle, close that plug back up tight.
    • 3. Now you need to clear a path to the pump. Depending on what you’re driving, this might mean removing the serpentine belt or even some extra brackets. Use a breaker bar if the bolts feel stubborn; don’t just muscle it with a tiny wrench or you’ll strip the head. If you’re working on one of my vintage Japanese tuners, you might have to move some vacuum lines out of the way, so keep track of them.
    • 4. This is where my magnetic parts tray comes in handy. Start unbolting the water pump itself, but do it in a crisscross pattern. If you just go in a circle, you might warp the housing or put uneven pressure on the gasket. As you pull the bolts out, toss them right into the tray so they don’t end up lost in the bottom of the engine bay.
    • 5. Once the old pump is out, you’ll see a nasty layer of old gasket material and crusty buildup on the engine block. You need to get that surface perfectly clean before the new one goes on. Grab a plastic scraper or a fine-grit sandpaper and wipe it down until it’s smooth. If there’s even a tiny bit of old gunk left, your new seal won’t seat right and you’ll be leaking again by next week.
    • 6. Prep the new pump and seat it. Most new pumps come with a fresh gasket, but if yours didn’t, grab some high-quality RTV silicone. Apply a very thin bead—don’t go overboard or you’ll end up with globs of sealant clogging your coolant passages. Line the pump up with the bolt holes, hand-tighten everything first to make sure it’s seated straight, and then give it a final snug with your socket set.
    • 7. Put everything back together in reverse, reinstall your belt, and then it’s time to refill. Pour in some fresh coolant (check your manual to see if you need the OAT or the old-school stuff) and start the engine. Keep the radiator cap off for a few minutes to let the air bubbles escape—this is called burping the system. Watch your temp gauge like a hawk to make sure everything stays in the green.

    Spotting the Signs of Failing Water Pump Before Disaster Strikes

    Spotting the Signs of Failing Water Pump Before Disaster Strikes

    You don’t want to be the person stranded on the shoulder of a highway because your temp gauge hit the red zone. Most of the time, the signs of failing water pump aren’t some sudden explosion; they’re subtle hints your car is begging for help. Keep an eye (and an ear) out for a high-pitched whining or grinding noise coming from the front of the engine. That’s usually the sound of the internal bearings giving up the ghost. If you notice a sweet, syrupy smell inside the cabin, you’re likely looking at a slow coolant leak that’s about to turn into a massive headache.

    Another big one is watching for those classic overheating engine symptoms, like steam billowing from under the hood or a needle that’s dancing way past the halfway mark. If you see crusty, colored residue around the pump housing, that’s a dead giveaway that your seals are shot. Don’t just ignore a small puddle under the car and hope it goes away. Catching these issues early means you can handle a simple swap instead of dealing with a warped head or a blown gasket.

    Essential Water Pump Installation Tools for Every Home Garage

    Essential Water Pump Installation Tools for Every Home Garage

    Look, you don’t need a professional-grade rolling toolbox to get this done, but you definitely can’t wing it with a stripped screwdriver and a prayer. First things first, grab a decent set of metric sockets and a long-reach ratchet. Depending on what you’re working on, things can get pretty tight near the timing cover, and having that extra reach saves you from a massive headache. I always keep my magnetic parts tray handy—seriously, if you drop a bolt into the subframe, you’re going to have a bad time.

    You’re also going to need a way to manage the mess. A drain pan is obvious, but I highly recommend picking up a drain syringe or a vacuum refiller. When you’re doing proper cooling system maintenance, you want to make sure you aren’t just dumping old fluid and hoping for the best. After the swap, you’ll need to perform an automotive coolant flush to clear out any debris or scale left behind. If you skip the cleaning phase, you’re basically asking for air pockets, and that’s a one-way ticket to seeing those overheating engine symptoms again next week.

    Pro-Tips to Save Your Sanity (and Your Engine)

    • Double-check your gasket surface before you even think about installing the new pump. If there’s even a tiny bit of old sealant or crusty residue left on the block, that new gasket won’t seat right, and you’ll be dealing with a leak before you even finish your first drive.
    • Don’t go overboard with the RTV silicone. I’ve seen guys glob it on like they’re frosting a cake, but that’s a recipe for disaster. Excess silicone can break off, get sucked into your coolant passages, and clog up your heater core. Just a thin, even bead is all you need.
    • Treat your bolts with respect. If you’re working on a modern engine, those water pump bolts are often torque-to-yield or just really sensitive to over-tightening. Use a torque wrench—don’t just “feel” it out like my old man used to do. If you snap a bolt in the block, your weekend is officially ruined.
    • Always drain the coolant completely before you start tearing things apart. There’s nothing worse than getting halfway through the job and realizing you’ve got a puddle of lukewarm Dex-Cool soaking into your work boots and making a massive mess on your garage floor.
    • Check your serpentine belt while you’ve got the pump off. Since you already have the tools out and the belt is likely loosened or removed, take a second to look for cracks or fraying. It’s way easier to swap a cheap belt now than to have it snap on you two weeks after you finished the pump.

    The Bottom Line on Swapping Your Pump

    Don’t wait for the steam to start pouring out from under your hood; if you hear that whining or see a crusty leak, get ahead of it before you melt an engine.

    You don’t need a massive shop setup to do this right, just a solid socket set, a bit of patience, and a clean workspace to keep those bolts organized.

    Doing this yourself isn’t just about saving a few hundred bucks at the shop—it’s about knowing your machine and making sure the job was actually done right.

    The Real Cost of Waiting

    Most shops will try to scare you into a massive repair bill, but a water pump is just a part, not a death sentence for your engine. If you catch that leak early and swap it yourself, you’re saving hundreds of bucks and a massive headache. Just don’t wait until you’re stuck on the shoulder with steam pouring out of your hood.

    Nikolai·Osterman

    Don't Leave It to Chance

    Don't Leave It to Chance: Water Pump.

    Look, swapping out a water pump isn’t some mystical ritual, but you can’t afford to be lazy about it. We covered how to spot those early leaks, the specific tools you need to keep from stripping bolts, and the actual process of getting that old unit out and the new one seated properly. Just remember: clean surfaces are everything. If you leave old gasket material or gunk on that engine block, you’re basically asking for a leak ten minutes after you drive off the lot. Double-check your coolant levels and make sure every bolt is torqued down to spec. If you follow the steps and don’t rush the process, you’ve just saved yourself a massive headache and a heavy bill at the shop.

    At the end of the day, there’s a certain kind of pride that comes with shutting your hood after a job like this. You didn’t just pay someone else to do it; you actually took control of your machine. It might feel intimidating when you’re staring at a pile of parts and a messy engine bay, but every veteran tech started exactly where you are right now. Don’t let a little grease or a stubborn bolt scare you off from learning. Keep your tools organized, keep your head clear, and just keep turning wrenches. You’ve got this.

    Frequently Asked Questions

    Do I really need to replace the timing belt at the same time, or can I just swap the pump and call it a day?

    Look, I’ll be straight with you: if you have to pull the timing belt to get to that pump, replace the belt too. It’s a massive pain to tear everything down just to realize two weeks later that your belt is fraying. You’ll end up paying for the same labor twice. Don’t gamble with your engine; just swap them both now and save yourself the headache later.

    How much coolant should I actually drain before I start unscrewing everything to avoid a massive mess?

    Look, I’ve seen enough coolant floods in my driveway to know this is a valid fear. You don’t need to drain the whole system, but you can’t just dive in either. I usually crack the radiator drain plug first to get the bulk of it out into a catch pan. Aim to get about half to two-thirds of the liquid out. That keeps the mess manageable without leaving you swimming in a lake of antifreeze.

    Can I reuse the old gasket, or is it a total waste of time if I don't grab a fresh one?

    Look, I know it’s tempting to save a few bucks and skip the trip to the parts store, but do not—I repeat, do not—reuse that old gasket. Once you pull it off, it’s done. It’s compressed, it’s probably brittle, and it’s definitely not going to seal the same way twice. If you try to reuse it, you’re just begging for a coolant leak that’ll leave you stranded. Just grab a fresh one.

  • Replacing Faulty Ignition Coils

    Replacing Faulty Ignition Coils

    I was under a beat-up Silvia last Tuesday, grease up to my elbows, when I heard that familiar, rhythmic stutter from the engine—the kind of misfire that makes you think your entire ignition system is toast. Most shops will see that check engine light and immediately quote you a massive bill for a full ignition overhaul, but here’s the reality: nine times out of ten, you’re just looking at a simple coil pack replacement. I’ve seen so many people get intimidated by a stumbling engine, thinking they need a master technician to dive in, when really you just need to stop letting mechanics overcharge you for something you can handle in your own driveway.

    I’m not going to give you some textbook lecture or a list of fancy tools you don’t actually need. Instead, I’m going to walk you through the actual, hands-on process of swapping those units out so you can get your car running smooth again. We’ll cover how to spot the failing part, the specific way to avoid snapping those brittle plastic clips, and the one mistake most beginners make that ends up costing them extra. Let’s get to work.

    Table of Contents

    Guide Overview

    Total Time: 30-60 minutes
    Estimated Cost: $40-200
    Difficulty: Beginner

    Tools & Supplies

    • Socket set and ratchet to remove mounting bolts
    • Screwdriver to release electrical connector clips
    • Flashlight to inspect spark plug wells
    • New coil pack(s) matching vehicle specifications
    • Dielectric grease to prevent moisture and electrical arcing

    Step-by-Step Instructions

    • 1. First things first, you gotta make sure the engine is completely cool before you even think about touching anything. If you try to pull these things off a hot engine, you’re asking for a burnt hand or, worse, cracking something you shouldn’t. Grab your magnetic parts tray from your pocket—you’re gonna need it—and clear some space on the workbench so you aren’t fumbling around in the dark.
    • 2. Pop the hood and locate the coil packs. Depending on what you’re driving, they’ll either be sitting right on top of the engine or tucked slightly under a plastic cover. If there’s a plastic shroud in your way, don’t stress; it’s usually just held on by a couple of plastic clips or small bolts. Just pull them out of the way so you can actually see what you’re working on.
    • 3. Now, you need to disconnect the electrical connector for the specific coil you’re replacing. Most of these have a little tab you need to squeeze to release the clip. Be careful here—don’t go forcing it like you’re trying to break a nut, or you’ll snap that plastic tab and end up with a much bigger headache. Once it clicks loose, pull it straight up and set it aside.
    • 4. Grab your socket wrench—usually a 10mm is the standard for most of these—and unscrew the mounting bolt holding the coil pack in place. This is where people usually mess up, so make sure you keep that bolt in your magnetic tray immediately. There is nothing worse than dropping a tiny bolt into the depths of an engine bay and spending an hour fishing for it with a flashlight.
    • 5. Gently pull the old coil pack straight up and out of the spark plug well. You might feel a little bit of resistance because of the seal, but just give it a steady, even tug. Once it’s out, take a quick look down into the hole to make sure there isn’t any dirt or debris sitting at the bottom. If there is, blow it out with some compressed air, because you don’t want that junk falling into your cylinder once the new one is in.
    • 6. Grab your brand new coil pack and line it up with the spark plug. Press it down firmly until it sits flush against the engine. You want to feel it seat properly before you even touch the bolt. If it feels wobbly or crooked, stop and realign it; you don’t want to cross-thread anything or leave a gap that lets moisture in.
    • 7. Reinstall the mounting bolt and tighten it down. You don’t need to go “mechanic mode” and crank it until your knuckles bleed; just get it snug and secure. Finally, plug that electrical connector back in until you hear it click. Give the wire a tiny little tug just to make sure it’s locked in, and you’re officially done.

    Spotting Ignition Coil Symptoms Before They Kill Your Engine

    Spotting Ignition Coil Symptoms Before They Kill Your Engine

    You don’t always have to wait for a flashing Check Engine light to know something is wrong. Usually, your car will start giving you these subtle hints that the electrical side of things is failing. I’ve seen plenty of guys ignore a slight shudder at red lights or a weird hesitation when they hit the gas, only to end up stranded on the shoulder a week later. If your car feels like it’s gasping for air or you notice a sudden drop in fuel economy, you’re likely dealing with early ignition coil symptoms. It’s much easier to catch it when it’s just a minor stumble rather than a full-blown breakdown.

    If you want to get ahead of the game, you can actually do some basic engine misfire troubleshooting before the symptoms get ugly. Sometimes a coil isn’t completely dead; it’s just struggling to deliver a consistent spark under load. If you’re feeling handy, grabbing a multimeter to start checking ignition coil resistance is a pro move that saves you from blindly throwing parts at a problem. Catching a weak coil early is the best way to ensure you aren’t causing unnecessary wear on your catalytic converter.

    Mastering Engine Misfire Troubleshooting Without a Degree

    Mastering Engine Misfire Troubleshooting Without a Degree

    Look, when your check engine light starts flashing, your first instinct might be to just start throwing parts at the problem, but that’s exactly how you end up wasting money. Real engine misfire troubleshooting is more about being a detective than a surgeon. Before you go buying a whole new set of coils, you need to figure out if the issue is actually electrical or if you’ve got a mechanical hiccup like a vacuum leak. I always tell people to start with the basics—check your spark plug wires and make sure nothing is physically loose or corroded.

    If you want to get technical without needing a master technician’s license, grab a cheap multimeter. Checking ignition coil resistance is a total game-changer; it lets you see if the internal windings are actually shot or if the coil is still within spec. If the resistance numbers are way off, then you know you’ve found your culprit. It’s all about isolating the variable so you aren’t guessing. Once you pinpoint the bad unit, the actual swap is easy, and you’ll save yourself a massive headache at the dealership.

    Pro Tips to Save You a Headache (and a Trip Back to the Shop)

    • Grab a magnetic parts tray before you even crack the hood. I’ve spent way too many late nights hunting for a single 10mm bolt that rolled under a workbench because I was too lazy to use one.
    • Don’t just yank on the old wires. If you pull the coil pack by the electrical connector instead of the plastic housing, you’re asking for a broken clip, and those little plastic bits are a nightmare to replace.
    • Inspect the spark plugs while you’re in there. There’s no point in installing fresh coils if you’re about to dump old, fouled plugs back into the engine; you might as well do the whole job right once.
    • Use a tiny bit of dielectric grease on the inside of the new coil boots. It keeps the connection clean and prevents the rubber from sticking to the plug, which makes your next repair way easier.
    • Double-check your torque. You don’t need a massive torque wrench for this, but don’t go gorilla on the bolts either—overtightening them can crack the housing or strip the threads in the cylinder head.

    The Bottom Line on Your Coil Packs

    Don’t let a rough idle scare you into a massive shop bill; if you’ve narrowed the misfire down to one specific cylinder, it’s almost certainly just a coil pack that needs swapping.

    You don’t need a fancy diagnostic computer to do this right—just grab a decent socket set, keep your magnetic tray handy so you don’t lose those bolts, and take your time.

    Replacing these is one of the easiest ways to save money, so don’t let a mechanic talk you into a whole new ignition system when a simple part swap is all you actually need.

    ## The Truth Under the Hood

    “Most shops will charge you an arm and a leg just to swap a coil pack, but once you realize it’s basically just a ‘plug and play’ job, you’ll realize you’ve been overpaying for something you could’ve done yourself in twenty minutes.”

    Nikolai·Osterman

    Don't Let the Shop Charge You for a Simple Fix

    Don't Let the Shop Charge You for a Simple Fix.

    Look, replacing coil packs isn’t some high-level engineering feat that requires a specialized lab. We’ve covered the symptoms—that annoying stumble under acceleration and the dreaded check engine light—and we’ve walked through the actual process of swapping them out. Once you realize it’s basically just unplugging a connector and spinning a bolt, the intimidation factor disappears. Just remember to keep your workspace clean, use that magnetic tray for the bolts so you don’t lose them in the engine bay, and always double-check that the clips are fully seated before you try to fire the engine back up.

    At the end of the day, my goal is to see you walk away from a repair job with more money in your pocket and more confidence in your hands. There’s a specific kind of satisfaction that comes from hearing your engine smooth out after you did the work yourself. You don’t need to be a master technician to take care of your own machine; you just need to be willing to get your hands dirty. Stop letting the fear of a little grease keep you from being self-sufficient. Grab your socket wrench, get under that hood, and take control of your ride.

    Frequently Asked Questions

    Do I really need to replace all the coil packs at once, or can I just swap the one that's acting up?

    Look, if you’re on a tight budget, you can definitely just swap the one that’s acting up. It’ll get you back on the road immediately. But honestly? If one coil pack has gone, the others aren’t far behind—they’ve all been through the same heat and miles. If you have the extra cash, I’d recommend doing the whole set. It saves you from having to tear the engine back apart in a month.

    How do I know if it's actually a bad coil pack and not something else like a spark plug or a sensor?

    Look, this is where most people get stuck and end up paying a shop way too much for a “diagnostic fee.” The easiest way to tell is the swap test. If you’ve got a misfire on cylinder three, grab your magnetic tray and swap that coil with cylinder one. If the misfire jumps to cylinder one, you’ve found your culprit. If it stays put? It’s probably your spark plug or a sensor.

    Is there a specific way to plug the connectors back in so I don't snap those plastic clips?

    Look, those plastic clips are the absolute worst—one wrong move and they snap, leaving you hunting for electrical tape and zip ties. Don’t just shove the connector on and hope for the best. Line up the grooves first, then push firmly until you actually hear that distinct click. If you feel too much resistance, stop. Back it out, check if the tab is seated right, and try again. Don’t force it; just be patient.

  • How to Bleed Brakes to Remove Air

    How to Bleed Brakes to Remove Air

    I remember sitting in my dad’s garage when I was twelve, staring at a brake pedal that felt like stepping on a wet sponge. I was terrified that I’d somehow ruined the entire system just by opening a single valve, and honestly, most shops will try to make you feel that same way so they can charge you three hundred bucks for a basic service. But here’s the truth: the whole brake bleeder procedure isn’t some dark magic reserved for master techs with expensive diagnostic computers. It’s just about managing pressure and making sure you don’t let any air sneak back into those lines while you’re working.

    I’m not here to give you some textbook lecture or a list of fancy tools you don’t actually need. Instead, I’m going to walk you through the exact way I handle this at the shop, from the first pump of the pedal to that final, firm stop. We’re going to cover how to spot air bubbles, how to keep your brake fluid from ruining your paint, and how to get it done right the first time. Let’s get to work.

    Table of Contents

    Guide Overview

    Total Time: 1-2 hours
    Estimated Cost: $30-60
    Difficulty: Intermediate

    Tools & Supplies

    • Wrench (Flare nut or box wrench to fit bleeder valve)
    • Vacuum Pump or Syringe (to assist fluid extraction)
    • Clear Tubing (to connect valve to container)
    • Jack and Jack Stands (to lift and secure the vehicle)
    • Brake Fluid (1-2 bottles, matching vehicle DOT specification)
    • Catch Container (to collect old fluid)
    • Rags (to clean spills and residue)

    Step-by-Step Instructions

    • 1. First things first, you gotta grab a fresh bottle of brake fluid that actually matches what your manual says—don’t go using some old, mystery bottle you found under the sink. Jack up the car, secure it on sturdy jack stands, and get all four wheels off so you can actually see the calipers. If you’re working alone, make sure you’ve got a clear workspace because things are about to get pretty messy.
    • 2. Head over to the master cylinder under the hood and top it off. This is the most important part: if you let that reservoir run dry while you’re working, you’ll suck air into the whole system and end up having to start the entire process over from scratch. Keep a close eye on the level throughout the whole job; I always keep a spare bottle right next to me just in case.
    • 3. Now, find the bleeder screw on the caliper. It’s usually a little metal nipple sticking out, and you’ll need a clear piece of plastic tubing that fits snugly over it. Attach one end of the tube to the screw and drop the other end into a clean glass jar with a little bit of brake fluid already in the bottom. This helps prevent air from being sucked back into the lines when you let go.
    • 4. This is where you need a buddy, or you’ll be doing a lot of extra running back and forth. Have your helper sit in the driver’s seat and pump the brake pedal a few times before telling them to hold it down firm. Once they’ve got the pedal pinned to the floor, you go ahead and crack that bleeder screw open just a fraction of a turn. You’ll see air bubbles and old, dark fluid rushing through the tube.
    • 5. Keep that screw open until the flow slows down, but don’t let them release the pedal while the screw is open. If they lift their foot while the valve is loose, you’re just letting air right back into the system. Once the fluid looks steady, tighten the screw back up, and then tell them they can let the pedal up. It’s all about that rhythm.
    • 6. Repeat this whole process for every single wheel, but if you want to do it the right way, start with the one furthest from the master cylinder—usually the passenger rear. Work your way closer to the engine one wheel at a time. You’ll know you’re done when the fluid coming through the tube looks clear and you don’t see a single annoying little bubble popping in the jar.
    • 7. Once you’ve hit all four corners, double-check your fluid level in the reservoir one last time and tighten the cap. Before you even think about driving, pump the brakes a few times while the car is still parked to make sure the pedal feels firm and responsive. If it feels spongy like a marshmallow, you’ve still got air in there and you need to go back and hit it again.

    Essential Brake Bleeding Tools You Actually Need

    Essential Brake Bleeding Tools You Actually Need

    Look, you don’t need to drop a fortune on a professional shop setup to get this done, but you can’t just wing it with a pair of pliers and a prayer. First off, grab a decent set of flare nut wrenches. Using a standard open-end wrench on a brake caliper bleeder valve is a rookie mistake that’ll leave you with a rounded-off bolt and a much bigger headache than you started with. I always keep my magnetic parts tray handy because those little caps and bolts love to disappear into the garage floor the second you look away.

    You’ll also need a clear plastic hose that fits snugly over the nipple and a clean catch bottle. If you’re doing this solo, a vacuum bleeder can save your sanity, but even a basic gravity setup works if you’re patient. Most importantly, keep a close eye on your brake fluid reservoir levels throughout the whole process. If that reservoir runs dry while you’re working, you’ve just sucked a massive gulp of air back into the system, and you’ll have to start the entire job from scratch.

    How to Remove Air From Brake Lines Like a Pro

    How to Remove Air From Brake Lines Like a Pro

    Look, once you’ve got your tools laid out, the real trick to knowing how to remove air from brake lines isn’t just about the mechanical movement; it’s about the rhythm. If you’re working solo or even with a buddy, you have to be incredibly disciplined about checking your brake fluid reservoir levels every single time you pump the pedal. If that reservoir runs dry halfway through the process, you’ve just sucked a massive gulp of air back into the system, and you’re basically starting from scratch. I’ve seen guys spend hours on a job only to realize they skipped this one simple check, turning a quick fix into a massive headache.

    Another thing to watch for is the consistency of your work. When you’re loosening that brake caliper bleeder valve, don’t just crank it open and hope for the best. You want a steady, controlled flow. If you see bubbles that look like foam rather than distinct pockets of air, you’re likely agitating the fluid too much. After you think you’re finished, the ultimate test is your brake pedal feel after bleeding. If it still feels spongy or dives toward the floor, you’ve still got air trapped in a corner somewhere. Don’t settle for “good enough”—keep at it until it feels rock solid.

    Pro Tips to Keep You From Messing This Up

    • Start with the wheel furthest from the master cylinder. If you start with the one closest, you’re just going to push air around instead of actually getting it out of the lines.
    • Keep a constant eye on your brake fluid reservoir. If that level drops too low while you’re pumping the pedal, you’ll suck air right back into the system and have to start the whole headache all over again.
    • Don’t go full throttle on the pedal. If you’re doing it manually, use steady, controlled pumps. If you stomp it like you’re racing, you’re more likely to miss the window when the bleeder is open and spray fluid everywhere.
    • Clean your bleeder valves before you even touch them. I’ve seen guys snap a crusty, rusted valve right off the caliper because they didn’t spray some brake cleaner on it first. A little prep saves a lot of money.
    • Always use fresh fluid. Don’t try to be cheap and reuse the old, murky stuff sitting in the reservoir. Fresh fluid is the only way to ensure you aren’t just bleeding air into a system full of moisture and junk.

    The Bottom Line on Getting it Done Right

    Don’t rush the process; if the pedal feels spongy, you’ve still got air in the lines and need to keep bleeding until it’s firm.

    Keep an eye on your reservoir level like a hawk—if you let it run dry while bleeding, you’ll suck air back in and have to start the whole mess over.

    You don’t need a fancy shop setup to do this, just the right basic tools and enough patience to make sure every bubble is out before you hit the road.

    The Truth About the Bleed

    Most people think a spongy brake pedal is a sign of a massive failure, but usually, it’s just a handful of air bubbles that you could’ve fixed yourself with twenty minutes of patience and a decent wrench.

    Nikolai·Osterman

    Don't Leave It to Chance

    Don't Leave It to Chance: Bleed brakes.

    Look, bleeding your brakes isn’t some high-level engineering feat, but it does require you to stay focused. You’ve got your tools ready, you know how to work that bleeder valve, and most importantly, you know how to spot when that air is finally gone. Just remember: keep an eye on that master cylinder reservoir so you don’t run it dry mid-process, or you’ll be starting this whole headache all over again. If you follow the steps, keep your lines clean, and never rush the pump, you’re going to end up with a pedal that feels firm and responsive instead of that mushy, dangerous sensation.

    At the end of the day, the goal isn’t just to get the job done; it’s about having the confidence to trust your own hands. There’s a specific kind of satisfaction that comes from pulling into your driveway knowing you didn’t pay a shop a couple hundred bucks for something you did yourself in your own garage. It’s about taking ownership of your machine and making sure it stays safe on the road. So, grab your wrench, get a little grease on your hands, and stop letting the fear of a little technicality keep you from maintaining your own ride. You’ve got this.

    Frequently Asked Questions

    What happens if I accidentally let the master cylinder run dry while I'm bleeding the lines?

    Man, that’s a headache you definitely want to avoid. If that master cylinder runs dry, you’ve basically sucked a massive gulp of air straight into the entire system. It’s not just a little bubble anymore; you’re looking at a total reset. You’ll have to bleed every single corner again, and honestly, it might take a few tries to get it feeling firm again. Keep a close eye on that reservoir level—don’t let it dip.

    Do I really need a second person to pump the pedal, or is there a way to do this solo with a vacuum pump?

    Look, I’ll be real with you: having a buddy pump the pedal is definitely easier, but it’s not the only way. If you’re flying solo, a vacuum pump is a solid workaround. It’ll suck the air and fluid through the caliper on its own. Just a heads-up though—cheap vacuum pumps can sometimes suck in extra air if the seals aren’t perfect. If you go that route, just take it slow and stay focused.

    How do I know for sure when all the air is actually out and I'm not just seeing bubbles from the fluid itself?

    That’s a fair question, and honestly, it’s where most people get nervous. You’re looking for a steady, solid stream of fluid through the clear hose. If you see tiny, consistent bubbles, that’s usually just aeration from the fluid itself—don’t sweat it. But if you see a burst of bubbles followed by a clear stream, that’s air leaving the lines. Once the pedal feels firm and doesn’t sink to the floor, you’re golden.