
I remember pulling into the shop last Tuesday with a customer who was absolutely livid because the dealership quoted him four hundred bucks just to swap out a cracked housing. He thought he was looking at a massive electrical nightmare, but honestly? It was just a few plastic clips and a standard screwdriver away from being fixed. Most people think a side mirror replacement is some high-tech, sensor-heavy ordeal that requires a computer programmer, but that’s just marketing fluff designed to keep your wallet thin.
I’m not here to give you some polished, textbook lecture that ignores how messy real work actually is. I’m going to walk you through the actual grit of the job, from popping the door panel without snapping those annoying plastic tabs to making sure your heated elements actually work when you’re done. You’re going to get the no-nonsense truth on the tools you actually need and the small mistakes that usually trip people up. Let’s get under the hood—or in this case, inside the door—and get this sorted so you can stop overpaying for basic maintenance.
Table of Contents
- Step-by-Step Instructions
- Essential Automotive Mirror Repair Tools You Actually Need
- How to Fix Cracked Mirror Glass Without a Pro
- Pro Tips to Keep You From Screwing This Up
- The Bottom Line on Mirror Repairs
- ## Don't Let a Small Crack Cost You a Big Bill
- Wrapping It All Up
- Frequently Asked Questions
Guide Overview
Tools & Supplies
- Socket wrench set to remove mounting bolts
- Trim removal tool to pry off plastic panels
- Screwdriver to detach electrical connectors
- Replacement side mirror assembly (1 unit)
- Microfiber cloth for cleaning contact surfaces
Step-by-Step Instructions
- 1. First things first, grab your tools and get inside the car. You’re going to need a screwdriver (usually Phillips head), maybe a small trim removal tool if you don’t want to scratch your door panel, and a socket set. Before you even touch a screw, pop the mirror glass out by gently prying it from the corner. Most of them just snap out with a bit of leverage, but don’t go hammering on it or you’ll shatter the glass everywhere.
- 2. Once the glass is out of the way, you’ll see the motor assembly and a plastic cover underneath. This is where people usually get intimidated, but it’s just a few clips and screws. Use your trim tool to carefully pry that plastic housing away. You might have to dig around a little to find where the clips are seated, but once they pop, you’re in the clear.
- 3. Now, look for the mounting bolts. These are usually tucked deep inside the door cavity, holding the mirror assembly to the actual metal of the car. You’ll likely need a socket wrench for this part. I always keep my magnetic parts tray handy here because if you drop one of these bolts into the bottom of the door, you’re going to have a very long afternoon trying to fish it out.
- 4. After you’ve loosened and removed the bolts, you can finally pull the old mirror assembly away from the door. It might feel stuck because of the weather stripping, so give it a firm, steady tug. Once it’s off, take a second to clean the mounting surface. If there’s dirt or old debris stuck in there, your new mirror won’t sit flush, and that’s just asking for wind noise or leaks later on.
- 5. Line up your new mirror with the mounting holes. This is a bit of a balancing act since you’re holding the weight of the mirror while trying to thread the bolts back in. Take your time with this part; you don’t want to cross-thread a bolt and ruin the mounting point. Get the bolts started by hand first to make sure they’re catching right before you tighten them down with the wrench.
- 6. With the mirror securely bolted to the door, it’s time to snap that plastic cover back on. Press it firmly until you hear the clips click into place. If it feels loose, something is probably misaligned, so pull it back and try again. You want it to look like it came straight from the factory.
- 7. The final step is putting the glass back in. Line up the clips on the back of the mirror glass with the slots on the motor assembly. Give it a firm press until it snaps into place. Once that’s done, turn your car on and test the power adjustments to make sure the motor is actually moving. If it works, you just saved yourself a massive markup at the dealership.
Essential Automotive Mirror Repair Tools You Actually Need
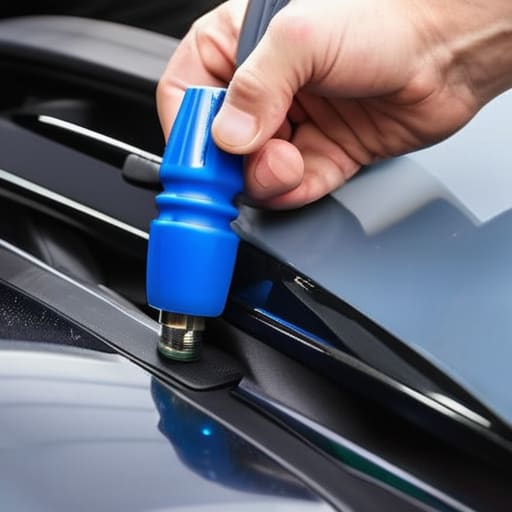
Look, you don’t need a massive rolling toolbox to get this done, but don’t go trying to wing it with a kitchen knife or a dull screwdriver. If you’re planning to replace broken side view mirror components, you’re going to want a decent set of socket extensions and a trim removal tool. I can’t stress this enough: using a flathead screwdriver to pry off your door panel is a one-way ticket to scratching your paint or snapping a plastic clip. Grab a cheap plastic pry tool instead; it saves your interior from looking like it went through a war zone.
Since I’m usually digging through my own kit, I’ve learned that having the right automotive mirror repair tools makes the difference between a thirty-minute job and an afternoon of frustration. If your mirror has power adjustments, make sure you have a small precision driver handy for those tiny electrical connectors. Also, if you’re dealing with a car mirror housing replacement rather than just the glass, keep a bit of electrical tape and some zip ties nearby. Sometimes the mounting bracket is a little loose, and a quick tie-down can keep everything from rattling while you’re cruising down the highway.
How to Fix Cracked Mirror Glass Without a Pro
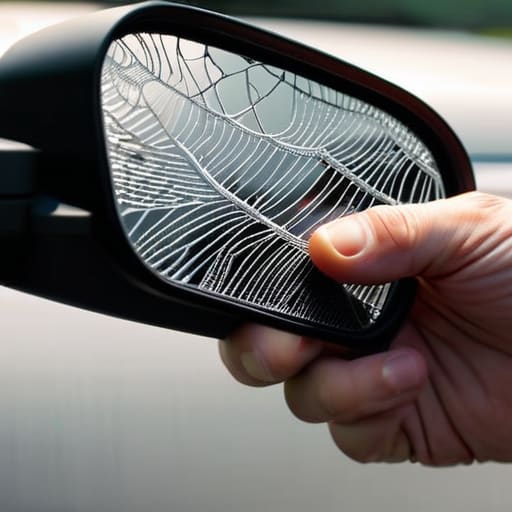
Look, if the actual plastic housing isn’t smashed, you don’t need to go out and buy a whole new assembly. A lot of guys think a crack in the glass means they have to replace broken side view mirror units entirely, but that’s just throwing money away. If it’s just the glass that’s spiderwebbed, you can usually pop the old piece out and snap a new one in. Just be careful when you’re prying—you don’t want to snap the heating elements if your car has them.
When you’re figuring out how to fix cracked mirror glass, grab a thin plastic trim tool or even a flathead screwdriver wrapped in a bit of tape so you don’t mar the surface. Once the old glass is out, wipe the backing down with some isopropyl alcohol. You want that surface completely free of grit and old adhesive before the new glass goes on. It’s a ten-minute job that saves you a hundred bucks, and honestly, it’s one of those small wins that makes DIY worth it.
Pro Tips to Keep You From Screwing This Up
- Don’t just yank the old mirror off. If you force it, you’re probably going to snap those plastic mounting clips, and then you’re looking at a much bigger headache than just a simple swap.
- Double-check your wiring before you snap the new housing into place. If your mirror has heated elements or turn signals, make sure those plugs are seated tight and clicking. There’s nothing worse than finishing the job only to realize your blinker doesn’t work.
- Keep a small container or even a piece of tape handy for the bolts. I always keep my magnetic parts tray in my back pocket for a reason—those tiny screws love to disappear into the floor mat the second you drop them.
- If you’re working on a car with power-folding mirrors, make sure the electronics are turned off or the fuse is pulled if you’re getting weird resistance. You don’t want to burn out a motor because the system was trying to adjust while you were mid-install.
- Clean the mounting surface thoroughly before you put the new one on. If there’s old grit or dried sealant in the way, the new mirror won’t sit flush, and you’ll end up with annoying rattles every time you hit a pothole.
The Bottom Line on Mirror Repairs
Don’t let a shop charge you a fortune just because a mirror looks intimidating; if you’ve got the right screwdriver and a little patience, it’s a job you can handle in your own driveway.
Always double-check if you’re replacing the whole assembly or just the glass—sometimes it’s a five-minute fix, and other times you’ll need to tackle the wiring.
Keep your workspace organized, especially with those tiny mounting clips, so you aren’t hunting for lost parts halfway through the job.
## Don't Let a Small Crack Cost You a Big Bill
“A busted side mirror isn’t a reason to hand over a couple hundred bucks to a service advisor; it’s just a twenty-minute job that’s waiting for you to grab a screwdriver and get it done.”
Nikolai·Osterman
Wrapping It All Up
Look, swapping out a side mirror might seem intimidating when you’re staring at all those wires and plastic clips, but we just broke it down. Whether you were just replacing the glass or pulling the entire assembly out of the door panel, the core process is the same: get the right tools, take your time with the fasteners, and don’t force anything that feels stuck. Most of the time, a little bit of patience and a steady hand with a screwdriver is all it takes to get back on the road safely. You’ve got the tools, you’ve got the steps, and now you’ve got a mirror that actually works without draining your bank account at a dealership.
At the end of the day, my goal isn’t just to teach you how to fix a mirror; it’s to show you that you’re capable of more than you think. Every time you pick up a wrench and tackle a job yourself, you’re taking control of your own machine. Don’t let the fear of a little grease or a confusing wire harness keep you from owning your maintenance. Keep practicing, keep learning, and remember that most of these “complex” repairs are just puzzles waiting to be solved. I’ll see you in the next one—now go get that car back in shape.
Frequently Asked Questions
What if my mirror has heated glass or power-folding features—is the process way more complicated?
Look, if your mirror has heating or power-folding, it’s not necessarily “harder,” it just means there’s more wiring to respect. You aren’t just dealing with a plastic shell anymore; you’re dealing with electrical connectors. Don’t just yank on the housing. You’ll need to be extra careful when unplugging the harness to avoid snapping those tiny plastic clips. As long as you take your time and don’t force anything, you’ll be fine.
How do I know if I can just swap the glass, or if I actually have to pull the whole housing off the door?
Look, here’s the deal: if the plastic housing is intact and only the glass is shattered or pitted, don’t waste your time pulling the whole assembly off. You can usually just pop the glass out. But, if you’ve got a cracked mirror cap, a loose mounting arm, or your power adjustments aren’t working, that’s a different story. In those cases, you’re swapping the whole unit. Don’t overcomplicate it—check the plastic first.
Is there a way to tell if the motor inside the assembly is dead versus just having a loose wire?
It’s a fair question, and honestly, it’s what saves you a ton of money. Here’s the trick: if you can hear a faint clicking or whirring sound when you hit the switch, but the glass doesn’t move, you probably just have a loose connection or a stripped gear. But if it’s dead silent and you’ve already checked your fuses, the motor is likely toast. Use a multimeter to check for power at the plug first.
