
I was pulling into the shop last Tuesday when I heard that unmistakable tink—the sound of a pebble deciding it wanted to live inside my glass. Most people see a little crater in their windshield and immediately think they need to drop a few hundred bucks at a glass shop for a full replacement. Honestly, it drives me crazy how shops try to upsell you on a whole new windshield when a simple windshield chip repair is all you actually need. You aren’t driving a high-end luxury tank; you’re driving a machine that just needs a little bit of TLC to stay functional.
Look, I’m not here to sell you some overpriced professional service or give you a lecture on glass density. I’ve spent enough time under hoods and around broken parts to know that most of this stuff is way simpler than they want you to believe. I’m going to show you exactly how to tackle this yourself using a basic kit and a little patience. My goal is to make sure you walk away knowing how to handle it without getting ripped off by a mechanic who thinks you don’t know any better.
Table of Contents
Windshield Repair Kit vs Professional Service Who Wins
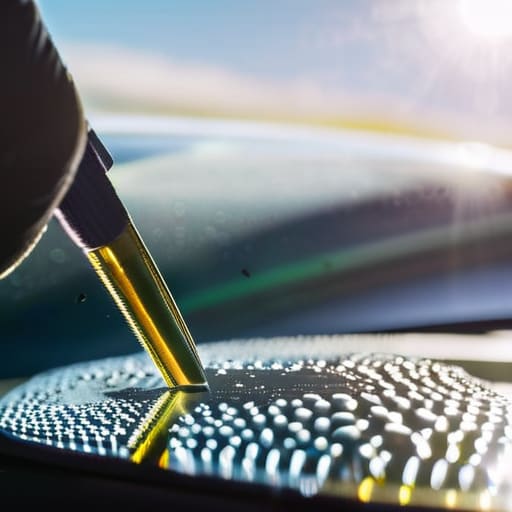
Look, I get the temptation to grab a cheap kit from the auto parts store. When you’re looking at the cost of windshield chip repair, doing it yourself feels like a massive win for your wallet. If it’s just a tiny pit and you catch it early, a DIY kit can work. You just need to be meticulous with the windshield resin curing process—if you mess up the pressure or leave air bubbles, you’ve basically just made the damage permanent.
But here’s the reality from someone who sees what happens in a shop: sometimes, you need a pro. If the chip is near the edge of the glass or looks like a “star,” a DIY kit won’t cut it. A technician does a proper damage assessment for auto glass to see if the structural integrity is actually compromised. I’ve seen guys try to save fifty bucks only to end up needing a total replacement because they didn’t realize the crack was already deep. If you’re unsure, get a professional auto glass safety inspection first. It’s better to pay a little now than to replace the whole damn windshield next week.
A Quick Damage Assessment for Auto Glass Success

Before you go diving into a DIY kit, you need to take a second to actually look at what you’re dealing with. I always tell people that a quick damage assessment for auto glass can save you a massive headache later. Run your finger near the chip—don’t press hard, obviously—to see if the edges feel jagged or if there’s a long crack branching out. If the damage is smaller than a quarter and doesn’t have long “legs” stretching across the glass, you’re usually in the clear for a home fix.
However, if that chip looks more like a spiderweb or is sitting right in the driver’s direct line of sight, stop right there. At that point, you’re looking at more than just a simple fix; you’re looking at a potential safety issue. Preventing windshield cracks from spreading is much easier when the damage is fresh and contained. If the crack is already moving, no amount of resin is going to pull that glass back together, and you’ll be looking at a full replacement instead of a cheap patch job.
Pro Tips to Keep That Crack from Spreading
- Clean the area before you even touch it. If there’s grit or dirt stuck in that chip, your resin won’t seat properly, and you’ll end up with a visible scar instead of a fix. Just use a little compressed air or a soft brush—don’t go shoving a screwdriver in there.
- Watch the temperature. If you’re working in a freezing garage or under a blistering sun, the glass is going to be stressed. Try to work in the shade and let the car sit at a normal temperature first so the resin flows the way it’s supposed to.
- Don’t skip the curing time. I see people rush this all the time because they want to get back on the road. Once you hit it with the UV light or put it in the sun, leave it alone. Let that resin harden completely before you start buffing it out.
- Keep the moisture out. If it’s raining or even just humid, avoid doing the repair. Water is the enemy here; if there’s moisture inside the chip, the resin won’t bond to the glass, and you’re basically just sealing in a puddle.
- Use a piece of clear tape as a temporary shield. If you aren’t ready to do the repair right this second, slap some clear packing tape over the chip. It keeps the dirt out and stops the edges from catching more debris until you can actually get to it.
The Bottom Line Before You Start
Stop procrastinating; a tiny chip is cheap to fix now, but once it spiderwebs across your view, you’re looking at a massive bill for a full windshield replacement.
If the damage is bigger than a quarter or sitting right in your line of sight, skip the DIY kit and go see a pro—some things just aren’t worth the risk of a cracked screen.
Grab a decent repair kit and do the work yourself if the chip is small, but make sure you clean the area properly first, or you’ll just end up with a permanent, ugly scar in the glass.
The Real Cost of Waiting
“Look, I’ve seen it a hundred times in the shop: a guy walks in with a tiny little pit in his glass, ignores it for a month, and then drives over a pothole. Suddenly, that fifty-dollar fix turns into a six-hundred-dollar replacement. Don’t be that guy. Catch the chip while it’s small, fix it yourself, and keep that money in your pocket instead of the shop’s.”
Nikolai·Osterman
Don't Wait Until It's Too Late

Look, the bottom line is pretty simple: if you catch a chip early, you can usually handle it with a decent DIY kit for a fraction of what a shop will charge you. Just remember to assess the damage first—if that crack is already spidering out or hitting the edge of the glass, put the kit away and call a pro. You don’t want to mess around with a structural failure while you’re hitting highway speeds. Whether you choose the quick DIY route or decide to hand it over to a specialist, the most important thing is that you don’t ignore it. A tiny pit today is a massive, expensive headache tomorrow.
At the end of the day, keeping your car in good shape shouldn’t feel like you’re being held hostage by a service advisor’s quote. I spent years watching people get overcharged for things they could have handled themselves with a little bit of focus and the right tools. Once you realize that most of these “scary” repairs are actually pretty manageable, you stop feeling intimidated by your own vehicle. Grab a kit, take control of your maintenance, and stop letting small issues turn into major money pits. You’ve got this.
Frequently Asked Questions
Can I actually fix a crack that’s already longer than a few inches, or is it too late for a DIY kit?
Look, I’ll be straight with you: if that crack is already stretching out a few inches, you’re playing with fire. DIY kits are great for those little “bullseye” chips or tiny cracks, but once a crack starts traveling, it’s usually too far gone for a resin kit to stabilize it. If you try to patch a long crack, you’ll likely just end up with a messy, ugly line that still compromises your view. At that point, it’s time for a replacement.
How long do I have to wait after fixing a chip before I can go through a car wash or drive in heavy rain?
Look, I’ve seen too many people rush this and end up with a spiderweb crack because they were impatient. If you’re using a resin kit, give it at least 24 hours before hitting a car wash or driving through a downpour. You want that resin fully cured and bonded to the glass. If you hit it with high pressure or heavy rain too soon, you risk pushing moisture back into the chip and ruining the seal. Just wait.
Is there a specific way to prep the glass so the resin actually sticks and doesn't just pop right back out?
Look, if you don’t prep the spot, that resin is just gonna sit on the surface like a bead of water. First, grab some fine-grit sandpaper or even a tiny bit of glass polish to clear out any dirt or loose glass shards inside the pit. Then, hit it with some isopropyl alcohol on a microfiber cloth. You need it bone-dry and totally decontaminated. If there’s even a hint of grease or dust left, the bond’s gonna fail.
