
I was staring at a repair estimate yesterday that made my blood boil—a local shop wanted nearly a grand just to swap out a tiny piece of plastic and wiring. They tried to frame it like some high-level surgical procedure that only a master technician could handle, but that’s a total lie. Most of the time, a transmission sensor replacement isn’t some deep, mechanical mystery that requires a specialized degree; it’s usually just a matter of getting into a tight spot and having the right socket on hand. I’ve spent enough weekends in my dad’s garage to know that mechanics love to gatekeep simple fixes to pad their invoices.
I’m not here to give you some textbook lecture or a list of “optimal vehicle procedures” that sound like they were written by a robot. Instead, I’m going to walk you through exactly how to tackle this job yourself, from the moment you pull the code to the second you clear that check engine light. I’ll show you the specific tools you actually need, the common pitfalls that’ll leave you covered in gear oil, and how to get it done right without getting ripped off.
Table of Contents
- Step-by-Step Instructions
- Spotting Transmission Sensor Symptoms Before They Break You
- Transmission Electrical Troubleshooting Without the Mechanics Markup
- Don't Make These Rookie Mistakes: 5 Pro Tips for the Swap
- The Bottom Line on Your Transmission
- ## Don't Let the Dashboard Scare You
- Don't Let the Shop Win
- Frequently Asked Questions
Guide Overview
Tools & Supplies
- Socket set and ratchet for removing bolts
- Screwdriver set for electrical clips and clamps
- Pliers for tension clips or hose clamps
- OBD-II scanner to clear error codes
- Replacement transmission sensor (1 unit)
- Transmission fluid (1-2 quarts depending on loss)
- Shop rags for cleaning spills
Step-by-Step Instructions
- 1. First things first, you gotta get the car up and stable. Don’t be a hero and try to work under a car held up by just a jack; grab some jack stands and make sure the vehicle isn’t going anywhere. Once you’re safely underneath, locate the transmission housing. It’s usually pretty easy to spot once you clear away some of the plastic shielding or road grime, but if you can’t see it, don’t panic—just follow the wiring harness coming from the engine down to the gearbox.
- 2. Before you even touch a wrench, find the electrical connector for the sensor. These things get hit with heat cycles and road salt, so the plastic clips can get pretty brittle. I always recommend spraying a little bit of electrical contact cleaner around the plug first to loosen things up. Gently depress the locking tab and pull it straight back. If it feels like it’s about to snap, stop pulling and wiggle it side-to-side a bit more to avoid breaking the clip.
- 3. Now, grab your socket set. Most of these sensors are held in by a single bolt—usually a 10mm or a 12mm. Make sure your socket is seated completely flush against the bolt head before you put any real pressure on it. If you’re at an angle, you’re just going to round off the head, and then you’ve got a much bigger headache on your hands. Once the bolt is out, keep it safe in your magnetic parts tray so it doesn’t end up in the bottom of your oil pan.
- 4. Pull the old sensor out. It might be a little stubborn if the O-ring has been baked in there for years. If it’s stuck, give it a gentle twist as you pull. Once it’s out, take a second to look inside the hole. You want to make sure there’s no leftover debris or old gasket material sitting in there. If it looks messy, wipe it out with a clean rag. You want a perfectly clean surface for the new seal to sit on.
- 5. Grab your new sensor and check the O-ring. I always suggest taking a tiny bit of clean transmission fluid or assembly lube and rubbing it onto the new rubber seal. This helps it slide into place without pinching or tearing, which is the number one reason why people end up with leaks right after a “successful” repair. Slide the new sensor into the housing, making sure it’s seated all the way down before you even think about the bolt.
- 6. Thread the bolt back in by hand first. This is a huge tip: never start tightening with your ratchet. If you cross-thread a sensor into a transmission case, you’re looking at a repair that costs way more than a simple sensor swap. Once you’re sure it’s going in straight, snug it up with your wrench. You don’t need to go overboard here—just enough to be tight and secure.
- 7. Finally, plug that electrical connector back in until you hear it click. Give the wire a tiny tug just to make sure it’s actually locked into place. Before you lower the car, I like to double-check that I haven’t left any tools or rags sitting on the subframe. Once everything looks clean, lower the car, start it up, and check your dash to make sure that annoying check engine light has finally gone dark.
Spotting Transmission Sensor Symptoms Before They Break You

The thing is, you don’t always have to wait for the car to stop moving entirely before you know something is wrong. Usually, your car starts throwing little hints at you. You might notice the gear shifts feeling “clunky” or notice the RPMs jumping around like crazy when you’re just cruising down the highway. These are classic transmission sensor symptoms that most people ignore until they’re stranded on the shoulder. If you feel a weird hesitation when you step on the gas, don’t just assume it’s old age—it’s often just a sensor sending garbage data to the computer.
If you want to be proactive, grab a cheap OBD-II scanner. Instead of guessing, you can look up the specific diagnostic trouble codes transmission modules are throwing. It saves so much headache when you can pinpoint exactly which sensor is acting up before you start tearing things apart. I always tell people to do a quick transmission fluid level check first, too. Sometimes a low fluid level messes with the sensor readings, and you don’t want to go through the whole process of a part replacement if all you actually needed was a quart of Dexron.
Transmission Electrical Troubleshooting Without the Mechanics Markup
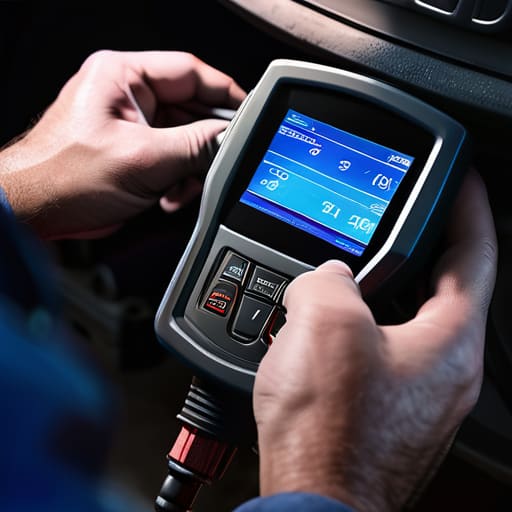
Before you go tearing into the hardware, you’ve got to make sure it’s actually an electrical issue and not just a mechanical fluke. I’ve seen plenty of guys jump straight into a part replacement only to realize their fluid was low or the wiring was just chewed up by a rodent. Start with a quick transmission fluid level check—if you’re low, your sensors might just be reading air instead of oil. If the fluid looks fine, grab a cheap OBD-II scanner. You aren’t looking for a magic wand, but catching those diagnostic trouble codes transmission modules throw out will tell you exactly which circuit is acting up.
If the codes point to a sensor, don’t just swap it blindly. Use a multimeter to check for continuity in the wiring harness. Sometimes the sensor is perfectly fine, but the connector is corroded or the wires are frayed. A little contact cleaner and some basic transmission electrical troubleshooting can save you fifty bucks and a trip to the parts store. Most of the time, it’s just a bad ground or a loose plug, not a dead component. Don’t let them charge you for a whole new unit when it’s just a bad connection.
Don't Make These Rookie Mistakes: 5 Pro Tips for the Swap
- Clean the connector before you touch it. I’ve seen way too many people swap a perfectly good sensor only to realize the old one just had some grit or oil in the plug. Use some electronic cleaner to make sure that connection is actually solid.
- Don’t go cheap on the part. I get it, the aftermarket sensors are way cheaper, but if you buy the bottom-of-the-barrel stuff, you’ll be back under the car in two weeks. Stick to OEM or a high-quality brand if you want to actually fix the problem.
- Keep your magnetic tray handy. Seriously, don’t be the guy hunting for a dropped 10mm bolt in a puddle of transmission fluid for forty minutes. Keep your bolts organized or you’ll end up with a handful of extra parts and a lot of regret.
- Watch your torque specs. These sensors are usually plastic or have delicate threads; if you go full-gorilla on the wrench, you’re going to crack the housing. Tighten it until it’s snug, not until you hear something snap.
- Double-check your ground wires. A lot of times, what looks like a dead sensor is actually just a corroded ground wire nearby. While you’re in there, give any nearby wiring a quick once-over to make sure the electrical path is clean.
The Bottom Line on Your Transmission
Don’t let a flashing check engine light scare you into a thousand-dollar repair bill; most of the time, it’s just a sensor that needs swapping, not a whole new gearbox.
Trust your gut and your tools—if the car is shifting weird or acting up, do the electrical troubleshooting yourself before you let a shop tell you the worst-case scenario.
You don’t need a master technician’s certification to handle this, just a decent socket set, a bit of patience, and the willingness to get your hands a little greasy.
## Don't Let the Dashboard Scare You
A flashing check engine light or a weird shift feels like a death sentence for your wallet, but half the time, it’s just a sensor acting up. Don’t let a mechanic convince you that you need a whole new transmission when all you really need is a clean connector and a basic socket set.
Nikolai·Osterman
Don't Let the Shop Win
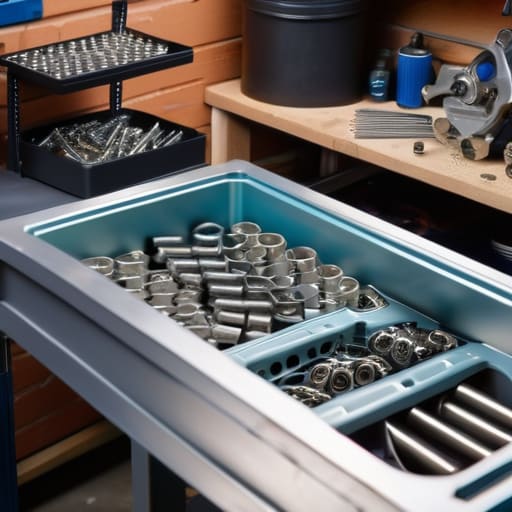
Look, replacing a transmission sensor isn’t some high-level engineering feat that requires a master technician and a massive invoice. We’ve gone through the symptoms, tracked down the electrical gremlins, and walked through the actual swap. If you took the time to properly troubleshoot the wiring before buying parts, you’ve already done the hardest part of the job. Just remember to keep your workspace clean, double-check those electrical connections, and make sure you’ve got your magnetic parts tray handy so you don’t lose a vital bolt in the chassis. Once that new sensor is seated and the codes are cleared, you’re back in business without having handed over half a paycheck to a service advisor.
At the end of the day, the gap between “I can’t fix this” and “I just fixed this” is a lot smaller than the dealerships want you to believe. Every time you pick up a wrench and tackle a sensor or a simple repair yourself, you’re taking back control of your own ride. It might be a little messy, and you might end up with some grease under your fingernails, but that’s just part of the process. Don’t be intimidated by the sensors or the computer codes; just stay patient, trust your gut, and keep learning. You’ve got this.
Frequently Asked Questions
Do I really need to clear the error codes with an OBD-II scanner after I swap the sensor, or will the car figure it out on its own?
Look, the car isn’t a mind reader. Even with a brand-new sensor, that Check Engine Light is probably going to stay staring you down. Most modern ECUs won’t just “forget” the fault on their own immediately. You can try driving it to see if the code clears itself after a few drive cycles, but honestly? Just grab your OBD-II scanner and clear it manually. It saves you the headache of wondering if it’s actually fixed.
Is there a specific type of dielectric grease I should be using on the connector to make sure it doesn't corrode or act up again in six months?
Don’t just grab whatever cheap stuff is sitting in the junk drawer. You want a high-quality silicone-based dielectric grease. I usually stick with something like Permatex—it’s reliable and won’t degrade the plastic housing or the rubber seals on the connector. It’s not meant to conduct electricity; it just seals out moisture and prevents that nasty oxidation that makes connections flaky. A little dab goes a long way to keep things from acting up again.
How do I know if it's actually a bad sensor and not just a blown fuse or a wiring issue somewhere in the harness?
Look, don’t go swapping parts just because a light popped up. Grab a multimeter first. Check the fuse—if it’s blown, you’ve likely got a short somewhere, not a dead sensor. If the fuse is fine, test the harness for continuity. If you’re getting power at the plug but the sensor isn’t sending a signal back to the ECU, then you know the sensor is actually toasted. Don’t let them charge you for a sensor you don’t need.
