Category: Guides

  • How to Bleed Air From Brake Lines

    How to Bleed Air From Brake Lines

    You ever hit the pedal and feel like you’re just pushing a sponge instead of actually stopping the car? It’s a terrifying feeling, especially when you realize you’ve got air trapped in your system. Most shops will try to tell you that brake line bleeding is some high-level, specialized procedure that requires a $500 vacuum kit and a master technician, but honestly, that’s mostly just a way to pad the bill. I remember the first time I tried this on my old project tuner; I was sweating bullets, certain I was going to wreck the whole system, but once I realized it was just about patience and the right rhythm, everything clicked.

    I’m not going to give you some textbook lecture or a list of overly complicated “safety protocols” that don’t mean anything in a real garage. Instead, I’m going to walk you through exactly how to get those bubbles out of your lines using basic tools you probably already have sitting in your toolbox. We’re going to talk about the actual tricks of the trade—like how to coordinate with a buddy so you don’t accidentally suck air back in—so you can stop getting ripped off and start driving with confidence.

    Table of Contents

    Guide Overview

    Total Time: 1-2 hours
    Estimated Cost: $20-50
    Difficulty: Intermediate

    Tools & Supplies

    • Wrench (Flare nut wrench preferred to prevent stripping)
    • Brake fluid catcher (Container to collect old fluid)
    • Clear plastic tubing (To see air bubbles in the fluid)
    • Helper (To pump the brake pedal)
    • Brake fluid (Fresh bottle matching vehicle spec)
    • Shop rags (To clean spills and mess)

    Step-by-Step Instructions

    • 1. First things first, you’re gonna need a second person. I know, I know, you wanted to do this solo, but unless you’ve got a vacuum bleeder kit, you need a buddy to pump the pedal while you work the bleeder valves. Grab a bottle of fresh brake fluid—don’t use the old, murky stuff from a half-open bottle—and make sure your workspace is clean. Even a tiny bit of dirt getting into the system can wreck your seals later on.
    • 2. Pop the hood and find your brake fluid reservoir. You’re going to fill this up until it’s near the max line. This is the most important rule: never let the reservoir run dry while you’re working. If air gets sucked in from the top because you ran out of fluid, you’re basically starting the whole process from scratch, and that’s a massive headache you don’t want.
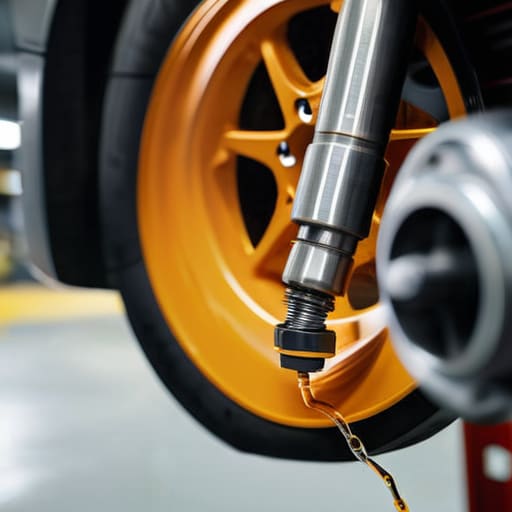
    • 3. Get down to one of the wheels. A good rule of thumb is to start with the wheel farthest away from the master cylinder—usually the passenger side rear—and work your way closer. Locate the bleeder screw on the caliper, clear off any grit with a brush, and attach your clear plastic tubing to it. Put the other end of the tube into a clean jar so you can actually see the bubbles moving through the line.
    • 4. Now, tell your buddy to sit in the driver’s seat and pump the brake pedal a few times, then hold it down firm with constant pressure. While they are holding it, you crack that bleeder screw open just a little bit. You’ll see fluid and air bubbles rushing through the tube into the jar. Once the flow slows down, tighten the screw back up before they let go of the pedal.
    • 5. This is where people usually mess up: tell your buddy to never release the pedal while the screw is open. If they lift their foot while the valve is loose, you’ll suck a huge gulp of air right back into the system. You want them to pump, hold, and then you tighten, then they release. Repeat this cycle until you see nothing but clear fluid coming through that tube with zero bubbles.
    • 6. Once you’ve finished all four wheels, go back up to the reservoir one last time. Check the level and top it off so it’s right where it needs to be. Give the pedal a few pumps to make sure it feels firm and responsive. If it feels spongy like a marshmallow, you probably missed a bubble somewhere, and you’ll need to go back and hit that wheel one more time.

    Spotting the Signs of Air in Brake Lines Before Its Too Late

    Spotting the Signs of Air in Brake Lines Before Its Too Late

    You don’t always have to wait for a complete pedal failure to know something is wrong. Usually, your car will give you a few warnings if you’re actually paying attention. The biggest giveaway is a spongy or soft brake pedal. If you press down and it feels like you’re stepping on a marshmallow instead of something firm, you’ve likely got air trapped in the system. Another huge red flag is if the pedal slowly sinks toward the floorboard while you’re sitting at a red light. That’s a classic sign that air is compressing under pressure, and you need to start removing air bubbles from brake lines immediately before you lose stopping power entirely.

    You might also notice a weird vibration or a pulsing sensation through the pedal when you try to slow down. While that can sometimes be warped rotors, if it feels “airy” rather than a hard shudder, it’s a hydraulic issue. I always tell people to keep an eye on the fluid level too; if it’s dropping, you might have a leak that’s letting air in. Don’t ignore these signs of air in brake lines, or you’ll end up stuck on the side of the road.

    Mastering the Brake Fluid Replacement Process Without the Mechanics Markup

    Mastering the Brake Fluid Replacement Process Without the Mechanics Markup

    Look, most shops will charge you a premium just to swap out your old, dark fluid for something fresh. But if you’re already down there with your wrenches, you might as well do the full brake fluid replacement process yourself. The trick is to treat it like a total system refresh rather than just a quick fix. Start from the furthest wheel from the master cylinder and work your way up. If you feel any sponginess even after a few rounds, you probably need to revisit your master cylinder bleeding technique to ensure no air is trapped in the reservoir itself.

    Don’t just rush through it to get back to your weekend plans. I’ve seen guys skip the fine details and end up back in the driveway an hour later because they missed a pocket of air. Use a clear plastic tube attached to your bleeder screw; it makes removing air bubbles from brake lines way easier because you can actually see when the fluid runs clear. It’s all about that visual confirmation. Grab a decent set of brake system maintenance tools, keep your workspace clean, and you’ll save a massive chunk of change.

    Pro Tips to Keep Your Brakes From Feeling Like Mush

    • Get a buddy you actually trust. You can’t do this alone unless you’re buying a vacuum bleeder, and even then, having someone pump the pedal while you watch the bleeder valve is way more reliable.
    • Don’t let that reservoir run dry. If you let the brake fluid level drop too low while you’re working, you’ll suck a massive gulp of air into the whole system and have to start the entire process from scratch.
    • Keep your workspace clean. Brake fluid is basically paint stripper in a bottle; if you spill it on your car’s paint, it’ll eat right through the clear coat, so keep a rag handy and work slow.
    • Use a fresh bottle of fluid every single time. Don’t try to save a few bucks by reusing the old stuff sitting in the reservoir. Fresh fluid means fewer contaminants and a much firmer pedal.
    • Watch out for the “pump and hold” rhythm. Make sure your buddy is holding the pedal down before you open the bleeder screw, otherwise, you’re just letting air leak right back into the line you just tried to clear.

    The Bottom Line on Keeping Your Brakes Solid

    Don’t rush the process; if you still feel a spongey pedal, there’s still air in there, so keep bleeding until it feels firm.

    Always keep a fresh bottle of the right brake fluid on hand, because running dry mid-job is a fast way to suck air straight into the system.

    You don’t need a fancy shop setup to do this right—just a second pair of hands, a decent wrench, and enough patience to get the job done safely.

    The Truth About That Mushy Pedal

    Look, if your brake pedal feels like you’re stepping on a wet sponge, don’t just ignore it and hope for the best. It’s usually just air in the lines, and honestly, it’s one of those jobs that feels intimidating until you actually get your hands dirty and see how simple it really is.

    Nikolai·Osterman

    Don't Leave It to Chance

    Don't Leave It to Chance: Bleeding brakes.

    Look, we’ve covered a lot of ground here. From spotting that spongy pedal feeling to actually getting the air out of the lines, the main thing is to stay methodical. Don’t rush the process just to get back to what you were doing. If you see bubbles in the clear tube, keep bleeding. If the fluid looks like old coffee, it’s time for a full flush. Remember, the goal isn’t just to finish the job; it’s to make sure your brakes feel solid and responsive every single time you hit the pedal. Keeping your tools organized and having a reliable buddy to help pump the brakes makes the whole thing way less of a headache.

    At the end of the day, I know how intimidating it feels to mess with something as critical as your braking system. It’s easy to feel like you should just hand the keys to a shop and let them charge you a premium for “specialized labor.” But honestly? Once you’ve done it yourself and felt that firm pedal under your foot, you’ll realize you were capable of it all along. Don’t let the fear of making a mistake keep you from taking control of your own machine. Grab your wrench, stay focused, and just keep turning. You’ve got this.

    Frequently Asked Questions

    Is it okay if I use a vacuum pump instead of having a buddy pump the pedal, or will that mess something up?

    Look, using a vacuum pump is totally fine—honestly, it’s a lifesaver if you’re working solo. It’s not going to mess anything up as long as you aren’t being reckless. Just make sure your seals are tight on the pump itself, otherwise, you’ll end up sucking in air from the tool instead of the lines, which defeats the whole purpose. It’s a solid way to get the job done without begging a neighbor for help.

    How do I know if I've actually gotten all the air out, or if I'm just wasting my time?

    The easiest way to tell is by the pedal feel. If it feels firm and consistent when you press down, you’re golden. If it’s mushy, spongy, or sinks straight to the floor, you’ve still got air trapped in there. Keep an eye on the fluid coming out of the bleeder valve, too. If you see even a single tiny bubble, don’t stop. Keep pumping until that fluid is clear and solid.

    Can I use a different brand of brake fluid than what came in the reservoir, or is that going to cause issues with my seals?

    Look, you don’t need to hunt down a specific brand, but you do need to check the spec. If your manual says DOT 3, don’t even think about dumping DOT 5 in there—that’s a recipe for a massive headache and ruined seals. As long as you’re sticking to the same DOT rating, the brand doesn’t matter. Just grab a decent bottle from a reputable shop, and you’ll be fine. Don’t overthink the label; just respect the rating.

  • How to Check a Fuel Pressure Regulator

    How to Check a Fuel Pressure Regulator

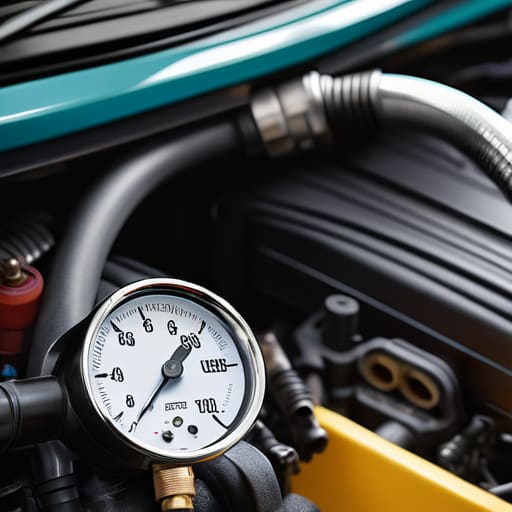
    I was working on a buddy’s old Silvia last weekend, and the guy was ready to drop a grand at the dealership because his car was stumbling and dying at stoplights. He was convinced he needed a whole new fuel pump assembly and a tank flush, but I just grabbed my pressure gauge and checked the lines. Turns out, his fuel pressure regulator was shot—a part that costs next to nothing and takes maybe twenty minutes to swap out if you know where to look. It kills me seeing people get talked into massive repair bills for something that’s basically just a simple valve doing its job.

    I’m not here to give you some textbook lecture or sell you on expensive diagnostic software you don’t need. My goal is to show you how to spot a failing fuel pressure regulator using basic tools and a bit of logic, so you can stop guessing and start fixing. I’ll walk you through the actual symptoms, how to test it yourself, and how to avoid getting ripped off by shops that see a DIYer coming. Let’s get under the hood and figure this out.

    Table of Contents

    Spotting the Signs of Failing Fuel Regulator

    Spotting the Signs of Failing Fuel Regulator.

    You don’t always need a high-end scanner to know something is off with your fuel delivery. Usually, your car will start throwing hints before it leaves you stranded. The most common signs of failing fuel regulator units show up as a rough idle or a sudden, unexplained loss of power when you step on the gas. If you’re cruising down the highway and the engine feels like it’s stumbling or hesitating, you might be dealing with inconsistent pressure. Sometimes, it’s even as simple as a strong smell of raw gas around the engine bay, which usually means the internal diaphragm has ripped and is leaking fuel directly into the vacuum line.

    Another thing to watch for is how your car handles under load. If you notice your RPMs jumping around or if the engine feels sluggish despite having plenty of air, you’re likely looking at a breakdown in engine performance and fuel pressure balance. It’s frustrating, but catching these symptoms early saves you from a much bigger headache later. Instead of just replacing parts blindly, pay attention to how the car reacts when you’re accelerating; that’s usually where the truth comes out.

    How Engine Performance and Fuel Pressure Are Linked

    How Engine Performance and Fuel Pressure Are Linked

    Think of your engine like a person trying to run a marathon; if they can’t breathe right, they’re going to crash. It’s the exact same deal with your automotive fuel delivery system. The engine needs a very specific amount of gas hitting the cylinders at the exact right moment to create that combustion explosion. If the pressure is too low, the engine starves and feels sluggish, like it’s dragging an anchor. If it’s too high, you’re basically flooding the party, which leads to wasted gas and a nasty smell.

    This delicate balance is why engine performance and fuel pressure are so tightly linked. When the regulator isn’t maintaining that “sweet spot,” your car’s computer starts panicking, trying to compensate for the weird readings. You might see your idle hunting up and down or notice a massive drop in power when you step on it. It’s not always a massive mechanical failure, either; sometimes it’s just a small fluctuation in pressure that throws the whole system out of whack. Once you realize how much the consistency of the flow matters, you’ll stop blaming the spark plugs for everything.

    Pro Tips for Dealing with Fuel Pressure Regulators

    • Don’t just swap it blindly; always check your fuel filter first. I’ve seen guys spend a whole afternoon replacing a regulator only to realize the filter was the real bottleneck all along.
    • Keep an eye on your vacuum line. If you see actual liquid fuel inside the vacuum hose connected to the regulator, that’s a dead giveaway that the internal diaphragm has ripped.
    • Grab a decent fuel pressure gauge before you start tearing things apart. Guessing based on how the car “feels” is how you end up wasting money on parts you didn’t actually need.
    • Check your fuel trims with an OBD2 scanner if you can. If you see high positive fuel trims, your regulator might be letting too much pressure drop, forcing the ECU to overcompensate.
    • When you’re replacing the unit, make sure you’re using the right torque specs on the fuel rail. It’s easy to get impatient and over-tighten, but you don’t want to crack a rail or blow a seal on your first test drive.

    The Bottom Line on Your Fuel Pressure

    If your car is stumbling or acting like it’s starving for gas, don’t just throw parts at it; test the regulator first to see if it’s actually holding pressure.

    A bad regulator isn’t just a performance killer—it can wreck your fuel economy and even mess with your engine sensors, so don’t ignore the warning signs.

    You don’t need a master tech to diagnose this; grab a pressure gauge, get a reading, and stop letting shops charge you for “mystery” engine issues.

    The Truth About Your Fuel Pressure

    A mechanic might try to tell you that you need a whole new fuel pump assembly just because your car’s stumbling, but before you drop a grand, check that regulator. If it’s not holding steady, you’re just throwing money at a symptom instead of fixing the actual problem.

    Nikolai·Osterman

    Don't Get Stumped by Your Fuel System

    Don't Get Stumped by Your Fuel System.

    At the end of the day, your fuel pressure regulator is just another component that needs a little attention to keep things smooth. We’ve covered how to spot those annoying symptoms—like stalling, rough idling, or that sudden loss of power—and why keeping that pressure steady is the only way your engine stays happy. If you’ve noticed your car acting up, don’t just assume it’s some massive, expensive failure. Most of the time, it’s just a matter of testing the pressure and realizing you can handle the fix yourself without handing over a stack of cash at the dealership.

    I know it can feel intimidating when you’re staring at a complex engine bay, but remember that every master tech started exactly where you are. You don’t need a fancy certification to understand how your machine works; you just need to trust your tools and stay patient while you work. Once you get that regulator swapped out or adjusted and hear that engine idle perfectly again, you’ll realize you’re more capable than you thought. Keep turning wrenches, keep learning, and don’t let anyone tell you that you aren’t “qualified” to take care of your own ride.

    Frequently Asked Questions

    Can I just swap in a generic regulator, or do I need to find the exact part number for my specific engine?

    Look, I get the temptation to just grab whatever’s cheapest on the shelf, but don’t do it. A generic regulator might “fit,” but it won’t necessarily hold the specific PSI your engine needs to run smooth. If you’re off by even a little, you’re looking at poor fuel economy or even engine damage. Stick to the exact part number or a high-quality OEM replacement. It saves you the headache of doing the job twice.

    Is there a way to tell if the problem is actually the regulator and not just a clogged fuel filter?

    Look, I get it—it’s easy to blame the filter because it’s a cheap, quick fix. But here’s the deal: if your car stumbles under heavy load or idles like trash, it’s usually the regulator. A clogged filter just starves the engine of fuel, making it feel sluggish. A bad regulator messes with the pressure balance itself. If you’ve got steady pressure but it’s just too low, check the filter. If it’s fluctuating wildly? That’s your regulator.

    If the regulator is failing, is it going to mess up my spark plugs or cause other parts to fail too?

    Yeah, it’ll definitely mess things up. If the regulator fails, you’re usually looking at a fuel mixture that’s way too rich or too lean. A rich condition floods your spark plugs with excess fuel, fouling them and causing misfires. Beyond that, you’re risking damage to your catalytic converter because it’s trying to burn off all that unspent gas. It’s a domino effect—fix the regulator before you end up paying for a whole new exhaust system.

  • Troubleshooting a Windshield Wiper Motor

    Troubleshooting a Windshield Wiper Motor

    There’s nothing quite like being stuck in a sudden downpour, staring through a blur of water, and realizing your windshield wiper motor has finally decided to quit on you. I remember one night working on an old Civic in my dad’s garage; the rain was coming down in sheets, and every time I flicked the switch, I just heard that pathetic, dying click-click-click from under the cowl. It’s one of those moments where you feel completely stranded, and honestly, it’s exactly the kind of situation where a shady mechanic will try to charge you for a “complete wiper system overhaul” when all you really need is a single part and a socket set.

    I’m not here to sell you on some complicated diagnostic software or tell you that you need a master technician to handle this. My goal is to show you how to actually diagnose the issue and swap out that motor yourself without getting ripped off. We’re going to skip the fluff and get straight to the real-world steps you need to follow to get your visibility back. If you’ve got a little patience and the right tools, you’ve got this.

    Table of Contents

    Identifying Critical Windshield Wiper Motor Symptoms of Failure

    Identifying Critical Windshield Wiper Motor Symptoms of Failure

    Before you go dropping a few hundred bucks at the shop, you need to figure out if the motor is actually dead or if something else is just acting up. The most obvious signs of a faulty wiper motor usually start with sound. If you flip that switch and hear a faint clicking or a low humming, but the blades aren’t moving, the motor is likely trying to work but can’t overcome the resistance. On the flip side, if you hear a loud, grinding noise, you might be looking at a stripped gear inside the unit or a mess-up in the wiper motor and linkage assembly.

    Sometimes it’s not even a mechanical issue, but something electrical. If your wipers work intermittently—like they only kick in when you hit a bump—you’re probably dealing with a loose connection or a dying brush inside the motor. If they don’t move at all, you might need to dive into some automotive wiper motor electrical troubleshooting to see if the fuse blew or if the motor itself has finally given up the ghost. Just listen closely to what the car is telling you before you start tearing things apart.

    Listen Closely to These Warning Signs of a Faulty Wiper Motor

    Listen Closely to These Warning Signs of a Faulty Wiper Motor

    One of the biggest mistakes I see people make is ignoring the sounds their car makes until it’s too late. If you start hearing a weird grinding or a high-pitched whining coming from behind your dashboard when you flip that switch, pay attention. That’s usually a sign that the internal gears are stripped or the motor is struggling to turn. Sometimes, you might even hear a faint clicking sound without any actual movement; that’s often a red flag that the motor is getting power but can’t physically move the arms.

    If the movement seems sluggish or jerky, it might not be a mechanical jam in the wiper motor and linkage assembly. You should also keep an ear out for a complete silence. If you turn the wipers on and hear absolutely nothing, you’re likely looking at signs of a faulty wiper motor or a blown fuse. Before you go out and buy a whole new unit, I’d suggest doing some basic electrical troubleshooting to make sure the issue isn’t just a loose connection or a dead relay.

    Pro-Tips for Tackling the Wiper Motor Without Losing Your Mind

    • Check your fuses first. I’ve seen so many people shell out a hundred bucks for a new motor when all they actually needed was a 10-cent fuse that popped because of a tiny short.
    • Don’t forget to grease the linkage. Sometimes it’s not the motor itself that’s dying, but the mechanical arms are just stuck because the old grease turned into literal glue. A little silicone spray goes a long way.
    • Keep your workspace dry. If you’re working under the cowl, make sure you aren’t getting water or debris into the electrical connectors while you’ve got them unplugged.
    • Use a multimeter to test for power. Before you go buying parts, hook up your meter to the connector to see if the motor is actually getting juice. If it is, then you know for a fact the motor is the culprit.
    • Grab a magnetic parts tray. Seriously, I can’t tell you how many times I’ve lost a tiny 10mm bolt in the engine bay because I was trying to be “efficient” without one. Keep those bolts in one spot.

    The Bottom Line on Your Wipers

    Don’t wait for the rain to start before you check your wipers; if you hear grinding or see them lagging, the motor is already on its way out.

    Most of the time, it’s not a massive mechanical failure—it’s usually just a dead motor or a blown fuse that you can swap yourself for a fraction of what a shop will charge.

    Keep a basic socket set and a multimeter handy, because being able to test if the motor is actually getting power saves you from replacing parts you don’t need to.

    ## The Reality of a Dead Wiper Motor

    “Look, a dead wiper motor isn’t some high-tech mystery that requires a specialized computer to solve; it’s usually just a worn-out part that’s finally given up the ghost. Don’t let a shop tell you it’s a massive electrical overhaul when, half the time, you just need a socket set and twenty minutes to swap it out yourself.”

    Nikolai·Osterman

    Wrapping It All Up

    Wrapping It All Up: Fixing windshield wipers.

    At the end of the day, if your wipers are stuttering, making a grinding noise, or just straight-up refusing to move when the rain starts coming down, you’ve got a problem that needs fixing before it becomes a safety issue. Whether it’s a blown fuse, a stripped linkage, or a completely dead motor, the key is to catch these symptoms early. Don’t wait until you’re driving through a downpour with zero visibility to realize something is wrong. Once you’ve identified if it’s a simple electrical hiccup or a mechanical failure, you’re already halfway to having the job done. Just remember to grab your magnetic parts tray and keep your connections clean while you’re swapping things out.

    Look, I get it—opening up the trim and messing with electrical components can feel intimidating if you haven’t done it before. But honestly? Once you get that new motor bolted in and see those blades sweeping clear across the glass, you’re going to feel like a total pro. You don’t need to pay a shop three hundred bucks for a job that only takes an hour and a bit of elbow grease. Stop letting the fear of a little grease under your fingernails keep you away from the driver’s seat. You’ve got this, and your wallet will definitely thank you for taking control of your own maintenance.

    Frequently Asked Questions

    Do I really need to replace the whole motor if the wipers are just moving slow, or is it just a blown fuse?

    Honestly, it’s rarely just a fuse. If a fuse blows, your wipers usually won’t move at all. If they’re just dragging or moving like they’re stuck in molasses, you’re likely looking at a dying motor or worn-out wiper linkage. Before you go buying a whole new motor, though, check your wiper blades and the linkage for gunk or physical resistance. If the hardware is clear, then yeah, that motor is probably on its last legs.

    How can I tell if the problem is actually the motor itself and not just a busted wiper linkage or arm?

    Look, this is where people usually get tripped up. If your wipers are moving super slow or making a grinding noise, that’s often the motor struggling. But if they’re moving at full speed and just aren’t hitting the glass right, or if they’re physically stuck in one spot despite the motor humming, you’re probably looking at a busted linkage or a loose arm. Pop the hood and feel for vibration; if the motor’s buzzing but nothing’s moving, it’s the linkage.

    Is it worth trying to fix the motor, or am I better off just buying a new one from the parts store?

    Look, I’ll be real with you: unless you’re just dealing with a loose connection or a blown fuse, don’t waste your weekend trying to rebuild the motor itself. These things are pretty sealed up, and trying to crack them open usually just leads to more headaches. Honestly? Just grab a new one. It’s a straightforward swap, and you’ll get way more peace of mind knowing it won’t quit on you mid-storm.

  • How to Safely Jump Start a Car Battery

    How to Safely Jump Start a Car Battery

    There’s nothing quite like that sinking feeling when you turn the key, hear nothing but a pathetic click-click-click, and realize you’re stranded. I remember being stuck in my driveway at 6:00 AM, shivering in a grease-stained hoodie, thinking I’d have to pay some tow truck company a fortune just to get a simple battery jump start. Most people think you need a specialized kit or a mechanic’s certification to get moving again, but honestly? That’s just a way for shops to pad their invoices. Once you understand the basic flow of electricity, you’ll realize this is one of those tasks that’s actually pretty easy if you don’t rush it.

    In this guide, I’m skipping the textbook fluff and giving you the real-world method I use every day at the shop. I’ll walk you through exactly how to hook up those cables without blowing a fuse or causing a spark where you don’t want one. You’re going to learn the safe sequence for connecting the clamps and how to know when your car is finally ready to roar back to life. No hype, no unnecessary jargon—just the facts you need to get back on the road.

    Table of Contents

    Guide Overview

    Total Time: 10-15 minutes
    Estimated Cost: $0 (using donor vehicle)
    Difficulty: Beginner

    Tools & Supplies

    • Jumper cables (Heavy-duty cables for reliable connection)
    • Vehicle manual (To locate specific jump points)
    • Donor vehicle (Must have a functioning battery)
    • Dead vehicle (Must have a functional starter motor)

    Step-by-Step Instructions

    • 1. First things first, get your donor car and your dead car parked close enough so the cables can reach, but make sure they aren’t actually touching each other. If the cars are touching, you could end up with a weird electrical short that’ll make your day a whole lot worse.
    • 2. Pop both hoods and find your battery terminals. You’re looking for the plus sign (+) for the positive terminal and the minus sign (-) for the negative. If you see a bunch of white, crusty gunk on the metal, scrape it off with a wire brush or even an old screwdriver so you get a solid connection.
    • 3. Grab your jumper cables and start with the red one. Clip one end to the positive (+) terminal on the dead battery. Then, take the other end of that same red cable and clip it to the positive terminal on the good battery. It’s basically just making a bridge between the two.
    • 4. Now grab the black cable. Clip one end to the negative (-) terminal on the good battery. For the last clip, don’t attach it to the negative terminal of the dead battery—that can actually cause a spark right near the battery gases. Instead, find a solid, unpainted metal part of the engine block or the frame on the dead car.
    • 5. Hop in the donor car and crank the engine. Let it run for a few minutes to get a decent charge flowing into the dead system. If it stutters or sounds weak, just give it more time before you try to turn the key in the other car.
    • 6. Now, try to start your car. Once it fires up and stays running, don’t just shut it off immediately. You need to keep it running for at least twenty minutes, or even better, go for a quick drive around the block to let the alternator do its job and top that battery back up.
    • 7. When you’re ready to disconnect, do everything in the exact reverse order you did it. Take the black cable off the dead car’s frame first, then the good battery, then the dead battery, and finally the good battery’s positive terminal. It sounds tedious, but following the order keeps you from accidentally sparking anything.

    Spotting the Signs of a Failing Car Battery Early

    Spotting the Signs of a Failing Car Battery Early

    Look, the worst time to find out your battery is shot is when you’re already late for work and the engine just clicks. If you want to avoid that headache, you’ve got to pay attention to the little things. One of the most common signs of a failing car battery is a slow crank—you know that heavy, sluggish sound when you turn the key, like the car is struggling to wake up? That’s a massive red flag. You might also notice your interior lights dimming when you idle at a stoplight or a weird, rotten egg smell coming from under the hood, which usually means the battery is leaking gas.

    Another thing I always tell people at the shop is to keep an eye on your electronics. If your power windows are moving slower than usual or your dashboard lights start acting possessed, you’re likely dealing with dead car battery symptoms before the car actually dies on you. It’s way better to catch it early and swap it out in your driveway than to be stuck on the shoulder of a highway trying to figure out how to use jumper cables safely in the dark.

    How to Use Jumper Cables Safely Without the Stress

    How to Use Jumper Cables Safely Without the Stress

    Look, I’ve seen plenty of people rush this and end up with a face full of sparks or, worse, a fried ECU. When you’re figuring out how to use jumper cables safely, the biggest mistake is being sloppy with the connections. Always make sure the cables aren’t touching each other while they’re clamped onto the terminals. If they touch, you’re going to get a massive arc that’ll definitely ruin your day. Also, double-check that both cars are off and in park before you even think about clipping anything on.

    One thing my dad always hammered into me is that the ground connection is everything. Don’t just slap the last negative clamp onto the dead battery’s negative terminal; instead, find a solid, unpainted metal part of the engine block or the frame on the dead car. This helps prevent any stray sparks from igniting battery gases. If you’re nervous about using another vehicle, jump starting a car with a portable power pack is a much cleaner, lower-stress way to get moving without the mess of tangled wires.

    Pro Tips to Keep You From Making a Mess of It

    • Don’t just hook it up and crank it immediately. Once the cables are connected, give the dead car a minute or two to let a little bit of juice trickle in before you actually try to turn the key. It saves your starter from taking a beating.
    • Watch out for the “spark.” When you’re attaching that last ground clamp, it might pop or spark a little. It’s usually fine, but don’t go shoving it right next to any leaking battery acid or gas fumes unless you want a very bad day.
    • Check your cable quality before you even get out of the car. If you’re using those super thin, cheap cables from a gas station bargain bin, they might not actually carry enough current to do the job. Look for thicker, heavy-duty wires if you can.
    • Keep the cars from touching. I see people do this all the time—they pull the cars up so the frames are touching. Just don’t. You want the vehicles close enough for the cables to reach, but keep them physically separated to avoid any weird electrical shorts.
    • Once the car starts, don’t kill the engine right away. You need to drive it around for at least 20 or 30 minutes to let the alternator actually do its job and recharge that battery. If you just shut it off immediately, you’ll be right back where you started.

    The Bottom Line

    Don’t rush the process—once you hook everything up, give the good battery a few minutes to breathe before you try to crank the engine.

    If your battery keeps dying even after a jump, it’s probably not just a dead cell; you might be looking at a bad alternator or a parasitic draw.

    Always double-check your connections; a loose clamp is the number one reason why a jump start fails, and it’s a massive headache to troubleshoot.

    ## The Real Truth About Dead Batteries

    Look, a dead battery isn’t a catastrophe; it’s just a minor inconvenience. Most people freak out and call a tow truck, but if you’ve got a set of cables and five minutes of patience, you can handle it yourself. Don’t let a little lack of voltage make you feel like you don’t belong under your own hood.

    Nikolai·Osterman

    Don't Let a Dead Battery Stall You

    Don't Let a Dead Battery Stall You.

    Look, at the end of the day, getting a jump start is just about staying calm and following the right sequence. You’ve learned how to spot those early warning signs like slow cranking or dim lights, how to connect the cables without making a mess, and most importantly, how to do it safely. Just remember: red to positive, black to negative, and always double-check your connections before you try to crank that engine. If you keep your head on straight and follow these steps, you’re not just avoiding a massive towing fee—you’re taking control of your own ride.

    I know it can feel intimidating when you’re stuck in a dark parking lot with a dead engine, but honestly, that’s how everyone starts. Every time you get your hands a little greasy or figure out a fix that used to scare you, you’re becoming more capable. Don’t let the fear of making a mistake keep you from learning. My goal is to make sure the next time you see those dashboard lights flicker out, you don’t feel helpless; you just feel ready to work. You’ve got this, and your car is lucky to have someone looking out for it.

    Frequently Asked Questions

    Can I jump-start a car if the battery is completely dead, or will it just not take a charge?

    Look, if the battery is stone-cold dead—meaning there’s zero juice left to even click the starter—you can still jump it. The donor car’s power will push enough current through to get your engine turning. But don’t get it twisted: a jump is just a temporary fix. If it’s that drained, your battery is likely toast or won’t hold a charge. Drive straight to an auto parts store to get it tested.

    Is it actually safe to jump-start a modern car with all those sensitive electronics and sensors?

    Look, I get it. You see all those fancy sensors and touchscreens and think, “If I mess this up, am I frying a computer module?” Honestly, it’s a fair question. If you follow the right sequence—connecting the positive terminals first and making sure your connections are tight—you’re fine. The real danger isn’t the electronics; it’s a bad connection causing a spark. Just stick to the order, and your ECU will be just fine.

    How do I know if my battery is just drained from leaving a light on or if it's actually shot and needs replacing?

    Honestly, the easiest way to tell is by how it reacts to a jump. If you get the car running and it stays alive, you probably just left a dome light on. But if the car dies the second you pull the cables off, or if it struggles to crank even after a long drive, that battery is toast. If it’s over three years old and acting moody, just stop fighting it and get a new one.

  • Replacing Faulty Transmission Sensors

    Replacing Faulty Transmission Sensors

    I was staring at a repair estimate yesterday that made my blood boil—a local shop wanted nearly a grand just to swap out a tiny piece of plastic and wiring. They tried to frame it like some high-level surgical procedure that only a master technician could handle, but that’s a total lie. Most of the time, a transmission sensor replacement isn’t some deep, mechanical mystery that requires a specialized degree; it’s usually just a matter of getting into a tight spot and having the right socket on hand. I’ve spent enough weekends in my dad’s garage to know that mechanics love to gatekeep simple fixes to pad their invoices.

    I’m not here to give you some textbook lecture or a list of “optimal vehicle procedures” that sound like they were written by a robot. Instead, I’m going to walk you through exactly how to tackle this job yourself, from the moment you pull the code to the second you clear that check engine light. I’ll show you the specific tools you actually need, the common pitfalls that’ll leave you covered in gear oil, and how to get it done right without getting ripped off.

    Table of Contents

    Guide Overview

    Total Time: 1-3 hours
    Estimated Cost: $30-150
    Difficulty: Intermediate

    Tools & Supplies

    • Socket set and ratchet for removing bolts
    • Screwdriver set for electrical clips and clamps
    • Pliers for tension clips or hose clamps
    • OBD-II scanner to clear error codes
    • Replacement transmission sensor (1 unit)
    • Transmission fluid (1-2 quarts depending on loss)
    • Shop rags for cleaning spills

    Step-by-Step Instructions

    • 1. First things first, you gotta get the car up and stable. Don’t be a hero and try to work under a car held up by just a jack; grab some jack stands and make sure the vehicle isn’t going anywhere. Once you’re safely underneath, locate the transmission housing. It’s usually pretty easy to spot once you clear away some of the plastic shielding or road grime, but if you can’t see it, don’t panic—just follow the wiring harness coming from the engine down to the gearbox.
    • 2. Before you even touch a wrench, find the electrical connector for the sensor. These things get hit with heat cycles and road salt, so the plastic clips can get pretty brittle. I always recommend spraying a little bit of electrical contact cleaner around the plug first to loosen things up. Gently depress the locking tab and pull it straight back. If it feels like it’s about to snap, stop pulling and wiggle it side-to-side a bit more to avoid breaking the clip.
    • 3. Now, grab your socket set. Most of these sensors are held in by a single bolt—usually a 10mm or a 12mm. Make sure your socket is seated completely flush against the bolt head before you put any real pressure on it. If you’re at an angle, you’re just going to round off the head, and then you’ve got a much bigger headache on your hands. Once the bolt is out, keep it safe in your magnetic parts tray so it doesn’t end up in the bottom of your oil pan.
    • 4. Pull the old sensor out. It might be a little stubborn if the O-ring has been baked in there for years. If it’s stuck, give it a gentle twist as you pull. Once it’s out, take a second to look inside the hole. You want to make sure there’s no leftover debris or old gasket material sitting in there. If it looks messy, wipe it out with a clean rag. You want a perfectly clean surface for the new seal to sit on.
    • 5. Grab your new sensor and check the O-ring. I always suggest taking a tiny bit of clean transmission fluid or assembly lube and rubbing it onto the new rubber seal. This helps it slide into place without pinching or tearing, which is the number one reason why people end up with leaks right after a “successful” repair. Slide the new sensor into the housing, making sure it’s seated all the way down before you even think about the bolt.
    • 6. Thread the bolt back in by hand first. This is a huge tip: never start tightening with your ratchet. If you cross-thread a sensor into a transmission case, you’re looking at a repair that costs way more than a simple sensor swap. Once you’re sure it’s going in straight, snug it up with your wrench. You don’t need to go overboard here—just enough to be tight and secure.
    • 7. Finally, plug that electrical connector back in until you hear it click. Give the wire a tiny tug just to make sure it’s actually locked into place. Before you lower the car, I like to double-check that I haven’t left any tools or rags sitting on the subframe. Once everything looks clean, lower the car, start it up, and check your dash to make sure that annoying check engine light has finally gone dark.

    Spotting Transmission Sensor Symptoms Before They Break You

    Spotting Transmission Sensor Symptoms Before They Break You

    The thing is, you don’t always have to wait for the car to stop moving entirely before you know something is wrong. Usually, your car starts throwing little hints at you. You might notice the gear shifts feeling “clunky” or notice the RPMs jumping around like crazy when you’re just cruising down the highway. These are classic transmission sensor symptoms that most people ignore until they’re stranded on the shoulder. If you feel a weird hesitation when you step on the gas, don’t just assume it’s old age—it’s often just a sensor sending garbage data to the computer.

    If you want to be proactive, grab a cheap OBD-II scanner. Instead of guessing, you can look up the specific diagnostic trouble codes transmission modules are throwing. It saves so much headache when you can pinpoint exactly which sensor is acting up before you start tearing things apart. I always tell people to do a quick transmission fluid level check first, too. Sometimes a low fluid level messes with the sensor readings, and you don’t want to go through the whole process of a part replacement if all you actually needed was a quart of Dexron.

    Transmission Electrical Troubleshooting Without the Mechanics Markup

    Transmission Electrical Troubleshooting Without the Mechanics Markup

    Before you go tearing into the hardware, you’ve got to make sure it’s actually an electrical issue and not just a mechanical fluke. I’ve seen plenty of guys jump straight into a part replacement only to realize their fluid was low or the wiring was just chewed up by a rodent. Start with a quick transmission fluid level check—if you’re low, your sensors might just be reading air instead of oil. If the fluid looks fine, grab a cheap OBD-II scanner. You aren’t looking for a magic wand, but catching those diagnostic trouble codes transmission modules throw out will tell you exactly which circuit is acting up.

    If the codes point to a sensor, don’t just swap it blindly. Use a multimeter to check for continuity in the wiring harness. Sometimes the sensor is perfectly fine, but the connector is corroded or the wires are frayed. A little contact cleaner and some basic transmission electrical troubleshooting can save you fifty bucks and a trip to the parts store. Most of the time, it’s just a bad ground or a loose plug, not a dead component. Don’t let them charge you for a whole new unit when it’s just a bad connection.

    Don't Make These Rookie Mistakes: 5 Pro Tips for the Swap

    • Clean the connector before you touch it. I’ve seen way too many people swap a perfectly good sensor only to realize the old one just had some grit or oil in the plug. Use some electronic cleaner to make sure that connection is actually solid.
    • Don’t go cheap on the part. I get it, the aftermarket sensors are way cheaper, but if you buy the bottom-of-the-barrel stuff, you’ll be back under the car in two weeks. Stick to OEM or a high-quality brand if you want to actually fix the problem.
    • Keep your magnetic tray handy. Seriously, don’t be the guy hunting for a dropped 10mm bolt in a puddle of transmission fluid for forty minutes. Keep your bolts organized or you’ll end up with a handful of extra parts and a lot of regret.
    • Watch your torque specs. These sensors are usually plastic or have delicate threads; if you go full-gorilla on the wrench, you’re going to crack the housing. Tighten it until it’s snug, not until you hear something snap.
    • Double-check your ground wires. A lot of times, what looks like a dead sensor is actually just a corroded ground wire nearby. While you’re in there, give any nearby wiring a quick once-over to make sure the electrical path is clean.

    The Bottom Line on Your Transmission

    Don’t let a flashing check engine light scare you into a thousand-dollar repair bill; most of the time, it’s just a sensor that needs swapping, not a whole new gearbox.

    Trust your gut and your tools—if the car is shifting weird or acting up, do the electrical troubleshooting yourself before you let a shop tell you the worst-case scenario.

    You don’t need a master technician’s certification to handle this, just a decent socket set, a bit of patience, and the willingness to get your hands a little greasy.

    ## Don't Let the Dashboard Scare You

    A flashing check engine light or a weird shift feels like a death sentence for your wallet, but half the time, it’s just a sensor acting up. Don’t let a mechanic convince you that you need a whole new transmission when all you really need is a clean connector and a basic socket set.

    Nikolai·Osterman

    Don't Let the Shop Win

    Don't Let the Shop Win: DIY sensor.

    Look, replacing a transmission sensor isn’t some high-level engineering feat that requires a master technician and a massive invoice. We’ve gone through the symptoms, tracked down the electrical gremlins, and walked through the actual swap. If you took the time to properly troubleshoot the wiring before buying parts, you’ve already done the hardest part of the job. Just remember to keep your workspace clean, double-check those electrical connections, and make sure you’ve got your magnetic parts tray handy so you don’t lose a vital bolt in the chassis. Once that new sensor is seated and the codes are cleared, you’re back in business without having handed over half a paycheck to a service advisor.

    At the end of the day, the gap between “I can’t fix this” and “I just fixed this” is a lot smaller than the dealerships want you to believe. Every time you pick up a wrench and tackle a sensor or a simple repair yourself, you’re taking back control of your own ride. It might be a little messy, and you might end up with some grease under your fingernails, but that’s just part of the process. Don’t be intimidated by the sensors or the computer codes; just stay patient, trust your gut, and keep learning. You’ve got this.

    Frequently Asked Questions

    Do I really need to clear the error codes with an OBD-II scanner after I swap the sensor, or will the car figure it out on its own?

    Look, the car isn’t a mind reader. Even with a brand-new sensor, that Check Engine Light is probably going to stay staring you down. Most modern ECUs won’t just “forget” the fault on their own immediately. You can try driving it to see if the code clears itself after a few drive cycles, but honestly? Just grab your OBD-II scanner and clear it manually. It saves you the headache of wondering if it’s actually fixed.

    Is there a specific type of dielectric grease I should be using on the connector to make sure it doesn't corrode or act up again in six months?

    Don’t just grab whatever cheap stuff is sitting in the junk drawer. You want a high-quality silicone-based dielectric grease. I usually stick with something like Permatex—it’s reliable and won’t degrade the plastic housing or the rubber seals on the connector. It’s not meant to conduct electricity; it just seals out moisture and prevents that nasty oxidation that makes connections flaky. A little dab goes a long way to keep things from acting up again.

    How do I know if it's actually a bad sensor and not just a blown fuse or a wiring issue somewhere in the harness?

    Look, don’t go swapping parts just because a light popped up. Grab a multimeter first. Check the fuse—if it’s blown, you’ve likely got a short somewhere, not a dead sensor. If the fuse is fine, test the harness for continuity. If you’re getting power at the plug but the sensor isn’t sending a signal back to the ECU, then you know the sensor is actually toasted. Don’t let them charge you for a sensor you don’t need.

  • How to Inspect Cv Axles and Boots

    How to Inspect Cv Axles and Boots

    I remember one of my first big headaches at the shop when a customer came in convinced they needed a whole new front end because of a clicking noise. The service advisor was already quoting them a price that sounded like a down payment on a new car, but I knew better. I just grabbed my flashlight and did a quick cv axle inspection, and sure enough, it was just a torn boot leaking grease everywhere. It’s honestly frustrating how many shops try to turn a simple, visual check into a massive, expensive headache just because they think you won’t know the difference.

    I’m not here to give you some textbook lecture or charge you for a diagnostic fee you don’t need to pay. My goal is to show you exactly what I look for when I’m under a car, so you can spot the actual trouble before it turns into a breakdown on the highway. We’re going to walk through a real-world cv axle inspection using nothing but your eyes and a basic light. I promise to keep it straightforward and honest, so you can keep your money in your pocket and your car on the road.

    Table of Contents

    Inspecting Cv Boots for Grease Leaks Before Its Too Late

    Inspecting Cv Boots for Grease Leaks Before Its Too Late

    The rubber boots on your axles are basically the first line of defense, and they’re usually the first thing to go. These boots are designed to keep grease trapped inside the joint while keeping dirt and road grit out. If you see dark, thick grease splattered around the inside of your wheel well or smeared on the suspension components, that’s a massive red flag. When you’re inspecting cv boots for grease leaks, don’t just glance at them from a distance; grab a flashlight and get low. Even a tiny tear or a hairline crack in that rubber can let the lubricant spray out under high speed, which leads directly to constant velocity joint failure.

    Once that grease is gone, it’s game over for the metal components inside. Without lubrication, the friction builds up instantly, and you’ll likely start hearing a rhythmic clicking noise when turning left or right. If you catch a torn boot early, you might just be looking at a cheap rubber replacement. But if you ignore it, you’re staring down the barrel of a much more expensive repair. Don’t wait for the noise to start—check your boots every few oil changes to save yourself the headache.

    Recognizing the Real Signs of Worn Cv Joints

    Recognizing the Real Signs of Worn Cv Joints

    If you’ve already checked the boots and they look clean, you need to start listening to what the car is actually telling you. The most dead giveaway for constant velocity joint failure is a rhythmic clicking noise when turning. If you’re pulling into a tight parking spot or navigating a sharp corner and you hear that repetitive “click-click-click” coming from the front end, your joint is likely starving for grease or the internal bearings are shot. It’s not a sound that goes away; in fact, it usually gets louder the more you turn the wheel.

    Beyond the noise, keep an eye out for weird vibrations. If you feel a shuddering or a heavy shimmy through the floorboards or the steering wheel while you’re accelerating, that’s another major red flag. It’s often a sign that the internal components aren’t rotating smoothly anymore. Don’t ignore these signs of worn cv joints just because the car still moves. Catching it early might save you from a much more expensive repair down the road, or worse, being stranded when a shaft finally snaps.

    5 Quick Ways to Check Your Axles Without a Lift

    • Grab a flashlight and do a slow walk-around; if you see dark, thick grease splattered on the inside of your wheel or suspension components, that’s a dead giveaway that a boot has torn.
    • Get under there and give the CV boots a gentle squeeze with your gloved hand; if they feel crunchy or stiff instead of flexible, the grease inside has likely dried up or been contaminated by dirt.
    • Check for excessive play by grabbing the axle shaft and trying to wiggle it up and down; you want to see almost zero movement, because if it’s clunking around, the internal bearings are shot.
    • Look closely at the clamps holding the rubber boots in place; sometimes they just slide off or get loose, and catching that early can save you from having to buy a whole new axle.
    • Don’t forget to inspect the inner joints near the transmission; people always focus on the outer side, but if the inner joint is failing, you’ll feel a nasty shuddering when you’re accelerating from a stop.

    The Bottom Line on Your CV Axles

    Catching a torn boot early is the difference between a cheap rubber replacement and a massive bill for a whole new axle assembly.

    If you hear that clicking sound when you’re turning, don’t just ignore it; your CV joint is likely already failing and needs attention.

    You don’t need a shop manual to do this—just grab a flashlight, get under there, and look for fresh grease sprayed around the joints.

    The Cost of Ignoring the Small Stuff

    Look, a torn CV boot might just look like a little bit of spilled grease, but if you ignore it, you’re basically inviting a massive repair bill to your front door. Catching a leak early means a cheap part and twenty minutes of work; waiting until the joint starts clicking means you’re stuck on the side of the road waiting for a tow.”

    Nikolai·Osterman

    Don't Wait for the Clunk

    Don't Wait for the Clunk: CV axle.

    Look, at the end of the day, inspecting your CV axles isn’t some high-level engineering task. It’s really just about being proactive. If you’ve been checking those rubber boots for grease spray and listening for that tell-tale clicking when you turn the wheel, you’re already ahead of most drivers. Don’t ignore the small stuff—a torn boot might seem minor now, but it’s the difference between a cheap rubber replacement and a full-blown, expensive axle assembly swap later on. Catching a leak early is how you keep your repair bills from spiraling out of control.

    I know it can feel intimidating when you first crawl under a car, but I promise you, you’ve got this. You don’t need a fancy diagnostic computer to tell you when something feels off; you just need to trust your eyes and your ears. Every time you take a minute to look under your own ride, you’re taking control back from the shops that want to charge you for things you could have spotted yourself. Keep that flashlight handy, stay patient, and don’t let the machine intimidate you. You’re doing the work, and that’s how you stay on the road longer.

    Frequently Asked Questions

    If I see a little bit of grease on the boot, does that mean I need to replace the whole axle right now?

    Not necessarily. If it’s just a tiny bit of grease or a “sweat” on the boot, you’ve caught it early. You don’t need to swap the whole axle yet. Just keep a close eye on it and clean the area to see if it keeps leaking. But if the boot is actually ripped or the grease is spraying everywhere, that’s a different story. At that point, the joint is losing lubrication, and you’re on borrowed time.

    Can I just tighten a clamp or patch a torn boot to save money, or is that a waste of time?

    Look, I get the urge to save a few bucks, but patching a torn boot is a total waste of time. Once that rubber is ripped, the grease is already spraying out and dirt is getting in. It’s a losing battle. Tightening a clamp might work if it’s just a loose fit, but if the boot is cracked, you’re just delaying the inevitable. Save your energy—just replace the axle before you end up stranded.

    Is there a way to tell if the noise is coming from the CV axle or if it's actually a bad wheel bearing?

    That’s a classic headache, but there’s a trick to it. If it’s a CV axle, you’ll usually hear a rhythmic clicking or popping, especially when you’re making tight turns. A bad wheel bearing is different; it’s more of a constant, low-frequency drone or hum that gets louder as you speed up. If the sound changes when you slightly sway the car left or right, it’s almost definitely that bearing.

  • How to Replace Worn Suspension Bushings

    How to Replace Worn Suspension Bushings

    You hear that annoying, rhythmic clunking every time you hit a pothole, and your first instinct is to call the shop and brace for a massive bill. Most mechanics will try to tell you that you need a whole new control arm or a professional alignment rig just to fix a little noise, but that’s a total lie. The truth is, a lot of the time, you’re just looking at a simple suspension bushing replacement job. I spent my entire childhood in my dad’s garage watching him tear down old sedans, and if there’s one thing I learned, it’s that these rubber components are usually the only thing standing between you and a smooth ride.

    I’m not going to sugarcoat it: this isn’t the easiest job in the world, and you might get a little frustrated with a stubborn bolt or two. But I’m going to walk you through exactly how to tackle this without getting ripped off. I’ll show you the specific tools you actually need—and the ones that are a complete waste of money—so you can get those worn-out parts out and the new ones in. We’re going to do this the right way, focusing on real-world grit rather than textbook perfection.

    Table of Contents

    Guide Overview

    Total Time: 3-5 hours per vehicle
    Estimated Cost: $40-150
    Difficulty: Intermediate

    Tools & Supplies

    • Ball joint separator or pickle fork to disconnect components
    • Hydraulic press or specialized bushing driver kit for removal/installation
    • Socket set and wrenches for bolt removal
    • Penetrating oil to loosen rusted hardware
    • Replacement bushing set (specific to vehicle make/model)
    • Chassis grease or assembly lube for installation
    • Penetrating oil spray for rusted bolts

    Step-by-Step Instructions

    • 1. First things first, get the car on jack stands. Don’t even think about working under a car held up by just a hydraulic jack; that’s how people get hurt. Once the car is stable, you’ll want to remove the wheel to get a clear view of the control arm. If you’re working on an older car, keep a can of penetrating oil handy because those bolts haven’t seen the light of day in years.
    • 2. Now you need to unbolt the control arm from the chassis. This is where most people start to sweat because the bolts are usually seized tight. Use a long breaker bar to get some real leverage on them. If they won’t budge, soak them in some PB Blaster and give it ten minutes. Just take your time so you don’t strip the heads, or you’ll be having a much worse day than you planned.
    • 3. Once the arm is loose, you’ve got to get the old, crusty bushing out of the way. Since you probably don’t have a professional hydraulic press sitting in your driveway, you’ll need to get creative. I usually use a heavy-duty socket that’s slightly smaller than the bushing itself. Use it as a makeshift driver to tap the old bushing out of the housing. It’s a bit of a workout, but it gets the job done.
    • 4. Clean out the housing before you even touch the new parts. If there’s old rubber or grit left inside the metal sleeve, your new bushing isn’t going to sit right, and you’ll be doing this whole thing over again in a month. Grab a wire brush or even just a clean rag to make sure the surface is smooth and ready for the new install.
    • 5. Apply a little bit of chassis grease to the new bushing. You don’t want to go in bone-dry, or you’ll be fighting it the whole way in. Slide the new bushing into the control arm, and if it’s a tight fit, use a mallet to gently tap it home. Don’t go ham on it with a sledgehammer or you might crack the metal, but you definitely need to be firm.
    • 6. Reinstall the control arm back onto the vehicle. Line up the holes, slide your bolts through, and get them started by hand first. This is a crucial tip: do not tighten the bolts all the way down while the car is still up in the air. If you torque them down while the suspension is hanging, you’ll bind the new rubber and it’ll tear itself apart the second you drive it.
    • 7. Finally, lower the car back to the ground so the weight of the vehicle is resting on the suspension. Now that the car is at its natural ride height, go back in with your torque wrench and tighten everything to spec. Once those bolts are locked down, pop your wheels back on, and you’re officially done. You just saved yourself a couple hundred bucks in labor.

    Spotting the Signs of Worn Suspension Bushings Before They Fail

    Spotting the Signs of Worn Suspension Bushings Before They Fail

    You don’t always need a diagnostic scanner to know something is off; usually, your car will tell you through how it feels on the road. If you’re noticing a weird clunking sound every time you hit a pothole or go over a speed bump, that’s a massive red flag. Another big one is if your steering feels “loose” or if the car pulls to one side when you’re cruising on a straight road. These are classic signs of worn suspension bushings that are starting to lose their shape. When that rubber gets compressed or cracked, you lose that tight connection between your components, and your vehicle handling and stability take a serious hit.

    I always tell people to do a quick visual check during their regular automotive suspension maintenance. Get under there with a flashlight and look for any visible tearing or oily residue around the joints. If the rubber looks dry, cracked, or completely squished, it’s time to stop ignoring it. Catching these issues early might save you from having to deal with much more expensive repairs down the line.

    Replacing Rubber Bushings vs Polyurethane Choosing Your Own Path

    Replacing Rubber Bushings vs Polyurethane Choosing Your Own Path

    Once you’ve finished your initial suspension component inspection and realized it’s time to swap things out, you’re going to hit a fork in the road: rubber or polyurethane. Most factory setups use rubber because it’s great at soaking up road vibration and noise. If you just want your daily driver to feel smooth and quiet, stick with rubber. It’s the standard for a reason, and it keeps that factory-spec ride quality intact without making every pebble feel like a pothole in your spine.

    On the flip side, if you’re working on one of my vintage tuner projects, you’re probably looking at polyurethane. These are much stiffer and won’t compress nearly as much under load, which drastically improves vehicle handling and stability when you’re carving corners. Just a heads-up though: they don’t absorb vibration well, so expect a bit more “road feel” inside the cabin. When you’re deciding between replacing rubber bushings vs polyurethane, just ask yourself if you value a silent cabin or a sharper steering response more. There’s no wrong answer, just different goals.

    Pro Tips to Save Your Sanity (and Your Knuckles)

    • Don’t even bother trying to press out old bushings with just a hammer and a prayer. If you aren’t renting a hydraulic shop press or using a heavy-duty driver kit, you’re just going to end up frustrated and bruised. Get the right tool for the job from the start.
    • Clean the control arm housing like your life depends on it before you seat the new bushing. Even a tiny bit of grit or a leftover shaving of old rubber can make the new part sit crooked, and once it’s in, it’s a massive pain to fix.
    • Always use a little bit of assembly lube or specialized grease on the outer edges of the bushing. It helps everything slide into place without binding, which saves you from having to fight the metal halfway through the install.
    • If you’re installing polyurethane bushings, don’t skip the grease. Unlike the factory rubber ones, poly needs that lubricant to prevent it from squeaking like a haunted house every time you hit a pothole.
    • Tighten your suspension bolts only when the car is back on the ground at ride height. If you torque everything down while the wheels are hanging in the air, you’ll preload the bushings and tear them apart before you even leave the driveway.

    The Bottom Line on Your Suspension

    Don’t wait for a massive repair bill to hit; if your car starts clunking over bumps or feeling loose in the turns, those bushings are already shot and need replacing.

    You don’t need a fancy shop setup to do this—just grab a decent socket set, some patience, and maybe a bit of grease, and you’ll save yourself a couple hundred bucks in labor.

    Pick your materials based on how you actually drive—stick with rubber if you want a smooth, quiet ride, or go polyurethane if you’re looking to tighten up the handling for more aggressive driving.

    The Truth About Your Ride

    Most shops will try to tell you your whole control arm is shot just to pad their bill, but usually, it’s just a couple of cracked bushings and a little bit of sweat that’ll get your car back to feeling tight again.

    Nikolai·Osterman

    Don't Let the Shop Win

    Don't Let the Shop Win: DIY bushings.

    At the end of the day, swapping out your bushings comes down to a few simple things: knowing when they’re shot, picking the right material for your driving style, and having the right tools on hand. Whether you went with the classic feel of rubber or the stiff, responsive bite of polyurethane, you’ve just saved yourself a massive chunk of change that a dealership would’ve happily pocketed. It’s not about being a master mechanic; it’s about recognizing the signs early and realizing that a little grease on your hands is a small price to pay for a ride that actually feels tight and controlled again.

    I know it can feel intimidating when you’re staring at a pile of greasy parts and a heavy subframe, but don’t let that stop you. Every time you finish a job like this, you’re building a level of confidence that no textbook can teach you. You’re taking control of your machine and proving that you don’t have to be a slave to the service department’s schedule or their inflated quotes. Keep that magnetic tray handy, stay patient, and just keep turning wrenches. You’ve got this.

    Frequently Asked Questions

    Do I really need a specialized press to get the old bushings out, or can I get away with a hammer and a punch?

    Look, I’ll be real with you: you can do it with a hammer and a punch, but you’re probably going to hate yourself halfway through. If you’re working on a tight control arm, you’ll end up bruising your knuckles and potentially mushrooming the metal. If you’re on a budget, try to borrow a shop press or rent one. If you absolutely must go old-school, grab some heavy-duty drift punches and a lot of patience.

    If I replace just one bushing on an arm, am I going to mess up the alignment and ruin my tires?

    Look, here’s the straight truth: replacing even one bushing is going to throw your geometry off. When you swap a part, you’re changing the exact resting position of that control arm. Even if it feels fine when you pull out of the driveway, your alignment is definitely out of whack. If you don’t get an alignment check right after, you’re basically asking for uneven tire wear that’ll eat your tread for breakfast.

    How long am I actually going to have to wait for the new polyurethane bushings to "settle in" before the ride feels normal?

    Look, don’t expect that “factory smooth” feel the second you tighten everything down. Polyurethane is stiffer by nature, so it’s going to feel a bit harsh or even “clunky” at first. Give it about 500 to 1,000 miles of real-world driving. That’s usually how long it takes for the material to mate properly with the housing and for the initial stiffness to settle. Just drive it, let it work, and don’t panic.

  • Ways to Clean an Engine Air Intake

    Ways to Clean an Engine Air Intake

    Ever notice your car feeling a little sluggish, like it’s struggling to catch its breath when you hit the gas? Most shops will try to tell you that your engine is “losing compression” or that you need some high-end, expensive sensor replacement to get that pep back. Honestly, that’s usually a load of garbage designed to pad their invoice. More often than not, your engine is just choking on a layer of grime and debris. A simple, thorough air intake cleaning is usually all it takes to stop that hesitation and let your car actually breathe again. It’s not some deep, mysterious mechanical failure; it’s just basic maintenance that most people overlook.

    I’m not here to sell you on some magic chemical or a complicated diagnostic tool that costs more than your monthly rent. I’m going to show you exactly how to tackle this job using stuff you probably already have in your garage. We’re going to walk through the right way to clear out that buildup without making a mess or accidentally frying a sensor. I’ll give you the straight truth on what tools you actually need and how to do it right the first time, so you can save your money and keep your ride running smooth.

    Table of Contents

    Guide Overview

    Total Time: 45-90 minutes
    Estimated Cost: $20-40
    Difficulty: Beginner

    Tools & Supplies

    • Screwdriver (to remove airbox clips or screws)
    • Vacuum cleaner (to remove loose debris from the housing)
    • Flashlight (to inspect the intake tubes and sensor area)
    • Air filter cleaner spray (1 can)
    • Microfiber cloths (2-3 cloths)
    • Replacement air filter (1 unit, if cleaning is insufficient)

    Step-by-Step Instructions

    • 1. First things first, grab a can of dedicated mass air flow (MAF) sensor cleaner and some lint-free cloths. Whatever you do, do not use brake cleaner or anything else on that sensor; it’s way too harsh and you’ll fry the delicate filaments in seconds.
    • 2. Pop your hood and locate the air intake assembly. You’ll usually see a thick plastic tube running from your air filter box to the engine. Most of the time, you can just loosen a couple of hose clamps with a screwdriver or a socket wrench to loosen the intake hose so you can actually get inside.
    • 3. Once you’ve got the hose off, take a peek inside the housing. If you see a bunch of gunk, dust, or oily residue, it’s time to clean it out. Use a clean, dry cloth to wipe away the heavy debris from the walls of the intake tube, but don’t be aggressive with it—you don’t want to knock anything into the engine.
    • 4. Now, find the MAF sensor. It’s that little plastic piece plugged into the intake tube. Carefully unplug the electrical connector first, then pull the sensor out of its housing. This part is the “brain” of your air intake, so treat it like it’s made of glass.
    • 5. Spray the sensor cleaner directly onto the sensor filaments. You’ll see the dirt and grime start to dissolve almost instantly. Just let it spray for a few seconds, then let it sit there. Don’t touch the wires with your fingers or a brush; let the chemical do all the heavy lifting for you.
    • 6. This part is crucial: you have to let the sensor and the entire intake assembly air dry completely. I usually just let it sit for about ten or fifteen minutes. If you try to plug it back in while it’s still wet, you’re asking for a sensor error code and a headache.
    • 7. Once everything is bone dry, slide the sensor back into its slot and tighten it down. Reattach your intake hose, make sure those clamps are snug but not over-tightened, and plug your electrical connector back in. Give the engine a quick start to make sure it’s idling smooth, and you’re good to go.

    Solving Engine Idling Issues With Carbon Buildup Removal

    Solving Engine Idling Issues With Carbon Buildup Removal

    If your car feels like it’s struggling to stay awake at a red light, you’re likely dealing with engine idling issues caused by gunked-up components. When you haven’t cleaned your intake in a while, a thick layer of soot and oil residue starts to coat the throttle plate. This prevents the butterfly valve from moving smoothly, which messes with the air-fuel ratio and makes your idle jumpy or inconsistent. I’ve seen plenty of people head straight to the shop thinking they need a new ECU, but usually, it’s just a case where a little carbon buildup removal is all it actually takes to smooth things out.

    While you’re in there, don’t just focus on the pipes; make sure you follow proper cleaning throttle body steps to ensure that valve can snap shut and open without any resistance. It’s a small detail, but it makes a massive difference in how the car feels when you’re sitting at a stop. Once that buildup is gone, you’ll notice a huge engine performance improvement almost immediately. It’s not just about the smoothness, though—you’ll likely see some decent fuel efficiency benefits too, because your engine isn’t working overtime just to stay running.

    Simple Cleaning Throttle Body Steps for Engine Performance Improvement

    Simple Cleaning Throttle Body Steps for Engine Performance Improvement

    Once you’ve tackled the intake, you really can’t ignore the throttle body. It’s basically the gateway for all that air, and over time, it gets coated in a nasty, oily film that messes with everything. When I’m working on a car that feels sluggish, checking this part is usually my next move. You don’t need a fancy shop setup for this; just grab some dedicated throttle body cleaner and a couple of lint-free rags. The key is to be gentle—you’re cleaning delicate components, not scrubbing a kitchen floor.

    When you’re going through the cleaning throttle body steps, make sure you don’t force the butterfly valve open too hard if it’s electronic. Just a light touch is fine. You’ll see a lot of black gunk come off, which is essentially the same kind of carbon buildup removal you’d do for the intake. Getting this surface clean is one of the fastest ways to see real engine performance improvement. It smooths out the airflow, which helps stabilize your revs and can even give you some noticeable fuel efficiency benefits since the engine isn’t fighting through a restriction.

    Pro Tips to Keep Your Intake from Turning into a Mess

    • Don’t go cheap on the cleaner; grab a dedicated throttle body cleaner or mass airflow sensor cleaner. Using something like brake cleaner might seem like a hack, but it can eat through the delicate coatings on your sensors and leave you with a massive headache.
    • Always work on a cool engine. I’ve seen guys try to rush through a cleaning while the block is still hot, and you risk warping parts or causing the cleaner to evaporate too fast, leaving behind a nasty residue that’s even harder to scrub off.
    • Be extremely gentle with your MAF sensor. Those tiny wires inside are incredibly fragile. Don’t touch them with a brush or a rag; just spray the cleaner through them and let it air dry. If you bend one of those wires, you’re looking at a replacement part you didn’t need to buy.
    • Keep an eye on your air filter every time you’re messing with the intake. There’s no point in cleaning the housing if you’re just going to suck more dirt right back in through a clogged, paper filter. If it looks gray or feels gritty, just swap it out.
    • Check your seals and clamps while you’re in there. Since you’ve already got the intake components apart, take a second to make sure every rubber gasket is seated right and every hose clamp is tight. A tiny air leak after you reassemble everything will mess up your idle just as bad as the dirt did.

    The Bottom Line on Keeping Your Airflow Clean

    Don’t wait for a Check Engine light to tell you something is wrong; if your idle feels shaky or your gas mileage drops, it’s probably time to grab some cleaner and check your intake.

    You don’t need a shop’s worth of expensive gear to do this right—just a decent can of specialized cleaner, some rags, and a little patience will save you a massive bill at the mechanic.

    Keeping your throttle body and intake clear of carbon buildup isn’t just about performance; it’s about preventing the kind of sludge that makes your car a nightmare to drive in stop-and-go traffic.

    The Real Cost of Neglect

    Most shops will charge you a fortune just to spray some cleaner through your intake, but the truth is, if you can follow a basic set of steps and don’t mind getting a little grime on your hands, you can save that money for something way better—like actual parts for your project car.

    Nikolai·Osterman

    Don't Let the Shop Fleece You

    Don't Let the Shop Fleece You.

    Look, we’ve covered a lot of ground here, from scrubbing out that nasty carbon buildup to making sure your throttle body isn’t choking on old residue. At the end of the day, cleaning your air intake isn’t some complex, high-level engineering feat; it’s just about preventative maintenance. If you take the time to clear out the gunk and keep those sensors clean, you’re going to see a smoother idle, better throttle response, and you won’t be staring at a massive repair bill because of a preventable clog. It’s really as simple as having the right cleaner and not being afraid to get your hands a little dirty to keep things flowing.

    I know it can feel intimidating when you first pop the hood and see a maze of hoses and sensors, but don’t let that stop you. Every time you tackle a job like this yourself, you’re taking back control from the big shops that thrive on your hesitation. You don’t need a master technician certification to understand your own machine. Just take it one bolt at a time, stay patient, and remember that the most important tool in your kit isn’t a fancy scanner—it’s your own willingness to learn. Keep wrenching, and I’ll see you in the next one.

    Frequently Asked Questions

    Is it actually safe to use regular brake cleaner on my throttle body, or am I going to melt the sensors?

    Look, don’t do it. I’ve seen too many people try to save five bucks and end up with a dead sensor and a massive headache. Regular brake cleaner is way too aggressive; it can eat through the delicate coatings on your throttle body sensors or leave a residue that actually makes things worse. Stick to a dedicated throttle body cleaner. It’s designed to dissolve the gunk without melting your electronics. Don’t risk it.

    How often do I actually need to do this before I start seeing a real difference in my gas mileage?

    Look, there’s no magic number, but if you’re hitting 30,000 to 50,000 miles without a cleaning, you’re probably already leaving money at the pump. If you notice your idle getting shaky or the car feeling sluggish when you step on it, that’s your sign. Don’t wait until the check engine light starts blinking. Just grab some cleaner and do it every couple of service intervals—it’ll pay for itself in gas savings pretty quick.

    Do I need to buy those expensive specialized kits, or can I just grab some basic stuff from the auto parts store?

    Look, don’t fall for the marketing trap. You definitely don’t need those fancy, $50 “pro-grade” kits. Most of that is just extra packaging. Honestly, a can of high-quality throttle body cleaner and a few basic microfiber cloths or an old toothbrush will do 95% of the work. Just make sure the cleaner is specifically rated for sensitive sensors so you don’t mess up your electronics. Keep it simple and save your cash for parts.

  • How to Service Vehicle Differential Fluid

    How to Service Vehicle Differential Fluid

    I remember being ten years old, crouched under my dad’s old sedan, the smell of heavy gear oil thick enough to taste in the back of my throat. He wasn’t lecturing me on “mechanical longevity”; he was just showing me how to avoid a massive repair bill by staying ahead of the game. Most shops will try to tell you that a differential fluid service is some high-level, specialized procedure that requires a master technician and a shop full of expensive diagnostic computers. That’s a total lie. They want you to believe it’s complicated so they can charge you triple the labor rate for a job that’s really just about having the right tools and not being afraid to get a little dirty.

    I’m not here to give you some textbook lecture or a list of vague manufacturer recommendations that don’t actually help you in a real garage. I’m going to walk you through exactly how to handle this yourself, from picking the right gear oil to making sure you don’t strip your drain plug. My goal is to give you the straight-up truth so you can stop overpaying the local dealership and start taking control of what’s under your own hood.

    Table of Contents

    How to Check Differential Fluid Level Without a Mechanic

    How to Check Differential Fluid Level Without a Mechanic

    Before you even think about buying a bunch of new oil, you need to see if you actually need it. To figure out how to check differential fluid level, you’re going to need a way to get under the car—a floor jack and some sturdy jack stands are non-negotiable here. Once you’ve got the chassis up and stable, crawl underneath and look for the fill plug on the side of the differential housing. It’s usually a large hex bolt.

    Don’t go cranking on it blindly, though. Use a socket that actually fits so you don’t strip the head and turn a simple check into a nightmare. Once that plug comes out, take a clean rag or a small screwdriver and peek inside. You’re looking for the fluid to be right at the bottom edge of the hole. If it’s bone dry or looks like thick, milky sludge, that’s a major red flag. Seeing dark, gritty liquid is one of the clearest signs of worn gear oil and means you’re overdue for a swap. If it looks clean and reaches the level, you can save your cash and just bolt the plug back in.

    Recognizing the Warning Signs of Worn Gear Oil

    Recognizing the Warning Signs of Worn Gear Oil

    If you start hearing a low-pitched whine or a rhythmic growling coming from under the car while you’re cruising, don’t just turn up the radio and hope it goes away. That’s usually the first real red flag. When the viscosity of gear oil breaks down because it’s been sitting in there too long, the metal gears inside lose that protective cushion they need. Without that film of oil, you’re basically watching your gears grind themselves into scrap metal. It’s loud, it’s annoying, and if you catch it early, it’s a cheap fix; if you wait, you’re looking at a massive repair bill.

    Another thing to watch for is any weird, burnt smell or sudden leaks around the housing. If you see dark, gritty sludge near the shafts, you might actually be looking at a need for a differential seal replacement rather than just a simple fluid swap. If the oil looks like pitch-black coffee instead of a clear, honey-colored liquid, your fluid has definitely reached the end of its life. Don’t ignore these signs of worn gear oil—your drivetrain will thank you later.

    Don't Make These Rookie Mistakes When You're Under the Car

    • Always crack the fill plug before you touch the drain plug. If you drain all that old, nasty oil and then realize your fill plug is seized or stripped, you’re stuck with a car that can’t move and a huge mess on your floor.
    • Get a decent fluid pump. Trying to pour gear oil straight from the bottle into a tiny hole on the side of the axle is a recipe for a massive, greasy disaster all over your driveway.
    • Check your manual for the specific GL rating. Don’t just grab whatever oil is on sale at the auto parts store; using the wrong viscosity or additive package can actually chew up your gears over time.
    • Keep a clean workspace near the plugs. Even a tiny bit of dirt or grit getting into the differential while the plug is off can act like sandpaper on your internal components once you start driving.
    • Don’t overthink the “level.” You aren’t trying to fill it to the brim; you just want the fluid to be right at the bottom edge of the fill hole. Any more than that and you’re just creating unnecessary pressure.

    The Bottom Line on Your Differential

    Don’t wait for a loud whining sound to start thinking about your gear oil; if it smells burnt or looks like milky sludge, it’s already too late.

    You don’t need a specialized shop to do this—as long as you’ve got a decent socket set and a way to pump the new fluid in, you can handle it in your own driveway.

    Checking your fluid level is the easiest way to avoid a massive repair bill, so make it a habit every time you’re doing an oil change.

    ## Don't Let Them Overcharge You

    “Most shops will try to tell you that a differential service is some high-level surgery, but honestly? It’s just a drain plug, a fresh bottle of gear oil, and ten minutes of your time. Don’t pay a premium for something you can do in your own driveway with a basic wrench set.”

    Nikolai·Osterman

    Don't Let the Shop Overcharge You

    Don't Let the Shop Overcharge You.

    Look, swapping out your differential fluid isn’t some high-level engineering feat. If you’ve learned to spot that burnt smell or the weird whining noise coming from your rear end, you’re already halfway there. All you really need is the right drain plug wrench, a clean way to catch the old sludge, and a bit of patience to make sure you don’t make a mess of your driveway. Just remember to check your levels regularly and don’t go cheap on the oil—using the specific weight your manual calls for is the difference between a smooth ride and expensive gear failure.

    At the end of the day, keeping your car on the road shouldn’t feel like a mystery designed to drain your bank account. I spent my childhood covered in grease in my dad’s garage, and if I can learn to navigate these sensor-heavy engines, you definitely can too. Don’t let a little bit of dirty oil or a daunting-looking underside intimidate you. Once you get your hands dirty and realize you’ve got the power to maintain your own machine, you’ll never look at a mechanic the same way again. Grab your tools and just get started.

    Frequently Asked Questions

    Do I really need to use a specific type of gear oil, or can I just use whatever is on the shelf?

    Look, I get it—it’s tempting to just grab whatever’s on sale, but please don’t do that. Using the wrong oil is a fast track to grinding your gears into expensive metal shavings. Every manufacturer specifies a certain viscosity and additive package for a reason. Check your owner’s manual or the differential housing itself. If it calls for 75W-90 GL-5, use that. Stick to the specs; your wallet will thank you later.

    How do I know if my differential is leaking or if it's just some old grime stuck to the housing?

    Honestly, it’s a common headache. If it’s just old grime, it’ll look like dark, crusty dirt that’s been baked on by the exhaust. But if it’s a real leak, you’ll see fresh, wet oil pooling around the seals or dripping down the housing. Grab a clean rag and wipe the area down completely. If it stays dry after a few drives, it’s just road filth. If it’s wet again? You’ve got a leak.

    Is it worth it to change the fluid every time I do an oil change, or should I wait longer?

    Look, I get why you’d think that—it’s easier to just do everything at once while you’re already under there. But honestly? Don’t waste your time. Your engine oil and your differential fluid are two completely different worlds. Changing your gear oil every time you swap engine oil is overkill and just burns money. Stick to the manual or aim for every 30,000 to 50,000 miles. Just check the level once in a while.

  • Understanding Changes in Clutch Pedal Feel

    Understanding Changes in Clutch Pedal Feel

    I remember being elbow-deep in a greasy engine bay last Tuesday, listening to a customer complain that they needed a whole new transmission because their pedal felt “off.” It’s the same story every time I’m at the shop: someone feels a slight change in their clutch pedal feel and immediately assumes they’re looking at a five-figure repair bill. Honestly, it drives me nuts how mechanics will try to upsell you a total overhaul when the actual issue is usually something as simple as a worn-out slave cylinder or just some old fluid that’s seen better days.

    Look, I’m not here to give you a lecture or sell you on parts you don’t need. I’ve spent enough time under cars to know that most of the time, you just need to identify the specific sensation you’re getting to figure out the culprit. In this post, I’m going to break down exactly what that mushy, heavy, or vibrating feeling means in plain English. I’ll show you how to diagnose the problem yourself so you can stop getting ripped off and get back on the road with confidence.

    Table of Contents

    Spotting Clutch Master Cylinder Failure Symptoms Early

    Spotting Clutch Master Cylinder Failure Symptoms Early

    If you start noticing your clutch pedal travel distance getting shorter or more inconsistent, that’s usually your first red flag. One day it’s fine, and the next, you’re barely moving your foot before the gears engage. If you feel any weird resistance—or worse, a total lack of it—that’s a classic sign that the internal seals in your master cylinder are starting to give out. I’ve seen plenty of guys ignore this until they’re stuck at a red light unable to shift into gear, and trust me, that’s a headache you don’t want.

    Keep a close eye on the floor mat, too. If you see any oily residue or dampness near the base of the pedal assembly, you’re likely looking at a leak. This is one of those critical clutch master cylinder failure symptoms that people always miss until it’s too late. Once that hydraulic pressure drops, you’re basically just pushing air around. Don’t wait for it to go completely limp; catching a leak early might save you from a much more expensive headache down the road.

    The Truth About Clutch Pressure Plate Wear

    The Truth About Clutch Pressure Plate Wear.

    Now, if you’ve ruled out the hydraulics, you’re probably looking at the mechanical side of things. This is where we talk about clutch pressure plate wear. Think of the pressure plate as the heavy-duty spring that keeps your clutch disc clamped tight against the flywheel. Over time, those metal “fingers”—the diaphragm spring—start to lose their tension or even get unevenly worn down. When that happens, you won’t just notice a weird sensation; you’ll see a massive change in your clutch pedal travel distance.

    It usually feels like you have to bury the pedal into the floorboard just to get the car to stop slipping, or conversely, it might feel like it’s engaging way too high up. If you’re feeling a rhythmic vibration or a “chatter” every time you take off from a stoplight, that’s a huge red flag. It means the plate isn’t making even contact anymore. It’s a much bigger job than swapping a cylinder, but honestly, getting ahead of it is better than being stranded in a parking lot with a car that won’t shift.

    5 Ways to Tell if Your Clutch is Actually Dying

    • Listen for the “chatter.” If your car shudders or vibrates like crazy when you’re trying to pull away from a stoplight, your clutch disc is likely uneven or worn down to the rivets. It’s not just annoying; it’s a sign you’re wearing down your input shaft.
    • Watch for the “slip.” If you hit the gas and the RPMs jump up but the car doesn’t actually speed up right away, your clutch is slipping. It’s basically just friction at that point, and you’re burning money every time you drive it like that.
    • Check your floorboard. If you notice any oily residue or wetness around the clutch pedal linkage inside the cabin, that’s a massive red flag. It usually means your master cylinder seal has given up the ghost, and you’re about to be stranded.
    • Feel the “travel distance.” A healthy clutch should have a consistent, predictable engagement point. If you suddenly have to mash the pedal all the way to the floor just to get it to disengage, something is definitely wrong with the hydraulics or the pressure plate.
    • Don’t ignore the noise. If you hear a grinding or squealing sound specifically when you press the pedal down, it’s often the throw-out bearing. It’s a relatively straightforward fix, but if you ignore it, it can end up damaging the whole assembly.

    The Bottom Line on Your Clutch

    Don’t ignore a changing pedal feel; if it starts feeling spongy or gets harder to press, your car is trying to tell you something before it leaves you stranded.

    Most “weird” pedal issues come down to either a hydraulic leak in the master cylinder or a worn-out pressure plate, so figure out which one it is before you start throwing money at parts you don’t need.

    You don’t always need a massive repair bill—sometimes it’s just a matter of bleeding the lines or replacing a single seal, so take a second to diagnose the actual symptom first.

    Listen to the pedal

    Your clutch pedal talks to you long before it actually dies; if it starts feeling spongy or won’t spring back like it used to, don’t just ignore it and hope it goes away—that’s usually your car’s way of telling you a simple fix is about to turn into a massive headache.

    Nikolai·Osterman

    Don't Let a Mushy Pedal Scare You Off

    Don't Let a Mushy Pedal Scare You Off

    Look, at the end of the day, a weird feeling in your clutch pedal usually boils down to a few specific culprits. Whether it’s a leaking master cylinder that’s losing pressure, air trapped in the lines, or a pressure plate that’s finally seen better days, the symptoms are almost always telling you something. You don’t need to guess or let a shop tell you that you need a whole new transmission just because the pedal feels off. Most of the time, it’s just about identifying the specific component that’s failing and getting the right tools to swap it out. Once you know how to distinguish between a simple hydraulic fix and actual mechanical wear, you’re already ahead of most drivers.

    I know it can feel intimidating when you first get under the car and see all those lines and bolts, but honestly, don’t let the complexity stop you. Every time I work on one of my vintage tuners, I’m reminded that these machines aren’t magic—they’re just engineering. If you take it one step at a time and keep a bit of patience, you’ll get it sorted. You’ve got this, and before you know it, that pedal is going to feel crisp and responsive again. Just keep your tools handy and keep learning.

    Frequently Asked Questions

    Is it possible to just bleed the clutch lines myself to fix a spongy pedal, or is that a sign something is actually broken?

    Look, you can definitely try bleeding the lines yourself—it’s a basic maintenance task and a good way to rule out air in the system. If a quick bleed fixes the sponginess, you’re golden. But if you bleed it and the pedal goes soft again within a few days, stop messing around. That’s a tell-tale sign you’ve got a leak or a failing seal. Don’t just keep chasing air; find the actual break.

    How can I tell if the problem is just a worn-out slave cylinder versus something more expensive like the actual clutch disc?

    Here’s the quick way to tell: if your pedal feels spongy or stays stuck to the floor, you’re likely looking at a slave cylinder—it’s usually just a seal leaking or a hydraulic issue. But, if you’re feeling heavy resistance, hearing a weird grinding noise, or the car is shuddering when you let the pedal out, that’s your clutch disc or pressure plate talking. One is a fluid problem; the other is a mechanical one.

    If my pedal is sticking to the floor, am I going to get stranded mid-drive, or can I limp it home to the shop?

    Look, if your pedal is sticking to the floor, you’re playing a dangerous game. It’s a massive red flag that your hydraulic system is failing, and honestly? It could give out completely at a stoplight or mid-turn. If you absolutely have to move it, keep it to short, low-speed trips and avoid heavy traffic. But if I were you, I’d call a tow. It’s way cheaper than a roadside breakdown or a total loss of control.