I remember standing over my dad’s old sedan back in high school, staring at a layer of sludge so thick I couldn’t even tell where the plastic covers ended and the metal began. Most shops will tell you that you need a specialized steam machine or a professional detailer to handle it, but honestly? That’s just a way to inflate the bill. Real engine cleaning isn’t about fancy equipment; it’s about knowing which grime is harmless and which buildup is actually hiding a leaking gasket or a cracked hose. You don’t need a shop’s worth of expensive gear to see what’s actually going on under your hood.
In this guide, I’m skipping the fluff and showing you how to do this right without stripping your wiring or drowning your sensors. I’ll walk you through the exact degreasers I use in the shop and the step-by-step process to get that grime off safely. My goal is to give you the confidence to grab a brush and a spray bottle so you can stop guessing and start seeing the truth about your car’s condition. Let’s get to work.
Table of Contents
- Step-by-Step Instructions
- Removing Oil Buildup From Engines Without the Fancy Shop Tools
- Cleaning Engine Components Safely to Avoid a Messy Mistake
- Pro Tips to Keep You From Making a Massive Mess
- The Bottom Line on Keeping Your Engine Clean
- ## The Real Reason to Clean Your Engine
- Getting the Job Done
- Frequently Asked Questions
Guide Overview
Tools & Supplies
- Degreaser spray nozzle for targeted application
- Soft-bristle brushes for scrubbing crevices
- Shop vacuum or compressed air for drying
- Engine degreaser (1 can)
- Microfiber towels (3-5 cloths)
- Plastic bags and tape for covering sensitive electronics
Step-by-Step Instructions
- 1. First things first, clear out the junk. I’m talking about those old leaves, twigs, and random debris that settle in the crevices near your windshield wipers. If you spray water into a pile of dried leaves, you’re just making sludge that can clog your drain lines. Grab a shop vac or even just a stiff brush and get that loose crap out of there before you even think about touching a hose.
- 2. You’ve got to protect the sensitive stuff. Modern engines are basically giant computers on wheels, and the last thing you want is water getting into your alternator or your fuse box. I always grab a couple of plastic grocery bags and some rubber bands to wrap up the electrical connectors and any exposed sensors. It’s a five-minute job that saves you a massive headache later.
- 3. Now, grab your degreaser. Don’t go buying some overpriced “professional grade” stuff that costs fifty bucks; a decent can of engine degreaser from the local auto shop works just fine. Spray it liberally over the dirty areas, but try to avoid getting it directly onto the intake or any sensitive wiring. Let it sit for maybe ten minutes so it can actually eat through the grime, but don’t let it dry completely on the surface.
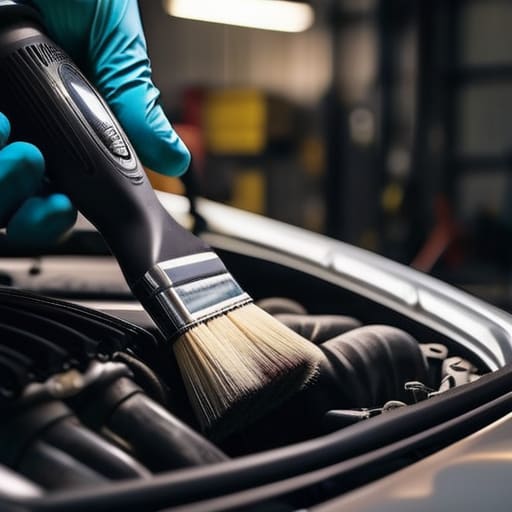
- 4. Get a brush in there. If you’re trying to clean around tight spots or those stubborn oil stains, a cheap paintbrush or an old toothbrush is your best friend. Scrub the areas where the degreaser is sitting to help break up the heavy buildup. It’s all about mechanical action here—the more you agitate that grease, the easier it’ll wash away.
- 5. Time for the rinse, but keep it low-pressure. This is where most people mess up. Do not hit your engine with a high-pressure power washer like you’re cleaning a driveway; you’ll blast water right into places it shouldn’t be. Use a garden hose on a gentle spray setting and rinse from the top down. You’ll see the dirty water running off, and honestly, it’s one of the most satisfying parts of the whole process.
- 6. Dry everything out as much as you can. I usually grab some compressed air if I have it, but if you’re working from your home driveway, a few clean microfiber towels will do the trick. Pay extra attention to those electrical connections you covered up. You want to make sure there isn’t any standing water sitting in the nooks and crannies before you start the car.
- 7. Finally, pop the plastic covers off and fire it up. Once the engine is running, let it idle for a few minutes. The heat from the engine will help evaporate any remaining moisture that you couldn’t get to with a towel. Just keep an eye on your gauges to make sure everything looks normal, and then you’re good to go.
Removing Oil Buildup From Engines Without the Fancy Shop Tools
Look, you don’t need a $500 pressurized steam cleaner or a professional-grade setup to tackle thick sludge. Most of the time, you’re just dealing with old, baked-on grime that’s been sitting there since your last oil change. If you’re removing oil buildup from engines at home, my best advice is to grab a decent can of automotive degreaser and a couple of stiff-bristled nylon brushes. The secret isn’t the price of the tool; it’s the dwell time. Spray your degreaser on, let it sit for a few minutes so it can actually break down the chemistry of the oil, and then scrub. It’s more about patience than power.
The biggest mistake I see beginners make, though, is being too aggressive with the water. If you’re cleaning engine bay safely, you have to treat the electronics like they’re made of glass. I always tell people to wrap their alternator and fuse box in plastic bags before they even touch a hose. If you aren’t careful about preventing electrical damage during cleaning, you’re going to trade a little bit of grease for a massive electrical headache that’ll cost way more than a mechanic’s visit.
Cleaning Engine Components Safely to Avoid a Messy Mistake
Look, I’ve seen plenty of guys go into a job thinking they can just blast everything with a hose and call it a day, only to end up with a car that won’t start. If you want to focus on cleaning engine components without turning your ride into a paperweight, you have to respect the electronics. Before you even touch a spray bottle, grab some plastic bags and electrical tape. Cover your alternator, the fuse box, and any exposed sensors you can find. Preventing electrical damage during cleaning is the difference between a successful weekend project and a massive headache at the shop.
Once you’ve shielded the sensitive stuff, you can get more aggressive with your automotive degreaser application. Instead of soaking the whole bay at once, work in small sections. Use a stiff-bristled brush to agitate the thickest grime around the valve covers or near the oil filter. If you try to spray everything down in one go, you’re just going to end up with a muddy slurry running into every crevice. Take your time and let the chemicals do the heavy lifting so you aren’t scrubbing until your hands go numb.
Pro Tips to Keep You From Making a Massive Mess
- Cover your electrical stuff first. I’ve seen guys spray degreaser straight onto an alternator or a sensitive sensor and spend the next three hours chasing phantom electrical issues. Wrap your alternator, fuse box, and air intake in some plastic bags and tape them down tight before you even touch the water.
- Don’t go overboard with the pressure washer. I get it, it feels satisfying, but high-pressure water is a great way to force moisture into connectors where it doesn’t belong. Use a standard garden hose or a low-pressure spray; you want to wash the grime away, not blast it into your wiring harness.
- Work in stages, not all at once. If you douse the whole engine bay in degreaser and then walk away to grab a coffee, that stuff is going to dry into a crusty mess that’s even harder to get off. Spray a section, let it sit for a minute to break down the oil, scrub it, and rinse it immediately.
- Keep a dedicated brush handy. You can’t get into the tight nooks and crannies around the valve cover or the fuel rails with just a hose. I always keep a cheap, stiff-bristled nylon brush in my kit—it’s the only way to actually lift the heavy sludge out of the corners.
- Dry it out properly before you start the car. This is where most beginners mess up. Once you’re done rinsing, use some compressed air if you have it to blow water out of the spark plug wells and electrical plugs. If you don’t have air, just let it sit in the sun for a good while. You don’t want to turn that key and hear a misfire because of leftover moisture.
The Bottom Line on Keeping Your Engine Clean
Don’t let a layer of sludge scare you off; you don’t need a professional steam cleaner to get the job done, just some decent degreaser and a bit of elbow grease.
Protect your electronics at all costs—cover those sensors and connectors before you start spraying, or you’ll turn a simple cleaning into a massive headache.
Cleaning isn’t just about looks; it’s about being able to spot actual leaks and cracks before they turn into a breakdown on the side of the road.
## The Real Reason to Clean Your Engine
Most people think cleaning an engine is just about making it look pretty for a car show, but it’s actually about visibility. You can’t fix what you can’t see, and you definitely can’t spot a slow oil leak or a cracked vacuum line if it’s buried under two inches of old grease and road grime.
Nikolai·Osterman
Getting the Job Done
Look, cleaning an engine isn’t some mystical ritual that requires a master certification. We’ve covered the essentials: you don’t need a pressurized steam cleaner to tackle that thick grime, and you definitely don’t need to go blasting sensitive sensors with high-pressure water if you know how to work smart. By focusing on targeted degreasing and being careful with your components, you’ve basically done more for your car’s longevity than most people do in a year of scheduled oil changes. Just remember to keep your connections dry and don’t rush the process, because a little patience saves you from a massive headache later.
At the end of the day, my goal isn’t just to show you how to wipe away dirt; it’s about getting you comfortable enough to actually look under the hood without feeling intimidated. Most shops will try to charge you a premium just for doing what you can do yourself with a brush and some decent chemicals. Don’t let them. Once you see how much easier it is to spot a leak or a cracked hose on a clean engine, you’ll realize that you’re in control of your machine. Grab your tools, keep that magnetic tray handy, and just start working. You’ve got this.
Frequently Asked Questions
Is it actually safe to spray water near all those sensitive sensors and electrical connectors?
Look, I get why you’re nervous. Seeing all those wires and plugs makes you want to steer clear. Honestly? It’s risky if you’re just blasting it with a high-pressure hose like you’re washing a driveway. That’s how you force water into a connector and end up with a nightmare electrical ghost. Stick to a damp rag or a light misting. If you must spray, keep the pressure low and avoid the sensitive spots.
How do I know if the grime I'm seeing is just surface dirt or if it's actually a sign of a leaking gasket?
Look, it’s easy to panic when you see a layer of black gunk, but don’t sweat it yet. If the grime is dry, dusty, and spread evenly across everything, it’s probably just road salt and spilled fluids that have settled over time. But if you see a fresh, wet “weeping” look—especially around a seam or a bolt head—that’s a leak. If it feels oily to the touch, you’ve likely got a gasket issue.
Can I use a regular pressure washer, or am I going to end up blowing something apart?
Look, I’ve seen guys turn a simple wash into a nightmare because they went full power-washer mode. Honestly? Don’t do it. You’re asking for trouble. Those high-pressure streams can blast water straight into electrical connectors, sensors, or even your alternator, and once that moisture gets in there, you’re looking at expensive sensor failures or even a car that won’t start. Stick to a garden hose with a decent spray nozzle—it’s safer and gets the job done.
