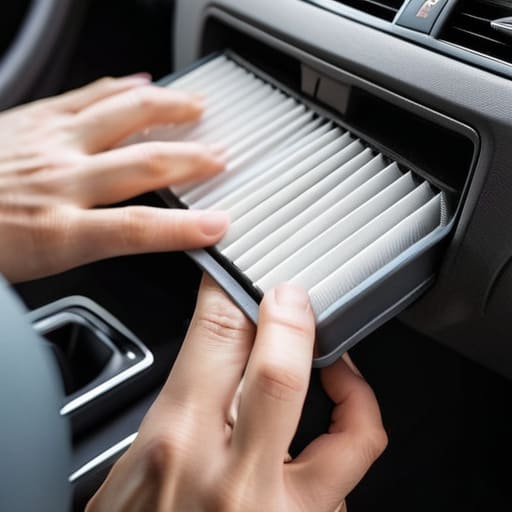
Ever pull into a red light and realize your car smells like a pile of wet gym socks? Most people think that’s just “old car smell” or something they need to mask with a cheap little hanging tree, but it’s actually a massive red flag. The truth is, you’re likely just breathing in months of dust, pollen, and road grime because you haven’t done a cabin air filter change in way too long. I’ve seen mechanics try to tell customers that a clogged filter means they need a whole new HVAC system, but honestly, that’s just total nonsense designed to pad their service invoice.
I’m not here to give you some textbook lecture or a list of expensive specialized tools you’ll never use again. I’m going to show you exactly how to find that filter, pop it out, and slide a fresh one in without breaking a sweat or spending more than twenty bucks. This is a five-minute job that anyone with a little bit of patience can master. By the time we’re done, you’ll be breathing clean air and keeping that extra cash in your own pocket instead of the shop’s.
Table of Contents
- Step-by-Step Instructions
- Spotting the Signs of a Dirty Cabin Filter Before It Stinks
- Mastering Automotive Hvac Maintenance Without a Mechanics Degree
- Pro Tips to Keep Your DIY Job from Turning into a Headache
- The Bottom Line on Your Cabin Filter
- The Real Cost of Neglect
- Don't Let Them Overcharge You
- Frequently Asked Questions
Guide Overview
Tools & Supplies
- Flashlight or phone light to see inside the housing
- None (most vehicles use tool-less clips)
- Replacement cabin air filter (1 unit)
- Microfiber cloth or vacuum (for cleaning debris)
Step-by-Step Instructions
- 1. First, grab your new filter and find where yours is hiding. In most cars, it’s tucked behind the glove box, but on some older models, you might have to look under the dashboard near the passenger footwell. Don’t stress if you don’t see it immediately; just give it a quick search around the passenger side.
- 2. Open your glove box and clear everything out so you aren’t dealing with loose pens or coins flying everywhere. You’ll usually see two plastic tabs or a small dampener arm on the side holding the box in place. Gently squeeze those tabs or unclip the arm to let the glove box drop down further toward your knees.
- 3. Once the glove box is hanging open, you’ll see a rectangular plastic cover. This is the housing for the filter. It might be held in by a couple of tiny clips, so just give them a gentle tug until the cover pops off. If it feels like it’s going to snap, stop and look for a screw you might have missed.
- 4. Slide the old, nasty filter out. I’m telling you, you’ll probably see a thick layer of dust and dead leaves in there, which is exactly why your AC has been smelling like a basement lately. Take a second to look at the airflow arrows printed on the side of the old filter so you know which way the air is supposed to move.
- 5. Before you slide the new one in, take a damp rag and wipe out the empty housing. There’s no point in putting a clean filter into a tray full of grit. You want that space to be as clean as possible so the new filter can actually do its job without getting clogged instantly.
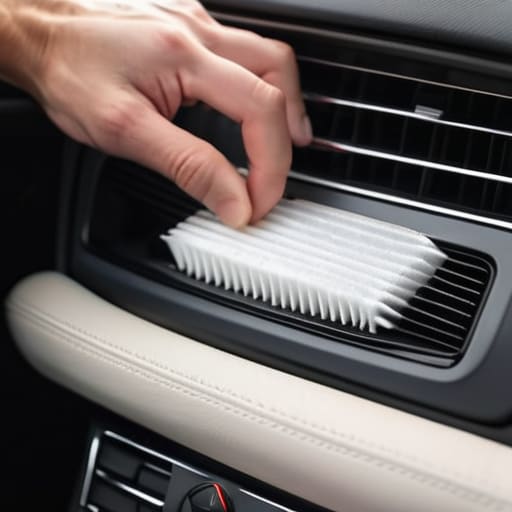
- 6. Slide your brand-new filter into the slot. This is the most important part: make sure the airflow arrow on the new filter is pointing in the same direction as the one you just pulled out. If you put it in backward, you’re basically choking your ventilation system and making the motor work way harder than it needs to.
- 7. Snap the plastic cover back on and lift your glove box back up into position. Re-attach the dampener arm or the side tabs until you hear a solid click. Give the glove box a quick shake to make sure everything is secure and seated properly, and you’re officially done.
Spotting the Signs of a Dirty Cabin Filter Before It Stinks
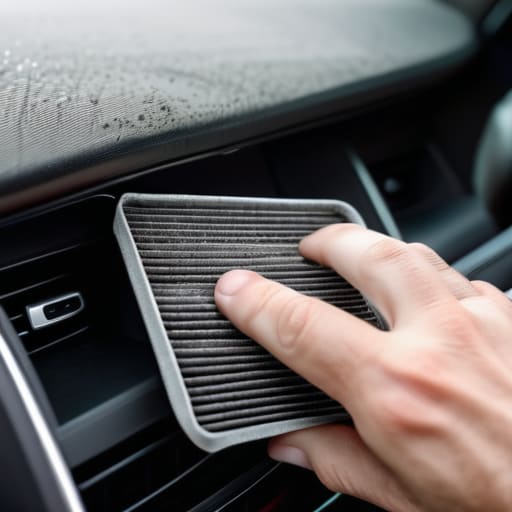
You don’t always have to wait for a service light to pop up to know something is wrong. Usually, your car will start giving you hints. The biggest giveaway is a sudden, funky smell hitting you the second you crank the AC—that’s a classic sign of preventing AC odors from becoming a permanent fixture in your upholstery. If it smells like old gym socks or damp basement, that filter is likely choked with dust, pollen, or even dead bugs.
Another red flag is when your airflow just feels… weak. If you’ve got the fan on full blast but it feels like you’re barely getting a breeze, your filter is probably clogged solid. This puts extra strain on your blower motor, which is a much pricier fix than just a quick swap. Keeping an eye out for these signs of a dirty cabin filter is the easiest way to handle basic automotive HVAC maintenance without waiting for a breakdown. Honestly, if the air feels stale or the windows are fogging up more than usual, it’s time to stop ignoring it and just get it done.
Mastering Automotive Hvac Maintenance Without a Mechanics Degree
Look, most people think automotive HVAC maintenance is some high-level mystery that requires a specialized scanner and a heavy-duty shop compressor. It’s not. Honestly, the biggest mistake I see people make is treating their air system like it’s “set it and forget it.” If you’re constantly cranking your fan to max just to get a decent breeze, or if you notice a weird musty smell every time you hit the defrost, you’re already behind. You don’t need to be a master tech to realize that preventing AC odors is way cheaper than trying to deep-clean a moldy evaporator core later on.
A good rule of thumb for your cabin air filter replacement interval is every 12,000 to 15,000 miles, but if you live somewhere with high pollen or heavy construction dust, you might need to swap it sooner. I always tell my buddies that improving vehicle air quality starts with staying ahead of the grime. Don’t wait for the airflow to become a joke. Just keep an eye on it, grab a fresh filter when the season changes, and you’ll save yourself a massive headache—and a much larger bill—at the dealership.
Pro Tips to Keep Your DIY Job from Turning into a Headache
- Grab a flashlight before you start. Most filter housings are tucked away in dark corners behind the glovebox, and trying to fumbled around in the shadows is a quick way to snap a plastic clip.
- Don’t just shove the new filter in. Take a second to look at the airflow arrows on the side of the frame. If you put it in backward, you’re basically choking your AC system instead of helping it.
- Check the housing for debris while the old filter is out. I’ve seen everything from dried leaves to old french fries stuck in there, and if you don’t clear that out, your new filter will be trashed in a week.
- Be gentle with the glovebox clips. Most modern cars use these little plastic tabs to hold the compartment in place, and they can be finicky. If you force it, you’ll be hearing a permanent rattle every time you hit a bump.
- Keep a spare filter in your trunk or garage. If you’re already halfway through the job and realize your old one was a total disaster, you don’t want to be stuck driving around with no protection for your lungs.
The Bottom Line on Your Cabin Filter
Don’t let a shop talk you into a “maintenance package” just to swap a filter; it’s a ten-minute job that shouldn’t cost you more than the part itself.
If your AC starts smelling like a locker room or your defroster feels weak, your filter is likely choked with dust and needs a swap immediately.
Keep a spare filter in your glovebox or under your seat so you can handle the job the second you notice the airflow dropping, rather than waiting for a scheduled service.
The Real Cost of Neglect
Honestly, watching a shop try to charge someone eighty bucks for a cabin filter swap is what drives me nuts. It’s not some high-tech sensor calibration; it’s literally just pulling out a piece of paper and sliding a new one in. If you can handle a screwdriver, you can handle this, and you’ll keep your lungs a lot cleaner doing it.
Nikolai·Osterman
Don't Let Them Overcharge You
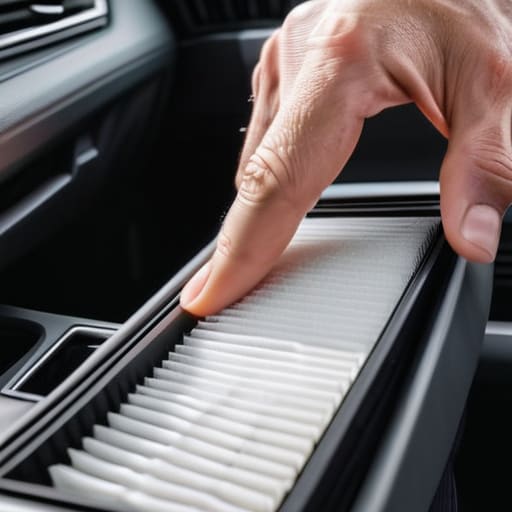
At the end of the day, swapping out your cabin air filter is one of those tasks that feels way more intimidating than it actually is. You’ve learned how to spot the signs—like that weird musty smell or your AC struggling to blow—and you’ve seen how easy it is to actually get the old one out and the new one in. It really just comes down to checking it every few months and making sure you don’t let dust and debris pile up in your HVAC system. You don’t need a specialized diagnostic tool or a shop bay to handle this; you just need a few minutes and a fresh filter to keep your air clean.
I know it’s tempting to just drop the car off at the dealership and let them handle the “dirty work,” but that’s exactly how they pad their margins. Every time you handle a basic maintenance task like this yourself, you’re taking back control of your vehicle and your wallet. It might feel small right now, but these little wins build the confidence you need to tackle the bigger stuff under the hood later on. Keep that magnetic tray handy, stay patient, and remember: you’re more than capable of keeping your own ride running right.
Frequently Asked Questions
Can I just use a standard paper filter from the auto parts store, or do I really need to spend the extra cash on those fancy carbon-activated ones?
Look, if you’re just trying to keep the dust out, the cheap paper filter from the parts store gets the job done. It’s fine. But if you’re driving in heavy traffic or near construction, grab the carbon-activated one. Those fancy ones actually trap smells and exhaust fumes instead of just letting them drift into your face. Honestly? It’s worth the extra few bucks if you don’t want your car smelling like a bus tailpipe.
If I can't find the filter behind the glovebox like everyone says, is there somewhere else it might be hiding in my car?
Look, don’t panic—you aren’t crazy. Not every car follows the “glovebox rule.” If it’s not there, check under the dashboard near the passenger footwell, or even behind the center console. Some manufacturers, especially on older models or certain European builds, hide them under the cowl near the windshield wipers. Grab a flashlight and poke around the footwell area. It might be tucked behind a plastic panel that needs a quick snap to pop off.
How often should I actually be doing this if I live in a city with a ton of dust and construction going on?
If you’re living in a city with constant construction and dust, forget that “every 15,000 miles” rule you see in the manual. That’s for ideal conditions. In a dusty urban environment, your filter is basically acting like a vacuum cleaner for the street. I’d check it every 6,000 to 8,000 miles. Honestly, just pop the housing open and take a look once a season; if it looks gray and fuzzy, swap it.
