
I was sitting in my dad’s garage last Saturday, watching him wipe grease off a 90s Silvia, when I realized something that still bugs me today: most shops charge you a massive markup just for something you can do in your own driveway. They try to make it sound like some high-level science, but honestly, a lot of these “professional” service centers are just banking on you being too intimidated to get your hands dirty. If you’re looking for a complicated, technical manual, you’re in the wrong place, but if you want a real oil change guide that actually respects your time and your wallet, I’ve got you covered.
I’m not here to sell you on fancy, overpriced synthetic blends you don’t need or tell you that you need a lift to get the job done. My goal is to walk you through the actual process—from picking the right filter to making sure you don’t leave a puddle on your floor—using nothing but basic tools and a bit of patience. This is the no-nonsense truth about keeping your engine healthy without letting a service advisor talk you into a hundred-dollar “maintenance package” you never asked for.
Table of Contents
- Step-by-Step Instructions
- The Essential Oil Change Tools Checklist for Real Work
- Synthetic vs Conventional Oil Choosing What Your Engine Deserves
- Pro Tips to Keep You From Making a Mess (or a Mistake)
- The Bottom Line on Your Next Oil Change
- ## The Truth About Maintenance
- Wrapping It All Up
- Frequently Asked Questions
Guide Overview
Tools & Supplies
- Socket wrench set for drain plug
- Oil filter wrench for removal
- Oil drain pan to catch old fluid
- Funnel to prevent spills
- Jack and jack stands for vehicle lifting
- Motor oil (check manual for quantity and grade)
- New oil filter (vehicle specific)
- Drain plug washer/gasket (if replacement is needed)
- Rags or paper towels for cleanup
Step-by-Step Instructions
- 1. First things first, grab your oil and a new filter, and get them ready before you even touch a wrench. You don’t want to be halfway through the job, covered in sludge, only to realize you forgot the specific oil weight your owner’s manual calls for. Check the cap under your hood to be sure; putting the wrong viscosity in can mess with your sensors later on.
- 2. Pop the hood and let the engine run for maybe two or three minutes. You don’t want it screaming hot—that’s a quick way to get a serious burn—but you want the oil warm enough to flow out easily. If the engine is stone cold, the old gunk is going to be thick and slow, making a mess of your driveway.
- 3. Get your car up on jack stands or a ramp. Never, and I mean never, trust just a hydraulic jack to hold you up while you’re underneath a heavy piece of machinery. Once you’re settled, find the oil pan and position your drain pan directly underneath the plug. If you don’t line it up right, you’re going to be cleaning black sludge off your garage floor for the next hour.
- 4. Unscrew the drain plug using your socket wrench. As soon as it gets loose, finish it by hand, but be ready for the flow. Once the stream slows down to a tiny drip, wipe the plug clean and check the washer. If it looks crushed or nasty, swap it out for a new one so you don’t end up with a slow leak down the road.
- 5. Now, tackle the old filter. Position your drain pan under it because, trust me, oil is going to spill out the second you break that seal. Use an oil filter wrench if it’s stuck, but once it’s off, take a clean rag and wipe the mounting surface on the engine. You want that area to be completely spotless before you try to seat the new one.
- 6. Before you screw the new filter on, dip your finger in some fresh oil and smear it around the rubber gasket. This is a pro tip that most beginners skip, but it’s the best way to prevent the gasket from binding or tearing when you tighten it down. Thread the new filter on by hand until it’s snug, then give it just one more little nudge. Don’t over-tighten it like you’re trying to win a wrestling match.
- 7. Screw that drain plug back in tight, grab your new oil, and start pouring. Use a funnel to keep things clean—nobody likes oil dripping down the side of the engine block. Once you’ve filled it to the correct level, start the car, let it idle for a minute to circulate everything, and then check the dipstick one last time to make sure you’re in the sweet spot.
The Essential Oil Change Tools Checklist for Real Work
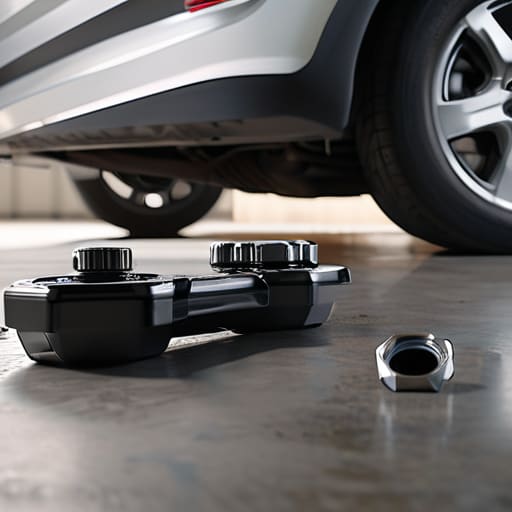
Before you even crack the hood, you need to get your gear sorted. I’ve seen too many people start a job only to realize halfway through that they’re missing a specific socket or a way to catch the mess. My personal oil change tools checklist always starts with a decent jack and jack stands—never, and I mean never, trust a hydraulic jack alone while you’re under a car. You’ll also want a drain pan that’s actually big enough to catch the flow, otherwise, you’re just painting your driveway with black sludge.
One thing that trips up most beginners is the drain plug wrench size. Don’t just guess; check your manual beforehand so you aren’t struggling with a rounded-off bolt because you used the wrong socket. While you’re at it, grab a new crush washer if your car requires one. Also, don’t get caught in the debate of synthetic vs conventional oil without a plan; just check your owner’s manual to see what the manufacturer actually calls for. If you follow the specs, you won’t have to worry about premature engine wear.
Synthetic vs Conventional Oil Choosing What Your Engine Deserves

Look, when you’re staring at that shelf full of colorful bottles at the auto parts store, it’s easy to just grab the cheapest one and call it a day. But if you want to actually follow your automotive maintenance schedule without constant headaches, you need to understand what you’re pouring in. Conventional oil is basically the old-school standard—it works fine for older, low-mileage engines that aren’t under much stress. However, if you’re driving something modern or you push your car hard, you really should be looking at synthetic vs conventional oil more closely.
Synthetic oil is engineered to handle extreme heat and stay stable much longer than the basic stuff. It doesn’t break down as fast, which means it keeps your engine internals cleaner for longer periods. If you’re working on a newer car with tight tolerances, synthetic is almost always the better play. It might cost a few extra bucks upfront, but it’s way cheaper than the repair bill you’ll get if your oil turns into sludge. Just make sure you still know how to check oil level regularly, regardless of which type you choose.
Pro Tips to Keep You From Making a Mess (or a Mistake)
- Don’t trust the manual blindly; always double-check your owner’s manual or the oil cap for the exact viscosity your engine actually needs.
- Get the car warm before you start. A little bit of heat makes the oil flow much faster and easier when you pull that drain plug.
- Always replace the crush washer on the drain bolt. It’s a tiny piece of metal, but if you skip it, you’re going to be dealing with a slow, annoying leak for weeks.
- Never, and I mean never, tighten that drain plug like you’re trying to win a wrestling match. Hand-tight plus a tiny nudge with the wrench is plenty; over-tightening is how you strip threads.
- Keep a catch pan positioned slightly under the plug before you unscrew it. Oil likes to come out faster than you expect, and nobody wants a puddle of black sludge all over their driveway.
The Bottom Line on Your Next Oil Change
Don’t let a shop talk you into expensive synthetic blends if your manual calls for conventional; just follow what the manufacturer says and save your money.
Having the right tools, especially a decent oil filter wrench and a way to catch the old stuff without a mess, is the difference between a quick job and a disaster in your driveway.
Doing this yourself isn’t just about saving cash—it’s about actually knowing what’s going on with your engine so nobody can pull a fast one on you later.
## The Truth About Maintenance
Look, most shops will try to sell you a whole list of “essential” services the second you pull into the bay, but at the end of the day, an oil change isn’t some complex mystery—it’s just the most basic way to show your engine some respect. If you can handle a wrench and follow a few steps, you’re already doing more for your car than most people ever will.
Nikolai·Osterman
Wrapping It All Up
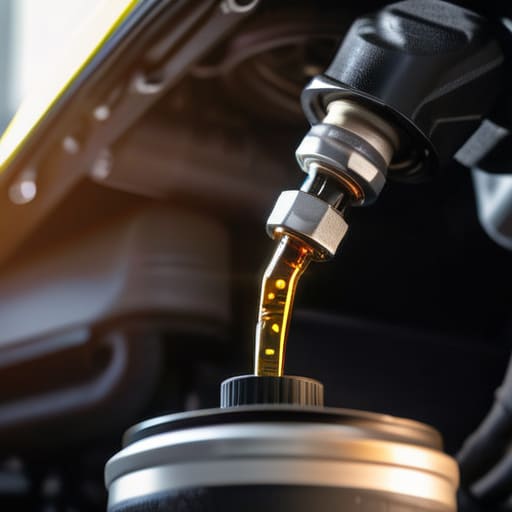
At the end of the day, changing your oil isn’t some mysterious ritual reserved for people with expensive degrees. We’ve covered the ground: you need the right tools, you need to pick a quality oil that actually matches your engine’s specs, and most importantly, you need to follow the procedure without cutting corners. Whether you went with a full synthetic or stuck to a conventional blend, the goal remains the same: keeping the sludge out of your internals so your car actually lasts. It’s about taking control of your maintenance instead of just handing over your credit card and hoping for the best.
I know it can feel intimidating when you’re staring down at a greasy drain plug for the first time, but honestly, the first time is always the hardest. Once you’ve got the rhythm down, it becomes just another Saturday morning task. Don’t let the fear of making a mess stop you from learning something useful. Every time you get under that chassis, you’re building a connection with your machine and saving yourself a massive headache down the road. Grab your wrench, keep that magnetic tray handy, and just get to work. You’ve totally got this.
Frequently Asked Questions
How do I know if I'm actually stripping the drain plug bolt when I'm tightening it?
You’ll know something’s wrong if the bolt feels “mushy.” If you’re turning the wrench and there’s zero resistance—like you’re just spinning it in butter—you’ve likely stripped the threads. It’s a gut-sinking feeling, I know. Also, if the bolt feels loose even when it’s seated, or if you see metal shavings in your old oil, that’s a massive red flag. Just stop immediately. Don’t try to force it; you’ll only make the hole bigger.
Is it actually okay to reuse the old crush washer, or am I asking for a leak?
Look, I’ve seen guys try to get away with it, and honestly? You’re asking for a headache. That crush washer is designed to deform slightly to create a perfect, airtight seal. Once you’ve squeezed it down once, it’s done. If you try to reuse it, you’re basically gambling on a slow drip that’ll eventually coat your driveway in oil. Grab a new one—they cost pennies and save you a massive mess.
What’s the best way to clean up the spilled oil so I don't ruin my driveway?
Look, nothing kills the vibe of a successful DIY job like seeing a dark stain creeping across your driveway. If you spill, don’t just spray it with a hose—that just spreads the mess. Grab some kitty litter or even sawdust and dump it thick over the puddle. Let it sit for a bit to soak up the liquid, then sweep it up. If there’s a stubborn stain left, a little dish soap and a stiff brush usually do the trick.
