I remember sitting on a cold concrete floor in my dad’s garage when I was twelve, staring at a dashboard full of warning lights that looked like a damn Christmas tree. My old man just sighed, wiped his hands on a greasy rag, and told me that most shops would charge you three hundred bucks just to tell you what a twenty-dollar plug could find. That’s the real scam: people think you need a degree and a factory-level computer to understand what your engine is trying to say. You don’t. Most of the time, you just need the right car diagnostic tools to stop the guessing game and actually see the data for yourself.
I’m not here to sell you on some flashy, overpriced scanner that promises to fix your car with one button. I’ve spent enough time under hoods to know that real knowledge comes from understanding what those codes actually mean. In this guide, I’m going to break down the gear that actually matters for a DIYer, separating the useful tech from the total junk. I’ll show you exactly what I use in my own kit so you can stop getting ripped off and start taking control of your own repairs.
Table of Contents
- Unmasking the Truth With Engine Fault Code Readers
- The on Board Diagnostics Scanner Your New Best Friend Under the Hood
- Don't Get Burned: 5 Rules for Using Your Gear Like a Pro
- The Bottom Line: Don't Let the Dashboard Scare You
- Stop Paying for Guesswork
- Cutting Through the Noise
- Frequently Asked Questions
Unmasking the Truth With Engine Fault Code Readers

Look, when that Check Engine light pops up on your dash, your first instinct might be to panic or immediately book a service appointment. Don’t. Most of the time, your car is just trying to tell you something specific, and you don’t need a shop’s expensive computer to listen. Using basic engine fault code readers is the fastest way to stop the guesswork. These little devices plug right into your OBD-II port and spit out a code that tells you exactly which sensor is acting up or which circuit is failing. It takes the mystery out of the situation so you aren’t just throwing parts at a problem hoping something sticks.
I’ve seen so many people get overcharged for simple fixes because they didn’t realize a single faulty oxygen sensor was the culprit. While a high-end on-board diagnostics scanner might be overkill for a weekend warrior, even a budget-friendly handheld unit is a massive step up from total ignorance. It’s about taking control of the narrative before you step foot into a repair shop. Once you have that code, you can look up the fix yourself, grab the right wrench, and get back on the road without getting ripped off.
The on Board Diagnostics Scanner Your New Best Friend Under the Hood

If the basic code readers we just talked about are like reading a summary of a book, then an on-board diagnostics scanner is like having the full manuscript in your hands. I remember when I first started at the shop, I thought these things were just for the guys in the fancy jumpsuits. I was wrong. These scanners don’t just tell you that a sensor is acting up; they let you dive into the live data stream to see exactly how your car is breathing in real-time.
When you’re dealing with something tricky like a stuttering idle or a weird hesitation under load, you can’t just rely on a static code. You need to see what the fuel trims and oxygen sensors are doing while the engine is actually running. Using these kinds of vehicle troubleshooting devices takes the guesswork out of the equation. It’s the difference between staring at a “Check Engine” light and actually understanding the conversation happening between your car’s computer and its components. It might feel intimidating at first, but once you see the data, you’ll realize you’ve got more control than you thought.
Don't Get Burned: 5 Rules for Using Your Gear Like a Pro
- Don’t just clear the codes and call it a day. If that Check Engine Light pops back on five minutes later, you didn’t fix the problem; you just hid the symptom. Use the tool to find the root cause, not to reset the dashboard.
- Invest in a tool that actually talks to you. There’s no point in buying a cheap reader if it only spits out generic codes that tell you nothing. You want something that can access specific modules so you aren’t just guessing in the dark.
- Keep your connections clean. I’ve seen guys get frustrated with a scanner thinking the sensor is dead, when really, it was just a dirty OBD-II port or a loose pin. A little contact cleaner goes a long way.
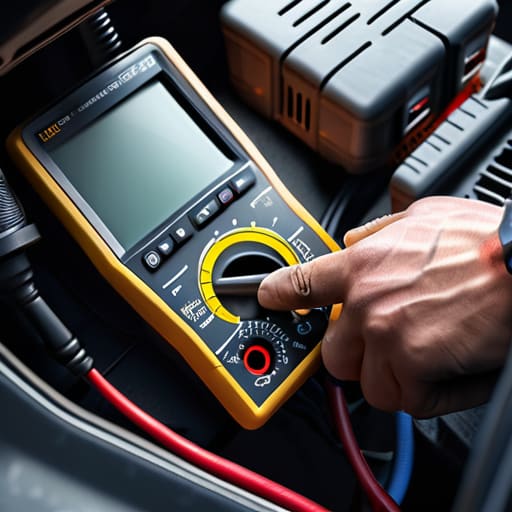
- Learn to read the “Live Data,” not just the error codes. The code tells you what failed, but the live data tells you how it’s behaving. Watching your fuel trims or oxygen sensor voltages in real-time is how you catch a dying part before it actually breaks.
- Match the tool to the job. You don’t need a $2,000 professional-grade tablet to change a spark plug or check a battery, but you also shouldn’t try to reprogram a modern ECU with a ten-dollar handheld from a gas station. Know your limits before you plug in.
The Bottom Line: Don't Let the Dashboard Scare You
You don’t need a $5,000 professional rig to stop getting ripped off; a decent mid-range scanner will get you through 90% of the common issues you’ll face at home.
A fault code is just a starting point, not a final verdict—always use the code to guide your inspection rather than blindly swapping parts.
Investing in your own tools is basically paying yourself back; the money you save by diagnosing a sensor yourself pays for the tool in a single afternoon.
Stop Paying for Guesswork
Most shops will charge you an hour of labor just to tell you what a twenty-dollar scanner could’ve told you in ten seconds. Don’t let them charge you for the privilege of knowing what’s actually wrong with your car.
Nikolai·Osterman
Cutting Through the Noise

Look, we’ve covered a lot of ground, from the basic code readers that tell you why your check engine light is acting up, to the more serious OBD-II scanners that actually give you the full picture. At the end of the day, these tools aren’t just gadgets; they are your eyes and ears when you’re staring at a dashboard full of warning lights. You don’t need to drop thousands on professional-grade shop equipment just to get started. Whether you’re just trying to figure out if it’s a loose gas cap or a dying oxygen sensor, having the right diagnostic tool in your hand means you’re no longer flying blind when you pop the hood.
I know it can feel intimidating when you first see those error codes scrolling across a screen, but don’t let that stop you. Every time you use one of these tools, you’re taking a step toward understanding your machine instead of just being a passenger in it. My dad always told me that the car isn’t trying to hide anything from you; it’s actually trying to tell you exactly what it needs. So, grab a scanner, grab a bit of patience, and start digging. Once you realize that most of these “scary” issues are just simple fixes waiting to happen, you’ll realize that you’ve got this.
Frequently Asked Questions
Do I really need to drop hundreds on a professional-grade scanner, or can I get away with a cheap one from the auto parts store?
Look, I get the temptation to grab the cheap one at the parts store, but don’t waste your money if you’re serious about DIY. Those basic readers are fine for telling you “your engine is acting up,” but they won’t give you the deep data you actually need to fix it. If you’re just chasing a Check Engine light, go cheap. But if you want to actually diagnose a sensor issue without getting ripped off? Invest in something mid-range.
Once the tool gives me a code like P0300, how do I actually know what part needs replacing instead of just guessing?
Look, a code like P0300 just tells you there’s a random misfire; it doesn’t point a finger at a specific part. If you just swap parts blindly, you’re basically throwing money into the oil pan. You’ve gotta play detective. Use that code to narrow it down to the ignition system or fuel delivery, then start testing components—like checking your spark plugs or looking for vacuum leaks—before you ever buy a new part.
Can these tools tell me if my car is about to break down, or are they only useful once something's already gone wrong?
Look, if you’re waiting for a light to pop up on the dash, you’re already playing catch-up. These tools are great for diagnosing a dead engine, but they’re even better for preventative maintenance. If you run a scan and see “pending codes” or weird sensor data that hasn’t triggered a light yet, that’s your car whispering that something is about to go sideways. Catch it early, and you’re buying a sensor; wait too long, and you’re buying a whole new engine.