Category: Cars

  • How to Change the Cabin Air Filter

    How to Change the Cabin Air Filter

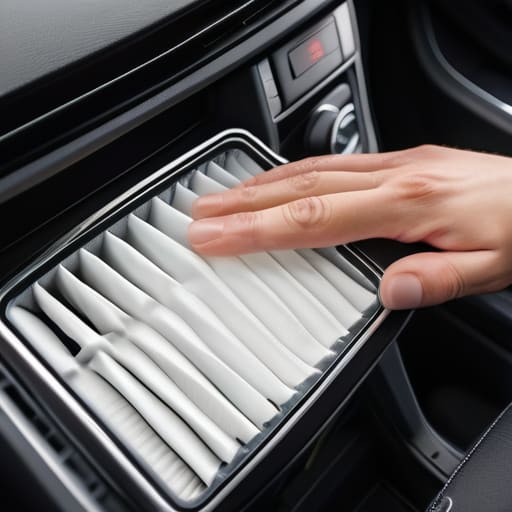
    Ever notice how your car’s AC starts smelling like a pile of damp laundry the second you turn it on? Most shops will try to tell you that you need a specialized service or some high-end system flush, but honestly, that’s usually just a load of junk. Nine times out of ten, you’re just breathing through a clogged, filthy piece of paper. A simple cabin filter replacement is the actual fix, and it’s one of those things mechanics love to mark up because they know most people won’t bother checking. I remember my first week at the shop seeing guys charge customers a hundred bucks just to snap a plastic housing shut; it really bugs me.

    I’m not here to give you some textbook lecture or a list of fancy tools you don’t need. I’m just going to show you exactly how to get in there, swap that dirty filter for a fresh one, and get back to driving without smelling like a basement. We’re going to keep this straightforward and practical, focusing on the real-world steps so you can stop overpaying and start breathing clean air again.

    Table of Contents

    Guide Overview

    Total Time: 15-30 minutes
    Estimated Cost: $15-30
    Difficulty: Beginner

    Tools & Supplies

    • Flashlight or work light to see the housing
    • Screwdriver (if your vehicle requires removing a panel)
    • Replacement cabin air filter (1 unit)
    • Microfiber cloth or vacuum (for cleaning debris)

    Step-by-Step Instructions

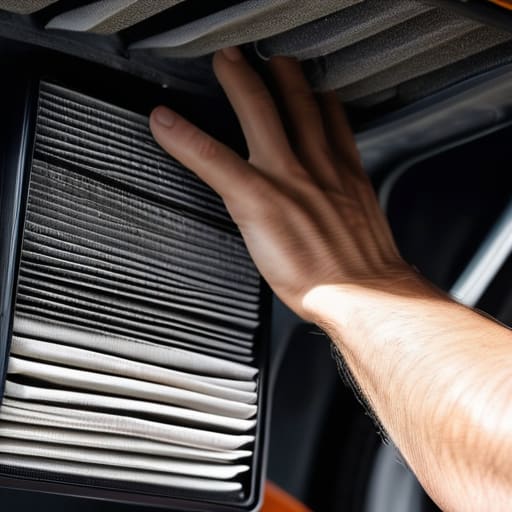
    • 1. First, grab your new filter and find where it lives. In most modern cars, it’s tucked right behind the glove box, but in some older models, you might have to look under the passenger side dashboard. I usually keep my magnetic tray handy just in case there are any small clips you need to catch so they don’t disappear into the floor mats.
    • 2. Open your glove box and clear everything out. You don’t want your loose change or sunglasses falling into the footwell once you start moving things around. Most of the time, you’ll see two plastic tabs or dampeners on the sides of the box; just squeeze them inward to let the whole unit drop down toward the floor.
    • 3. Once the glove box is hanging low, you’ll see the filter housing. It’s usually a rectangular plastic cover. Look for the little tabs on the side of that cover and give them a gentle tug to pop the lid off. If it feels like it’s stuck, don’t force it—just check if there’s a hidden screw or a clip you missed.
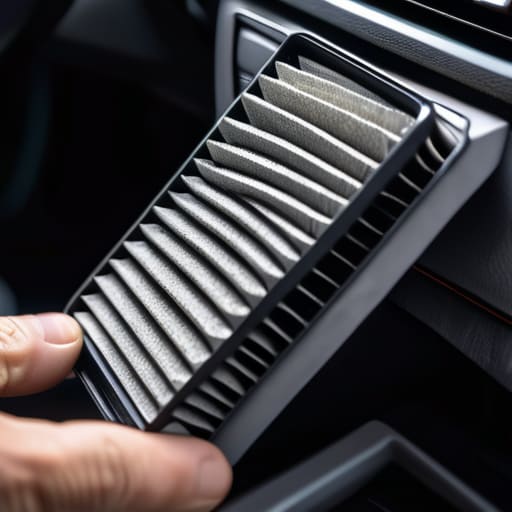
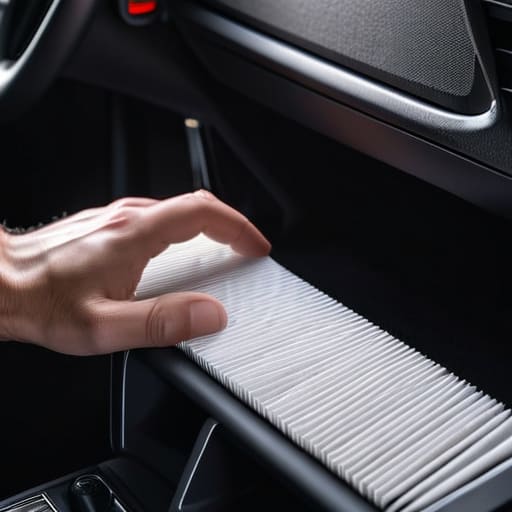
    • 4. Slide the old, nasty filter out. This is the part where you’ll probably see a bunch of leaves, dust, or even dead bugs. It’s gross, but seeing how much junk was in there is exactly why you shouldn’t pay a pro to do this for you. Take a second to look at the direction of the airflow arrows on the side of the old filter; you’ll need that for the next step.
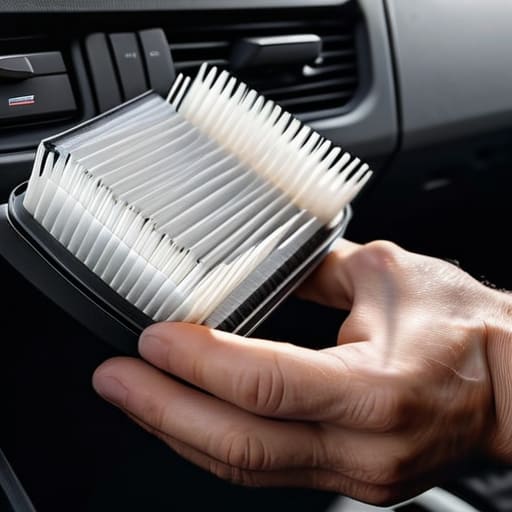
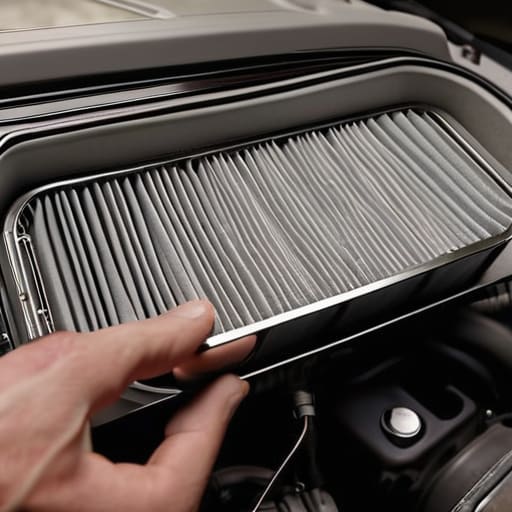
    • 5. Take your clean filter and slide it into the slot. Make sure the airflow arrow is pointing in the same direction as the old one—usually, that means it’s pointing down toward the floor. If you put it in backward, you’re basically choking your AC system and making it work twice as hard as it needs to.
    • 6. Snap the housing cover back into place until you hear it click into position. Then, lift your glove box back up and make sure those side tabs or dampeners are seated correctly. Give the glove box a quick shake to ensure everything is secure and flush before you go about your day.

    Spotting Clogged Cabin Filter Signs Before They Stink

    Spotting Clogged Cabin Filter Signs Before They Stink

    You don’t always have to wait for a nasty smell to realize something is wrong. One of the biggest clogged cabin filter signs I see at the shop is just a sudden drop in airflow. If you crank your AC to max and it feels like you’re barely getting a breeze, or if the defrost takes forever to clear your windshield, that filter is likely choked with dust and debris. It’s basically suffocating your system, making your blower motor work twice as hard as it should.

    Another dead giveaway is the “musty sock” vibe. If you turn on the vents and get a whiff of something damp or earthy, your vehicle interior air quality has officially taken a dive. This usually happens because the filter is so saturated with organic matter that it’s actually holding onto moisture. Honestly, if you’re noticing more dust settling on your dashboard than usual, that’s a massive red flag. Don’t ignore these cabin air filter symptoms; catching them early saves you from potentially expensive automotive HVAC maintenance down the road.

    Mastering Automotive Hvac Maintenance With Just Your Hands

    Mastering Automotive Hvac Maintenance With Just Your Hands

    Look, swapping the filter is the easy part, but if you want to actually get good at automotive HVAC maintenance, you need to look at the bigger picture. Don’t just swap the paper and call it a day; take a second to check the area around the housing for any debris or fallen leaves. I’ve seen plenty of guys struggle with airflow issues only to realize a handful of pine needles were wedged right next to the slot. Keeping that space clear is huge for maintaining your vehicle interior air quality over the long haul.

    While you’re at it, pay attention to how your vents feel. If you notice a weird damp smell or if the air just feels “weak” even on max blast, you might be dealing with more than just a dirty filter. Sometimes, moisture can build up in the evaporator, which is a total pain to deal with if it starts smelling like old gym socks. If you decide to upgrade, look into the HEPA cabin filter benefits—they’re a bit more expensive, but they do a much better job of catching the fine dust that standard ones miss.

    Pro Tips to Save You Time and a Headache

    • Grab a flashlight before you start. Most cabin filters are tucked away in dark corners behind the glovebox, and trying to feel around blindly is a great way to snap a plastic clip you didn’t mean to touch.
    • Check the airflow arrow. Every filter has a little arrow on the side indicating which way the air should flow. If you flip it backward, you’re basically choking your HVAC system, and it won’t blow nearly as strong.
    • Don’t cheap out on the heavy-duty stuff. I’ve seen people buy those super thin, bargain-bin filters just to save five bucks, but they clog up in weeks. Get a decent carbon-activated one; it actually handles the smells.
    • Keep a vacuum handy. When you pull that old filter out, a mountain of leaves, dust, and whatever else has been living in there is going to fall out. Suck that junk up immediately so it doesn’t end up in your blower motor.
    • Inspect the housing while it’s empty. Since the filter is out, take a second to look for any debris or dampness inside the slot. If there’s standing water or a pile of pine needles in there, a new filter isn’t going to fix your air quality.

    The Bottom Line on Your Cabin Filter

    Don’t let a shop talk you into a high-priced service for this; it’s one of the easiest DIY wins that saves you a massive headache and a lot of cash.

    If your defroster is acting weak or the air smells like old gym socks, stop ignoring it and swap the filter out immediately.

    Keep a spare filter in your glovebox or your tool kit so you aren’t caught off guard when the air quality starts tanking.

    The Real Cost of a Dirty Filter

    Most shops will try to sell you a “premium HVAC service” just to swap a piece of pleated paper, but honestly? It’s a five-minute job that shouldn’t cost you a dime in labor. Don’t let them gatekeep your own air quality.

    Nikolai·Osterman

    Don't Let Them Overcharge You

    Don't Let Them Overcharge You: DIY filter.

    At the end of the day, swapping out your cabin air filter is one of those small wins that makes a massive difference in how your car feels. You’ve learned how to spot the warning signs like that weird dusty smell or a weak airflow, and you know that a quick inspection can save you from a headache later. It really isn’t about having a shop full of expensive scanners; it’s just about knowing where to look and having the right mindset. Once you’ve cleared out that old, clogged debris and popped in a fresh filter, you’ve officially taken control of your car’s environment and saved yourself a trip to the dealership for a job that should have taken ten minutes.

    I know it can feel intimidating when you first pop the glovebox or look under the dash, but don’t let that stop you. Every time you pick up a tool and tackle a fix yourself, you’re building a level of confidence that no mechanic can sell you. My dad always said that the best way to respect a machine is to understand how it works, and that starts with the basics. Keep your tools handy, keep your eyes open, and remember that you are more than capable of keeping your own ride running clean. You’ve got this, so go out there and stop paying for the simple stuff.

    Frequently Asked Questions

    How often should I actually be swapping this thing out if I don't live in a dusty area?

    Look, if you aren’t driving through construction zones or living in a literal desert, you don’t need to obsess over it. Honestly, once a year is a safe bet for most people. But don’t just go by the calendar; if you notice your defroster is acting weak or the airflow feels sluggish, that’s your cue. Even in clean areas, pollen and fine dust still find their way in. Just check it annually and you’re golden.

    Is there a huge difference between the cheap generic filters and the expensive brand-name ones?

    Look, I get the temptation to grab the cheapest one on the shelf, but don’t cheap out too much. Those ultra-budget generic filters are usually just thin mesh; they catch big dust bunnies but let the fine stuff right through. If you want to actually protect your HVAC system and your lungs, spend the extra few bucks on a decent brand or a carbon-activated one. It’s worth the extra change to avoid that stale smell.

    If I replace the filter and the air still smells like old gym socks, what's the next thing I should check?

    If you swapped the filter and it still reeks, you’ve likely got a mold or bacteria problem living in your evaporator core. Basically, moisture gets trapped in there and starts growing stuff. I’d grab a can of specialized HVAC disinfectant foam—you spray it directly into the vents or the drain tube. If that doesn’t kill the funk, check your AC drain line; if it’s clogged, standing water is just rotting in your dash.

  • Replacing the Engine Air Filter

    Replacing the Engine Air Filter

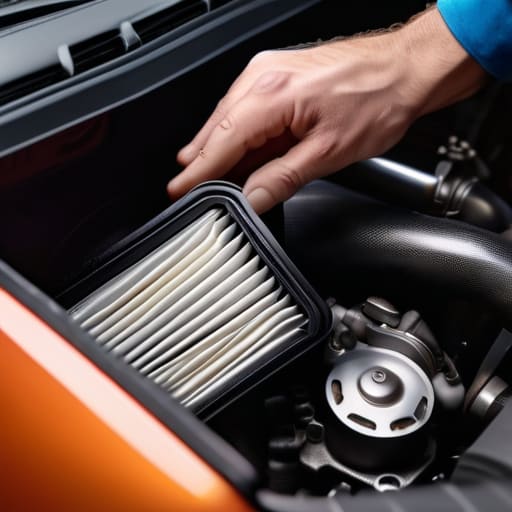
    I remember watching my dad pull a used filter out of an old Corolla last summer, and it looked less like a car part and more like a clump of wet lint. He just laughed and told me that most shops would charge you fifty bucks just to touch that plastic housing, even though it takes about two minutes to do yourself. Honestly, it kills me when I see people getting hit with “maintenance fees” for a simple air filter change that they could’ve handled in their own driveway during a lunch break. You aren’t paying for expertise here; you’re just paying for someone else’s convenience.

    I’m not here to give you some textbook lecture or a list of fancy tools you don’t actually need. My goal is to show you exactly how to spot a dying filter and swap it out without breaking a sweat or emptying your wallet. I’ll walk you through the process step-by-step, from popping those clips to making sure your engine is finally getting the clean air it actually deserves. Let’s get under the hood and stop wasting your money.

    Table of Contents

    Guide Overview

    Total Time: 10-20 minutes
    Estimated Cost: $15-50
    Difficulty: Beginner

    Tools & Supplies

    • Screwdriver (if housing requires screws)
    • Flashlight (to inspect filter slot)
    • Replacement air filter (1 unit)
    • Microfiber cloth (1 unit)

    Step-by-Step Instructions

    • 1. First things first, find a flat spot to park and pop the hood. You don’t need a lift for this, but I always recommend turning off the engine and making sure everything is cool to the touch so you don’t burn your fingers on the housing.
    • 2. Locate your airbox. Depending on what you’re driving, it’ll be a big black plastic box sitting somewhere near the top of the engine bay. Most of them are held down by simple metal clips or a couple of screws, so just unclip the housing or use a screwdriver to back those fasteners out.
    • 3. Once the clips are loose, lift the lid up carefully. You might see a bunch of leaves or grit sitting on top of the old filter—don’t just let that fall into your engine. Use a vacuum or a can of compressed air to clear out any debris from the bottom of the box before you even touch the filter itself.
    • 4. Reach in and pull the old filter out. It’s going to look pretty gross—probably gray, dusty, or even oily if you’ve been pushing it too hard. Take a second to inspect the housing for any cracks or loose rubber seals; if the box itself is broken, a new filter won’t do squat.
    • 5. Grab your new filter and check the shape. It might look identical to the old one, but you want to make sure it’s the exact right fit for your specific year and model. Line it up with the tracks inside the airbox so it sits perfectly flat; if it’s crooked, you’re just sucking in unfiltered air.
    • 6. Drop the lid back onto the housing and line up those clips or screws again. You want to make sure the seal is completely tight so no “unauthorized” dust gets a chance to bypass the filter. Give the box a little wiggle to ensure everything feels secure and seated properly.
    • 7. Close the hood and give the engine a quick start. It should sound a little smoother, or at least not struggle like it was gasping for breath. If you hear any weird whistling, pop the hood again and double-check your clips—you probably didn’t seat the lid right.

    Spotting Dirty Air Filter Symptoms Before They Cost You

    Spotting Dirty Air Filter Symptoms Before They Cost You

    You don’t always have to wait for a dashboard light to tell you something is wrong. Most of the time, your car will start giving you subtle hints that it’s struggling to breathe. One of the biggest dirty air filter symptoms I see in the shop is a noticeable hesitation when you hit the gas. If you press down and the car feels sluggish or “bogged down,” it’s usually because the engine is choking on dust and debris. You might also notice your idle feeling a bit rough or inconsistent, which is just your car’s way of saying it’s working way too hard for very little reward.

    Another thing to watch for is a sudden drop in your gas mileage. When that filter gets clogged, your engine has to compensate, which directly hits your fuel efficiency and air filters balance. If you’re finding yourself hitting the gas pump more often than usual for no clear reason, check that intake box. It’s not just about keeping the engine clean; it’s about making sure you aren’t literally burning money because of a ten-dollar part that’s been sitting there for a year.

    How Often to Replace Air Filters Without Guessing

    How Often to Replace Air Filters Without Guessing

    Look, most people just wait until their car starts acting like a jerk before they check anything, but that’s a mistake. If you’re asking how often to replace air filters, the standard answer is every 12,000 to 15,000 miles, but that’s just a baseline. If you live somewhere with heavy construction, dusty dirt roads, or even just a lot of pollen in the spring, your filter is going to clog way faster. I always tell people to just pull the cover off and take a peek once a season. It takes two minutes and saves you from a massive headache later.

    Don’t get caught in the trap of thinking all filters are created equal, either. When you’re shopping, you’ll see different replacement filter types, like standard paper ones or those high-flow reusable ones. If you’re just commuting to work, stick to the standard paper—they’re cheap and they do the job. But if you’re chasing a bit of engine performance improvement or you’re working on one of my vintage tuner projects, a high-flow option might be worth the extra cash. Just don’t overthink it; a clean filter is always better than a fancy one that’s clogged with grit.

    Pro Tips to Keep Your Engine Breathing Easy

    • Don’t just eyeball it—take the old filter into the sunlight. If you see a thick layer of gray grime or debris packed into the pleats, it’s time to toss it. Light passing through the material is the easiest way to tell if it’s shot.
    • Check the airbox housing while you’re in there. I’ve seen plenty of leaves, pebbles, and even small rodent nests sitting in the bottom of the plastic box. Clear that junk out so it doesn’t get sucked into your intake.
    • Avoid the temptation to use compressed air to “clean” a paper filter. I know it looks tempting to just blow the dust out, but you’ll end up tearing the microscopic fibers that actually do the work. Once it’s dirty, just replace it.
    • Make sure the seal is seated perfectly. If that rubber gasket isn’t sitting flush in the housing, your engine is going to suck in “unfiltered” air from the gaps. That’s a fast track to engine wear you definitely don’t want.
    • Keep a spare filter in your glovebox if you live somewhere dusty or near a construction site. If you notice your MPG dropping or the car feeling sluggish, you can swap it out on the fly instead of waiting for a service light to come on.

    The Bottom Line on Keeping Your Air Clean

    Don’t wait for a dashboard light or a sluggish engine to act; if the filter looks like a dust bunny’s nest, just swap it out.

    You don’t need fancy tools for this—if you can open a clip or turn a simple screw, you can do this job in five minutes.

    Save your money for the stuff that actually matters, like tires or oil, by handling this basic maintenance yourself instead of paying a shop’s labor rate.

    ## The Real Cost of Neglect

    Look, a mechanic is gonna charge you fifty bucks just to pull a piece of cardboard out of a plastic box, but if you don’t do it, you’re basically asking your engine to breathe through a straw. Don’t let a ten-dollar part kill your fuel economy.

    Nikolai·Osterman

    Don't Overthink It

    Don't Overthink It: DIY air filter replacement.

    Look, at the end of the day, swapping an air filter is one of those tasks that sounds intimidating until you actually get your hands dirty. We covered how to spot the warning signs—like that sluggish acceleration or the sudden drop in MPG—and we went over the fact that you don’t need to wait for a manual to tell you when it’s time. Just keep an eye on the debris and listen to how your engine is breathing. If you can manage to identify a clogged filter and slide a fresh one into the housing, you’ve already saved yourself a trip to the shop and a chunk of change on a service invoice that probably should have been a ten-minute DIY job.

    My dad always told me that the best way to learn about cars is to stop being afraid of them. Every time you pop that hood and fix something yourself, you’re taking back control from the big shops that want to charge you for things you can do in your own driveway. It’s not just about the money you save; it’s about the confidence you build every time you realize you’re more capable than the guy in the grease-stained jumpsuit telling you it’s a “complex repair.” Grab a new filter, get stuck in, and just keep driving.

    Frequently Asked Questions

    Can I just blow out the old filter with some compressed air instead of buying a new one?

    Look, I get the temptation—it feels like a quick win to just blast it with some compressed air and call it a day. But honestly? Don’t do it. Blowing air through those pleats usually just pushes the fine grit deeper into the paper fibers. You aren’t actually cleaning it; you’re just rearranging the dirt. Save your money and just buy a new one. A cheap filter is way better than a “cleaned” one that’s still choking your engine.

    Is there a difference between the engine air filter and the cabin air filter, and do I change them both the same way?

    Big misconception right there. They’re totally different beasts. The engine filter sits under the hood and keeps dirt out of your cylinders so your car doesn’t choke. The cabin filter is inside—usually behind the glovebox—and keeps the dust and pollen out of your lungs. You can’t swap them the same way; one involves engine components, the other is more about interior access. Check your manual, but don’t mix them up.

    Will putting in a high-performance "performance" filter actually give me more horsepower, or is it just marketing hype?

    Look, I’ll be real with you: most of the time, it’s marketing hype. If you’re driving a stock commuter car, a high-flow filter isn’t going to magically turn your sedan into a race car. You might see a tiny bump in throttle response, but you won’t feel actual horsepower gains. Unless you’ve actually modded your intake or tuning, save your money. Just stick to a solid, clean replacement and keep that engine breathing easy.

  • Changing Windshield Wiper Blades

    Changing Windshield Wiper Blades

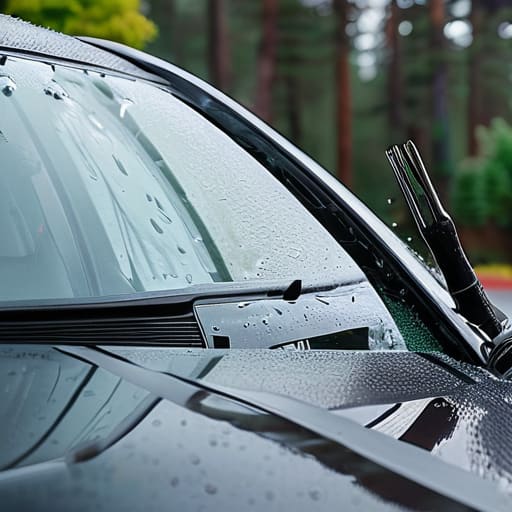
    I was driving home during a massive downpour last Tuesday, squinting through a blurry, streaky mess of water, when I realized my wipers were basically just smearing mud around my field of vision. It’s one of those things that feels like a huge deal when you’re behind the wheel in a storm, but honestly, most people let a shop charge them thirty bucks just to handle a windshield wiper replacement that takes less time than making a sandwich. You don’t need a specialized tool kit or a mechanic’s certification to fix this; you just need to stop letting minor maintenance turn into an unnecessary bill.

    In this guide, I’m going to cut through the fluff and show you exactly how to swap those old blades out for a fresh set without breaking anything. I’ll walk you through identifying your specific blade type, the actual clicking sound you should hear when they lock in, and a few pro tips I’ve picked up working in the shop to make sure they don’t squeak on day one. Let’s get it done so you can see the road clearly again.

    Table of Contents

    Guide Overview

    Total Time: 15-30 minutes
    Estimated Cost: $20-50
    Difficulty: Beginner

    Tools & Supplies

    • Microfiber cloth to clean the glass surface
    • Owner's manual to verify wiper blade size
    • Set of replacement wiper blades (driver and passenger side)
    • Glass cleaner or water for cleaning residue

    Step-by-Step Instructions

    • 1. First things first, grab your new blades from the store and check the packaging to make sure they actually match your car’s year and model. I’ve seen too many guys get halfway through a job only to realize they bought the wrong size, which is a massive headache.
    • 2. Lift your wiper arms up away from the glass until they’re standing at a comfortable angle. If your car has a built-in “service mode” that makes the arms pop up from the hood, use that, but for most older cars, you can just manually pull them up until they lock into place.
    • 3. Locate the little plastic tab or button on the underside of the wiper arm where the blade meets the metal. You’re going to press that button or squeeze the clip to release the old blade from the arm; it might feel a bit stiff, but don’t force it so hard that you snap the plastic.
    • 4. Once the old blade slides off, take a micro-fiber cloth or a paper towel and wipe down the metal arm itself. You’ll probably see a layer of grime and old rubber residue sitting right in the hinge, and you want that surface clean so the new blade sits perfectly flush.
    • 5. Take your new wiper blade and line up the connector with the hook or tab on the wiper arm. Slide it in until you hear a satisfying click—that’s how you know it’s actually locked in and won’t fly off onto the highway the second you hit forty miles per hour.
    • 6. Before you let the arms snap back down, do a quick visual check to ensure the blade is centered and isn’t wobbling around on the arm. You want it to look solid and straight.
    • 7. Slowly lower the arms back onto the windshield, being extremely careful not to let them slam down too hard. If you let them snap back too fast, you run a real risk of cracking your windshield, and trust me, that’s a repair you definitely don’t want to deal with.

    Spotting the Signs of Worn Wiper Blades Before They Fail

    Spotting the Signs of Worn Wiper Blades Before They Fail

    You don’t always have to wait for a massive rainstorm to realize something is wrong. Usually, your blades will start giving you subtle hints long before they actually stop clearing the glass. If you notice those annoying streaks or smudges every time you flip the switch, that’s your first big red flag. Sometimes it’s just dirt, but if the pattern repeats, the rubber is likely cracked or dried out from sitting in the sun. Another dead giveaway is that high-pitched squealing sound; that’s basically the blade screaming for help because it’s lost its grip on the windshield.

    I also tell people to watch out for “chattering.” If your wipers are jumping or skipping across the glass instead of gliding smoothly, the internal structure is shot. Don’t ignore these signs of worn wiper blades, because trying to drive through a downpour with bad visibility is a massive risk to your automotive visibility safety. It’s way better to catch it early and spend ten bucks on a new set than to end up squinting through a blurry mess when you actually need to see the road.

    Mastering How to Change Wiper Blades Without the Mechanics Fee

    Mastering How to Change Wiper Blades Without the Mechanics Fee

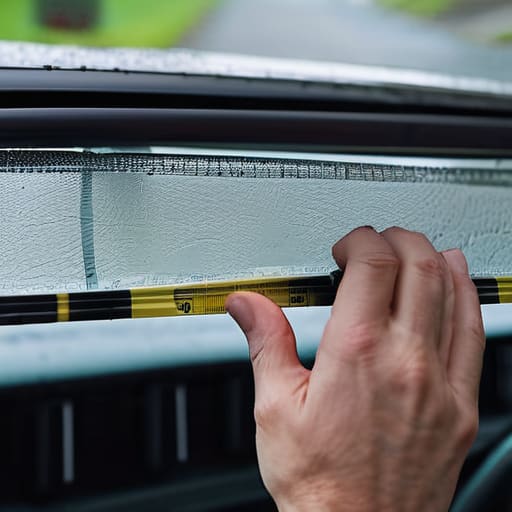
    Look, the biggest mistake I see people make isn’t even the installation itself—it’s walking into the auto parts store and grabbing whatever looks cheapest. You need to actually know your wiper blade types and sizes before you even leave the house. Most cars use a specific length for the driver versus the passenger side, and if you get a “universal” fit that’s too short, you’re going to have massive blind spots right when a storm hits. I always tell my friends to check the owner’s manual or just measure the old ones with a tape measure first. It saves you that annoying second trip back to the store.

    Once you’ve got the right parts, the real trick to a smooth wiper arm installation is being gentle with the metal. Those arms are under tension; if you let them snap back against the glass without a blade attached, you’re looking at a cracked windshield and a very expensive mistake. I always keep a folded towel on my glass to cushion the arm while I’m swapping things out. It takes two seconds, but it’s the difference between a quick fix and a massive headache.

    Pro Tips to Keep Your View Crystal Clear

    • Don’t just buy the cheapest blades at the grocery store; spend the extra few bucks on a decent brand like Bosch or Rain-X. The cheap ones start streaking after two weeks of sun exposure, and you’ll just end up doing this whole job again.
    • Always check your wiper arm tension before you swap the blades. If the arm feels loose or doesn’t press the blade firmly against the glass, you’re going to get annoying gaps in your wipe pattern no matter how new the rubber is.
    • Grab a bottle of dedicated windshield washer fluid instead of just using plain old water. It helps lubricate the blades and prevents that nasty buildup of road grime and minerals that makes your wipers chatter across the glass.
    • Keep a clean microfiber cloth handy while you’re working. Once the old blades are off, wipe down the glass thoroughly to get rid of any old residue or grit that could scratch your new blades the second you turn them on.
    • Watch out for your wiper arms when you’re swapping them out. If you let that metal arm snap back against the windshield without a blade attached, you’re looking at a cracked windshield and a much more expensive afternoon than you bargained for.

    The Bottom Line on Keeping Your View Clear

    Don’t wait for the storm to realize your blades are shot; if they’re streaking or squealing now, swap them out before you’re actually stuck in the rain.

    You don’t need a shop appointment for this—grab the right size from any auto parts store and you can knock it out in your driveway in under five minutes.

    Keep an eye on the rubber. Even if they look okay, heat and grime wear them down, so checking them once a season saves you from a massive headache later.

    Don't Get Ripped Off for a Five-Minute Fix

    Honestly, it kills me seeing people pay a shop fifty bucks just to swap out some rubber blades. It’s not a mechanical mystery; it’s a five-minute job that anyone with a little patience can handle. Don’t let a mechanic charge you for something you can do yourself in your own driveway.

    Nikolai·Osterman

    Don't Let Them Overcharge You

    Don't Let Them Overcharge You: DIY Wipers

    At the end of the day, replacing your wipers is one of those small wins that keeps you in the driver’s seat. We covered how to spot those annoying streaks before they turn into a visibility nightmare, picked out the right blades for your specific car, and walked through the actual swap so you aren’t sitting there staring at a confusing connector. It really comes down to two things: knowing when to swap them and having the right size in your trunk. Once you realize it’s just a matter of clicking a tab and sliding a new arm into place, you’ll see why I hate seeing people pay fifty bucks at a quick-lube shop for something that takes less than five minutes to do yourself.

    I know it can feel intimidating when you first pop the hood or mess with the wiper arms, but don’t let that stop you. Every pro mechanic started exactly where you are, just trying to figure out which way a bolt turns. Taking care of your own car isn’t just about saving a few bucks—though that definitely helps—it’s about the confidence that comes from knowing your machine is actually safe to drive. Keep your tools handy, stay patient, and remember that you are more than capable of handling the basics on your own. See you in the next one.

    Frequently Asked Questions

    How do I know which specific blade size I need for my car without driving to the parts store?

    Don’t waste your gas driving to the shop just to guess. The easiest way is to grab a tape measure and measure your current blades from tip to tip—just make sure you’re measuring the rubber part, not the whole arm. If you don’t have a tape, pull up your owner’s manual online or search your car’s year, make, and model on a parts site. They’ll tell you the exact inches you need.

    Is it worth buying those expensive beam blades, or are the cheap ones just as good?

    Look, I get why you’re hesitant to drop twenty bucks on a single blade. Honestly? If you’re just driving a commuter car in a dry climate, the cheap ones do the job. But if you deal with heavy rain or snow, go for the beam blades. They don’t have those metal frames that get clogged with grit or lose tension. They stay pressed against the glass way better. Save your money on the oil change, but spend it on the blades.

    I accidentally popped my wiper arm up and it feels loose—did I break something?

    Relax, you probably didn’t snap anything. Most wiper arms are designed to lift up so you can swap the blades without smashing your windshield. If it feels “loose,” you’re likely just feeling the tension from the spring mechanism or the pivot joint. As long as it still snaps back into place firmly against the glass, you’re golden. Just don’t go yanking it around too aggressively, or you might actually stress the mounting bolt.

  • Process for Flushing Engine Coolant

    Process for Flushing Engine Coolant

    I remember watching my dad stare at a thermometer in frustration while steam poured out from under the hood of an old sedan, thinking the entire cooling system needed a total replacement. The shop told him it would cost a fortune, but the truth is, most of the time, you’re just looking at neglected fluid. A proper coolant flush isn’t some mysterious, high-level procedure that requires a master technician; it’s just about getting the old, acidic sludge out of your radiator before it starts eating your gaskets from the inside out. Don’t let a mechanic talk you into a massive bill when the fix is actually this straightforward.

    I’m not here to give you some textbook lecture or sell you on expensive, unnecessary additives. I’m going to show you exactly how to tackle a coolant flush using basic tools you probably already have in your garage. We’ll go through the actual process—from draining the old junk to making sure you don’t leave any air pockets trapped in the lines—so you can do it right the first time. No hype, no fluff, just the real way to keep your engine from overheating on a hot summer day.

    Table of Contents

    Guide Overview

    Total Time: 1-2 hours
    Estimated Cost: $30-60
    Difficulty: Beginner

    Tools & Supplies

    • Drain pan to catch old fluid
    • Funnel to prevent spills
    • Pliers to loosen hose clamps
    • Gloves and safety glasses for protection
    • New coolant/antifreeze (check manual for type)
    • Distilled water (if mixing concentrate)
    • Rags for cleaning spills

    Step-by-Step Instructions

    • 1. First things first, make sure your engine is completely cold. I’ve seen way too many people try to crack a radiator cap on a warm engine, and trust me, you don’t want a face full of boiling liquid. Once you’re sure it’s cool, grab your drain pan and position it right under the radiator petcock (that little plastic valve at the bottom) or the lower radiator hose.
    • 2. Open your radiator cap to let the pressure vent, then slowly unscrew that petcock. If your car doesn’t have a petcock, just loosen the lower radiator hose clamp and pull the hose off. Let that old, murky fluid drain out until it’s just a slow drip. If the fluid looks like chocolate milk, you might have a bigger head gasket issue on your hands, but let’s just hope it’s just old coolant for now.
    • 3. Now you need to get the gunk out of the system. Find your coolant reservoir (the plastic tank next to the radiator), drain that out too, and then refill it with distilled water. Start the car, turn your heater on full blast, and let it run for about ten minutes. This helps the water circulate through the heater core and flush out the hidden sludge.
    • 4. Once the engine has cycled through the water, shut it off and let it cool down again. Drain that water out just like you did with the old coolant. I usually like to do this twice if the old stuff was particularly nasty. You want that water coming out looking as clear as possible before you move on to the actual refill.
    • 5. Now it’s time for the good stuff. Grab a jug of the correct 50/50 pre-mixed coolant for your specific make and model—don’t just buy whatever is on sale at the grocery store. Slowly pour it into the radiator and the reservoir until they’re both at the proper levels. Don’t just dump it in and walk away; you need to watch for air bubbles.
    • 6. With the cap off, start the engine and let it run. You’ll see the level drop as air pockets escape the system. Keep topping it off as needed. Once the level stays steady, put the cap back on tight. It’s a good idea to check the level again after your first drive to make sure everything settled in correctly.

    Mastering Engine Temperature Regulation Without a Mechanic

    Mastering Engine Temperature Regulation Without a Mechanic

    Look, keeping your engine at a steady temperature isn’t just about swapping fluids; it’s about understanding how the whole system breathes. A lot of people ignore their cooling system until they see steam pouring from under the hood, but by then, you’re already looking at a massive repair bill. To really master engine temperature regulation, you need to keep an eye on more than just the gauge. Check your hoses for soft spots or cracks and make sure your radiator cap isn’t losing pressure. If the rubber feels mushy, it’s time to swap it out before it fails you on the highway.

    I also see way too many people getting confused about coolant vs antifreeze differences. Here’s the deal: antifreeze is the concentrated stuff you mix with water, while coolant is the pre-mixed version ready to go. If you’re doing your own cooling system maintenance, don’t just guess. Stick to what your owner’s manual says regarding the specific type your car needs. Getting the chemistry wrong can actually cause buildup that ruins your radiator cleaning process later on. Just stay consistent with your service intervals, and your car will thank you.

    The Real Difference Between Coolant vs Antifreeze Differences

    The Real Difference Between Coolant vs Antifreeze Differences

    Look, I see people at the parts counter all the time grabbing whatever bottle is cheapest, thinking they’re saving money. But if you don’t understand the coolant vs antifreeze differences, you might actually be doing more harm than good. Technically, antifreeze is just the concentrated chemical—usually ethylene glycol—that you mix with water to keep things from freezing or boiling. Coolant is the finished product ready to go into your engine. If you’re just topping off with straight antifreeze without diluting it properly, you’re actually messing with the thermal properties and could end up sabotaging your engine temperature regulation.

    When you’re doing your routine cooling system maintenance, you need to check your owner’s manual to see if your car requires a specific type, like OAT or HOAT. Using the wrong chemistry can lead to sludge buildup that ruins your radiator cleaning process. Don’t just guess; a mistake here is way more expensive than a $20 bottle of the right stuff. Keeping an eye on your coolant flush interval ensures you aren’t just circulating old, acidic fluid that eats away at your gaskets from the inside out.

    Pro Tips to Keep You From Making a Mess (or a Mistake)

    • Never, and I mean never, open that radiator cap while the engine is hot. You’re basically asking to get sprayed with pressurized, boiling liquid, and trust me, that’s a hospital trip you don’t want.
    • Don’t just eyeball the fluid level. Once you’ve finished the flush and the engine has cooled back down, double-check the reservoir. If it’s low, top it off, or you’re heading straight for an overheat.
    • Make sure you’re using the right stuff for your specific car. Mixing different types of coolant—like an organic acid technology (OAT) with an older conventional stuff—can actually turn into a weird, sludge-like mess that clogs your heater core.
    • Get a dedicated drain pan that’s actually bigger than your radiator drain plug. I’ve seen too many guys get caught off guard when that old, heavy coolant comes out faster than they expected and spills all over their garage floor.
    • When you’re refilling, try to run the car with the heater on full blast for a few minutes. It helps circulate the new fluid through the entire system, including the heater core, so you don’t end up with air pockets trapped inside.

    The Bottom Line on Keeping Your Engine Cool

    Don’t wait for a temperature spike to act; if your coolant looks like muddy water or feels gritty, it’s already time for a flush.

    Stop treating coolant and antifreeze like they’re the same thing—using the wrong one can mess up your seals and lead to a much more expensive repair.

    You don’t need a specialized shop rig to do this right, just a drain pan, some patience, and the right coolant for your specific make and model.

    ## The Truth About Your Cooling System

    “Most shops will try to tell you that a radiator flush is some high-level technical procedure, but honestly? It’s just about clearing out the sludge before it turns your engine into a very expensive paperweight. Don’t wait for the temperature needle to climb; just get in there and clean it out yourself.”

    Nikolai·Osterman

    Don't Let Your Engine Rot From the Inside Out

    Don't Let Your Engine Rot From the Inside Out

    Look, at the end of the day, a coolant flush isn’t some high-level engineering feat; it’s just basic maintenance that keeps your car from turning into a very expensive paperweight. We covered how to spot the signs of old, sludge-like fluid, the real distinction between antifreeze and coolant, and the actual steps to get that old gunk out of your radiator. If you follow the process and don’t skip the final rinse, you’re already ahead of 90% of the drivers on the road. Taking twenty minutes to swap out your fluids now is a whole lot better than dealing with a blown head gasket and a massive repair bill three months down the line.

    I know it can feel intimidating when you’re staring down a steaming engine bay for the first time, but don’t let that stop you. Every pro I know started exactly where you are—probably covered in a bit of spilled fluid and feeling a little unsure. The more you get your hands dirty, the more you realize that these machines aren’t mysteries; they’re just puzzles waiting to be solved. Grab your tools, keep your workspace clean, and trust your instincts. Once you realize you can handle the stuff the shops charge hundreds for, you’ll never look at your car the same way again.

    Frequently Asked Questions

    How do I know if I actually need a flush or if I can just top off the reservoir?

    Look, if your reservoir is just a little low, topping it off with the right mix is fine. But don’t just ignore it. Pop the radiator cap (when it’s cold!) and check the color. If it looks like clean, bright liquid, you’re good. If it looks like muddy water, rusty sludge, or has oily chunks floating in it, stop topping it off and just do the flush. That’s old fluid doing damage.

    Is it safe to mix different colors of coolant, or am I asking for trouble?

    Look, I’ve seen guys do this thinking they’re saving a buck, and it’s a nightmare. Don’t do it. Different colors usually mean different chemical additives—like OAT vs. IAT. If you mix them, they can react, turn into a weird, thick sludge, and clog your heater core or radiator. If you’ve already mixed them, you’re looking at a full flush. Just stick to what your manual calls for. Don’t risk your engine for a shortcut.

    How long does it actually take to do this, and do I need any special tools beyond a drain pan?

    Honestly, if you’ve got a clear workspace, you can knock this out in about an hour or ninety minutes tops. Most of that is just waiting for the engine to cool down so you don’t melt your skin off. Beyond a drain pan, grab a funnel to avoid making a massive mess, some pliers to move the hose clamps, and maybe a cheap spill mat. Just don’t wing it without a way to catch the runoff.

  • How to Adjust a Clutch Pedal

    How to Adjust a Clutch Pedal

    You ever feel like your car is fighting you every time you try to shift gears? I remember working on my neighbor’s old hatchback last summer—the guy was convinced he needed a whole new transmission because the pedal felt like it was made of lead. I pulled my magnetic tray out of my back pocket, took one look at the linkage, and realized he was about to spend a fortune on something that just needed a simple clutch adjustment. Most shops will try to sell you a whole kit or a new pressure plate when, in reality, your pedal engagement is just off-center.

    I’m not here to give you some textbook lecture or a list of expensive specialized tools you’ll never use again. I’m going to show you exactly how to dial in your pedal feel so your gear shifts feel crisp and predictable again. We’re going to walk through the actual process of clutch adjustment step-by-step, focusing on the real-world tweaks that make a difference. No fluff, no gatekeeping—just the straight truth on how to get your car back to feeling smooth without getting ripped off.

    Table of Contents

    Guide Overview

    Total Time: 1-2 hours
    Estimated Cost: $0-20
    Difficulty: Beginner

    Tools & Supplies

    • Wrench or Socket set for adjusting linkage bolts
    • Screwdriver for accessing adjustment screws or covers
    • Penetrating oil for loosening rusted bolts
    • Rag for cleaning debris

    Step-by-Step Instructions

    • 1. First things first, you need to get your car on something stable. If you’re working on a cable-operated clutch, you’ll usually be under the dash, but if it’s a hydraulic setup, you might be looking at the master cylinder under the hood. Either way, make sure the car is parked on level ground and the parking brake is pulled tight so you aren’t moving while you’re elbow-deep in the footwell.
    • 2. Grab a flashlight and find the adjustment nut. On most older cars or tuners, this is a threaded rod right where the clutch cable meets the pedal assembly. You’re looking for a little nut that you can turn to either tighten or loosen the tension. I always keep my magnetic parts tray handy for this because those little nuts love to disappear into the carpet the second you let go of them.
    • 3. Before you start turning anything, check your “free play.” This is that tiny bit of wiggle you get in the pedal before it actually starts feeling resistance. Push the pedal down with your hand and see how much it moves before it hits the actual mechanism. If there’s zero play, you’re going to burn through your clutch plate in no time, so we definitely need to fix that.
    • 4. Now, start adjusting. If the pedal feels too “mushy” or engages way too high up, you need to tighten the tension by turning the adjustment nut so the cable pulls the lever closer to the pedal. Don’t go overboard in one go; just give it a half-turn at a time. If you over-tighten it, the clutch won’t fully disengage, and you’ll start having a nightmare of a time shifting gears.
    • 5. Once you think you’ve nailed it, test the pedal feel. Press it down a few times to make sure it doesn’t feel “sticky” or weird. You want a smooth, consistent travel from the top of the stroke to the bottom. If it feels consistent and firm, you’re likely heading in the right direction.
    • 6. Take it for a quick spin around the block. This is the most important part because you need to see how it actually behaves under load. Pay close attention to how easy it is to get into first gear from a standstill and how the gear transitions feel while you’re moving. If it’s not biting where it should, go back to step four and tweak it a little more.
    • 7. Finally, double-check your work one last time before you pack up your tools. Make sure the adjustment nut is secure and isn’t going to vibrate loose while you’re driving down the highway. Once you’re sure it’s solid, clean up your workspace—a messy garage is a recipe for losing a 10mm socket in the floorboards.

    Decoding the Symptoms of a Bad Clutch

    Decoding the Symptoms of a Bad Clutch.

    Before you start turning bolts, you need to be sure you’re actually dealing with a setup issue and not a part that’s just plain dead. One of the biggest giveaways is a shifting clutch engagement point that feels way too high or too low. If you’re having to floor it just to get the gear to bite, or if it’s grabbing the second you touch the pedal, your linkage is likely out of whack. I’ve seen plenty of guys rush into a full replacement when all they really needed was a simple tweak to the tension.

    Keep an eye (and an ear) out for other symptoms of bad clutch behavior, like a pedal that feels spongy or doesn’t spring back up like it should. If you have a newer car, that mushy feeling usually points toward a leak in the hydraulic clutch master cylinder rather than a simple mechanical slack issue. If it’s an older tuner with a physical cable, you’ll notice the pedal feels inconsistent. Don’t just ignore the warning signs; catching a minor adjustment early can save you from a massive repair bill down the road.

    Finding Your Perfect Clutch Engagement Point

    Finding Your Perfect Clutch Engagement Point.

    Once you’ve finished the actual mechanical work, you need to figure out exactly where that bite point sits. It’s not just about whether the car moves; it’s about how it feels when you’re actually driving. If you find that you have to ride the pedal halfway up before the power kicks in, you’re probably dealing with too much clutch pedal free play. I always tell people to test this in a controlled environment—a quiet side street is perfect. You want that engagement to happen in a predictable, consistent window so you aren’t constantly guessing when the gears are going to catch.

    If you’re working on an older rig, you’re likely adjusting clutch cable tension to get this right, which is a bit of a trial-and-error game. If you’ve got a newer setup, you might be looking at a hydraulic clutch master cylinder, where things get a little more complicated because you’re dealing with fluid pressure rather than just physical slack. Either way, the goal is the same: smooth, predictable transitions. If it feels jumpy or “grabby,” you haven’t hit the sweet spot yet. Grab a coffee, take a breath, and tweak it until it feels natural.

    Pro Tips to Keep Your Clutch from Acting Up

    • Don’t go overboard with the adjustment; if you tighten it too much, you’ll end up riding the clutch without even realizing it, which is a fast track to burning out your pressure plate.
    • Keep your workspace clean, seriously. I can’t tell you how many times I’ve lost a tiny adjustment screw in a pile of greasy rags or floor mats. Use that magnetic tray I’m always talking about.
    • Check your hydraulic fluid levels while you’re at it. Sometimes what feels like a mechanical adjustment issue is actually just a low reservoir or some air trapped in the lines.
    • Listen to the car. If you adjust it and start hearing a new grinding noise or a weird shudder when you pull away, back off the tension immediately—you’ve gone too far.
    • Treat the pedal with some respect. Once you’ve got the engagement point dialed in, stop “stabbing” the clutch at red lights; a smooth release goes a long way in making a DIY adjustment actually last.

    The Bottom Line on Your Clutch

    Don’t let a mushy pedal scare you; most of the time, a quick adjustment is all it takes to get that crisp engagement back without dropping hundreds at a shop.

    Trust your gut—if the pedal feels weird or you’re smelling something burnt, stop messing around and actually look at the hardware before you turn a small fix into a total transmission nightmare.

    Grab the right tools and take your time; rushing a clutch adjustment is the fastest way to strip a bolt or mess up your cable, and nobody has time for that.

    ## The Truth About That Feeling

    “A clutch that’s fighting you isn’t a death sentence for your car; usually, it’s just a sign that it’s lost its rhythm. You don’t need a master tech to find it again—just a steady hand and the patience to dial it back in.”

    Nikolai·Osterman

    Getting It Right

    Getting It Right: Adjusting car clutch.

    Look, adjusting your clutch isn’t some high-level engineering feat, but you can’t afford to be sloppy with it. We went over how to spot those early warning signs like slipping or a pedal that feels like it’s stuck in mud, and we walked through the actual process of dialing in that engagement point. If you’ve followed these steps, you should notice the pedal feeling more consistent and the gear shifts feeling a lot more natural. Just remember to double-check your work before you head out on the highway; you want to make sure that tension is exactly where it needs to be so you aren’t constantly fighting the gearbox every time you hit a stoplight.

    At the end of the day, my goal is to make sure you feel confident when you’re staring down an open hood. Most shops will try to tell you that a weird pedal feel means you need a whole new assembly, but more often than not, it’s just a matter of taking control of your own maintenance. Don’t let the fear of a little grease or a heavy wrench keep you from understanding your own machine. Grab your tools, trust your hands, and keep that car running on your terms. You’ve got this.

    Frequently Asked Questions

    If I adjust the clutch and it still feels like it's slipping, does that mean the pressure plate is shot?

    Look, if you’ve dialed in the adjustment and it’s still slipping, yeah, you’re likely looking at a hardware problem. If the pedal feels fine but the RPMs jump without the car actually speeding up, your pressure plate or the clutch disc itself is probably toast. You can’t adjust your way out of worn-down friction material. It’s frustrating, I know, but at that point, it’s time to stop tweaking and start replacing.
    Can I mess things up if I over-tighten the adjustment screw, or is there a specific limit I should watch out for?

    Yeah, you definitely can mess things up. If you crank that screw down too tight, you’re basically putting constant pressure on the release bearing. That’s a fast track to premature wear or even a total failure of the throw-out bearing. It’s not like a bolt where you just “tighten it until it stops”; you’re looking for a specific feel. Just go slow. If you feel heavy resistance, back it off a hair. Don’t force it.

    How often should I actually be checking this, or is it a "only when it feels weird" kind of thing?

    Honestly? It’s mostly a “only when it feels weird” kind of thing. Your car talks to you; you just have to listen. If the pedal starts feeling mushy, or you notice you’re having to push it almost to the floor to get into gear, that’s your signal. Don’t wait for it to fail completely on the highway. Just keep an eye on the pedal travel during your regular oil changes. If it changes, check it.

  • Symptoms of a Failing Alternator

    Symptoms of a Failing Alternator

    I remember sitting in my dad’s garage when I was twelve, staring at a dead battery and listening to him explain that we didn’t need to shell out five hundred bucks for a new part. He just pointed at the alternator and said, “We can fix this ourselves.” Most shops will try to tell you that an aging electrical system needs a total overhaul, but that’s usually just a way to pad their invoice. Real alternator repair isn’t some dark art reserved for guys with master degrees and specialized diagnostic computers; it’s mostly just about knowing which bolt to turn and making sure you don’t lose your small fasteners in the engine bay.

    I’m not here to give you some textbook lecture or a list of fancy jargon you’ll never use. I’m going to show you exactly how I handle these jobs at the shop, from testing the voltage to actually swapping the unit out without breaking your spirit. My goal is to give you the straight truth so you can get back on the road without feeling like you just got taken for a ride. If you’ve got a basic socket set and a little bit of patience, you’ve got this.

    Table of Contents

    Recognizing Critical Alternator Replacement Symptoms Early

    Recognizing Critical Alternator Replacement Symptoms Early.

    You don’t want to be stuck on the shoulder of a highway at 10 PM because your battery suddenly gave up the ghost. Usually, your car will give you some fair warning before it leaves you stranded. The most obvious signs of a failing alternator are the little things you might ignore at first—like your headlights getting dim when you’re idling at a red light, or your dashboard lights flickering like a cheap horror movie. If you notice your power windows are moving slower than usual or your radio keeps cutting out, your car is basically screaming at you that the electrical supply is getting shaky.

    If you want to get ahead of the game, I always recommend a little bit of diy alternator troubleshooting before you go panic-buying parts. If your battery light pops up on the dash, don’t just assume it’s a dead battery. Grab a multimeter and try some multimeter voltage testing on the terminals while the engine is running. If you aren’t seeing a steady reading between 13.5 and 14.5 volts, you’ve likely found your culprit. Catching these issues early saves you from a massive headache later.

    Mastering Diy Alternator Troubleshooting Before You Break Down

    Mastering Diy Alternator Troubleshooting Before You Break Down

    Before you go tearing into your engine bay, you need to make sure the alternator is actually the culprit. I’ve seen plenty of people rush into a full replacement only to realize they just had a loose battery terminal or a blown fuse. The best way to start is with some basic car charging system testing. If your dashboard lights are flickering or your headlights seem dim when you’re idling, that’s a massive red flag. I always recommend checking your battery connections first; if they’re corroded or loose, the alternator can’t do its job properly no matter how new it is.

    If the connections look clean, it’s time to get a little more technical with some multimeter voltage testing. This is where most people get intimidated, but it’s actually pretty straightforward. With the engine running, you should see a reading between 13.5 and 14.7 volts. If you’re seeing anything significantly lower than that, you’ve likely found the source of your headache. This kind of diy alternator troubleshooting saves you a ton of money and prevents you from buying parts you don’t actually need.

    Pro-Tips from the Shop Floor: How to Not Mess Up Your Alternator Job

    • Don’t just swap the part blindly. Before you spend money on a new alternator, use a multimeter to test your battery voltage while the engine is running. If you aren’t seeing between 13.5 and 14.5 volts, you’ve definitely found your culprit.
    • Keep your eyes peeled for “the belt dance.” If your serpentine belt is squealing or looks frayed, your new alternator won’t matter because it won’t spin right. Check the tension and the condition of that belt before you even unbolt the old unit.
    • Clean your connections like your life depends on it. Most people get a new alternator, bolt it in, and wonder why the lights are still dim. Use a wire brush to scrub the corrosion off the battery terminals and the wiring harness connectors; a bad connection is just as deadly as a dead alternator.
    • Watch your fingers and your workspace. I’ve seen too many guys try to reach around the fan shroud and end up with a nasty cut. Also, make sure you disconnect the negative battery terminal first. If you don’t, and your wrench hits the frame while you’re loosening the positive lead, you’re going to see some very expensive sparks.
    • Grab a new serpentine belt if you can afford it. Since you’ve already gone through the trouble of getting everything disassembled to reach the alternator, it’s a waste of time to put an old, stretched belt back on. It’s a cheap part that saves you from having to do this whole job twice.

    The Bottom Line on Your Alternator

    Don’t wait for the car to die in a parking lot; if your lights are dimming or you’re seeing that battery light pop up, start testing things immediately.

    Most of the time, it’s not a mystery—it’s just a bad connection or a worn-out belt, so check the easy stuff before you go dropping cash on a new unit.

    You don’t need a specialized shop to do this; as long as you’ve got a decent socket set and a little patience, you can swap it yourself and keep that money in your pocket.

    ## Don't Let a Dead Battery Lie to You

    Most people see a dim dashboard or a dead battery and think they need a whole new electrical system, but half the time, it’s just a tired alternator. Don’t let a shop talk you into a massive bill for something you can fix yourself with a basic socket set and twenty minutes of your time.

    Nikolai·Osterman

    Don't Let a Dead Battery Keep You Down

    Don't Let a Dead Battery Keep You Down

    Look, at the end of the day, fixing an alternator isn’t some mystical science. We’ve covered the red flags—like those flickering dashboard lights or that weird whining sound—and we walked through how to test the voltage so you aren’t just guessing what’s wrong. If you’ve done the troubleshooting and confirmed the unit is shot, you’re already halfway there. Just remember to double-check your battery terminals and make sure your belt tension is dialed in once the new part is on. If you follow these steps and keep your workspace organized, you’ll avoid the most common mistakes that turn a simple swap into a massive headache.

    I know it can feel intimidating when you’re staring at a complex engine bay, but don’t let a shop’s quote scare you off. Every time you pick up a wrench and tackle a job yourself, you’re taking back control of your wallet and your ride. You don’t need a fancy certificate hanging on a wall to be capable; you just need to trust your process and stay patient. Grab your magnetic tray, get under that hood, and just start working. You’ve got this, and your car will thank you for it.

    Frequently Asked Questions

    Do I really need to replace the whole alternator, or can I just swap out the brushes or the voltage regulator to save some cash?

    Look, I get it—why spend $300 on a whole unit when a $20 regulator might be the culprit? If you’ve got the patience and a multimeter, you can definitely swap brushes or the regulator to save some cash. It’s a solid way to avoid getting ripped off. But honestly? If the bearings are whining or the internal windings are shot, don’t waste your time. Just swap the whole thing and move on.

    How can I tell if my battery is actually dead versus the alternator just not charging it properly?

    Look, this is the million-dollar question. The easiest way to tell is by checking your voltage while the engine’s running. If you jump-start the car and it dies again shortly after you remove the cables, your battery’s likely toast. But if the car stays running while jumped, but the lights flicker or dim when you rev it, that’s a huge red flag that your alternator isn’t doing its job.

    Are there any specific tools I'll need for my specific car, or can I get away with just a basic socket set and a wrench?

    Honestly, a basic socket set and a wrench will get you through about 80% of the job, but don’t get caught off guard. You’ll definitely want a tensioner tool or a long breaker bar to deal with that serpentine belt—trying to do it with just a standard ratchet is a massive pain. Also, grab some electrical contact cleaner. If your connections are crusty, a clean connection is the difference between a fix and a wasted afternoon.

  • Replacing Worn Spark Plugs

    Replacing Worn Spark Plugs

    I remember sitting in my dad’s garage when I was twelve, watching him stare at a misfiring old sedan like it was some unsolvable puzzle. He finally sighed, grabbed a socket, and told me that most people think a rough idle means you need a whole new ignition system, but usually, it’s just a basic spark plug replacement job. It’s one of those things shops love to quote you a ridiculous amount for, acting like it’s some high-level diagnostic mystery when, in reality, it’s just routine maintenance that anyone with a little patience can handle.

    I’m not here to give you some textbook lecture or a list of expensive specialty tools you don’t actually need. Instead, I’m going to walk you through the actual process I use at the shop, minus the fluff. I’ll show you exactly how to avoid stripping those delicate threads and how to tell if your plugs are actually shot or just dirty. By the time we’re done, you’ll have the confidence to stop overpaying the mechanic and get your engine running smooth again on your own terms.

    Table of Contents

    Guide Overview

    Total Time: 1-2 hours
    Estimated Cost: $30-80
    Difficulty: Beginner

    Tools & Supplies

    • Socket wrench and ratchet for loosening bolts
    • Spark plug socket with rubber insert to protect porcelain
    • Extension bar to reach deep engine recesses
    • Torque wrench for precise tightening
    • New spark plugs (set of 4, 6, or 8 depending on engine)
    • Dielectric grease for preventing moisture buildup

    Step-by-Step Instructions

    • 1. First things first, make sure your engine is completely cool before you even touch a wrench. I’ve seen too many guys try to rush this on a hot engine and end up stripping a thread or burning their knuckles. If you’re working on a modern car, you might need to pop the plastic engine cover off first—just grab a screwdriver or a socket and lift it out of the way.
    • 2. Locate your ignition coils or spark plug wires. If you’ve got coils sitting right on top of the plugs, you’ll need to disconnect the electrical connector first. Don’t yank on the wires themselves; grab the plastic plug and pull it straight up so you don’t snap the connector. Once that’s done, unscrew the bolt holding the coil in place and pull the whole unit out.
    • 3. Now, grab your spark plug socket—and make sure it’s the right one, usually with a rubber insert inside to hold the plug—and thread it onto the old plug. Slowly turn it counter-clockwise. If it feels like you’re fighting something, stop and re-check your angle. You don’t want to cross-thread anything here, or you’re looking at a much more expensive headache.
    • 4. Once the old plug is out, take a second to look at it. If it’s covered in heavy black soot or looks melted, that tells you something about how your engine is running. Before you drop the new one in, use a can of compressed air to blow out any debris from the spark plug hole. The last thing you want is a tiny piece of dirt falling into your cylinder while the plug is out.
    • 5. Take your new spark plug and thread it into the hole by hand first. This is the most important part: always start it by hand. If you feel resistance immediately, back it out and try again. You want to feel it spinning smoothly into the seat without needing the wrench yet. This ensures you aren’t forcing it onto crooked threads.
    • 6. Once the plug is finger-tight, use your ratchet to give it that final snugging. Don’t go overboard and try to muscle it like you’re tightening a lug nut; you just need to meet the torque spec or give it about a quarter-turn past finger-tight if you don’t have a torque wrench handy. Over-tightening is a rookie mistake that can ruin the plug or the engine head.
    • 7. Reinstall your ignition coil or wire, making sure the connector clicks back into place firmly. Repeat this process for the rest of the cylinders. Once you’re done, double-check everything to ensure no tools or loose bolts are left sitting on the engine before you go for that first start-up.

    Spotting the Signs of Worn Spark Plugs Before They Fail

    Spotting the Signs of Worn Spark Plugs Before They Fail

    You don’t always have to wait for a dashboard light to pop up to know something is wrong. Usually, your car will start talking to you through how it feels on the road. If you notice a sudden stutter when you’re merging onto the highway or if your idle feels rough and inconsistent while sitting at a red light, those are classic signs of worn spark plugs. Another big one is a noticeable drop in gas mileage. If you’re hitting the pump more often than usual, it’s likely because your engine is struggling to burn fuel efficiently due to a weak spark.

    Keep an eye out for any hesitation when you step on the gas. If the car feels sluggish or like it’s “missing” a beat, you’re probably dealing with fouled plugs or an incorrect spark plug gap setting. Catching these issues early is the best way to ensure long-term engine performance improvement without ending up with a much more expensive repair bill down the line. Don’t ignore the symptoms; your car is trying to tell you it’s time for some basic maintenance.

    Boosting Fuel Efficiency and Spark Plugs for Better Mileage

    Boosting Fuel Efficiency and Spark Plugs for Better Mileage

    Look, if you’re noticing your gas gauge dropping faster than it used to, don’t immediately assume you have a massive leak or a bad sensor. A huge part of fuel efficiency and spark plugs comes down to how cleanly that fuel actually burns. When your plugs are old or fouled, they aren’t delivering that crisp, consistent spark needed to ignite the air-fuel mixture. Instead, you get incomplete combustion, which basically means you’re literally pumping unburnt gas through your exhaust. It’s a massive waste of money that most people overlook until they see their monthly fuel bill spike.

    To really see an engine performance improvement, you can’t just slap in new parts and call it a day. If you’re working on an older tuner or a car where the manufacturer doesn’t specify a pre-gapped plug, you’ve got to double-check your spark plug gap setting. Even a tiny deviation can mess with your timing and kill your MPG. It’s one of those small, technical details that separates a “quick fix” from actually getting your car back to peak efficiency.

    Pro Tips to Keep You From Screwing This Up

    • Don’t just wing the gap. Even if the plugs say they’re “pre-gapped,” check them with a feeler gauge before they touch your engine. If the gap is off, your ignition coil is going to work overtime and you’ll be back under the hood way sooner than you planned.
    • Clean the area around the plug before you even think about loosening it. I’ve seen too many guys pull a plug only to have a bunch of grit and dirt fall straight down into the cylinder. Use some compressed air to blow that junk out first; it’s a five-second job that saves a massive headache.
    • Hand-thread those new plugs in. Seriously. If you feel any resistance while you’re turning them by hand, stop immediately. You do not want to cross-thread a plug in an aluminum head—that’s a one-way ticket to an expensive shop visit that you can’t DIY.
    • Use a torque wrench. I know, it feels like overkill, but “tight enough” is how you end up with a snapped plug or a crushed washer. Find the spec for your specific engine and stick to it. It’s the difference between a job well done and a disaster.
    • Grab a set of dielectric grease for the boot of the ignition coil. A little dab helps prevent the boot from sticking to the plug and ensures you get a solid connection. It keeps everything moisture-free and makes your next tune-up a hell of a lot easier.

    The Bottom Line on Your Spark Plugs

    Don’t wait for your car to start stumbling or idling rough; if you’re noticing a drop in MPG, it’s probably time to swap those plugs out.

    You don’t need a shop full of expensive gear to do this—just a decent socket set, a torque wrench if you want to be precise, and a little patience.

    Doing this yourself isn’t just about saving a few bucks on labor, it’s about making sure the job is actually done right so you aren’t stuck on the side of the road later.

    The Truth About Your Engine's Heartbeat

    Look, a mechanic might try to tell you it’s a complex job to justify a massive labor charge, but honestly? It’s just a matter of getting the right socket, keeping your bolts organized in a tray, and not rushing the thread. If you can follow a basic sequence, you can do this yourself and keep that extra hundred bucks in your own pocket.

    Nikolai·Osterman

    Don't Let the Shop Overcharge You

    Don't Let the Shop Overcharge You.

    At the end of the day, swapping out your spark plugs isn’t some mystical ritual reserved for guys with master certifications. We’ve covered how to spot those early warning signs like rough idling or poor gas mileage, and we walked through the actual process of getting those old, fouled plugs out and the fresh ones in. It really comes down to two things: having the right socket and making sure you don’t cross-thread anything when you’re tightening them back down. If you take your time and follow these steps, you’ve just saved yourself a massive chunk of change that most shops would have happily taken from your wallet for a job that takes me maybe twenty minutes in the bay.

    I know it can be intimidating when you first pop the hood and see a mess of wires and sensors, but I promise you’re more capable than you think. Every time you pick up a wrench and tackle a job yourself, you’re gaining a level of mechanical confidence that no textbook can teach you. Stop viewing your car as a black box of mystery and start seeing it as something you actually understand and control. Keep that magnetic tray handy, stay patient, and don’t be afraid to get a little grease under your fingernails—that’s just part of the process.

    Frequently Asked Questions

    Do I really need to buy the expensive iridium plugs, or can I get away with the cheaper copper ones?

    Look, don’t just grab whatever’s cheapest on the shelf. Check your owner’s manual first—it’ll tell you exactly what your engine expects. If your car calls for iridium, stick with it. Iridium plugs last way longer and handle the heat better, so you aren’t digging back into that engine bay in six months. Copper is fine for old beaters, but for modern cars, those cheap plugs can actually mess with your sensors.

    How do I know if I accidentally stripped the threads in the engine block while tightening them?

    Look, don’t panic, but if you feel the plug just spinning and spinning without any resistance, you likely stripped the threads. If you were tightening it and it suddenly felt “loose” or like it was just sliding through grease, that’s a huge red flag. If the plug won’t seat or stays sitting high above the head, the threads are gone. Don’t keep forcing it; you’ll just make the hole bigger and the fix way more expensive.

    Should I be replacing my ignition coils at the same time, or is that just a waste of money?

    Look, I get why you’re asking. If you’re already elbow-deep in the engine bay with the coils sitting right there, it feels like the right time. Honestly? If your car has over 100k miles and you’re on a budget, you don’t have to. But if you’ve got a little extra cash, doing them now saves you from tearing everything apart again in six months when a coil inevitably quits. It’s about convenience, not just necessity.

  • How to Test a Car Battery

    How to Test a Car Battery

    There is nothing quite like the sound of a starter motor struggling to turn over in a freezing driveway at 6:00 AM, followed by that dreaded, hollow click-click-click. I’ve been there more times than I’d like to admit, usually while working on one of my vintage projects, staring at a dead engine and wondering if I just lost my entire morning. Most shops will try to tell you that you need a specialized computer or a full diagnostic suite just for car battery testing, charging you a premium just to tell you what you already know: your battery is toast. It’s a total racket, and honestly, it’s frustrating to see people get talked into expensive replacements when the fix is actually pretty straightforward.

    I’m not here to give you some textbook lecture or sell you on high-end shop equipment you don’t need. My goal is to show you how to handle car battery testing using basic tools and a bit of common sense so you can stop guessing and start knowing. I’ll walk you through exactly what to look for and how to read the results, ensuring you only spend money when it actually makes sense.

    Table of Contents

    Spotting the Real Signs of a Failing Car Battery

    Spotting the Real Signs of a Failing Car Battery

    Most people don’t realize their battery is dying until they’re stuck in a grocery store parking lot at 9 PM. But if you actually pay attention, your car usually tries to tell you something first. One of the biggest signs of a failing car battery is that sluggish, “labored” sound when you turn the key—it’s like the engine is trying to wake up from a deep sleep. You might also notice your headlights getting dim or flickering when you’re idling at a red light. If your interior lights look weak, your electrical system is definitely struggling to stay consistent.

    If you want to get technical before you’re stranded, you should look into automotive electrical system troubleshooting by checking your dashboard. If you see a battery warning light or if your power windows seem to move slower than usual, don’t just ignore it. Sometimes it’s just a loose terminal or some corrosion, but often it’s a sign that the cells inside are finally giving up. Catching these small red flags early saves you a massive headache—and a much larger repair bill—down the road.

    Decoding Car Battery Health Indicators Before They Die

    Decoding Car Battery Health Indicators Before They Die

    Once you’ve spotted those obvious warning signs, it’s time to get a bit more technical so you aren’t just guessing. If you want the real truth, you need to move past just looking at the battery and actually look at the numbers. I always tell people that testing battery with multimeter is the only way to know if you’re dealing with a dying cell or just a loose connection. When the car is off, you’re looking for a steady reading around 12.6 volts. Anything significantly lower than that is a massive red flag that your battery isn’t holding a full charge.

    If the voltage looks okay while the engine is off, don’t get too comfortable. You also need to check how it handles a load. This is where most people get tripped up during automotive electrical system troubleshooting. If you see the voltage tanking the second you try to crank the engine, your battery might have enough surface charge to look fine, but it lacks the actual strength to do its job. It’s better to catch this drop now than to find yourself stuck in a parking lot at 11 PM.

    Pro Tips for Testing Without Getting Ripped Off

    • Grab a cheap digital multimeter instead of relying on your eyes; seeing a voltage reading under 12.4V when the car is off tells you way more than just looking at a crusty terminal.
    • Always test your battery while the engine is off, but then check it again while cranking—if that voltage drops into the single digits during the start, your battery’s basically a paperweight.
    • Don’t forget to clean those terminals first; if you’ve got white, fuzzy corrosion buildup, your tester might give you a garbage reading that has nothing to do with the actual cells.
    • Check the “load” if you can. A battery might show full voltage sitting idle, but it’s the actual strength under pressure that matters, so try to find a way to see how it handles a heavy electrical draw.
    • Keep an eye on your charging system too. If you test the battery and it looks fine, but the voltage spikes way too high when the engine is running, your alternator is likely the real culprit killing your battery.

    The Bottom Line on Keeping Your Battery Alive

    Don’t wait for the car to just refuse to start; if you notice dim lights or a sluggish crank, your battery is already screaming for help.

    A cheap multimeter is your best friend—it’s better to spend ten bucks on a tool now than a hundred bucks on a tow truck later.

    Keep those terminals clean and tight; half the time “dead” batteries are just dealing with a little corrosion or a loose connection.

    ## The Truth About Your Battery

    Most people wait until they’re stranded in a dark parking lot at 2 AM to care about their battery, but you don’t have to be a victim of bad luck; a five-minute test with a multimeter can save you a massive headache and a ridiculous mechanic’s bill.

    Nikolai·Osterman

    Don't Wait for the Silence

    Test car battery: Don't Wait for the Silence.

    Look, we’ve covered a lot here, from spotting those annoying slow cranks to actually reading what your battery is trying to tell you through a multimeter. At the end of the day, testing your battery isn’t some high-level science experiment; it’s just about being proactive. If you notice your lights dimming or your starter sounding like it’s struggling through mud, don’t just turn up the radio and hope for the best. Grab a tester, check those terminals for corrosion, and get a real reading on your voltage. It’s much easier to swap a battery on a Saturday afternoon in your driveway than it is to deal with a dead car when you’re late for work or stuck in a grocery store parking lot. Catching it early saves you money and a massive headache.

    I know it can feel intimidating when you first pop the hood and see a mess of wires and plastic, but I promise you, you can handle this. You don’t need a master technician’s certification to keep your ride reliable; you just need to stop guessing and start actually looking at the facts. Every time you take control of a simple repair like this, you’re taking power back from the shops that want to charge you a premium for something you could have diagnosed yourself. Keep that magnetic tray handy, stay patient, and just keep turning wrenches. You’ve got this.

    Frequently Asked Questions

    Can I just use a multimeter to test my battery, or do I actually need one of those fancy load testers?

    Look, if you’ve already got a multimeter in your toolbox, use it. It’s great for checking if the battery is actually holding a charge or if your alternator is acting up. But honestly? A multimeter only tells half the story. It shows voltage, not strength. If you really want to know if that battery can actually crank your engine on a freezing morning, a load tester is the only way to see if it’s truly got the guts to do the job.

    If my battery passes a voltage test, does that mean it's actually healthy enough to start my car in the winter?

    Short answer: No, not necessarily. A voltage test is just a snapshot of potential; it doesn’t tell you if your battery has the actual “oomph” to turn the engine over when it’s freezing. Think of it like a runner who looks fine standing still but gasses out after ten feet. In the winter, you need to check the Cold Cranking Amps (CCA). If your CCA is low, that battery’s gonna bail on you the second the temperature drops.

    How do I know if the problem is a dying battery or if my alternator is actually the thing failing?

    This is the question that keeps people stranded in parking lots. Here’s the quick way to tell: if your car dies while you’re driving, or if your headlights dim when you rev the engine, that’s usually your alternator failing to keep the system charged. But if the car starts fine most of the time and only struggles when it’s been sitting, it’s likely just a weak battery. Grab a multimeter; if it’s under 13.5V while running, your alternator’s toast.

  • Importance of Regular Tire Rotation

    Importance of Regular Tire Rotation

    I was working on a customer’s sedan last week when I saw the invoice for their “premium tire service.” They were charged nearly eighty bucks just for a basic tire rotation that takes maybe twenty minutes if you’ve got the right gear. It honestly makes my blood boil. Most shops try to frame this like it’s some complex, high-tech procedure that requires a specialized computer, but that’s just a total scam to pad their margins. You’re paying for their overhead, not for any special magic happening to your rubber.

    Look, I’m not here to give you some textbook lecture or a list of things you’ll never actually do. My goal is to show you that you can handle this yourself with just a jack and a bit of patience. I’m going to walk you through the exact way I do it in my own garage, from figuring out your specific pattern to making sure everything is torqued down right. No fluff, no unnecessary jargon—just the straight truth on how to keep your tread wearing even without getting ripped off.

    Table of Contents

    Spotting Even Tire Wear Patterns Before They Kill Your Grip

    Spotting Even Tire Wear Patterns Before They Kill Your Grip

    Before you even think about grabbing a jack, you need to actually look at what your rubber is doing. I tell my buddies all the time: don’t just wait for a light to pop up on the dash. Get down on the ground and check for even tire wear patterns. If you notice the inside edge of the tread is looking smoother than the outside, you’re likely dealing with an alignment issue or a suspension problem that’s eating your money.

    You should also keep an eye on how the tread depth looks across the whole width of the tire. If one side looks like it’s been through a meat grinder while the other side looks brand new, you’re basically throwing money away. Paying attention to these small details is the easiest way to focus on extending tire lifespan without spending a dime on extra parts. It’s all about catching the problem before it turns into a blowout or a slide in the rain. Just grab a penny or a tread depth gauge and make it a habit every time you’re out in the garage.

    Extending Tire Lifespan Without Paying a Mechanics Fee

    Extending Tire Lifespan Without Paying a Mechanics Fee

    Look, you don’t need to drop a couple hundred bucks at a shop just to keep your rubber from balding prematurely. Most shops will try to upsell you on a full service, but extending tire lifespan really just comes down to being proactive with what you already have. Check your pressure at least once a month. If your tires are running low, they’re going to drag, heat up, and shred your tread way faster than they should. It’s a simple fix that saves you a massive headache down the road.

    You also need to pay attention to your automotive maintenance schedule regarding how often you’re actually swapping them around. For most people, hitting your tire rotation intervals every 5,000 to 7,500 miles is the sweet spot. If you’re driving an AWD rig, don’t get lazy; some of those systems require a specific pattern to avoid messing with the drivetrain. Just grab your floor jack, get the wheels off, and move them according to your manual. It’s basic stuff, but doing it yourself keeps your money in your pocket where it belongs.

    5 Pro Moves to Master Your Rotation

    • Check your owner’s manual first—don’t just guess. Some cars use a cross-pattern while others want a simple front-to-back swap, and if you get it wrong, you’re just scrubbing your tread for nothing.
    • Grab a torque wrench and actually use it. Don’t just “feel” if the lug nuts are tight with a tire iron; if you over-tighten them or leave them loose, you’re asking for a warped rotor or a wheel flying off.
    • Inspect the sidewalls every single time you jack the car up. Since you’ve already got the wheels off, check for cracks or bulges that you’d normally miss just by looking at the car from the driveway.
    • Don’t forget to reset your TPMS (Tire Pressure Monitoring System). Most modern cars will throw a dashboard light at you if you move the tires around without telling the car’s computer that the positions have changed.
    • Keep a dedicated pressure gauge in your glovebox. Rotating the tires is useless if you aren’t checking the PSI afterward, because different positions on the car might need slightly different pressures to stay balanced.

    The Bottom Line on Keeping Your Tread Right

    Don’t wait for a vibration in the steering wheel to check your tread; if you see uneven wear, your rotation schedule is already messed up.

    You don’t need a shop to do this—grab a jack, a torque wrench, and twenty minutes of your time to save yourself a massive bill later.

    Treat tire rotation like an oil change; it’s just basic maintenance that keeps you from buying a whole new set of rubber way too early.

    The Real Cost of Ignoring Your Tread

    Look, a mechanic is going to charge you fifty bucks just to move some rubber around, but if you skip it, you’re gonna end up paying a thousand for a new set because you let one corner go bald. It’s not rocket science; just swap them around so they wear even and save your cash for something better.

    Nikolai·Osterman

    Don't Overthink It, Just Do It

    Don't Overthink It, Just Do It: Tire Rotation.

    At the end of the day, rotating your tires isn’t some high-level engineering feat that requires a specialized shop or a massive invoice. It’s just about keeping an eye on those wear patterns and making sure you aren’t letting one corner of your car do all the heavy lifting. If you can spot uneven tread and you’ve got a decent jack in your garage, you’ve already done the hardest part. Taking twenty minutes to swap those wheels around is way cheaper than replacing a full set of rubber because you let them wear down prematurely. Just remember: consistency is everything when it comes to keeping your grip reliable and your wallet full.

    I know it can feel intimidating when you’re staring at a car and wondering if you’re about to mess something up, but trust me, you’ve got this. Most people let mechanics charge them for “preventative maintenance” that you can handle yourself with a little bit of patience and the right tools. Don’t let the fear of a little grease under your fingernails stop you from taking control of your own machine. Once you get the hang of it, it becomes second nature. Own your maintenance, keep your car safe, and stop giving away your hard-earned money for things you can do yourself.

    Frequently Asked Questions

    Do I really need to rotate them if I only drive on the highway most of the time?

    Honestly, yeah, you still do. Even if you’re just cruising on the highway, your front tires are doing way more work than the rears. They’re handling all the steering, most of the braking, and carrying the bulk of the weight every time you hit a bump. If you skip the rotation, those fronts are gonna bald way faster than the backs. Just swap ’em out every few months to keep things even.

    How do I know if my car is front-wheel drive or all-wheel drive before I start moving tires around?

    Look, you don’t want to be swapping tires blindly. The easiest way is to check your owner’s manual or look for a badge on the trunk—it’ll usually say AWD or 4WD if you’ve got it. If there’s no badge, check your floor mats; if they’re worn weirdly, it’s a hint. Honestly, just check your VIN online or look at the center differential if you’re already under there. Don’t guess; just know.

    Is it okay to just swap the fronts to the back, or do I have to do that weird X-pattern thing?

    Look, just swapping front-to-back is fine if you’re in a rush, but it’s not the best way to do it. If you’ve got a rear-wheel drive car, you really want that “X-pattern”—moving the fronts to the opposite rear corners and vice versa. It helps the tread wear more evenly across the whole set. If you just swap front to back, you’re basically just moving the problem around instead of fixing it.

  • Steps for a Basic Oil Change

    Steps for a Basic Oil Change

    I was sitting in my dad’s garage last Saturday, watching him wipe grease off a 90s Silvia, when I realized something that still bugs me today: most shops charge you a massive markup just for something you can do in your own driveway. They try to make it sound like some high-level science, but honestly, a lot of these “professional” service centers are just banking on you being too intimidated to get your hands dirty. If you’re looking for a complicated, technical manual, you’re in the wrong place, but if you want a real oil change guide that actually respects your time and your wallet, I’ve got you covered.

    I’m not here to sell you on fancy, overpriced synthetic blends you don’t need or tell you that you need a lift to get the job done. My goal is to walk you through the actual process—from picking the right filter to making sure you don’t leave a puddle on your floor—using nothing but basic tools and a bit of patience. This is the no-nonsense truth about keeping your engine healthy without letting a service advisor talk you into a hundred-dollar “maintenance package” you never asked for.

    Table of Contents

    Guide Overview

    Total Time: 30-60 minutes
    Estimated Cost: $30-70
    Difficulty: Beginner

    Tools & Supplies

    • Socket wrench set for drain plug
    • Oil filter wrench for removal
    • Oil drain pan to catch old fluid
    • Funnel to prevent spills
    • Jack and jack stands for vehicle lifting
    • Motor oil (check manual for quantity and grade)
    • New oil filter (vehicle specific)
    • Drain plug washer/gasket (if replacement is needed)
    • Rags or paper towels for cleanup

    Step-by-Step Instructions

    • 1. First things first, grab your oil and a new filter, and get them ready before you even touch a wrench. You don’t want to be halfway through the job, covered in sludge, only to realize you forgot the specific oil weight your owner’s manual calls for. Check the cap under your hood to be sure; putting the wrong viscosity in can mess with your sensors later on.
    • 2. Pop the hood and let the engine run for maybe two or three minutes. You don’t want it screaming hot—that’s a quick way to get a serious burn—but you want the oil warm enough to flow out easily. If the engine is stone cold, the old gunk is going to be thick and slow, making a mess of your driveway.
    • 3. Get your car up on jack stands or a ramp. Never, and I mean never, trust just a hydraulic jack to hold you up while you’re underneath a heavy piece of machinery. Once you’re settled, find the oil pan and position your drain pan directly underneath the plug. If you don’t line it up right, you’re going to be cleaning black sludge off your garage floor for the next hour.
    • 4. Unscrew the drain plug using your socket wrench. As soon as it gets loose, finish it by hand, but be ready for the flow. Once the stream slows down to a tiny drip, wipe the plug clean and check the washer. If it looks crushed or nasty, swap it out for a new one so you don’t end up with a slow leak down the road.
    • 5. Now, tackle the old filter. Position your drain pan under it because, trust me, oil is going to spill out the second you break that seal. Use an oil filter wrench if it’s stuck, but once it’s off, take a clean rag and wipe the mounting surface on the engine. You want that area to be completely spotless before you try to seat the new one.
    • 6. Before you screw the new filter on, dip your finger in some fresh oil and smear it around the rubber gasket. This is a pro tip that most beginners skip, but it’s the best way to prevent the gasket from binding or tearing when you tighten it down. Thread the new filter on by hand until it’s snug, then give it just one more little nudge. Don’t over-tighten it like you’re trying to win a wrestling match.
    • 7. Screw that drain plug back in tight, grab your new oil, and start pouring. Use a funnel to keep things clean—nobody likes oil dripping down the side of the engine block. Once you’ve filled it to the correct level, start the car, let it idle for a minute to circulate everything, and then check the dipstick one last time to make sure you’re in the sweet spot.

    The Essential Oil Change Tools Checklist for Real Work

    The Essential Oil Change Tools Checklist for Real Work.

    Before you even crack the hood, you need to get your gear sorted. I’ve seen too many people start a job only to realize halfway through that they’re missing a specific socket or a way to catch the mess. My personal oil change tools checklist always starts with a decent jack and jack stands—never, and I mean never, trust a hydraulic jack alone while you’re under a car. You’ll also want a drain pan that’s actually big enough to catch the flow, otherwise, you’re just painting your driveway with black sludge.

    One thing that trips up most beginners is the drain plug wrench size. Don’t just guess; check your manual beforehand so you aren’t struggling with a rounded-off bolt because you used the wrong socket. While you’re at it, grab a new crush washer if your car requires one. Also, don’t get caught in the debate of synthetic vs conventional oil without a plan; just check your owner’s manual to see what the manufacturer actually calls for. If you follow the specs, you won’t have to worry about premature engine wear.

    Synthetic vs Conventional Oil Choosing What Your Engine Deserves

    Synthetic vs Conventional Oil Choosing What Your Engine Deserves

    Look, when you’re staring at that shelf full of colorful bottles at the auto parts store, it’s easy to just grab the cheapest one and call it a day. But if you want to actually follow your automotive maintenance schedule without constant headaches, you need to understand what you’re pouring in. Conventional oil is basically the old-school standard—it works fine for older, low-mileage engines that aren’t under much stress. However, if you’re driving something modern or you push your car hard, you really should be looking at synthetic vs conventional oil more closely.

    Synthetic oil is engineered to handle extreme heat and stay stable much longer than the basic stuff. It doesn’t break down as fast, which means it keeps your engine internals cleaner for longer periods. If you’re working on a newer car with tight tolerances, synthetic is almost always the better play. It might cost a few extra bucks upfront, but it’s way cheaper than the repair bill you’ll get if your oil turns into sludge. Just make sure you still know how to check oil level regularly, regardless of which type you choose.

    Pro Tips to Keep You From Making a Mess (or a Mistake)

    • Don’t trust the manual blindly; always double-check your owner’s manual or the oil cap for the exact viscosity your engine actually needs.
    • Get the car warm before you start. A little bit of heat makes the oil flow much faster and easier when you pull that drain plug.
    • Always replace the crush washer on the drain bolt. It’s a tiny piece of metal, but if you skip it, you’re going to be dealing with a slow, annoying leak for weeks.
    • Never, and I mean never, tighten that drain plug like you’re trying to win a wrestling match. Hand-tight plus a tiny nudge with the wrench is plenty; over-tightening is how you strip threads.
    • Keep a catch pan positioned slightly under the plug before you unscrew it. Oil likes to come out faster than you expect, and nobody wants a puddle of black sludge all over their driveway.

    The Bottom Line on Your Next Oil Change

    Don’t let a shop talk you into expensive synthetic blends if your manual calls for conventional; just follow what the manufacturer says and save your money.

    Having the right tools, especially a decent oil filter wrench and a way to catch the old stuff without a mess, is the difference between a quick job and a disaster in your driveway.

    Doing this yourself isn’t just about saving cash—it’s about actually knowing what’s going on with your engine so nobody can pull a fast one on you later.

    ## The Truth About Maintenance

    Look, most shops will try to sell you a whole list of “essential” services the second you pull into the bay, but at the end of the day, an oil change isn’t some complex mystery—it’s just the most basic way to show your engine some respect. If you can handle a wrench and follow a few steps, you’re already doing more for your car than most people ever will.

    Nikolai·Osterman

    Wrapping It All Up

    Wrapping It All Up: Car Oil Maintenance

    At the end of the day, changing your oil isn’t some mysterious ritual reserved for people with expensive degrees. We’ve covered the ground: you need the right tools, you need to pick a quality oil that actually matches your engine’s specs, and most importantly, you need to follow the procedure without cutting corners. Whether you went with a full synthetic or stuck to a conventional blend, the goal remains the same: keeping the sludge out of your internals so your car actually lasts. It’s about taking control of your maintenance instead of just handing over your credit card and hoping for the best.

    I know it can feel intimidating when you’re staring down at a greasy drain plug for the first time, but honestly, the first time is always the hardest. Once you’ve got the rhythm down, it becomes just another Saturday morning task. Don’t let the fear of making a mess stop you from learning something useful. Every time you get under that chassis, you’re building a connection with your machine and saving yourself a massive headache down the road. Grab your wrench, keep that magnetic tray handy, and just get to work. You’ve totally got this.

    Frequently Asked Questions

    How do I know if I'm actually stripping the drain plug bolt when I'm tightening it?

    You’ll know something’s wrong if the bolt feels “mushy.” If you’re turning the wrench and there’s zero resistance—like you’re just spinning it in butter—you’ve likely stripped the threads. It’s a gut-sinking feeling, I know. Also, if the bolt feels loose even when it’s seated, or if you see metal shavings in your old oil, that’s a massive red flag. Just stop immediately. Don’t try to force it; you’ll only make the hole bigger.

    Is it actually okay to reuse the old crush washer, or am I asking for a leak?

    Look, I’ve seen guys try to get away with it, and honestly? You’re asking for a headache. That crush washer is designed to deform slightly to create a perfect, airtight seal. Once you’ve squeezed it down once, it’s done. If you try to reuse it, you’re basically gambling on a slow drip that’ll eventually coat your driveway in oil. Grab a new one—they cost pennies and save you a massive mess.

    What’s the best way to clean up the spilled oil so I don't ruin my driveway?

    Look, nothing kills the vibe of a successful DIY job like seeing a dark stain creeping across your driveway. If you spill, don’t just spray it with a hose—that just spreads the mess. Grab some kitty litter or even sawdust and dump it thick over the puddle. Let it sit for a bit to soak up the liquid, then sweep it up. If there’s a stubborn stain left, a little dish soap and a stiff brush usually do the trick.