I still remember the first time my dad let me take the lead on a brake job back in his old garage. The air was thick with the sharp, stinging scent of brake cleaner hitting hot metal, a smell that honestly sticks in your nose for days. I was sixteen, covered in road grime, and trying to figure out why the rotors looked like they’d been through a war zone. That moment taught me something no textbook could: if you don’t get that nasty buildup off properly, you’re basically throwing money away on new parts that won’t even perform right.
Look, I’m not here to sell you on some overpriced, “professional-grade” aerosol that costs a fortune just because the label looks fancy. Most shops will try to charge you an arm and a leg for a simple cleaning service, but you don’t need a mechanic’s license to do it yourself. I’m going to show you exactly what kind of brake cleaner actually works, which ones won’t melt your rubber seals, and how to use them without making a mess of your driveway. Let’s get to work.
Table of Contents
Mastering Effective Brake Dust Removal Techniques
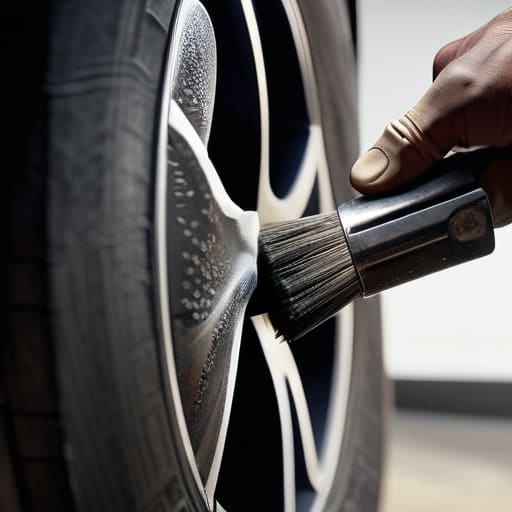
When you’re tackling brake dust removal techniques, the biggest mistake people make is just spraying and praying. If you’ve got a thick layer of black soot caked onto your calipers, a quick mist isn’t going to cut it. You need to start by using a stiff-bristled brush to knock off the heavy chunks first. If you just blast it with liquid right away, you’re essentially creating a black sludge that’s going to smear all over your suspension components. Once the heavy stuff is gone, that’s when you bring in the heavy hitters to really strip the residue away.
I always tell my buddies that cleaning brake rotors and calipers requires a bit of a rhythm. Start with the easy-to-reach spots, but don’t ignore the tight crevices where the dust likes to hide and cause corrosion. I prefer using non-chlorinated brake cleaner benefits to keep things a bit safer for my lungs and the environment, especially when I’m working in a garage with limited airflow. Just remember to work in sections and let the solvent do the heavy lifting instead of scrubbing like crazy. It’s all about letting the chemicals break down the grime so you aren’t fighting against it.
Why Non Chlorinated Brake Cleaner Benefits Your Health
Look, I’ve spent enough hours hunched over a fender to know that the stuff you breathe in matters just as much as the tool in your hand. Back in the day, a lot of shops used heavy-duty solvent-based cleaning agents that were loaded with chlorinated hydrocarbons. They worked fast, sure, but they’re nasty stuff for your lungs and skin. When you’re deep into brake system maintenance safety, the last thing you want is to be inhaling toxic fumes every time you spray down a rotor.
Switching to a non-chlorinated option isn’t just about being “eco-friendly”—it’s about not feeling like garbage after a long Saturday in the garage. The non-chlorinated brake cleaner benefits really show up when you’re working in tight, poorly ventilated spaces like a crawlspace or a cramped garage. You still get the heavy-duty punch needed for cleaning brake rotors and calipers, but without the extreme chemical risk. I’ve learned the hard way that it’s better to protect your health now so you can actually enjoy working on your cars for years to come.
5 Pro Tips to Keep You from Making a Mess (or a Mistake)
- Always let the parts dry completely before you try to put anything back together. If you reassemble a rotor or caliper while it’s still wet with cleaner, you’re basically just lubing up your brake pads, and that’s a recipe for a massive headache.
- Watch out for your rubber seals and plastic lines. Brake cleaner is aggressive stuff; if you accidentally spray a bunch of it directly onto your brake hoses or rubber bushings, it can cause them to swell or crack over time. Aim for the metal, not the rubber.
- Don’t skimp on ventilation. I know it’s tempting to spray a whole can in a closed-up garage to get the job done fast, but those fumes are no joke. Crack the garage door or grab a fan. Your lungs will thank me later.
- Use a dedicated parts washer or a clean rag to catch the runoff. You don’t want a pool of solvent and brake dust sitting on your shop floor, especially if you’ve got a dog or a kid running around. Plus, it keeps your workspace from getting sketchy.
- Keep your spray can’s nozzle clean. After you’re done, wipe the tip of the can down. If it gets gummed up with old grime or dried residue, you’ll end up with a messy spray pattern next time you need a quick blast, and that’s how you end up spraying cleaner where it doesn’t belong.
The Bottom Line on Brake Cleaner
Don’t just spray and pray; make sure you’re using a non-chlorinated version so you aren’t breathing in nasty toxins while you work.
Use the cleaner to actually clear out the grit and dust, not just to make the parts look shiny, otherwise you’re just masking a bigger problem.
Keep a can of high-quality brake cleaner in your kit—it’s one of those cheap tools that saves you from a massive headache and a wasted trip to the shop.
The Truth About the Can
Look, a can of brake cleaner isn’t just some fancy detailer; it’s the difference between a smooth stop and a grinding nightmare. If you’re too cheap to spray down your rotors, you’re basically paying a mechanic to fix your mistakes later.
Nikolai·Osterman
Final Thoughts Before You Get Back Under the Hood
Look, at the end of the day, picking the right brake cleaner isn’t some high-level engineering feat; it’s just about being smart with your tools. We’ve covered how to actually clear out that nasty dust without making a mess, and why you should never settle for those old-school chlorinated cans that’ll mess with your lungs. Just remember: use the right spray for the job, don’t skimp on the cleaning process, and always prioritize your safety by working in a spot with decent airflow. If you follow these steps, you aren’t just cleaning parts; you’re making sure your braking system actually does what it’s supposed to do when you hit the pedal.
I know it can feel intimidating when you first look at a pile of greasy, blackened components, but don’t let that stop you. Every pro I know started exactly where you are, staring at a dirty part and wondering if they were doing it right. Once you realize that most of this is just patience and the right solvent, the whole garage starts to feel a lot less like a mystery shop and more like your own personal workspace. Stop letting the fear of making a mistake keep you from doing the work yourself. Grab your cans, get to cleaning, and take control of your ride.
Frequently Asked Questions
Can I use brake cleaner on painted surfaces if I accidentally spray a little too much?
Look, don’t panic, but don’t just leave it there either. If you accidentally spray some on your paint, grab a clean microfiber towel and wipe it off immediately. Most modern clear coats can handle a little overspray, but if you let it sit—especially in the sun—it can dull the finish or even eat through the wax. Just wash the area with some soapy water afterward to make sure no residue is left behind.
Is it safe to use brake cleaner on rubber seals or brake lines, or am I going to melt something?
Look, don’t go spraying it everywhere blindly. If you hit your rubber seals or brake lines with heavy-duty brake cleaner, you’re asking for trouble. It’s designed to eat grease, and it can absolutely swell or crack that rubber, which is the last thing you want when you’re trying to stop. Keep the spray focused strictly on the metal components and the dust. If you get some on a seal, wipe it off immediately with a damp rag.
How long do I actually need to let the cleaner dry before I start pumping the pedal again?
Look, I get the urge to just get moving, but don’t rush this. You want to wait until the components are bone dry to the touch. Usually, that’s just a couple of minutes if you’re letting it air dry, but if you’re in a hurry, hit it with a bit of compressed air. Once that liquid sheen is gone, you’re good to pump the pedal and set your seating before you actually hit the road.
