Category: Tools

  • Importance of Wearing Mechanic Gloves

    Importance of Wearing Mechanic Gloves

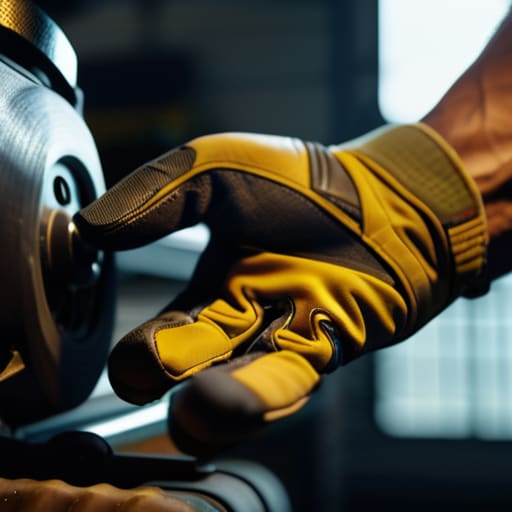
    I remember sitting on my dad’s oil-stained concrete floor when I was twelve, trying to wrestle a stubborn bolt on an old Corolla. I thought I was being tough by working bare-handed, but by the time I finished, my knuckles were shredded and the grease was so deep under my fingernails that no amount of scrubbing could get it out. That was the day I realized that skipping out on decent mechanic gloves isn’t some badge of honor—it’s just a fast track to ruining your hands and slowing down your work.

    Look, I’m not here to sell you some overpriced, high-tech gear that promises to turn you into a professional racer overnight. Most of the stuff you see in flashy ads is just marketing fluff designed to drain your wallet. I’m going to give you the straight truth based on what I actually use in the shop every single day. We’re going to break down which pairs actually hold up against heat and chemicals, and which ones are just a complete waste of money.

    Table of Contents

    Why Nitrile Coated Work Gloves Are Your Best Friend

    Why Nitrile Coated Work Gloves Are Your Best Friend

    Look, if you’re working on a modern engine, you’re dealing with a mess of tiny sensors and tight spaces. This is exactly why I swear by nitrile coated work gloves over those bulky, old-school leather ones. Leather is great for swinging a sledgehammer, but the second you try to feel a loose clip or thread a small bolt, you’re fighting the material. Nitrile gives you that tactile sensitivity you need to actually feel what you’re doing, which prevents you from stripping heads or snapping delicate plastic connectors.

    Plus, let’s be real about the fluids we deal with. Between the old engine oil and whatever brake cleaner you’re using, your skin takes a beating. These gloves act as solid oil resistant hand protection, so you aren’t scrubbing grease out from under your fingernails for three days straight after a simple oil change. They grip onto slippery tools way better than bare hands, too. If you want to work faster and keep your skin from getting trashed, making the switch to a coated style is the easiest win you’ll have in the garage.

    Finding the Perfect Balance of Tactile Sensitivity Repair Gloves

    Finding the Perfect Balance of Tactile Sensitivity Repair Gloves

    The biggest headache I run into at the shop is when a guy buys these massive, thick leather gauntlets and then realizes he can’t even feel a tiny 10mm bolt anymore. If you can’t feel the threads, you’re going to cross-thread something, and then you’re looking at a much bigger headache than just a bit of grease. You need tactile sensitivity repair gloves that actually let you feel the tension in a screw or the click of a connector. If your hands feel like they’re encased in oven mitts, you’re going to end up frustrated and making mistakes.

    I usually tell people to look for a hybrid setup. You want something that offers cut resistant mechanic gloves protection if you’re reaching around sharp radiator supports or jagged metal edges, but without the bulk. A good pair should be thin enough to pick up a dropped washer but tough enough to handle the grime. Finding that sweet spot between “I can feel everything” and “I won’t slice my fingers open” is what separates a smooth job from a total nightmare.

    5 Ways to Not Waste Your Money on Trash Gloves

    • Don’t go for the cheapest bulk packs you find online. If the palms shred after one oil change, you’re just throwing money into the scrap bin. Spend a few extra bucks on something that actually lasts.
    • Check the dexterity before you buy. There’s nothing more annoying than trying to fish a tiny 10mm bolt out of a tight crevice with gloves that feel like you’ve got oven mitts on.
    • Look for reinforced knuckles if you’re working on older, beat-up rigs. You’ll be bumping into rusted brackets and sharp edges constantly, and you don’t want a metal shard slicing right through the fabric.
    • Make sure they’re breathable. If you’re stuck under a chassis for two hours, your hands are going to sweat like crazy. If the gloves don’t breathe, they’ll get slippery and gross real fast.
    • Get a pair with a good grip pattern on the fingers. When you’re trying to get leverage on a stubborn, greasy wrench, the last thing you need is your hand sliding off and smashing your knuckles against the frame.

    The Bottom Line on Protecting Your Hands

    Don’t just grab the cheapest pair at the hardware store; if you can’t feel the small bolts or the tension on a clip, you’re going to end up stripping something or losing a nut in the engine bay.

    Go with nitrile-coated gloves for the heavy, greasy jobs—they give you that grip you need when things get slippery, but they won’t let the oil soak straight through to your skin.

    Prioritize a mix of protection and dexterity so you aren’t fighting your own gear while trying to reach a stubborn sensor or a tight fastener.

    ## The Real Cost of Skipping the Right Gear

    “Look, you can try to ‘tough it out’ with bare hands, but between the jagged metal edges and the chemical burns from old fluids, you’re just asking for a week of busted knuckles that’ll keep you off the tools. A decent pair of gloves isn’t some luxury; it’s the difference between finishing the job or sitting on the sidelines nursing a cut.”

    Nikolai·Osterman

    Don't Settle for Less Than Your Hands Deserve

    Don't Settle for Less Than Your Hands Deserve

    Look, at the end of the day, picking out the right gloves isn’t about being fancy; it’s about not making your job harder than it already is. We talked about why those nitrile coatings are a lifesaver for grip and why you can’t sacrifice that tactile sensitivity if you’re trying to feel a stripped bolt or a tiny clip. If you go too heavy, you’re working blind, and if you go too light, you’re just asking for a nasty scrape or a chemical burn. Just remember to match the glove to the specific task you’re tackling, whether it’s a heavy engine swap or just swapping out some sensors.

    I know it feels like just another thing to buy, but trust me, your hands are your most important tools in this shop. I’ve seen too many guys skip out on decent protection only to end up frustrated because they couldn’t feel what they were doing, or worse, they’re nursing busted knuckles for a week. Don’t let a cheap pair of gloves be the reason you give up on a repair halfway through. Grab something solid, get under that hood, and start taking control of your own maintenance. You’ve got this.

    Frequently Asked Questions

    How do I know if I need heavy-duty leather gloves or just the thin nitrile ones for a specific job?

    Look, it’s all about what you’re actually touching. If you’re just swapping out sensors or messing with wiring harnesses, stick to the thin nitrile ones—you need that feel so you don’t snap a connector. But if you’re pulling a rusted suspension bolt or sliding under a chassis where things are sharp and heavy, grab the leather. Don’t be a hero; if it looks like it could scrape or crush you, go heavy-duty.

    Are these gloves actually going to protect me if I'm working with harsh chemicals like brake cleaner?

    Look, I’ll be straight with you: if you’re drenching your hands in brake cleaner, most standard work gloves aren’t going to cut it. They’re built for grip and scrapes, not chemical barriers. If you’re dealing with harsh solvents or nasty fluids, you’re better off throwing on some heavy-duty nitrile disposables over your work gloves. Don’t risk a chemical burn just to save a few seconds—protect your skin first, then get back to the job.

    How often should I be replacing them before they get too greasy or lose their grip?

    Honestly, don’t wait until they’re falling apart. If you can’t feel the small bolts anymore because the coating is caked in sludge, or if you feel yourself slipping while trying to tighten a stubborn nut, toss them. For me, if they’re looking more black than whatever color they started as, it’s time. I usually swap mine out every few months of heavy work, but if the grip goes, they’re useless.

  • Testing Automotive Fluid Levels

    Testing Automotive Fluid Levels

    I remember one Saturday afternoon working on my dad’s old sedan, staring at a dipstick that looked like it hadn’t been cleaned since the nineties. I was sweating, covered in grease, and honestly just guessing if the coolant was actually okay or if I was about to cook the engine. Most shops will try to sell you some high-tech, computerized diagnostic suite just to tell you your fluids are low, but that’s a total scam. You don’t need a thousand-dollar scanner to avoid a breakdown; you just need a decent fluid level tester to see what’s actually happening before a small problem turns into a total nightmare.

    Look, I’m not here to give you a lecture or sell you on some fancy, overpriced gadgetry you’ll never use. My goal is simple: I want to show you how to use a fluid level tester to take control of your own maintenance without getting ripped off by a mechanic. I’ll walk you through the stuff that actually matters, from reading the colors to spotting the warning signs, so you can keep your car running on your own terms.

    Table of Contents

    Checking Vehicle Fluid Levels Without Paying the Mechanic

    Checking Vehicle Fluid Levels Without Paying the Mechanic

    Look, the biggest mistake I see people make is waiting until a warning light pops up on the dash before they even think about their fluids. By then, you’re usually looking at a massive repair bill instead of a quick fix. Most shops will try to charge you an hour of labor just to pull a dipstick or check a reservoir, but you can handle checking vehicle fluid levels yourself in about ten minutes. All it really takes is a little bit of patience and a few basic automotive fluid diagnostic tools that you can grab for cheap.

    I always tell my friends: don’t just look at the color and assume it’s fine. If you want to be smart about preventative vehicle maintenance, you need to know what’s actually happening inside the system. For example, using an engine coolant testing kit tells you if your antifreeze is actually protecting your engine or if it’s just old, dirty water waiting to cause an overheat. It’s about being proactive so you aren’t stuck on the side of the road with a blown head gasket because you wanted to save fifty bucks on a shop visit.

    Why Every Real Driver Needs Automotive Fluid Diagnostic Tools

    Why Every Real Driver Needs Automotive Fluid Diagnostic Tools

    Look, I see it all the time at the shop: people waiting until they’re stranded on the shoulder to realize something is wrong. By then, a simple fix has turned into a massive repair bill. That’s why I’m such a big believer in preventative vehicle maintenance. Having a few basic automotive fluid diagnostic tools in your trunk isn’t about being a gearhead; it’s about having the data before a sensor starts screaming at you.

    When you actually know what’s happening inside your lines, you stop guessing. For example, if you ignore the brake fluid tester importance, you might not realize your fluid is absorbing moisture until your pedal goes soft right when you need it most. Or, if you aren’t running a regular coolant concentration test, you’re basically just praying your engine doesn’t overheat during a summer drive. Using an engine coolant testing kit lets you catch acidity or improper mix levels before they start eating away at your water pump. It’s about taking control so you aren’t at the mercy of a shop’s estimate.

    5 Ways to Not Screw Up Your Fluid Checks

    • Don’t just trust your eyes. A cheap tester gives you a reading on the actual condition, not just the level. If the fluid looks okay but the tester says it’s acidic or contaminated, listen to the tool, not your eyes.
    • Check things when they’re cold. I’ve seen guys try to test coolant or oil right after a long highway run. You’ll get a garbage reading if the engine is still heat-soaked. Let it sit, let it cool, then get to work.
    • Keep your testers clean. If you dip a dirty tester into your brake fluid and then shove it back in, you’re just introducing grit into your lines. Wipe it down with a lint-free rag every single time.
    • Match the tool to the fluid. You can’t use a generic dipstick approach for everything. Using a specialized tester for things like transmission fluid or coolant prevents you from missing the subtle color shifts that signal a major problem.
    • Make it a habit, not a crisis response. Don’t wait until you smell burning or see a warning light to grab your tester. If you check your fluids once a month, you’ll catch a $20 leak before it turns into a $2,000 engine rebuild.

    The Bottom Line on Using Fluid Testers

    Don’t wait for a warning light on your dash; catching a weird color or smell with a tester now saves you from a massive repair bill later.

    You don’t need a shop’s worth of expensive gear, just a decent fluid tester to stop guessing and start knowing what’s actually happening in your engine.

    Taking five minutes to check your fluids yourself is the easiest way to make sure a mechanic isn’t overcharging you for something you could’ve spotted yourself.

    ## The Real Cost of Guesswork

    “Most people wait until they see smoke or hear a knock to check their fluids, but by then, you’re already paying for a repair that a twenty-dollar tester could’ve prevented. Don’t let a mechanic charge you for a ‘mystery problem’ that was just a simple fluid issue you could’ve caught yourself.”

    Nikolai·Osterman

    Don't Leave Your Engine to Chance

    Don't Leave Your Engine to Chance.

    At the end of the day, using a fluid level tester isn’t about being a gearhead; it’s about taking control of your own ride. We’ve covered how these tools stop you from flying blind, how they save you from those massive shop bills, and why guessing at your fluid health is a recipe for a breakdown. Whether you’re just checking your coolant or diving deep into brake fluid clarity, having the right diagnostic tool means you aren’t just crossing your fingers every time you turn the key. It’s about knowing the truth about what’s actually happening inside those metal casings before a small leak turns into a total engine meltdown.

    Look, I know it can feel intimidating when you first pop the hood and see a mess of hoses and sensors, but don’t let that stop you. You don’t need a fancy certification to be the person who actually understands their machine. Every time you pick up a tool and do a quick check yourself, you’re building a connection with your car that most drivers never bother with. Grab a tester, get your hands a little dirty, and start trusting your own eyes instead of a mechanic’s sales pitch. You’ve got this, and your car will definitely thank you for it.

    Frequently Asked Questions

    Do I really need a specialized tester for everything, or can I just use the dipsticks that came with the car?

    Look, dipsticks are fine for a quick check, but they don’t tell the whole story. A dipstick shows you the volume, but it won’t tell you if your coolant is turning acidic or if your brake fluid is pulling in moisture from the air. If you’re just checking oil levels, the dipstick is your best friend. But if you want to catch a problem before it turns into a $2,000 repair bill, you need a real tester.

    Is there a specific type of tester I should get if I'm working on an older car versus something newer with more sensors?

    Honestly, it depends on what you’re wrenching on. For my older projects—like those vintage tuners I restore—I stick to the old-school stuff: manual dipsticks, glass testers, and basic refractometers. They’re reliable and don’t need a computer. But if you’re touching a modern car, you really need something that plays nice with sensors, like an OBD-II compatible scanner or digital testers. Don’t try to use 90s methods on a car that’s basically a rolling smartphone.

    How do I know if a tester is actually giving me a real reading or if it's just malfunctioning?

    Look, there’s nothing worse than trusting a tool that’s lying to you. If you’re suspicious, run a “sanity check.” Compare the tester’s reading against the physical dipstick or the sight glass on the reservoir. If the tester says your coolant is fine but it looks like muddy sludge in the tank, the tool is bunk. Also, clean the sensors before use—grease buildup is the number one reason for false readings. Don’t let a glitchy tool cost you an engine.

  • Choosing the Right Adjustable Wrench

    Choosing the Right Adjustable Wrench

    I remember being ten years old, stuck under my dad’s old sedan with a busted tie rod end, frantically digging through a metal toolbox because I couldn’t find the exact socket I needed. I was sweating, covered in grime, and honestly pretty close to throwing the whole wrench across the garage in frustration. That’s when he handed me a solid, heavy-duty adjustable wrench and told me to stop overthinking it. Most people think you need a massive, expensive set of specialized tools for every single nut and bolt, but that’s just a way for shops to inflate your bill. Sometimes, a single versatile tool is all that stands between you and a finished job.

    Look, I’m not here to sell you on some fancy, gold-plated tool kit that’s going to sit in your trunk collecting dust. I’m going to show you how to pick an adjustable wrench that actually grips without stripping your bolts and, more importantly, when to use one so you don’t end up making a mess of your engine. I’ve spent enough hours in the shop to know which ones hold up and which ones are just cheap junk.

    Table of Contents

    Choosing Between Metric vs Imperial Wrenches Without the Guesswork

    Choosing Between Metric vs Imperial Wrenches Without the Guesswork

    Here’s the thing that trips most people up when they first start working in a garage: the constant battle between metric vs imperial wrenches. If you’re working on a newer Japanese tuner or a modern domestic car, you’re almost certainly going to be dealing with metric bolts. But if you’re digging through an older project or some heavy-duty American machinery, you’ll need those imperial sizes. The biggest mistake I see beginners make is trying to force a wrench that’s just slightly off because they’re in a rush.

    If the fit isn’t perfect, you aren’t just wasting time; you’re actively preventing bolt stripping from becoming a nightmare. When you use an adjustable tool that doesn’t seat tightly against the flats of the bolt, the jaws will slip, and once you round off that head, you’re looking at a much bigger, much more expensive headache. Before you start cranking, always double-check that the jaw is snug. It’s better to spend ten seconds verifying the size than ten hours trying to drill out a mangled fastener.

    Finding the Right Jaw Width Capacity for Tight Spaces

    Finding the Right Jaw Width Capacity for Tight Spaces

    Look, there is nothing worse than being halfway through a job, covered in grime, only to realize your tool is just a hair too fat to fit between the firewall and the engine block. When you’re shopping, don’t just look at how big the wrench is; you need to pay attention to the jaw width capacity. A wrench might have a massive opening, but if the head itself is too bulky, it’s useless in the tight spots where the real work happens. I’ve spent way too many afternoons fighting with a tool that was technically the right size but physically too thick to actually engage the bolt.

    If you’re working on modern cars, you’re going to run into a lot of cramped quarters. I always tell people to aim for a slim-profile design if they can. It’s also about how the tool handles torque application tools in those awkward angles. If the jaws are too wide or the build is clunky, you’ll lose your leverage, and that’s exactly how you end up preventing bolt stripping from becoming an impossible task. You want something that feels surgical, not like you’re swinging a sledgehammer in a closet.

    5 Ways to Stop Turning Your Wrenches into Expensive Paperweights

    • Always tighten the knurled screw before you start pulling. If the jaws have any wiggle room, you’re going to slip, and that’s how you end up rounding off a bolt head or, worse, smashing your knuckles against the frame.
    • Face the pressure toward the fixed jaw. When you’re applying heavy torque, make sure the movable part of the wrench is pressing against the solid, non-moving side. It keeps the tool from twisting or snapping under the load.
    • Stop using them for everything. I get it, an adjustable wrench is convenient, but if you’re working on a high-torque situation, grab a dedicated socket or a fixed combination wrench. Adjustables are great for odd sizes, but they aren’t built for heavy-duty lug nut scenarios.
    • Check the jaw alignment regularly. If you see the jaws starting to tilt or gap when they meet, the tool is worn out. Using a warped wrench is a fast track to stripped fasteners, and nobody wants to spend three hours drilling out a broken bolt.
    • Keep the mechanism clean of grit and old grease. If that adjustment screw gets gummy with shop grime, you’ll end up forcing it, which can strip the threads. A quick wipe-down after a job keeps it sliding smooth for the next time you’re stuck in a tight spot.

    Quick Tips for Your Next Job

    Don’t just grab any old wrench; make sure the jaws are wide enough to grip the bolt head fully so you don’t end up stripping it and making a massive headache for yourself.

    Always double-check if you’re working on a metric or imperial setup before you start cranking, because trying to force a fit is the fastest way to ruin a bolt.

    Invest in a decent quality adjustable wrench that feels solid in your hand—if it feels flimsy or wobbles when you tighten it, it’s going to fail you when you’re mid-repair.

    The One Tool That Saves Your Sanity

    Look, you aren’t going to have a perfect socket set for every single weird bolt on a twenty-year-old engine, and that’s fine. An adjustable wrench isn’t a way to avoid buying tools; it’s your way of making sure you don’t get stuck halfway through a job just because one bolt decided to be difficult.

    Nikolai·Osterman

    Getting the Job Done Right

    Getting the Job Done Right with wrenches.

    At the end of the day, an adjustable wrench isn’t just some generic tool you grab when you’re too lazy to find a socket set; it’s a lifesaver when you’re elbow-deep in a tight engine bay. Just remember what we talked about: don’t get caught between metric and imperial measurements, and for the love of everything, pick a jaw width that actually fits the clearance you’re working with. If you invest in a decent tool that doesn’t slip the second you apply pressure, you’re going to save yourself a massive headache—and a lot of money—when that next bolt refuses to budge. Don’t settle for cheap, flimsy hardware that’s just going to strip your fasteners and leave you stranded mid-repair.

    Look, I know staring at a disassembled engine can feel pretty intimidating when you’re first starting out. But honestly? Most of the stuff mechanics charge hundreds for is just a matter of having the right gear and the patience to see it through. You don’t need a fancy degree or a professional-grade toolbox to take control of your own vehicle. Grab your wrench, keep your workspace organized, and just take it one bolt at a time. You’ve got this, and before you know it, you’ll be doing these repairs in your own driveway without breaking a sweat.

    Frequently Asked Questions

    How do I know if the adjustable wrench I'm using is actually going to strip a bolt head?

    If you feel the wrench “spongy” or see it shifting even a hair while you’re pulling, stop immediately. That’s the jaw slipping, and you’re seconds away from rounding that bolt head into a smooth, useless circle. A good adjustable should feel solid, like it’s locked in. If there’s any play in the jaws or the bolt feels like it’s sliding, you’ve either got a cheap tool or you haven’t tightened the screw enough. Don’t force it.

    Is it worth spending extra money on a high-end brand, or will a cheap one from a big-box store get the job done?

    Look, if you’re just tightening a loose bracket once a year, a cheap one from a big-box store won’t kill you. But if you’re actually turning bolts on a daily driver, buy the good stuff. Cheap wrenches have sloppy tolerances; they slip, they round off your bolt heads, and then you’re in real trouble. I’ve spent way too many hours drilling out stripped bolts because I tried to save twenty bucks. Buy quality once.

    When should I stop using an adjustable wrench and just go grab a dedicated socket or fixed wrench instead?

    Look, adjustable wrenches are lifesavers when you’re stuck, but they aren’t a substitute for everything. If you’re dealing with a high-torque bolt—like an oil drain plug or a suspension component—stop. Using an adjustable there is a one-way ticket to rounding off that bolt head, and then you’re in real trouble. If you can see a fixed socket or a dedicated wrench that fits, use it. Save the adjustable for the weird, one-off sizes.

  • Uses for Needle Nose Pliers in Car Repair

    Uses for Needle Nose Pliers in Car Repair

    I was elbow-deep in the engine bay of an old S13 last Tuesday, swearing under my breath because a tiny, snapped cotter pin had wedged itself into a gap so narrow my fingers felt like sausages. I reached for my tool bag, knowing exactly what I needed, but I realized most people treat needle nose pliers like they’re some specialized, high-end instrument you need to spend eighty bucks on at a specialty shop. Honestly, that’s a load of garbage. You don’t need a professional-grade, titanium-coated set to grab a clip or steady a wire; you just need a pair that actually grips without slipping and won’t bend the second you apply any real pressure.

    I’m not here to sell you on some overpriced brand name or tell you that you need a massive kit to get the job done. My goal is to give you the straight truth about what actually works when you’re stuck in a tight spot. I’ll show you how to pick a reliable pair, how to use them without stripping your hardware, and why having the right leverage is the difference between a quick fix and a massive headache.

    Table of Contents

    Mastering Precision Gripping Tools in Tight Engine Bays

    Mastering Precision Gripping Tools in Tight Engine Bays

    When you’re leaning over a fender, trying to reach a clip tucked behind the firewall, standard pliers are basically useless. That’s where having a set of precision gripping tools actually pays off. I’ve spent countless hours in the shop staring at sensors that are just barely out of reach, and if you don’t have the right reach, you’re just going to end up stripping a plastic connector or bruising your knuckles. I usually reach for my high-leverage versions when I’m dealing with stubborn, rusted clips because they give you that extra bit of bite without needing to put your whole body weight into the move.

    It’s not just about strength, though; it’s about finesse. If you’re working near the ECU or messing with those tiny, fragile wiring harnesses, you need to treat them like they’re made of glass. I’ve seen guys try to use heavy-duty linesman pliers for everything, and they end up snapping a harness in seconds. For the delicate stuff, you want something that feels more like electronics repair tools than heavy hardware. Using the right tool for the specific gap ensures you aren’t just forcing a fix, but actually doing it right the first time.

    Why High Leverage Needle Nose Pliers Save Your Day

    Why High Leverage Needle Nose Pliers Save Your Day

    Look, I’ve spent enough time hunched over a fender to know that sometimes, brute force is your worst enemy. When you’re trying to fish a dropped washer out of a crevice or grab a stubborn clip, you don’t just need reach—you need grip strength that doesn’t slip. That’s where high leverage needle nose pliers actually earn their keep. Most cheap sets you find at a big-box store have these thin, flimsy handles that make your hand cramp up after two minutes of work. If you’re dealing with a seized connector or a piece of debris wedged near a sensor, you need a tool that multiplies your hand strength so you aren’t struggling just to hold onto the part.

    It’s not just about strength, though; it’s about the control you get when things are cramped. I’ve seen guys try to use standard pliers for small tasks, only to end up stripping a plastic housing or snapping a delicate wire. Using proper pliers for small spaces allows you to apply just enough pressure to get the job done without turning a simple fix into a nightmare. Whether you’re working on a fuel line or just tidying up some wiring, having that extra leverage means you spend less time fighting the tool and more time actually finishing the job.

    5 Pro Tips to Stop Stripping Bolts and Losing Your Mind

    • Don’t just grab the first pair you see; look for pliers with a serrated grip inside the jaws. If you’re trying to pull a stubborn, corroded clip out of a harness, smooth jaws are just going to slip and leave you swearing at the engine block.
    • Keep a pair of smaller, precision needle nose pliers in your pocket or a dedicated small tray. Sometimes the standard 9-inch shop pliers are just too bulky to maneuver around a brake master cylinder or a tight strut tower.
    • If you’re fishing for a dropped screw in a dark corner of the bay, use your pliers as an extension. If you can, wrap a bit of electrical tape around the tips to give you a tiny bit of extra “feel” so you don’t accidentally gouge a sensor.
    • Watch your angle when you’re pulling wire connectors. Instead of just yanking straight up, use the pliers to get a firm grip on the plastic housing and wiggle it slightly side-to-side. It prevents the wires from snapping right at the terminal.
    • Clean your pliers after working on anything oily or greasy. I’ve seen guys try to grab a delicate fuse or a small washer with pliers covered in old sludge, and they end up sliding right off. A quick wipe keeps your precision work actually precise.

    The Bottom Line on Needle Nose Pliers

    Don’t settle for cheap, flimsy pliers; if the tips bend the first time you try to grab a stubborn clip, you’re just wasting time and frustration.

    Always check your grip before you commit—nothing’s worse than getting a good hold on a sensor only to have the pliers slip and strip the plastic.

    Think of them as an extension of your fingers, not a replacement; use them to guide and steady things, but don’t try to force heavy components with just the tips.

    The Tool You’ll Reach For Most

    “Look, you can have the fanciest torque wrench in the shop, but when you’re elbow-deep in a cramped engine bay trying to fish out a dropped clip or a busted sensor wire, a solid pair of needle nose pliers is the only thing that’s actually going to save your afternoon.”

    Nikolai·Osterman

    Don't Leave the Job Half Done

    Don't Leave the Job Half Done pliers.

    At the end of the day, a decent pair of needle nose pliers isn’t just some extra clutter in your toolbox; they are the difference between a five-minute fix and a two-hour headache. We’ve talked about how much easier life gets when you have the right leverage for those stubborn clips and how much sense it makes to invest in a pair that actually fits into those impossible engine bay gaps. Whether you’re fishing out a dropped washer or trying to reseat a tiny sensor connector, having the right tool means you aren’t fighting the car—you’re actually working on it. Don’t settle for cheap, flimsy versions that bend the second you apply any real pressure, because getting the right grip the first time is what keeps your project moving forward.

    Look, I know that staring at a cluttered engine bay can feel pretty overwhelming when you first pop the hood. But honestly? Most of the “complex” stuff mechanics charge a fortune for is really just a matter of patience and the right reach. You don’t need to be a master technician to get these small jobs done; you just need to be willing to get your hands a little dirty and use the tools you have. Grab your pliers, take a breath, and just start one small repair at a time. I promise, once you get that first clip to snap back into place, you’ll realize you’re way more capable than you thought.

    Frequently Asked Questions

    Is there a specific difference between standard needle nose pliers and long-reach versions when I'm working deep in the engine bay?

    Yeah, there’s a massive difference once you’re actually elbow-deep in a bay. Standard needle nose pliers are your go-to for general stuff—clips, small wires, or anything you can actually see and reach. But when you’re chasing a dropped bolt or a sensor connector tucked way behind the firewall, you need the long-reach versions. They trade a bit of grip strength for extra length, which is a lifesaver when you can’t get your hand in there.

    How do I know if the pliers I'm using are actually high-leverage or just cheap junk that's going to slip?

    Look, the easiest way to tell is by looking at the pivot point. If the handles are long but the joint where they meet is right at the tip, you’re looking at cheap junk. High-leverage pliers have that joint moved much closer to the cutting edge or the jaws. This gives you way more mechanical advantage. Also, give them a squeeze; if the handles feel mushy or the jaws wiggle, toss ’em.

    Can I use these for electrical work, or am I going to fry something if the handles aren't insulated?

    Look, if you’re talking about working on live circuits, absolutely do not use your standard mechanic pliers. If those handles aren’t specifically rated for electrical work, you’re asking for a nasty shock or a short that’ll fry your ECU. I use my regular needle nose for pulling wires or crimping connectors on a dead battery, but for anything else, grab a pair with actual insulated grips. Don’t risk your safety or your car’s brain.

  • Using a Torque Multiplier for Large Bolts

    Using a Torque Multiplier for Large Bolts

    I was elbow-deep in a rusted-out suspension job last Tuesday, swearing at a bolt that felt like it had been welded into place by the gods themselves. My knuckles were raw, my back was screaming, and I was about five seconds away from just giving up and calling a shop to charge me three hours of labor to fix a single fastener. That’s the moment you realize that brute force is a lie; you don’t need more muscle, you just need a torque multiplier to do the heavy lifting while you stay sane.

    Look, I’m not here to sell you some overpriced, shiny tool that’s going to sit in your toolbox gathering dust. I’ve spent enough time in grease-stained hoodies to know what actually works when you’re stuck under a chassis. I’m going to show you exactly how to use a torque multiplier without snapping heads off or stripping threads, based on actual sweat and mistakes I’ve made in the garage. No fluff, no textbook nonsense—just the straight truth on how to get those stubborn bolts moving so you can get back to your project.

    Table of Contents

    Mastering the Planetary Gear System Torque Without the Sweat

    Mastering the Planetary Gear System Torque Without the Sweat

    When you’re dealing with something like a planetary gear system torque requirement, you quickly realize that brute force is your worst enemy. I’ve seen guys try to muscle through heavy-duty assemblies with a long breaker bar, only to end up stripping the head or, worse, snapping the bolt entirely. That’s when you need to lean into the mechanical advantage in hand tools. Instead of using your body weight to fight the resistance, you let the internal gearing do the heavy lifting. It turns a task that usually requires a full-body heave into something you can manage with just a steady, controlled motion of your arm.

    The real trick is understanding how the torque multiplication ratio explained in your tool’s manual actually translates to your hands. If you’re using a 4:1 ratio, a relatively light 50 ft-lbs of input suddenly feels like 200 ft-lbs at the fastener. It’s not just about saving your shoulders, though; it’s about precision and consistency. When you’re working in tight engine bays or on heavy machinery where space is a luxury, having that controlled output ensures you aren’t over-torquing things by accident just because you lost your footing.

    Mechanical Advantage in Hand Tools Your New Secret Weapon

    Mechanical Advantage in Hand Tools Your New Secret Weapon

    Look, I’ve spent plenty of late nights in the shop wrestling with bolts that felt like they were welded on by the gods themselves. You can have all the muscle in the world, but sometimes physics just wins. That’s where the concept of mechanical advantage in hand tools actually becomes your best friend. Instead of you trying to heave a massive breaker bar and risking a slipped wrench or a torn rotator cuff, you’re using a device that re-routes that energy through a series of gears. It’s essentially a cheat code for anyone working on heavy-duty suspension components or seized chassis bolts.

    When you’re looking at the numbers, the torque multiplication ratio explained is pretty straightforward: if you have a 4:1 ratio, every single pound of force you apply to the handle turns into four pounds of force at the bolt. It’s not about being stronger; it’s about being smarter. Whether you’re comparing a manual torque multiplier vs pneumatic setups, the manual version gives you that tactile, precise control that’s hard to get with an air tool. It’s the difference between guessing if a bolt is tight and actually knowing it’s seated right.

    5 Pro Tips to Keep You from Wrecking Your Tools (or Your Hands)

    • Always check your input ratio before you start cranking. If you’re using a 4:1 multiplier and you apply 50 ft-lbs of force with a breaker bar, you’re actually putting 200 ft-lbs on that bolt. Don’t accidentally snap a head off a bolt because you forgot the math.
    • Keep the input tool straight. If you’re pulling at an angle or wobbling the breaker bar, you’re going to lose a ton of that mechanical advantage and, worse, you might strip the internal gears of the multiplier. It needs to be a clean, straight pull every single time.
    • Don’t forget to grease the input shaft. I’ve seen guys struggle with a multiplier that feels “sticky,” and usually, it’s just because they didn’t put a little bit of high-pressure grease on the connection point. A little lube goes a long way in making the tool feel smooth.
    • Secure your workspace. When you’re using a multiplier, you’re generating a massive amount of force, which means that tool wants to move. If you aren’t braced properly or if the part you’re working on isn’t clamped down, you’re going to end up slipping and bruising a knuckle.
    • Use the right breaker bar for the job. Don’t try to use a tiny, flimsy ratchet as your input tool. You need a solid, heavy-duty breaker bar that can handle the leverage without bending. If your input tool flexes, your torque reading is basically a lie.

    The Bottom Line: Why You Need One in Your Box

    Stop treating your body like a pry bar; use a multiplier to save your joints and prevent injury when you’re dealing with massive, seized-up bolts.

    It’s not just about brute force, it’s about precision—using the right gear lets you apply massive torque without the risk of snapping a fastener or losing control.

    Don’t let a mechanic charge you an extra hour of labor just because a bolt is stuck; having this tool means you can handle the heavy-duty stuff yourself.

    ## The Real Difference Between a Job Done and a Job Broken

    Look, you can spend an hour wrestling with a seized bolt until your knuckles are bleeding and your back is screaming, or you can just grab a torque multiplier and let physics do the heavy lifting. It’s not about being lazy; it’s about being smart enough to know when a tool is more reliable than your own raw strength.

    Nikolai·Osterman

    Don't Fight the Bolt, Outsmart It

    Don't Fight the Bolt, Outsmart It.

    Look, at the end of the day, a torque multiplier isn’t just some fancy gadget to show off in the garage; it’s a tool that respects your time and your joints. We’ve covered how the planetary gear system turns a struggle into a smooth rotation and how that mechanical advantage basically gives you superhuman leverage without the risk of snapping a bolt or blowing out your shoulder. Whether you’re dealing with a seized suspension component or just trying to hit a massive spec on a heavy-duty flange, having this in your kit means you’re working smarter, not harder. Don’t let a single stubborn fastener be the reason you end up calling a tow truck or paying a shop triple the price for a “specialty” job.

    My dad always told me that the best mechanics aren’t the ones with the biggest muscles, but the ones who understand how the physics of the tool works. You don’t need to be a master engineer to take control of your own repairs, you just need to be willing to learn the right way to do things. Grab the right gear, keep your cool, and remember that every tough job is just a puzzle waiting for the right solution. You’ve got this, so get back under the hood and show that machine who’s actually in charge.

    Frequently Asked Questions

    Can I use a torque multiplier on my impact wrench, or is it strictly for hand tools?

    Look, I’ve seen guys try to rig this up, but honestly? Don’t do it. Most torque multipliers are designed for manual, controlled input—think long breaker bars or ratchets. If you slap one on an impact wrench, you’re asking for a disaster. The sudden, violent bursts of an impact tool can shred the internal planetary gears of the multiplier or, worse, snap a bolt clean off. Stick to hand tools for the multiplier; keep the impact for the speed.

    Is there a risk of snapping a bolt if I'm using a multiplier on a really rusted-out fastener?

    Look, I’m gonna be real with you: yeah, there’s a massive risk there. If that bolt is rusted solid, a multiplier is basically a force multiplier for disaster, too. You’re applying so much leverage that you won’t even feel the bolt snap until it’s too late. If it’s crusty, don’t just go ham. Hit it with some penetrating oil, let it soak, or maybe use a bit of heat first. Don’t let your ego snap a stud.

    How do I know which multiplier to grab if I'm working on something heavy like suspension bolts versus smaller engine components?

    Look, don’t just grab the first one you see. For heavy-duty stuff like suspension bolts or lug nuts, you need a high-ratio multiplier—something that can handle massive input torque without the internal gears stripping. For smaller engine components, a high-ratio tool is overkill and actually risky because you might snap a bolt. Stick to a lower-ratio version there. Basically, match the tool’s capacity to the scale of the job so you don’t end up breaking more than you fix.

  • Compressing Brake Pistons During Service

    Compressing Brake Pistons During Service

    I still remember the first time I tried to change my own pads back in my dad’s garage. I was sweating, covered in road grime, and desperately trying to shove a massive C-clamp into the caliper like it was some kind of brute force puzzle. I ended up scarring the metal and nearly stripping a bolt because I didn’t have the right gear. That’s when I realized that most people get intimidated by brake work not because it’s hard, but because they try to wing it without a proper brake piston compressor. You don’t need to fight your car to get the job done; you just need to stop treating a precision task like a demolition derby.

    Look, I’m not here to sell you some overpriced, professional-grade kit that costs more than your monthly grocery bill. I’ve spent enough hours under chassis to know exactly which tools actually work and which ones are just marketing fluff. In this guide, I’m going to show you how to use a brake piston compressor correctly so you can finish your job fast, save a ton of money, and—most importantly—avoid breaking something expensive. Let’s get to work.
    Table of Contents

    Why a Brake Caliper Compression Tool Is Your Best Friend

    Why a Brake Caliper Compression Tool Is Your Best Friend

    Look, I’ve seen plenty of guys try to get by using an old C-clamp or, even worse, a screwdriver to force a piston back into the housing. It’s a recipe for a bad time. You’re either going to score the surface of the piston or, if you’re lucky, you’ll end up cracking a seal and dealing with a massive brake fluid leak. Using a dedicated brake caliper piston tool takes the guesswork out of it. It applies even, controlled pressure across the entire face of the piston, which is exactly what you want if you’re trying to avoid damaging those sensitive internal seals.

    Beyond just preventing damage, having a proper disc brake maintenance kit makes the whole job feel less like a struggle and more like actual work. When you’re retracting brake pistons with the right gear, you aren’t fighting the hardware; you’re just following a process. It saves your hands from cramping up and keeps the job moving so you can get back to whatever else you had planned for the weekend. It’s about working smarter, not harder.

    The Truth About Retracting Brake Pistons Without the Struggle

    The Truth About Retracting Brake Pistons Without the Struggle

    Look, I’ve seen plenty of guys try to get creative when they don’t have the right gear. I once watched a buddy try to use a C-clamp and a piece of scrap wood to force a piston back, and honestly? He was one slip away from cracking a caliper or scoring the piston surface. That’s exactly why you shouldn’t wing it. Retracting brake pistons isn’t about brute force; it’s about even pressure. When you use a dedicated brake caliper piston tool, the force is distributed perfectly across the face of the piston, which keeps everything seated correctly and prevents you from damaging those expensive seals.

    If you’re serious about doing this right, you need to realize that modern cars aren’t like the old junkers my dad used to work on. A lot of newer vehicles have electronic parking brakes that actually require a specific sequence to reset. Trying to force them back with a standard clamp can cause a massive headache—and a massive bill. Investing in a decent disc brake maintenance kit ensures you aren’t just guessing. It turns a frustrating, greasy struggle into a quick, predictable job that you can actually finish before your coffee gets cold.

    Pro Tips to Keep Your Brakes From Becoming a Nightmare

    • Don’t go brute-forcing it with a C-clamp if you can avoid it. I’ve seen guys crack caliper housings because they were using the wrong leverage. A dedicated compressor tool distributes the pressure evenly so you aren’t fighting the hardware.
    • Open your brake fluid reservoir cap before you start pushing. When you compress that piston, the fluid has to go somewhere, and if the cap is tight, you’re just building up pressure that can blow a seal or leak out of the overflow.
    • Check your brake lines for any signs of weeping or cracks before you even touch the piston. There’s no point in doing a perfect pad swap if your lines are shot and about to fail under the new pressure.
    • Make sure your piston is clean before you compress it. If there’s a bunch of grit or rust on the face of the piston, you’re basically just shoving that junk straight past your new seals, which is a fast track to a leaky caliper.
    • Always double-check your piston type. If you’re working on a rear brake with an integrated electronic parking brake, a standard compressor might not work—or worse, you could fry the motor. Know your car before you start cranking.

    The Bottom Line on Piston Compression

    Stop fighting your brakes with a C-clamp or a screwdriver; a dedicated compressor tool saves your knuckles and ensures the piston goes back smoothly without damaging the seals.

    Most shops will charge you a premium just to do this, but once you own a basic kit, it’s a five-minute job that pays for itself in a single brake job.

    Always make sure your brake lines are clear and your piston moves with steady pressure—if it feels like you’re fighting a brick wall, stop and check for a seized caliper before you force it.

    The Right Tool Changes Everything

    “I’ve seen guys try to force a piston back with a C-clamp and a prayer, and honestly, it’s just asking for a busted seal or a ruined caliper. You don’t need to fight the hardware; you just need a decent compressor to do the heavy lifting so you can focus on actually getting the job done right.”

    Nikolai·Osterman

    Bottom Line: Don't Overcomplicate It

    Bottom Line: Don't Overcomplicate It.

    Look, at the end of the day, using a brake piston compressor isn’t some high-level engineering feat. We’ve covered why you shouldn’t be fighting with a C-clamp or, even worse, trying to force a piston back with a screwdriver—that’s a quick way to damage your seals and end up with a much more expensive repair bill. Once you have the right tool in your hand, the whole process becomes a matter of controlled pressure rather than brute force. Just remember to check your brake fluid level before you start pushing anything back, because that extra volume can cause your reservoir to overflow. Keep it clean, keep it steady, and you’ll have those new pads seated perfectly without any of the usual headache.

    I know it can feel intimidating when you’re staring down a set of heavy-duty calipers for the first time, but honestly, you’ve got this. Most people get ripped off by shops for “complex” jobs that are really just standard maintenance. Every time you pick up a tool and tackle a job yourself, you’re taking back control of your car and your wallet. Don’t let the fear of making a mistake keep you from learning. Grab the compressor, get your hands a little greasy, and start doing the work. Your car—and your bank account—will thank you.

    Frequently Asked Questions

    Can I just use a C-clamp to push the piston back, or am I asking for trouble?

    Look, I get it—you’re in the middle of the job and you see a C-clamp sitting right there. You can use one, but honestly? You’re asking for a headache. A C-clamp applies pressure in one tiny spot, which can tilt the piston or even damage the delicate internal seals. If you want to avoid a costly brake rebuild, just grab a proper compressor. It spreads the force evenly so you aren’t fighting the hardware.

    Do I need to retract the piston on all four wheels, or just the ones I'm working on?

    Look, you only need to retract the pistons on the wheels you’re actually touching. If you’re just swapping pads on the front, don’t waste your time messing with the rears. However, if you’re doing a full brake job all around, then yeah, you’ll have to compress all four. Just focus on the specific caliper you’ve got pulled apart. Don’t overcomplicate it; just handle what’s in front of you.

    Is there a difference between a standard compressor and one of those wind-up spreader tools?

    Yeah, there’s a definite difference. A standard compressor is basically just a screw mechanism that pushes the piston back—it’s simple and gets the job done for most daily drivers. Those wind-up spreaders are a bit more specialized; they actually push the brake pads apart to make room for the new, thicker ones. If you’re working on a tight squeeze, the spreader saves you the headache of trying to pry everything apart manually.

  • Different Types of Car Battery Chargers

    Different Types of Car Battery Chargers

    I remember being ten years old, standing in my dad’s garage with a handful of grease-stained rags, watching him struggle with a cheap, generic jump starter that died right when we needed it most. There’s this huge misconception that you need some high-tech, thousand-dollar industrial unit to keep your car’s life support going, but honestly? Most of that is just marketing fluff designed to separate you from your paycheck. You don’t need a computer science degree to understand how a battery charger works, and you definitely shouldn’t be paying a premium just for a fancy brand name on a plastic box.

    I’m not here to sell you on some overpriced gadget that’ll end up in a junk drawer by next summer. My goal is to cut through the noise and show you exactly what you need to look for so you can stop getting ripped off by the big-box stores. I’ll break down the real-world differences between smart chargers and the old-school manual ones, and I’ll tell you which ones are actually worth the space in your toolkit. Consider this your no-nonsense guide to getting the job done right the first time.

    Table of Contents

    Mastering Smart Charger Technology Without the Degree

    Mastering Smart Charger Technology Without the Degree

    Look, you don’t need to be a wizard to understand smart charger technology, but you do need to stop treating every charger like a dumb brick. Back in my dad’s garage, we just hooked up a transformer and hoped for the best. Nowadays, if you do that to a modern car, you’re asking for a headache. A decent smart unit handles the heavy lifting by monitoring the charge stages automatically. It’s all about that voltage regulator importance; you want something that knows when to taper off the current so you aren’t cooking the electrolyte inside the cells.

    If you’re working on anything beyond a standard starter battery—like a setup for a camper or a trolling motor—you’ve got to get serious about deep cycle battery charging. These aren’t meant to be slammed with high amperage all at once. Using a smart unit ensures you’re actually performing proper automotive battery maintenance rather than just forcing juice into a cell that can’t take it. It’s basically set it and forget it, which is exactly how I like to work when I’m focused on a project.

    Why Voltage Regulator Importance Matters for Your Engine

    Why Voltage Regulator Importance Matters for Your Engine

    Look, I’ve seen way too many people think a charger is just a “dumb” box that pushes electricity into a terminal until it’s full. That’s a fast track to cooked electronics and a dead alternator. This is where understanding voltage regulator importance actually saves your wallet. If your charger doesn’t actively monitor and throttle the output, it can send a surge straight into your car’s sensitive ECU. Modern cars are basically rolling computers, and a single spike from a cheap, unregulated unit can fry sensors that cost more to replace than the entire car is worth.

    A decent piece of gear acts like a gatekeeper. It keeps the current steady and ensures you aren’t overcharging, which is crucial for automotive battery maintenance in the long run. When you’re dealing with modern setups, especially if you’ve upgraded to something more specialized, you need that precision to prevent heat buildup. Keeping the voltage within that sweet spot isn’t just about making the car start; it’s about protecting every single component downstream from the battery.

    Five Things I Wish I Knew Before Buying a Charger

    • Don’t just grab the cheapest one on the shelf. If you’re working on anything newer than a 90s sedan, you need a charger with a “smart” mode. Cheap, old-school chargers just dump current into the battery until it cooks, which kills the cells way faster than you’d think.
    • Check your amp ratings before you get home. If you’ve got a massive truck or a high-performance engine, a tiny little trickle charger isn’t going to do squat. You need something with enough juice to actually move the needle without blowing a fuse.
    • Get yourself some decent clamps. I’ve seen guys try to use those flimsy, thin wires that come with budget kits, and they barely make a connection. Get a unit with heavy-duty, spring-loaded clamps so you aren’t fighting a loose connection while you’re trying to work.
    • Watch out for the “Maintenance” vs. “Fast Charge” trap. If you’re just keeping a project car alive in the garage, use a maintenance tender. If you’re stuck in your driveway and need to get to work, you need a fast charger. Using a tender to try and jump-start a dead engine is a waste of your time.
    • Keep the charger in a dry spot, even if it’s rated for it. I’ve seen too many guys leave their gear sitting on a damp concrete floor in the back of the shop. Moisture is the enemy of the electronics inside these smart units, and a fried charger is just money down the drain.

    The Bottom Line on Keeping Your Battery Alive

    Don’t just buy the cheapest brick you find on a shelf; invest in a smart charger with a proper voltage regulator so you aren’t accidentally frying your car’s sensitive electronics.

    Most “dead” batteries are just deeply discharged, so instead of rushing to the auto parts store for a replacement, try a slow, steady charge first to see if you can save some cash.

    Stop guessing if your battery is actually healthy—use your charger’s built-in tech to monitor the charge stages and make sure you’re actually getting a full recovery, not just a surface charge.

    The Truth About Cheap Chargers

    “Don’t let some guy at the parts counter talk you into a ‘one-size-fits-all’ charger just because it’s cheap. If you aren’t matching the tech to what’s actually under your hood, you aren’t charging your battery—you’re just playing Russian roulette with your car’s electronics.”

    Nikolai·Osterman

    Don't Get Stranded

    Don't Get Stranded: Choose quality battery chargers.

    Look, at the end of the day, picking a battery charger isn’t about finding the flashiest gadget on the shelf; it’s about understanding what your car actually needs to stay healthy. We covered how smart technology can take the guesswork out of the process and why you can’t afford to ignore the importance of a solid voltage regulator. If you grab a cheap, no-name charger that just dumps raw current into your battery without any finesse, you aren’t saving money—you’re just asking for a dead cell down the road. Stick to the basics: get something that manages the charge stages properly, and you’ll stop wasting money on replacements that didn’t even need to die in the first place.

    I know it can feel intimidating when you’re staring at a wall of different specs and confusing acronyms at the auto parts store, but don’t let that stop you. Every time you take care of a small thing like maintaining your battery, you’re gaining total control over your ride. You don’t need to be a master technician to prevent a breakdown; you just need to be proactive. Grab the right tool, give it a shot, and keep that engine turning. You’ve got this.

    Frequently Asked Questions

    Is it actually safe to leave a smart charger hooked up to my car overnight while I'm sleeping?

    Yeah, it’s safe, but only if you aren’t using some cheap, no-name junk from a random site. A legit smart charger is designed to taper off the current once the battery is topped up, so it won’t cook your cells while you’re sleeping. Just make sure the connections are tight and there’s no frayed wiring. If the charger has a “float mode” or automatic shut-off, you can sleep easy.

    How do I know if my battery is actually dead or if the charger itself is just broken?

    Look, I’ve been there—staring at a charger that’s doing nothing and wondering if I’m about to waste money. Here’s the trick: grab a multimeter. If the charger shows it’s putting out voltage but your battery stays at zero, the battery is likely toast. But if the charger shows no output at all, even when plugged in, the unit is dead. Check the fuses first, though; sometimes it’s just a cheap fix.

    Can using a cheap charger from a big-box store actually mess up my car's computer or sensors?

    Look, I’ve seen this happen way too often. Those super cheap, “no-name” chargers from big-box stores often lack proper voltage regulation. If the charger sends a massive spike or unstable current through your system, it can absolutely fry your ECU or knock out sensitive sensors. Modern cars are basically rolling computers; they’re way more delicate than the old junkers I used to fix with my dad. Stick to a reputable brand—it’s cheaper than replacing a computer.

  • Checking Tire Tread Depth With a Gauge

    Checking Tire Tread Depth With a Gauge

    I remember watching a guy at the shop last week get talked into a $800 set of new tires just because the service writer claimed his tread was “dangerously low.” The guy looked totally lost, just staring at his wheels like they were some kind of mystery. Honestly, it kills me how much shops rely on people being too intimidated to ask for proof. You don’t need to take their word for it, and you definitely don’t need to guess if your grip is shot. All you really need is a decent tread depth gauge to see the actual numbers for yourself.

    I’m not here to sell you some overpriced, fancy diagnostic kit that you’ll just lose in your toolbox. My goal is to show you how to use a simple tread depth gauge to get the real truth about your rubber. I’ll walk you through exactly what those measurements mean, which ones are actually unsafe, and how to avoid getting played by a shady mechanic. We’re going to keep it simple, keep it honest, and make sure you’re driving with confidence instead of just taking someone’s word for it.

    Table of Contents

    Measuring Tire Grooves Without Getting Your Hands Dirty

    Measuring tire grooves without getting your hands dirty.

    Look, I get it. Most people don’t want to spend their Saturday digging through oily grit or getting black rubber residue all over their palms just to see if they’re safe to drive. If you’re looking for a shortcut, you can actually check your tire tread wear indicators first. Most modern tires have these little raised bumps built right into the grooves. If the tread surface is flush with those bumps, you’re already past the point of no return and need to start shopping for new rubber.

    If you want a more precise reading without the mess, I’d suggest picking up one of those slim, handheld tools. When you’re measuring tire grooves, you don’t need to be elbow-deep in the wheel well; you just need to slide the probe into the channel. You’ll run into a choice between digital vs analog tread gauges here. Personally, I like the analog ones because they don’t need batteries and they never glitch on you when you’re out in the driveway, but digital ones are great if you want a quick, decimal-point reading without any guesswork.

    Digital vs Analog Tread Gauges Which One Wins

    Digital vs Analog Tread Gauges Which One Wins

    Look, if you’re just starting out, you’ll probably see two types of tools in the shop: the old-school analog sliders and the newer digital versions. The analog ones are basically indestructible. They’re just a piece of metal with a sliding scale, which means they don’t have a battery to die on you when you’re mid-job. I’ve used these for years on my project cars because they’re straightforward—you just slot it in and read the line. There’s no learning curve, and you don’t have to worry about a screen failing during a quick automotive safety inspection.

    On the other hand, the digital models are a huge step up if you’re someone who hates squinting at tiny markings in low light. They give you a precise decimal reading instantly, which takes the guesswork out of measuring tire grooves when they’re getting thin. If you’re trying to be super exact about whether you’ve hit those legal tire tread limits, the digital readout is your best friend. Personally, I keep an analog one in my work bag for reliability, but if you want the most accurate data without the headache, digital is the way to go.

    Pro Tips for Not Messing Up Your Measurements

    • Don’t just check one spot. Tires wear unevenly depending on your alignment, so take readings from the inner edge, the center, and the outer shoulder to get the full picture.
    • Clean the grooves first. If there’s a pebble or a chunk of dried mud stuck in there, your gauge is going to give you a fake reading, and that’s how you end up making bad calls.
    • Watch out for “feathering.” If you run your finger along the tread and it feels sharp or directional in one way, your alignment is likely shot, regardless of what the gauge says.
    • Check your measurements against the manufacturer’s limit, not just the legal minimum. If you’re hitting that 2/32″ mark, you’re already playing a dangerous game with wet roads.
    • Keep your gauge in your glovebox or center console. If you wait until you’re already stuck on the side of the road to realize your tires are bald, it’s already too late.

    The Bottom Line on Checking Your Tread

    Stop eyeballing your tires; a cheap gauge is the only way to know if you’re actually safe or just guessing.

    Go digital if you want precision without the headache, but a solid analog gauge will never fail you in a pinch.

    Check your tread regularly, because catching wear early saves you from a massive bill for a full set of rubber.

    ## Stop Guessing with the Penny Trick

    Look, the whole ‘quarter in a tire’ thing is fine if you’re just playing around, but if you actually care about your safety and your wallet, get a real gauge. A few millimeters of rubber is the difference between a smooth drive and a hydroplaning nightmare, and you shouldn’t have to guess when the truth is right there in your hand.

    Nikolai·Osterman

    The Bottom Line on Your Tread

    The Bottom Line on Your Tread.

    At the end of the day, whether you decide to go with a classic analog gauge or a high-tech digital one, the goal is the same: stop guessing. We’ve looked at how much easier it is to get an accurate reading without making a mess of your hands, and we’ve weighed the pros and cons of the different tools on the market. Just remember that a tire might look “fine” to the naked eye, but that doesn’t mean it’s safe for a rainy highway drive. Investing a few bucks in a decent gauge is way cheaper than replacing a full set of rubber because you waited too long, or worse, dealing with a hydroplaning incident. Don’t let your tires become a gamble.

    Look, I know most people see car maintenance as this huge, intimidating mountain of expense, but it doesn’t have to be that way. Taking five minutes to check your tread depth is a small win that keeps you in control of your vehicle and your wallet. You don’t need to be a master technician to know when your car is asking for help; you just need the right tool and the guts to check it yourself. Keep that gauge in your glovebox, stay proactive, and stop letting the shops dictate your safety. You’ve got this.

    Frequently Asked Questions

    Is it actually worth buying a digital gauge, or can I just use a penny to check my tread?

    Look, the penny trick is fine if you’re in a pinch, but it’s not exactly precision work. Using a coin just tells you if your tires are “bad,” not how much life they actually have left. If you’re serious about maintenance, get a gauge. A digital one is worth the few bucks because it takes the guesswork out of it. I’d rather see an exact number than play guessing games with pocket change.
    How often should I really be checking my tire depth if I'm not driving long distances?

    Look, even if you’re just running errands or commuting to work, your tires aren’t frozen in time. I’d say grab your gauge once a month. Rubber degrades, and things like dry rot or uneven wear can sneak up on you while the car is just sitting in the driveway. It only takes thirty seconds, but catching a shallow tread early saves you from a blowout or a massive bill later. Don’t get lazy.

    Does the type of tire—like all-terrain versus standard street tires—change how I should read the gauge?

    Yeah, it definitely changes things. With standard street tires, you’re looking for that even wear across the tread. But with all-terrains or mud-terrains, the tread blocks are massive and deep. You can’t just check one spot; you need to make sure the lugs aren’t wearing unevenly or “feathering.” Always check multiple spots around the circumference. If one side is bald while the other is deep, you’ve got an alignment issue, not just a worn tire.

  • Using a Fluid Transfer Pump for Maintenance

    Using a Fluid Transfer Pump for Maintenance

    I remember being twelve years old, hunched over my dad’s old sedan in the driveway, trying to drain transmission fluid using nothing but a shop vac and a prayer. I ended up with more red fluid on my sneakers and the concrete than I did in the catch pan, and let me tell you, that smell never truly leaves your nostrils. Most people think you need a massive, professional-grade setup to move liquids around, but honestly, trying to DIY a fluid transfer pump setup with improvised junk is just a fast track to a massive headache and a ruined garage floor.

    I’m not here to sell you on some overpriced, industrial-grade equipment that you’ll only use once every three years. I’ve spent enough time under hoods to know exactly which tools actually work and which ones are just marketing fluff. In this guide, I’m going to break down how to pick a reliable fluid transfer pump that won’t break your bank or your spirit. I’ll show you what to look for so you can get the job done right the first time, without getting ripped off by the big-box stores.

    Table of Contents

    Manual vs Electric Fluid Transfer Which One Actually Works

    Manual vs Electric Fluid Transfer Which One Actually Works

    Look, I’ve spent enough Saturday mornings in my dad’s garage to know that choosing between manual and electric fluid transfer isn’t just about your budget—it’s about the job in front of you. If you’re just swapping out some oil or pulling a little bit of coolant from a tight spot, a manual hand pump is your best friend. They’re cheap, they don’t need a battery, and honestly, they’re hard to break. But if you’re dealing with something thick, you need to keep viscosity compatibility for pumps in mind. Trying to hand-pump heavy gear oil is a one-way ticket to a cramped hand and a wasted afternoon.

    That’s where the electric setups come in. If you’re doing a full transmission flush or moving larger volumes of fluid, an electric model is a lifesaver. They take the grunt work out of it, but they can be overkill for small DIY tweaks. Just remember, if you’re working with something nasty like brake cleaner or specialized solvents, you can’t just grab any cheap motor. You need chemical resistant transfer pumps to make sure the tool doesn’t melt halfway through the job. Pick the one that matches your patience level and the mess you’re willing to deal with.

    Viscosity Compatibility for Pumps Stop Forcing It

    Viscosity Compatibility for Pumps Stop Forcing It

    Look, I’ve seen it happen a dozen times in the shop: someone tries to move some heavy-duty gear oil or thick molasses-like coolant with a pump that was clearly meant for thin brake fluid. If you try to force a thick liquid through a setup not rated for it, you aren’t just wasting time; you’re probably going to burn out a motor or snap a seal. Understanding viscosity compatibility for pumps is the difference between a quick job and a massive headache. If the fluid is thick, it’s going to fight you every step of the way, killing your suction pump efficiency before you even get halfway through the tank.

    Before you even crack the seal on your container, check the specs. If you’re working with heavy lubricants, you need something beefy, not a cheap little gadget meant for water or light oils. If you’re dealing with something more aggressive, like solvents or cleaners, don’t just grab any old tool—make sure you’re using chemical resistant transfer pumps so you don’t end up melting your equipment. Just match the thickness of the liquid to the pump’s capability, and you’ll save yourself a lot of frustration.

    Pro Tips to Save Your Hands (and Your Floor)

    • Check your seals before you start. If you’re pumping something like gear oil or brake fluid, make sure the pump’s gaskets actually match what you’re moving. Using a pump meant for oil on brake fluid is a fast way to melt the internals and ruin your whole afternoon.
    • Don’t be a hero with thick fluids. If you’re trying to move heavy 90W gear oil on a cold morning, don’t just crank a manual pump like crazy. Warm the fluid up a bit first if you can. It’ll move way smoother and you won’t end up stripping the pump’s gears.
    • Keep a dedicated set of hoses for different fluids. I can’t tell you how many times I’ve seen someone try to use the same hose for coolant and transmission fluid. It’s a recipe for a chemical mess that’ll eat your gaskets from the inside out.
    • Always prime your pump. If you’re using an electric one, don’t just flip the switch and hope for the best. Give it a little bit of the fluid you’re working with to get the air out of the lines first. It prevents air pockets from making the transfer a massive headache.
    • Clean up immediately. If you leave residue in the pump, the next thing you put through it is going to be contaminated. Even if you’re tired, take two minutes to flush it with a bit of cleaner so you aren’t fighting a clogged pump next time you need it.

    The Bottom Line: Don't Make It Harder Than It Needs To Be

    Match your pump to the job—use manual pumps for small, quick tasks like brake fluid, but don’t waste your energy trying to hand-pump thick gear oil when an electric one would save you an hour of frustration.

    Read the specs on viscosity; trying to force a thick fluid through a pump designed for thin liquids is the fastest way to strip a seal or burn out a motor.

    Invest in the right tool for the specific fluid you’re moving to avoid contamination and messy spills that end up all over your garage floor.

    Don't Fight the Fluid

    Look, you can spend an hour wrestling with a cheap funnel and a greasy mess, or you can just grab a decent fluid transfer pump and get the job done right. Don’t treat your tools like an afterthought; if you use the wrong one, you’re just making more work for yourself and your wallet.

    Nikolai·Osterman

    Bottom Line: Get the Right Tool for the Job

    Bottom Line: Get the Right Tool for the Job

    Look, picking out a fluid transfer pump isn’t about buying the most expensive unit on the shelf; it’s about knowing what you’re actually trying to move. If you’re just swapping out some gear oil in your tuner, a simple manual pump is plenty and won’t break the bank. But if you’re dealing with heavy-duty tasks or large volumes, don’t waste your time—go electric. Just remember that viscosity is everything. If you try to force thick, heavy fluids through a pump designed for thin liquids, you’re going to end up with a stripped motor and a massive mess on your garage floor. Match the tool to the fluid, and you’ll save yourself a lot of headache.

    At the end of the day, my goal is to see you get under that hood with confidence instead of fear. You don’t need a shop full of specialized equipment to take care of your own machine. Once you have a few reliable pumps in your arsenal, these little maintenance jobs become almost second nature. Don’t let a messy fluid change intimidate you into paying a mechanic double what it’s actually worth. Grab the right gear, stay patient, and just keep turning wrenches. You’ve got this.

    Frequently Asked Questions

    Can I use the same pump for both my transmission fluid and my oil, or am I asking for a mess?

    Look, I’ve seen guys try this, and it’s a recipe for a disaster. Short answer? Don’t do it. Transmission fluid and motor oil have totally different chemical additives. If you use the same pump for both, you’re going to cross-contaminate. Even if you think you cleaned it, there’s always residue left in the internals. You’ll end up dumping old oil into your trans, and that’s a massive, expensive headache you don’t need.

    How do I know if a pump is actually rated for the thickness of the fluid I'm working with?

    Look, don’t just trust the box. If the specs say it’s for “oils,” that’s too vague. You need to look for the actual centistokes (cSt) rating. That’s the number that tells you how the fluid flows under heat. If you’re moving heavy gear oil, check the pump’s viscosity range against the fluid’s spec sheet. If the pump isn’t rated for that thickness, you’re just going to burn out the motor or strip the gears.

    Is it worth spending the extra cash on an electric pump, or is a cheap manual one enough for basic DIY jobs?

    Look, if you’re just swapping oil on an old sedan once a year, a cheap manual pump is fine. It’s basic, it works, and it won’t break the bank. But if you’re doing more frequent maintenance or hate the hand fatigue from pumping a lever for ten minutes straight, spring for the electric one. It’s about saving your sanity and your time. If you can afford the extra cash, the electric pump is worth it.

  • Stripping Automotive Wires for Repairs

    Stripping Automotive Wires for Repairs

    I still remember being twelve years old, hunched over my dad’s old Corolla in the driveway, trying to fix a busted headlight connector with a pair of dull kitchen scissors. I thought I was being smart, but all I did was shred the copper strands until the wire was basically useless. That’s when I realized that most people treat electrical work like a guessing game because they’re using the wrong gear. You don’t need some $200 professional-grade kit from a specialty catalog, but if you try to DIY a sensor repair using a cheap, generic wire stripper that can’t actually gauge wire thickness, you’re just asking for a short circuit and a massive headache later.

    Look, I’m not here to sell you on some fancy marketing hype or tell you that you need a master’s degree to handle a little bit of wiring. I’ve spent enough time under hoods and in cramped engine bays to know what actually works when your hands are covered in grease and the light is fading. I’m going to show you exactly what to look for in a solid wire stripper so you can stop guessing and start doing the job right the first time.

    Table of Contents

    The Truth About Precision Wire Stripping Tools

    The Truth About Precision Wire Stripping Tools

    Look, I’ve seen plenty of guys try to save five bucks by using a pair of old lines cutters or a dull utility knife to get the job done. It’s a disaster waiting to happen. When you’re working on a modern car’s harness, one tiny nick in the copper can cause a phantom electrical short that’ll haunt you for weeks. That’s why you can’t skip out on decent precision wire stripping tools. If you’re just hacking away at the casing, you aren’t actually stripping the wire; you’re just damaging the integrity of the connection.

    If you’re tired of guessing which hole to use, you need to pay attention to your wire gauge sizing guide. Every wire has a specific thickness, and if your tool isn’t matched to it, you’re either going to leave too much insulation behind or, worse, chew right through the metal. I personally lean toward the automatic wire stripper benefits because they take the guesswork out of the equation when I’m deep in a cramped engine bay and my hands are already greasy. It’s about doing it right the first time so you don’t have to go back in twice.

    Mastering Electrical Insulation Removal Without the Mess

    Mastering Electrical Insulation Removal Without the Mess

    Look, I’ve seen way too many guys in the shop try to “eyeball” it with a pair of old pliers or a utility knife. That’s a fast track to a short circuit. If you want to do this right, you need to treat electrical insulation removal like a surgical procedure, not a demolition job. The goal is to peel back that plastic coating without biting into the copper underneath. Once you nick that metal, you’ve created a weak point that’ll eventually snap or cause a massive headache with resistance issues down the line.

    If you’re working on a tight harness in a modern engine bay, you’ll quickly realize why the automatic wire stripper benefits are so huge. It takes the guesswork out of the equation. You just seat the wire, squeeze, and the tool does the heavy lifting perfectly every single time. It’s not about being fancy; it’s about being consistent. If you aren’t using a tool that matches your specific wire gauge, you’re just gambling with your car’s electrical system. Stop guessing and start being precise.

    5 Ways to Stop Ruining Your Wires (And Your Sanity)

    • Match the gauge or you’re asking for trouble. Don’t just grab the first hole you see; if you use a stripper meant for heavy-duty cables on a tiny sensor wire, you’re going to slice right through the copper and end up chasing a ghost electrical fault for three hours.
    • Stop using your teeth or a dull pocket knife. I’ve seen enough guys do this in the shop, and it’s a disaster. You either nick the conductor or you end up with a frayed mess that won’t hold a solid connection, which is just begging for a short circuit later.
    • Keep your strippers clean. If you’re working on a car, there’s always grease, oil, or coolant floating around. If that gunk builds up in the stripping notches, you won’t get a clean cut, and you’ll start struggling to get the insulation off cleanly.
    • Don’t over-strip the wire. You only need enough bare copper to get a clean seat in your terminal or crimp. If you leave a huge chunk of exposed wire hanging out, you’re just creating a spot where a short can happen if it touches the chassis.
    • Invest in a pair of self-adjusting strippers if you’re doing a lot of wiring. They aren’t the cheapest thing in the drawer, but they save a massive amount of time when you’re working in a cramped engine bay and don’t want to keep checking a gauge every five seconds.

    The Bottom Line on Stripping Wires

    Stop using knives or pliers to strip insulation; you’re just asking to nick the copper and deal with a short circuit down the road.

    Invest in a decent pair of multi-gauge strippers so you aren’t guessing which hole to use and accidentally mangling your wires.

    Always double-check your work for any stray copper strands before you crimp or solder, because a messy connection is a ticking time bomb.

    ## Don't Hack Your Way Through a Repair

    “Look, I’ve seen too many guys try to save five bucks by using a pair of dull side cutters to hack at a harness, only to end up nicking the copper and chasing a phantom short circuit for three days. If you aren’t using a proper wire stripper, you aren’t fixing the car—you’re just creating a new problem for yourself.”

    Nikolai·Osterman

    Don't Let a Bad Connection Stall Your Project

    Don't Let a Bad Connection Stall Your Project

    Look, at the end of the day, it all comes down to not overcomplicating things. We covered why you can’t just wing it with a pocket knife and why investing in a decent pair of strippers is the smartest move you can make for your electrical work. Whether you’re tracing a short in a sensor harness or just tidying up some wiring in your project car, the goal is the same: clean cuts and intact copper. If you take the time to use the right gauge settings and avoid hacking at the insulation, you’re going to save yourself a massive amount of frustration when you finally flip that ignition switch. Protect your wires, and they’ll protect your build.
    I know it can feel intimidating when you’re staring at a mess of colorful wires and a multimeter, but don’t let that stop you. Most people get intimidated by car repairs because they think they need a master technician’s brain, but honestly, it’s usually just about having the right tool and a bit of patience. Once you get the hang of a clean strip, you’ll realize that electrical work isn’t some dark art—it’s just another part of the job. Grab your tools, keep your workspace organized, and stop letting the fear of a small mistake keep you from getting under the hood. You’ve got this.

    Frequently Asked Questions

    Is it actually worth spending the extra cash on a high-end brand, or can I just grab a cheap pair from the local hardware store?

    Look, I get it. When you’re staring at a $30 price tag for a pair of pliers, it feels like a rip-off. But here’s the reality from my shop: cheap strippers have sloppy markings and blades that slip. You’ll end up nicking the copper, which leads to resistance issues and electrical gremlins down the line. If you’re just doing one thing once, fine, grab the cheap ones. But if you’re working on your own car, buy the good brand. It’s an investment in not having to redo the job.

    How do I know if I'm using the wrong gauge setting and accidentally slicing into the actual copper wire?

    Look, if you see tiny little copper strands sticking out or looking “fuzzy” after you strip it, you’ve gone too deep. That’s a huge red flag. Another giveaway is if the wire feels stiff or won’t bend smoothly; that means you’ve nicked the core. If you’re seeing even one tiny cut in the copper, just snip the whole end off and try again with a different notch. Don’t risk a short circuit.

    Can I use a standard pair of linesman pliers for this, or am I just asking for a massive electrical headache later?

    Look, you can use linesman pliers, but you’re basically asking for trouble. If you try to bite through the insulation with those, you’re almost certainly going to nick the copper strands. Once you’ve weakened that wire, it’s a ticking time bomb for heat buildup or a total break down the line. Save yourself the massive headache and the extra work of re-stripping; just grab a real wire stripper and do it right the first time.