Category: Tools

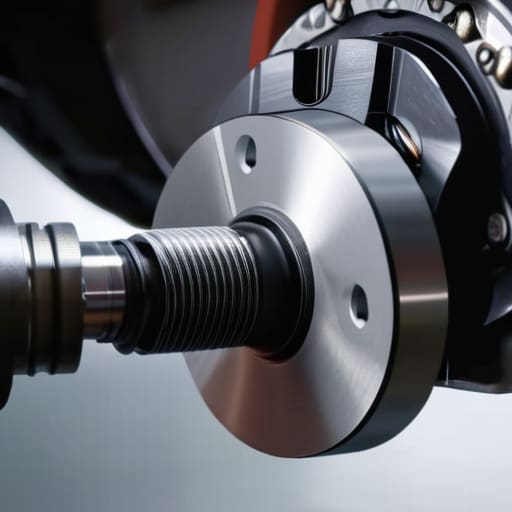
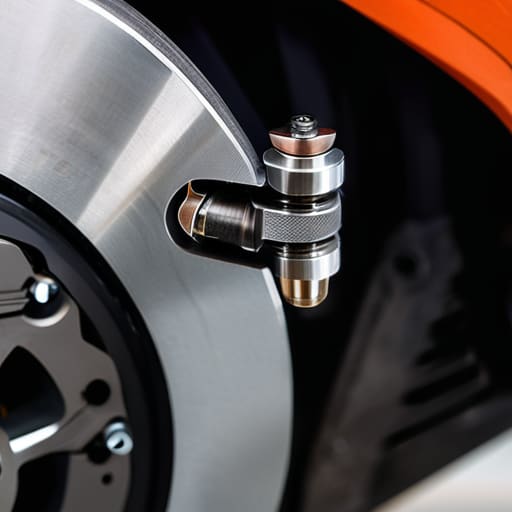
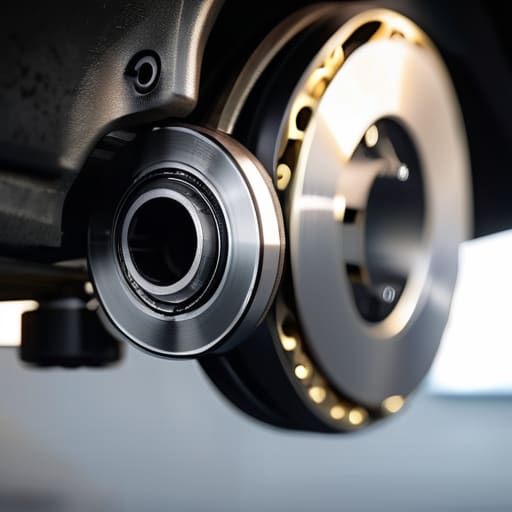
  • How to Use Brake Cleaner Safely

    How to Use Brake Cleaner Safely

    I still remember the first time my dad let me take the lead on a brake job back in his old garage. The air was thick with the sharp, stinging scent of brake cleaner hitting hot metal, a smell that honestly sticks in your nose for days. I was sixteen, covered in road grime, and trying to figure out why the rotors looked like they’d been through a war zone. That moment taught me something no textbook could: if you don’t get that nasty buildup off properly, you’re basically throwing money away on new parts that won’t even perform right.

    Look, I’m not here to sell you on some overpriced, “professional-grade” aerosol that costs a fortune just because the label looks fancy. Most shops will try to charge you an arm and a leg for a simple cleaning service, but you don’t need a mechanic’s license to do it yourself. I’m going to show you exactly what kind of brake cleaner actually works, which ones won’t melt your rubber seals, and how to use them without making a mess of your driveway. Let’s get to work.

    Table of Contents

    Mastering Effective Brake Dust Removal Techniques

    Mastering Effective Brake Dust Removal Techniques.

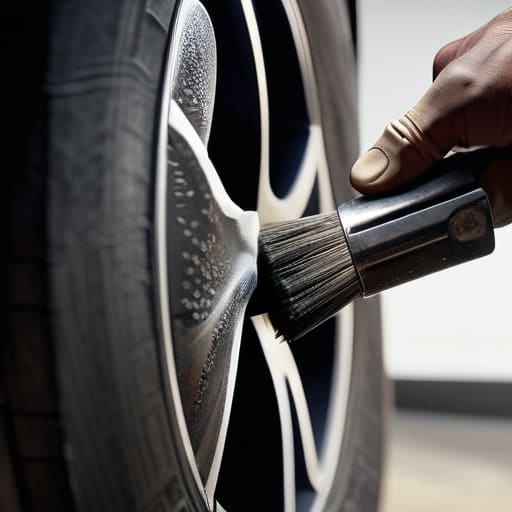
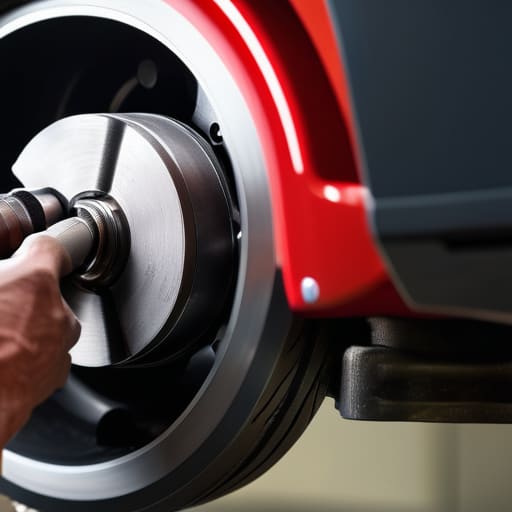
    When you’re tackling brake dust removal techniques, the biggest mistake people make is just spraying and praying. If you’ve got a thick layer of black soot caked onto your calipers, a quick mist isn’t going to cut it. You need to start by using a stiff-bristled brush to knock off the heavy chunks first. If you just blast it with liquid right away, you’re essentially creating a black sludge that’s going to smear all over your suspension components. Once the heavy stuff is gone, that’s when you bring in the heavy hitters to really strip the residue away.

    I always tell my buddies that cleaning brake rotors and calipers requires a bit of a rhythm. Start with the easy-to-reach spots, but don’t ignore the tight crevices where the dust likes to hide and cause corrosion. I prefer using non-chlorinated brake cleaner benefits to keep things a bit safer for my lungs and the environment, especially when I’m working in a garage with limited airflow. Just remember to work in sections and let the solvent do the heavy lifting instead of scrubbing like crazy. It’s all about letting the chemicals break down the grime so you aren’t fighting against it.

    Why Non Chlorinated Brake Cleaner Benefits Your Health

    Why Non Chlorinated Brake Cleaner Benefits Your Health

    Look, I’ve spent enough hours hunched over a fender to know that the stuff you breathe in matters just as much as the tool in your hand. Back in the day, a lot of shops used heavy-duty solvent-based cleaning agents that were loaded with chlorinated hydrocarbons. They worked fast, sure, but they’re nasty stuff for your lungs and skin. When you’re deep into brake system maintenance safety, the last thing you want is to be inhaling toxic fumes every time you spray down a rotor.

    Switching to a non-chlorinated option isn’t just about being “eco-friendly”—it’s about not feeling like garbage after a long Saturday in the garage. The non-chlorinated brake cleaner benefits really show up when you’re working in tight, poorly ventilated spaces like a crawlspace or a cramped garage. You still get the heavy-duty punch needed for cleaning brake rotors and calipers, but without the extreme chemical risk. I’ve learned the hard way that it’s better to protect your health now so you can actually enjoy working on your cars for years to come.

    5 Pro Tips to Keep You from Making a Mess (or a Mistake)

    • Always let the parts dry completely before you try to put anything back together. If you reassemble a rotor or caliper while it’s still wet with cleaner, you’re basically just lubing up your brake pads, and that’s a recipe for a massive headache.
    • Watch out for your rubber seals and plastic lines. Brake cleaner is aggressive stuff; if you accidentally spray a bunch of it directly onto your brake hoses or rubber bushings, it can cause them to swell or crack over time. Aim for the metal, not the rubber.
    • Don’t skimp on ventilation. I know it’s tempting to spray a whole can in a closed-up garage to get the job done fast, but those fumes are no joke. Crack the garage door or grab a fan. Your lungs will thank me later.
    • Use a dedicated parts washer or a clean rag to catch the runoff. You don’t want a pool of solvent and brake dust sitting on your shop floor, especially if you’ve got a dog or a kid running around. Plus, it keeps your workspace from getting sketchy.
    • Keep your spray can’s nozzle clean. After you’re done, wipe the tip of the can down. If it gets gummed up with old grime or dried residue, you’ll end up with a messy spray pattern next time you need a quick blast, and that’s how you end up spraying cleaner where it doesn’t belong.

    The Bottom Line on Brake Cleaner

    Don’t just spray and pray; make sure you’re using a non-chlorinated version so you aren’t breathing in nasty toxins while you work.

    Use the cleaner to actually clear out the grit and dust, not just to make the parts look shiny, otherwise you’re just masking a bigger problem.

    Keep a can of high-quality brake cleaner in your kit—it’s one of those cheap tools that saves you from a massive headache and a wasted trip to the shop.

    The Truth About the Can

    Look, a can of brake cleaner isn’t just some fancy detailer; it’s the difference between a smooth stop and a grinding nightmare. If you’re too cheap to spray down your rotors, you’re basically paying a mechanic to fix your mistakes later.

    Nikolai·Osterman

    Final Thoughts Before You Get Back Under the Hood

    Final Thoughts Before You Get Back Under the Hood

    Look, at the end of the day, picking the right brake cleaner isn’t some high-level engineering feat; it’s just about being smart with your tools. We’ve covered how to actually clear out that nasty dust without making a mess, and why you should never settle for those old-school chlorinated cans that’ll mess with your lungs. Just remember: use the right spray for the job, don’t skimp on the cleaning process, and always prioritize your safety by working in a spot with decent airflow. If you follow these steps, you aren’t just cleaning parts; you’re making sure your braking system actually does what it’s supposed to do when you hit the pedal.

    I know it can feel intimidating when you first look at a pile of greasy, blackened components, but don’t let that stop you. Every pro I know started exactly where you are, staring at a dirty part and wondering if they were doing it right. Once you realize that most of this is just patience and the right solvent, the whole garage starts to feel a lot less like a mystery shop and more like your own personal workspace. Stop letting the fear of making a mistake keep you from doing the work yourself. Grab your cans, get to cleaning, and take control of your ride.

    Frequently Asked Questions

    Can I use brake cleaner on painted surfaces if I accidentally spray a little too much?

    Look, don’t panic, but don’t just leave it there either. If you accidentally spray some on your paint, grab a clean microfiber towel and wipe it off immediately. Most modern clear coats can handle a little overspray, but if you let it sit—especially in the sun—it can dull the finish or even eat through the wax. Just wash the area with some soapy water afterward to make sure no residue is left behind.

    Is it safe to use brake cleaner on rubber seals or brake lines, or am I going to melt something?

    Look, don’t go spraying it everywhere blindly. If you hit your rubber seals or brake lines with heavy-duty brake cleaner, you’re asking for trouble. It’s designed to eat grease, and it can absolutely swell or crack that rubber, which is the last thing you want when you’re trying to stop. Keep the spray focused strictly on the metal components and the dust. If you get some on a seal, wipe it off immediately with a damp rag.

    How long do I actually need to let the cleaner dry before I start pumping the pedal again?

    Look, I get the urge to just get moving, but don’t rush this. You want to wait until the components are bone dry to the touch. Usually, that’s just a couple of minutes if you’re letting it air dry, but if you’re in a hurry, hit it with a bit of compressed air. Once that liquid sheen is gone, you’re good to pump the pedal and set your seating before you actually hit the road.

  • Tools for Resetting Tire Pressure Sensors

    Tools for Resetting Tire Pressure Sensors

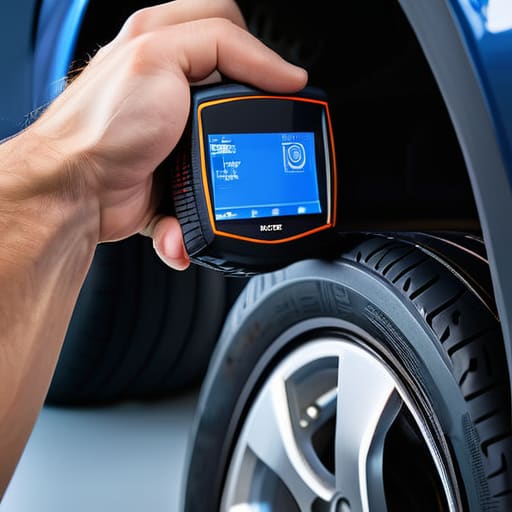
    I remember sitting in my dad’s garage last summer, staring at a dashboard light that wouldn’t quit blinking, while a shop foreman tried to tell me I needed a full sensor replacement just to “diagnose” the issue. It’s the same old story: shops love to gatekeep information to pad their invoices. They make you think you need a thousand-dollar scanner just to figure out why your TPMS is acting up, but honestly, a decent tire pressure sensor tool is all you really need to stop the guessing game. You don’t need to pay a mechanic’s hourly rate just to find out a sensor’s battery is dead or a valve stem is leaking.

    Look, I’m not here to sell you on some high-end, professional-grade diagnostic suite that you’ll only use once. My goal is to show you the practical stuff—the tools that actually work for people working out of their own driveways. I’m going to break down exactly what to look for in a tire pressure sensor tool so you can handle these sensors yourself without getting ripped off. I’ll give you the straight truth on what’s worth your cash and what’s just expensive garage clutter.

    Table of Contents

    Mastering the Tpms Relearn Procedure at Home

    Mastering the Tpms Relearn Procedure at Home

    Once you’ve got your tools ready, the actual TPMS relearn procedure isn’t as intimidating as the dealerships make it sound. Most of the time, your car just needs to be “introduced” to the sensors again after a rotation or a replacement. If you’re dealing with a tire pressure sensor malfunction light that won’t quit, you’ll likely need to trigger each sensor one by one. Some cars let you do this through the dashboard menu, but usually, you’ll need a handheld device to send a signal to the wheel. It’s basically just a digital handshake between the sensor and the car’s computer.

    I’ve seen plenty of people get stuck because they try to skip steps, but you really just need to be methodical. Grab your sensor tool, pop it against the valve stem, and follow the sequence your car requires—usually starting from the front left and working your way around. If you’re doing a full TPMS sensor replacement guide style overhaul, make sure you aren’t rushing the signal. Patience is everything here; if the computer doesn’t register the code on the first try, don’t panic. Just reset and try again.

    Solving a Tire Pressure Sensor Malfunction Yourself

    Solving a Tire Pressure Sensor Malfunction Yourself

    When that annoying light pops up on your dash, your first instinct might be to book a shop appointment, but don’t panic. Most of the time, a tire pressure sensor malfunction isn’t a catastrophic failure; it’s often just a sensor that’s lost its connection or a battery that’s finally kicked the bucket. Before you go spending hundreds on a shop labor fee, try a basic tire pressure monitoring system diagnostic. Check your actual PSI levels first with a standard gauge to rule out a simple leak. If the pressures are all fine but the light stays on, you’re likely looking at a sensor that needs a reset or a replacement.

    If you’ve already swapped out a dead sensor, you can’t just slap it in and hope for the best. You’ll need to walk through a TPMS relearn procedure so your car’s computer actually recognizes the new hardware. Depending on what you’re driving, this might involve a specific handheld tool or even some OBDII sensor programming to sync everything up. It’s a bit of a learning curve, but once you get the hang of it, you’ll realize these “complex” electronic issues are just another part of routine automotive tire maintenance tools and logic.

    Pro Tips for Not Wasting Your Time (or Money) on TPMS

    • Don’t just buy any cheap sensor; make sure the tool you’re getting is actually compatible with your car’s specific frequency, whether it’s 315MHz or 433MHz, or you’re just buying a paperweight.
    • Always keep a small bottle of soapy water handy; if you think a sensor is leaking air, spray it on the valve stem to see if you’ve got a real leak or just a sensor that’s acting up.
    • Grab a dedicated TPMS activation tool rather than trying to “force” the sensor to wake up with a generic scanner; those little handheld triggers save you a massive headache during a relearn.
    • Check your sensor battery life before you start a full service; if your car is more than five or six years old, the sensors might be dying, and no amount of resetting is going to fix a dead battery.
    • Keep your magnetic parts tray close when swapping sensors; those tiny valve cores are incredibly easy to lose in a greasy garage, and finding one in the floor cracks is a nightmare.

    The Bottom Line on Managing Your TPMS

    Don’t let a dashboard light panic you; most TPMS issues are just simple sensor resets or low pressure that you can fix without paying shop labor rates.

    Invest in a decent TPMS tool if you plan on rotating your tires or changing them yourself, because it’ll save you a massive headache during the relearn process.

    Always double-check your actual tire pressure with a manual gauge before assuming the sensor is actually broken—sometimes the tech is fine, the air just isn’t.

    Don't Let a Dashboard Light Fleece You

    “Most shops will try to charge you an hour of labor just to reset a sensor, but once you grab a decent TPMS tool, you realize it’s a five-minute job that anyone with a bit of patience can handle.”

    Nikolai·Osterman

    Don't Let a Sensor Scare You Off

    Don't Let a Sensor Scare You Off.

    Look, at the end of the day, dealing with TPMS issues really boils down to two things: having the right sensor tool and not panicking when that little light pops up on your dash. We’ve walked through how to handle a relearn procedure, how to spot a malfunction before it turns into a headache, and why investing in a decent tool is way better than paying a shop eighty bucks just to press a few buttons. You don’t need to be a master tech to keep your tires monitored and your ride safe; you just need to stop guessing and start using the right gear to get the job done.

    I know it can feel intimidating when you’re staring at a dashboard full of warning lights, but trust me, most of this stuff is just logic and a bit of patience. Every time you fix something yourself instead of handing your keys over to a service advisor, you’re taking control of your own wallet and your own machine. Keep that magnetic tray handy, keep learning, and remember that most repairs are just about having the right tool. You’ve got this, so get out there and start working on it.

    Frequently Asked Questions

    Do I actually need a dedicated TPMS tool, or can I just use a standard OBDII scanner to reset the light?

    Honestly? Most of the time, a standard OBDII scanner won’t cut it for TPMS. An OBDII tool is great for reading engine codes, but it usually can’t “talk” to the individual sensors inside your wheels to trigger a relearn. If you’ve swapped a tire or hit a massive pothole, you’ll likely need a dedicated TPMS tool to actually sync everything up. Don’t waste your time trying to reset it through the dash if the sensor itself is acting up.

    Is it worth buying a handheld sensor tool if I only plan on doing this once every few years?

    Honestly? If you’re only messing with it once every few years, don’t waste your cash on a dedicated handheld tool. Those things can get pricey, and they’ll just sit in your junk drawer collecting dust. Save your money. Most shops will do a quick scan for a small fee, or you can just learn the manual relearn sequence for your specific car. Unless you’re planning on DIYing more than just tires, it’s not worth the investment.

    Can I use a generic tool for any car brand, or do I need something specific for my vehicle's manufacturer?

    Look, here’s the deal: it depends on what you’re trying to do. If you just want to check the actual pressure, a standard gauge works on everything. But if you’re trying to trigger a relearn or reset a sensor, generic tools are a gamble. Some brands are picky and won’t talk to cheap, universal scanners. I usually tell people to check their specific frequency first—don’t waste money on a tool that your car’s computer will just ignore.

  • Using Magnetic Trays to Organize Small Parts

    Using Magnetic Trays to Organize Small Parts

    I still remember being twelve years old, hunched over my dad’s old sedan in the driveway, staring at a dark, oil-slicked puddle on the concrete where a crucial 10mm bolt had just vanished. I spent forty-five minutes on my hands and knees, frantically searching through grime and old rags, only to realize it had rolled deep into the subframe. That was the day I realized that most “pro” advice skips over the small, frustrating stuff that actually ruins your afternoon. Honestly, you don’t need some high-tech, computerized diagnostic tool to keep your sanity; you just need a decent magnetic tray to keep your hardware from playing hide-and-seek with your engine block.

    I’m not here to sell you on some overpriced, brand-name organizer that claims to revolutionize your workshop. My goal is much simpler: I want to show you which setups actually hold up when they’re covered in grease and how to pick one that won’t fail you mid-repair. I’ll give you the straight truth on what works in a real garage, so you can stop wasting time hunting for parts and get back to actually fixing your ride.

    Table of Contents

    Preventing Lost Hardware Before It Ends Up Under the Engine

    Preventing Lost Hardware Before It Ends Up Under the Engine

    There’s nothing worse than being halfway through a brake job, covered in grease, only to realize a crucial bolt has vanished into the abyss of your subframe. I’ve spent more hours than I’d like to admit on my hands and knees with a flashlight, hunting for a single M8 washer that decided to migrate under the engine block. It’s a massive waste of time and, honestly, it’s how you end up with a messy workspace that feels impossible to manage. Preventing lost hardware isn’t about being a perfectionist; it’s about staying sane while you work.

    When I’m stripping down a sensor or pulling a water pump, I don’t just set bolts on the fender or a greasy rag. I use a dedicated magnetic part dish for mechanics to keep everything in one spot. If you’re picking one up, check the neodymium magnet strength before you buy. You want something that holds onto a heavy socket just as well as a tiny cotter pin. Keeping your hardware contained in a single, predictable spot is the easiest way to master automotive tool organization without needing a professional-grade toolbox.

    Mastering Workshop Clutter Management Without a Degree

    Mastering Workshop Clutter Management Without a Degree

    Look, you don’t need a master technician’s certification to keep a workspace from turning into a total disaster zone. Most of the time, a messy garage isn’t about lack of skill; it’s just bad workshop clutter management. When I’m elbow-deep in a turbocharger install, the last thing I want to do is spend twenty minutes digging through a pile of oily rags just to find a 10mm socket. If you keep your workspace organized from the jump, you spend more time turning wrenches and less time playing hide-and-seek with your own gear.

    The secret is having a dedicated spot for every single piece of hardware you pull off the car. Instead of tossing bolts onto a greasy workbench, grab a decent magnetic part dish for mechanics and keep it within arm’s reach. It’s a small habit, but it’s the difference between a smooth afternoon and a massive headache. I always tell people that true organization is about efficiency, not just looking pretty. If you control the small stuff, the big jobs won’t feel nearly as overwhelming.

    5 Ways to Actually Use a Magnetic Tray Without Wasting Time

    • Don’t just throw everything in one pile. If you’re taking apart a sensor assembly, use two or three separate trays to keep the different bolt sizes from getting mixed up.
    • Keep your tray on a flat, stable surface. I’ve seen guys try to balance one on a fender, and one wrong bump sends your hardware flying straight into the oil pan.
    • Check the magnet strength before you trust it with something heavy. If you’re dealing with thick steel components, make sure the tray actually has the pull to hold them so you aren’t cleaning up a mess.
    • Use it for more than just bolts. I keep a tray handy for small clips, washers, and even those annoying little plastic trim fasteners that always seem to disappear the second they leave the car.
    • Clean your tray regularly. If it’s covered in old grease and metal shavings, things won’t stick right, and you’ll end up fighting the tray instead of fixing the car.

    The Bottom Line on Keeping Your Hardware in Check

    Stop treating small bolts like they’re disposable; grab a magnetic tray before you even crack a lug nut so you aren’t spending your Saturday hunting for a 10mm under a pile of grease.

    You don’t need a professional-grade workshop to stay organized, just a few cheap magnetic trays to keep your workspace from turning into a junk drawer.

    Using a tray isn’t just about being tidy—it’s about saving your sanity and making sure you actually have all the parts you need when it’s time to put everything back together.

    The $5 Insurance Policy

    Look, you can spend an hour on your hands and knees fishing a 10mm bolt out from under a subframe, or you can spend five bucks on a magnetic tray and actually get the job done. I’ve seen guys lose half a day’s work just because they didn’t have a place to toss their hardware.

    Nikolai·Osterman

    The Bottom Line

    The Bottom Line: organized magnetic tool tray.

    Look, at the end of the day, a magnetic tray isn’t some high-tech diagnostic tool that’s going to magically fix a blown head gasket. It’s a simple, low-cost piece of gear that solves one of the biggest headaches in any garage: losing track of your hardware. Whether you’re swapping out an alternator or just doing a quick oil change, keeping your bolts, washers, and clips in one spot prevents that mid-job panic when you realize a crucial piece of metal has vanished into the dark abyss under your workbench. It’s about working smarter, not harder, and making sure your workspace stays organized enough that you can actually focus on the engine instead of playing hide-and-seek with a 10mm socket.

    I know that starting your own repairs can feel intimidating, especially when you see how much shops charge for labor. But honestly? Most of the time, you’re just one or two decent tools away from being able to handle it yourself. Don’t let a little bit of clutter or a missing bolt stop you from getting under the hood. Grab a tray, keep your workspace clean, and just start turning wrenches. You’ll realize pretty quickly that you’re a lot more capable than those mechanics want you to believe. Keep at it, stay patient, and don’t let the small stuff get in your way.

    Frequently Asked Questions

    How strong does the magnet actually need to be so my bolts don't fly off if I bump the tray?

    Look, you don’t need some heavy-duty industrial magnet to keep things in place. Most decent trays use a standard ferrite or neodymium base that’s plenty strong for standard Grade 5 or 8 bolts. If you’re working on a tuner with lightweight aluminum hardware, just be careful. As long as you aren’t tossing heavy socket sets in there, a solid magnetic pull will keep your hardware stuck even if you accidentally bump the tray with your elbow.

    Are there specific types of trays I should get for working on modern cars with lots of plastic engine covers?

    Since modern engines are basically computers wrapped in plastic, you’ve gotta be careful. Avoid those heavy-duty industrial steel trays if you’re working near delicate plastic covers or sensitive sensor housings—one slip and you’ll gouge something expensive. I usually stick to high-quality silicone-lined magnetic trays. The magnet keeps your bolts from jumping, but the silicone padding means if you drop a piece of hardware, it won’t crack your engine cover or scratch your trim.

    Can I use these on a car lift, or am I going to end up with a mess if the tray slides around?

    Look, if you’re working on a lift, things get shaky. If you just set a standard tray on a moving chassis or a greasy fender, it’s definitely going to slide, and you’ll be fishing for bolts in the oil pan. My advice? Stick to the heavy-duty rubber-coated ones. They have enough grip to stay put even when the car is bouncing slightly. Just don’t trust a cheap plastic one once the lift starts moving.

  • Using Different Types of Funnels for Fluid Changes

    Using Different Types of Funnels for Fluid Changes

    I still remember being ten years old in my dad’s garage, trying to help him with an oil change on an old Civic, only to end up with a massive, dark puddle of 10W-30 coating the concrete and my favorite sneakers. I thought I was being helpful, but I was actually just making a mess because I was trying to pour straight from the bottle. That’s when I realized that even the simplest job can go sideways if you don’t have the right gear, like a decent funnel set to actually guide the fluid where it belongs. It’s not about being a pro; it’s about not making a mess of your own driveway.

    Look, I’m not here to sell you some overpriced, professional-grade kit that costs more than your actual car. I’ve spent enough time under hoods to know that most of the fancy stuff is just marketing fluff. I’m going to show you exactly what to look for in a reliable funnel set so you can stop guessing and start pouring with confidence. My goal is to give you the straight truth on what works, what breaks, and how to keep your engine clean without getting ripped off.

    Table of Contents

    Why a No Spill Funnel Kit Beats Your Old Plastic Bottle

    Why a No Spill Funnel Kit Beats Your Old Plastic Bottle

    Look, I’ve seen it a hundred times in the shop: some guy trying to pour fresh oil straight from the bottle into a tight engine bay, praying he doesn’t miss. You end up with a greasy mess coating your block and a smell that lingers in your driveway for weeks. Using a cheap, flimsy plastic bottle is a gamble you’re bound to lose. When you switch to a proper no-spill funnel kit, you’re not just being fancy; you’re actually making sure that every drop of fluid goes exactly where it belongs.

    The real difference comes down to the design. Most of the basic automotive fluid transfer tools I see in DIY kits are just straight tubes, but a decent set usually includes a universal funnel adapter that actually grips the filler neck. This prevents that annoying backflow where the oil hits the rim and splashes right back at you. If you’re serious about your oil change equipment, stop treating it like an afterthought. Investing in a kit that actually fits your car’s specific angles is the easiest way to keep your engine bay clean and your workspace professional.

    Ditch the Mess With Reliable Automotive Fluid Transfer Tools

    Ditch the Mess With Reliable Automotive Fluid Transfer Tools

    Look, I’ve seen too many guys try to “wing it” by pouring oil straight from the bottle into the filler neck. You end up with a greasy mess all over the valve cover, and let’s be real, cleaning that dried oil off later is a massive pain. If you want to do this right, you need proper automotive fluid transfer tools that actually fit the job. A decent kit isn’t just about convenience; it’s about keeping your engine bay clean so you can actually spot leaks when they happen.

    When you’re working on a tight engine bay—especially on those older Japanese tuners I spend my weekends on—space is always an issue. That’s where a no-spill funnel kit becomes a lifesaver. Instead of fighting with a rigid, cheap plastic cone that keeps tipping over, these kits usually come with flexible necks or a universal adapter that lets you reach those awkward, recessed spots without breaking your knuckles. It’s one of those small investments in your oil change equipment that pays off every single time you pull into the driveway to get to work.

    Pro tips to keep your garage from becoming an oil slick

    • Don’t just buy the cheapest set you find on a random site; look for one with a wide mouth and a flexible neck. If the neck is too stiff, you’ll be fighting it just to get it into that tight spot near the firewall.
    • Always give your funnel a quick rinse with some degreaser or even just some warm soapy water after you’re done with oil or coolant. You don’t want old, dirty fluid contaminating your fresh batch next time.
    • If you’re working on a car with a really cramped engine bay, grab a set that includes a long, gooseneck funnel. It’ll save you from having to contort your arms into positions that’ll leave you sore for a week.
    • Use a bit of shop towel or a clean rag to wipe the rim of the filler neck before you start pouring. It sounds small, but it keeps grit and dirt from falling into your engine while you’re trying to be precise.
    • Keep your funnels in a dedicated drawer or a small organizer rather than just tossing them in your main toolbox. There’s nothing more annoying than digging through a pile of wrenches when you’ve already got oil on your hands.

    The bottom line on picking your next funnel

    Don’t waste money on those cheap, flimsy single-use ones that crack the second you tighten them; get a decent set that actually fits your engine’s fill neck.

    A good kit saves you more than just time—it keeps oil and coolant off your engine block and your driveway, which makes the whole job way less of a headache.

    Stop trying to “eyeball it” with a random bottle; having the right tool for the specific fluid you’re pouring means less mess and zero wasted money.

    The real cost of a cheap pour

    You can try to wing it by pouring straight from the bottle, but once you’ve got oil dripping down the side of your engine block or pooling on your driveway, you’ll realize a twenty-dollar funnel set is a lot cheaper than a professional engine degreasing job.

    Nikolai·Osterman

    Don't Let a Mess Ruin Your Weekend

    Don't Let a Mess Ruin Your Weekend.

    Look, at the end of the day, a decent funnel set isn’t some luxury item you need to hunt down in a high-end tool catalog. It’s about avoiding that headache where you’re staring at a puddle of transmission fluid on your garage floor, wondering why you didn’t just spend the ten bucks to do it right the first time. By ditching those flimsy, single-use plastic bottles and grabbing a proper kit with different nozzle sizes, you’re making sure your fluids actually end up in the engine instead of all over your hands and the chassis. It keeps your workspace clean, prevents contamination, and honestly, it just makes the whole job feel a lot more professional.

    I know it can feel intimidating when you first pop the hood and see a maze of sensors and tight spaces, but don’t let that stop you. Most of the “big” jobs are really just a series of small, manageable steps, and having the right gear is half the battle. Once you get used to working with tools that actually work for you, you’ll realize that maintaining your own ride isn’t some impossible task reserved for the pros. Grab a funnel, get your hands a little dirty, and take control of your car instead of letting a mechanic dictate your budget. You’ve got this.

    Frequently Asked Questions

    Do I really need a specialized funnel for different fluids, or can I just use one for everything?

    Look, you could technically use one funnel for everything, but I wouldn’t recommend it. If you use a funnel that’s been sitting in old, sludge-filled oil to pour fresh coolant, you’re just introducing contaminants into your system. It’s a headache waiting to happen. I usually keep a dedicated one for oil and a separate, clean one for coolant or transmission fluid. It’s a small investment to keep your engine from acting up.

    How do I clean out a funnel properly so I don't accidentally mix coolant with my oil?

    Look, the absolute worst thing you can do is cross-contaminate. If you use an oil funnel for coolant, you’re asking for a massive headache. The best way? Keep separate sets. But if you’re stuck using one, flush it with a bit of degreaser and warm water, then rinse it until it’s spotless. Honestly, though? Just buy a cheap second set. It’s way cheaper than replacing your entire engine because of a messy funnel.

    Are those cheap plastic sets actually going to last, or should I invest in something more heavy-duty?

    Look, I’ve seen both. Those cheap $5 plastic sets from the big-box stores work fine for an oil change once or twice, but they crack easily if you drop them on a concrete shop floor. If you’re just doing basic maintenance, they’re okay. But if you’re planning on actually working on your own cars regularly, grab a decent set with thicker walls or even some metal ones. It’s worth the extra few bucks to not have a funnel snap mid-pour.

  • Essential Work Lights for Automotive Repair

    Essential Work Lights for Automotive Repair

    I still remember being twelve, stuck under my dad’s old sedan with nothing but a dying, flickering flashlight that felt like it was mocking me. I was trying to find a blown fuse, but all I could see were vague, dancing shadows and a whole lot of frustration. Every time I thought I saw something, the light would dim or shift, leaving me squinting into a black hole. That’s when I realized that having a decent work light isn’t some luxury for professional shops—it’s the difference between actually fixing your car and just getting pissed off in the driveway.

    Look, I’m not here to sell you on some overpriced, tactical LED gadget that costs more than your oil change. Most of the gear marketed to DIYers is just flashy junk designed to eat your paycheck. I’m going to give you the straight truth about what actually works when you’re elbow-deep in an engine bay. We’re going to talk about brightness, battery life that doesn’t quit halfway through a job, and how to find the right shape for those tight, impossible corners. I’ll show you exactly what’s worth your money so you can stop guessing and start wrenching.

    Table of Contents

    Why High Lumen Workshop Lamps Change the Game

    Why High Lumen Workshop Lamps Change the Game

    Look, I’ve spent more hours than I’d like to admit squinting into a dark engine bay, trying to figure out if a leak is oil or just old grime. It’s frustrating and, honestly, a waste of time. That’s where high lumen workshop lamps actually make a difference. When you’ve got serious brightness, you aren’t just seeing shapes; you’re seeing the actual texture of a cracked hose or a tiny hairline fracture in a plastic housing. It turns a guessing game into actual diagnostics.

    Beyond just raw power, the setup matters just as much as the brightness. If you’re working deep in the wheel well or under a chassis, you can’t be holding a flashlight in your teeth like some amateur. I always lean toward magnetic mechanic work lights because they let you stick the light exactly where you need it, leaving both your hands free to actually turn the wrench. Once you stop fighting with shadows and start having proper illumination, you’ll realize how much faster you can actually get the job done.

    Magnetic Mechanic Work Lights That Stick Where You Need Them

    Magnetic Mechanic Work Lights That Stick Where You Need Them

    There is nothing more frustrating than trying to hold a flashlight in your teeth while you’re wrestling with a stubborn bolt in the wheel well. I’ve spent enough hours under lifted chassis to know that if your hands aren’t free, you aren’t actually working—you’re just struggling. That’s where magnetic mechanic work lights become a total lifesaver. I always keep a few of these in my kit because they let you slap the light right onto the frame, strut tower, or any steel surface near the job. It turns a chaotic mess into a controlled environment where you can actually focus on the task at hand.

    When you’re looking for something reliable, don’t just grab the cheapest plastic thing you find. Look for rechargeable battery powered lights that have a decent magnet strength; you don’t want your light sliding off a greasy engine block halfway through a repair. I prefer models that offer a few different brightness modes so you can dial it back when you’re working near sensitive sensors, or crank it up when you’re deep in the dark corners of a transmission tunnel. Having that hands-free inspection lighting makes the difference between a quick fix and a two-hour headache.

    Pro Tips for Not Losing Your Mind (or Your Vision) While Working

    • Get yourself a light with adjustable brightness. You don’t always need a floodlight hitting you in the eyes when you’re just trying to inspect a tiny sensor deep in the engine bay; being able to dim it down saves your eyes from fatigue.
    • Prioritize battery life over everything else. There is nothing more frustrating than being halfway through a brake job only to have your light die on you. If it doesn’t have a decent runtime or a quick-charge option, leave it on the shelf.
    • Look for something waterproof and dust-resistant. You’re working around oil, coolant, and road grime—it’s a fact. If your light can’t handle a little splash or a dusty environment, it’s going to die on you within a month.
    • Go for a light with a wide beam angle. You don’t want a tiny little laser beam that only shows you one bolt at a time; you need a light that spreads out enough to actually illuminate the whole area you’re working in.
    • Always have a backup. Even if you buy the most expensive light on the market, things happen. Keep a cheap, small LED flashlight in your pocket or your toolbox just in case your main setup fails mid-job.

    The Bottom Line on Lighting Up Your Project

    Don’t cheap out on lumens; if you can’t see the tiny cracks in a belt or a leaking gasket clearly, you’re just guessing, and guessing leads to expensive mistakes.

    Look for magnetic bases every single time—being able to slap a light onto a strut tower or a frame rail while you’re using both hands is a total life-saver.

    Invest in something rugged that can take a drop or a splash of oil, because if your light dies halfway through a job, you’re stuck staring at a dark engine bay with no way out.

    The Real Cost of Bad Lighting

    You’d be surprised how many stripped bolts and busted knuckles I see just because a guy was trying to work in the shadows. A cheap flashlight isn’t a tool; it’s a liability. If you can’t see the component clearly, you’re just guessing, and guessing is how you end up paying a professional to fix your mistake.

    Nikolai·Osterman

    Bottom Line: Stop Guessing and Start Seeing

    Bottom Line: Stop Guessing and Start Seeing

    Look, at the end of the day, it doesn’t matter if you’re swapping out a spark plug or hunting for a vacuum leak in a dark corner of the engine bay; if you can’t see the part, you’re just wasting your time. We talked about why you need those high-lumen lamps to kill the shadows and why a magnetic base is a total lifesaver when your hands are full of greasy tools. Investing in decent lighting isn’t some luxury for pro shops; it’s the smartest move you can make to avoid stripping a bolt or missing a hairline crack in a hose. Don’t settle for a dying phone flashlight when you’re halfway through a job.

    I know that staring down a complex repair can feel intimidating, especially when you’re working in cramped, dim spaces that make everything look ten times harder than it actually is. But remember, most of the “magic” mechanics do is just a combination of the right procedure and having the right visibility. Once you get the right light in your hands, you’ll realize that the stuff under your hood isn’t some unsolvable mystery—it’s just a machine waiting to be understood. So, grab your gear, turn on the lights, and get to work. You’ve got this.

    Frequently Asked Questions

    How bright does a light actually need to be before it starts blinding me while I'm working?

    Look, there’s a sweet spot. If you’re just looking for a little extra light to see a bolt, you don’t need a stadium floodlight. For most of my jobs, I aim for something around 500 to 1,000 lumens. Anything higher than that in a tight engine bay is just going to bounce off the chrome and metal, leaving you squinting and seeing spots. You want enough light to see the detail, not a flashbang.

    Is it worth spending extra cash on a rechargeable LED light, or should I just stick to the cheap battery-powered ones?

    Look, if you’re just checking a fuse box once a month, the cheap AA-battery ones are fine. But if you’re actually getting your hands dirty like I am, go rechargeable. There is nothing more frustrating than being halfway through a timing belt job and having your light die on you. The LED ones hold a steady brightness without dimming as the juice drops, and you won’t go broke constantly buying disposables. Spend the extra cash.

    What’s the best way to keep my work light from getting smashed or covered in grease when I'm crawling under the chassis?

    Look, I’ve dropped more than a few lights on concrete or seen them get buried in sludge. If you’re crawling under a chassis, don’t just toss your light on the floor. Get a rugged, silicone-encased LED—the kind that can take a hit without cracking. For the grease, keep a dedicated rag in your back pocket just for wiping the lens. If you can’t see through the grime, you’re basically working blind.

  • Types of Portable Jump Starters for Vehicles

    Types of Portable Jump Starters for Vehicles

    I was standing in my driveway last Tuesday, staring at my old Silvia, feeling that familiar, hollow click-click-click of a dead battery. It’s that sinking feeling in your gut when you’re already running late and you realize you’re stranded. Most people think they need to call a tow truck or wait around for some Good Samaritan to show up with heavy, old-school jumper cables, but that’s just wasting your time and money. Honestly, if you aren’t carrying a decent portable jump starter in your trunk, you’re basically just asking for a bad day.

    Look, I’m not here to sell you some overpriced gadget with a thousand useless features you’ll never touch. I’ve spent enough time under hoods to know what actually works when you’re stuck in the cold. I’m going to break down exactly what you need to look for so you can stop feeling helpless when your car refuses to turn over. No fluff, no marketing hype—just the straight truth on how to pick a tool that actually does its job so you can get back on the road without the headache.

    Table of Contents

    Understanding Capacity and Peak Current Explained Without the Fluff

    Understanding Capacity and Peak Current Explained Without the Fluff

    Look, when you’re staring at a spec sheet, the numbers can get pretty overwhelming, but you really only need to care about two things: capacity and peak current. Think of capacity like the size of your gas tank; it tells you how many times you can jump a car before the unit itself needs a recharge. If you’re looking for the best jump starter for a dead car battery that you can rely on for a whole weekend of tinkering, you want a higher mAh rating.

    Peak current, on the other hand, is the raw muscle. It’s the burst of power that actually turns the engine over. If you’ve got a massive V8 truck, a tiny unit with high capacity but low peak current is just going to sit there humming while your engine stays dead. You need that massive surge to fight through the resistance of a cold starter motor. Understanding capacity and peak current explained simply like this keeps you from buying a glorified flashlight that lacks the oomph to actually do the job when you’re stranded in a parking lot.

    The Real Lithium Ion Jump Starter Benefits You Need to Know

    The Real Lithium Ion Jump Starter Benefits You Need to Know

    Look, I’ve spent way too many nights hunched over a fender in the cold, wrestling with those old-school, heavy lead-acid packs. They’re massive, they leak, and honestly, they’re a pain to store. Switching to a lithium ion jump starter is probably the single best upgrade you can make for your emergency kit. These things are tiny—you can toss one in your glovebox or even a backpack—but they pack a serious punch. The main lithium ion jump starter benefits come down to weight and readiness; they hold their charge way longer than the old bricks, so when you actually need it, it’s actually there.

    Beyond just being lightweight, these portable units are way smarter. Most modern ones have built-in protection so you don’t accidentally fry your car’s sensitive ECU while trying to get moving. If you’re looking for the best jump starter for dead car battery situations, you want something that feels solid but doesn’t weigh twenty pounds. It’s about having a reliable emergency car battery booster that’s ready to go the second you turn the key and hear nothing but a click.

    5 Things I Wish I Knew Before My First Jump Start

    • Check your cables every few months. I’ve seen way too many people get stranded because the clamps were corroded or the wires had tiny cracks in the insulation. If they look sketchy, toss ’em.
    • Don’t just look at the price tag. Some of those cheap-ass units from random sites claim huge numbers but die the second they hit a cold engine. Buy something from a brand that actually tests their peak amps in real conditions.
    • Keep your jump starter charged, not just in your garage. If you leave it in your trunk for six months without checking it, don’t be surprised when it’s a paperweight the moment you actually need it.
    • Learn the “clamping order” before you’re panicking in a dark parking lot. Positive to positive, negative to a good metal ground on the engine block. Doing it out of order is a fast way to fry your car’s ECU, and that’s an expensive mistake.
    • Match the power to your engine size. If you’re driving a massive V8 truck, that tiny little pocket-sized power bank isn’t going to do squat. You need enough cranking amps to actually turn that heavy steel over.

    The Bottom Line: What to Look For Before You Buy

    Don’t get blinded by the marketing; focus on the peak current and mAh rating to make sure the unit actually has enough juice to turn your engine over.

    Go with lithium-ion if you can afford it—they’re way lighter to toss in your glovebox and won’t leak acid all over your gear like those old lead-acid bricks.

    Always double-check that the jump starter matches your vehicle’s needs, because a tiny unit meant for a scooter isn’t going to do squat for a heavy-duty truck.

    ## The Truth About Getting Stranded

    Look, there is nothing worse than being stuck in a dark parking lot at 11 PM because your battery decided to quit on you. Don’t rely on some stranger with jumper cables and a prayer; get a decent lithium pack in your trunk so you can fix the problem yourself and get home.

    Nikolai·Osterman

    Don't Get Caught Stranded

    Don't Get Caught Stranded without lithium jump starters.

    Look, we’ve covered a lot of ground here, but if you remember nothing else, remember this: don’t just buy the cheapest brick you see on a random website. You need to look at the peak current to ensure it can actually turn over your specific engine, and you should almost always go with lithium-ion if you want something that won’t die on you in the trunk for six months. A jump starter isn’t just another gadget; it’s your insurance policy against a bad morning. Whether you’re dealing with a cold snap or just a forgotten interior light, having the right capacity means the difference between a quick fix and a very expensive tow truck bill.

    At the end of the day, my goal isn’t to turn you into a master mechanic, but I want you to feel like you’ve got a handle on your own ride. There is a certain kind of peace of mind that comes with knowing you aren’t completely helpless when something goes wrong under the hood. Grab a decent unit, toss it in your glovebox, and get back to enjoying the drive. You don’t need a shop full of specialized equipment to stay mobile; you just need the right tool and the guts to use it. Keep your tools ready, and you’ll keep your freedom.

    Frequently Asked Questions

    Can I actually use a small lithium jump starter on a big V8 truck, or am I going to fry something?

    Look, I get why you’re worried about frying something, but you’re not going to blow up your ECU just by connecting it. The real risk isn’t electrical damage; it’s just that the little guy might tap out. If you’ve got a massive V8 with a heavy-duty starter, a tiny lithium pack might struggle to turn that engine over, or it’ll drain itself instantly. Check the peak amps first. If the pack is rated high enough, you’re good to go.

    How often do I need to charge these things so they aren't dead when I actually need them?

    Look, there’s nothing worse than grabbing your jump starter in a rainstorm only to realize it’s a paperweight. Most lithium units hold a charge pretty well, but don’t get lazy. I check mine every three months like clockwork. If you leave it in a freezing garage or a scorching trunk, it’ll drain faster. My rule of thumb? Check the indicator every season. If it’s below 80%, plug it in. Don’t wait for the emergency to find out.

    Is it safe to jump-start a car with a lithium pack if the engine is already running?

    Look, I get why you’re asking—it feels like you’re adding too much juice to the system. Honestly? Don’t do it. If the engine is already running, your alternator is already doing the heavy lifting. Connecting a lithium pack while the car’s live can cause a massive voltage spike that might fry your car’s sensitive sensors or even wreck the jump starter itself. Just wait until the engine’s off. Better safe than replacing an ECU.

  • Testing Your Car Battery With a Tester

    Testing Your Car Battery With a Tester

    I’ve lost count of how many times I’ve seen a guy standing over an open hood, staring at a dead engine like it’s some kind of unsolvable mystery. Usually, he’s about to drop a hundred bucks on a brand-new battery just because his car wouldn’t crank, even though the real issue was something else entirely. Most shops will try to sell you a whole new electrical setup, but honestly? Half the time, you just need a decent battery tester to see what’s actually happening. Stop letting people talk you into expensive replacements when a simple test could prove your current setup is actually fine.

    I’m not here to give you some textbook lecture or a list of overpriced tools you’ll never use. I’m going to show you exactly what to look for so you can stop guessing and start knowing. My goal is to break down the different types of gear out there—from the cheap handhelds to the digital ones—and tell you which ones are actually worth your money. I’ll help you find the right tool for the job so you can keep your own car running without getting ripped off.

    Table of Contents

    Mastering Digital Multimeter Battery Testing Without the Fancy Degree

    Mastering Digital Multimeter Battery Testing Without the Fancy Degree

    Look, you don’t need a specialized automotive battery load tester to get a decent reading, but you do need to know what you’re looking at. If you’ve got a basic digital multimeter lying around, you’re already halfway there. Start by setting your dial to DC voltage. Touch your red probe to the positive terminal and the black to the negative. This is the most basic way of how to check battery voltage before you even think about turning the key. If you’re seeing anything below 12.6 volts while the engine is off, your battery is likely sitting at a low state of charge and might need a long drive or a dedicated charger.

    Now, here’s the part where most people get tripped up: a static voltage reading doesn’t tell the whole story. A battery can show 12.6 volts but still fail the moment you try to start the car. To get real insight, you need to watch that number while someone else cranks the engine. If that voltage plummets below 9 or 10 volts during the crank, your battery is toast, regardless of what it showed while sitting idle. It’s not rocket science; it’s just about watching how the power holds up under pressure.

    The Truth About Cranking Amps Measurement and Real Power

    The Truth About Cranking Amps Measurement and Real Power

    Here’s the thing: seeing a healthy voltage reading on your screen doesn’t always mean your car is actually going to start on a cold morning. You can have a perfect 12.6 volts sitting there, but if that battery can’t dump enough juice the second you turn the key, you’re still stuck. That’s where cranking amps measurement comes into play. It’s the difference between a battery that looks good on paper and one that actually has the muscle to turn over a heavy engine under load.

    When I’m working on one of my vintage tuners, I don’t just trust a quick voltage check. I look for how the battery handles the sudden, massive demand of the starter motor. If you’re trying to get serious about lead acid battery diagnostics, you really need to understand that voltage is just the potential, while cranking amps are the actual work being done. If the voltage takes a massive dive the moment you crank, your battery is likely toast, regardless of what a basic meter tells you.

    5 Ways to Stop Guessing and Start Testing Like a Pro

    • Don’t trust your eyes; a battery might look brand new and have clean terminals but still be a total dud when you’re trying to turn the engine over on a cold morning.
    • Always clean your contact points before you hook up a tester, because even a thin layer of corrosion can mess with your readings and give you a false sense of security.
    • Check your battery while the car is actually sitting idle, not right after a long drive, because an alternator charging the system will throw off your baseline voltage numbers.
    • Learn the difference between a simple voltage check and a load test; knowing the voltage is fine is one thing, but knowing if it can actually handle the stress of a starter motor is what matters.
    • Get yourself a dedicated handheld tester instead of relying on a cheap multimeter for everything; it’s faster, more accurate for CCA, and way less headache when you’re under a tight hood.

    The Bottom Line: Don't Get Stuck on the Side of the Road

    Stop relying on “maybe” when it comes to your battery; a cheap tester is way more reliable than just guessing based on how slow your engine cranks.

    Understand that voltage isn’t everything—if your battery can’t hold the cranking amps needed to turn the starter, you’re still going to be stranded.

    You don’t need to be a master electrician to use these tools, just learn how to read the basic numbers so you can avoid paying a shop for a battery you might not even need to replace.

    Stop Guessing, Start Testing

    Most shops will try to sell you a brand new battery the second your car struggles to start, but don’t let them. Grab a decent tester, get the real numbers, and find out if you’re actually looking at a dead cell or just a bad connection.

    Nikolai·Osterman

    Stop Guessing and Start Testing

    Stop Guessing and Start Testing electrical systems.

    Look, at the end of the day, you’ve got two solid ways to handle this. You can play it old school with a digital multimeter to check your voltage, or you can invest in a dedicated tester to get those crucial cranking amps and load test readings. Don’t let a mechanic talk you into a full battery replacement just because your car struggled to start on a cold morning. Whether you’re checking for a parasitic draw or just verifying that your alternator is actually doing its job, the goal is the same: get the actual data so you aren’t throwing money at parts you don’t need. Stop playing the guessing game with your electrical system and start making decisions based on what the tools are actually telling you.

    I know it can feel a little intimidating when you’re staring at a mess of wires and sensors, but trust me, you’ve got this. Most people get stranded because they ignored the warning signs or didn’t have the right gear to spot a dying cell before it quit entirely. Owning a decent tester isn’t just about fixing a car; it’s about taking back control of your own ride and your wallet. Grab a tool, get a little grease on your hands, and learn the truth about what’s happening under that hood. You don’t need a fancy certification to be your own best mechanic.

    Frequently Asked Questions

    Is it worth buying a dedicated digital tester, or can I just rely on my multimeter for everything?

    Look, if you’re just checking if a battery has a charge, your multimeter is fine. But if you want the full story, get a dedicated tester. A multimeter tells you the voltage, but a digital tester tells you if the battery actually has the muscle to turn your starter. It tests internal resistance and cranking amps—stuff a multimeter just can’t see. Save the extra cash for tools you’ll actually use daily, but for battery health? The dedicated tester wins.

    How do I know if my battery is actually failing or if it's just the cold weather messing with the readings?

    Look, cold weather is a total liar. It makes your battery look weaker than it actually is because the chemical reaction slows down when it’s freezing. If you want the truth, test it when it’s warmer, or better yet, use a load tester. If the voltage drops significantly while you’re cranking in the cold, the battery’s struggling. But if it holds steady under load, it’s probably just the temperature playing tricks on you.

    Can a cheap tester from a big-box store give me accurate results, or am I just wasting my money?

    Look, I get the temptation to grab that $15 unit at the big-box store just to get the job done, but there’s a catch. For a basic “is it dead or alive” check, it’ll work fine. But if you’re trying to diagnose a parasitic draw or figure out if your alternator is actually charging properly, those cheap ones can lie to you. Don’t waste your money on junk if you actually want the truth.

  • Choosing a Comfortable Mechanic Stool for Long Repairs

    Choosing a Comfortable Mechanic Stool for Long Repairs

    I still remember being twelve, crouched on the cold, oil-slicked concrete of my dad’s garage, trying to reach a stubborn bolt on an old Civic. My knees were screaming, my lower back felt like it was being put through a meat grinder, and I was about two minutes away from throwing my wrench across the room in frustration. I thought I needed to be “tough” to work on cars, but the truth is, I was just being stupid. I didn’t realize back then that a decent mechanic stool isn’t some luxury for professional shop rats; it’s the difference between actually finishing a job and spending the next three days icing your spine.

    Look, I’m not here to sell you some overpriced, gold-plated rolling seat that promises to revolutionize your life. I’ve spent enough hours under chassis to know what actually holds up and what just breaks the first time you hit a pebble on the shop floor. I’m going to give you the straight truth on what to look for so you don’t waste your hard-earned cash on junk. We’re going to talk about height, wheel durability, and why comfort actually matters when you’re deep in a project.

    Table of Contents

    The Truth About Ergonomic Mechanic Seating and Your Back

    The Truth About Ergonomic Mechanic Seating and Your Back

    Look, I’ve seen too many guys my age trying to act tough by working on the concrete floor for six hours straight. They think they’re saving money, but they’re actually just paying for a physical therapist later. When you’re leaning over a fender or hunched under a chassis, your spine is taking a beating. Investing in proper ergonomic mechanic seating isn’t some luxury for high-end shops; it’s about making sure you can actually move the next morning. If you’re constantly twisting your torso to reach a bolt, you’re begging for a pulled muscle.

    I’ve learned the hard way that a cheap plastic seat is just as bad as nothing at all. You need something that moves with you. A solid swivel mechanic seat with casters lets you glide around the vehicle instead of constantly standing up and repositioning your entire body. That constant micro-movement is what kills your lower back over time. If you can find a setup that supports your weight while letting you pivot easily, you’ll stay focused on the engine instead of focusing on how much your spine hurts.

    Heavy Duty Rolling Stools Built for Real Work Not Show

    Heavy Duty Rolling Stools Built for Real Work Not Show

    If you’re looking at those cheap, plastic stools you find at big-box retailers, stop right there. They might look fine in a photo, but once you’re halfway through a brake job and leaning into a wheel well, they’ll buckle or just feel like a piece of cardboard under you. You need heavy duty rolling stools that are actually built to handle the weight of a person and the constant abuse of a shop environment. I’ve seen guys ruin their posture on flimsy seats that don’t even have decent height adjustment, and honestly, it’s a waste of money in the long run.

    When you’re hunting for something that lasts, look for a swivel mechanic seat with casters that actually roll smooth over oil spills and metal shavings. You don’t want to be fighting your own seat just to reach a bolt on the other side of the chassis. A solid setup should feel like an extension of your body, not an obstacle. If the wheels feel like they’re going to snap the second you put some pressure on them, leave it on the shelf. Real work requires gear that can actually take a beating.

    Don't Waste Your Cash: What I Actually Look For in a Stool

    • Check the casters before you buy. If they’re those cheap, hard plastic wheels, they’re gonna struggle on anything but a perfectly smooth showroom floor. Look for polyurethane or rubber wheels that actually roll over concrete without getting stuck or scratching it up.
    • Don’t ignore the weight limit. I’ve seen guys grab a flashy-looking stool only to have the hydraulic lift fail halfway through a brake job. Make sure it’s rated for your weight plus whatever heavy parts you’re gonna be leaning on.
    • Look for a seat that actually has some cushion. I’m not talking about a soft sofa, but if it’s just a piece of hard molded plastic, you’re gonna be feeling that in your tailbone by the end of a four-hour shift.
    • Make sure the height range is actually useful. You need a stool that can drop low enough to get you close to the chassis, but still lift high enough so you aren’t hunched over like a question mark while you’re working on the engine bay.
    • Test the swivel. A good stool should spin freely without catching or making a grinding noise. If you have to fight the seat just to turn your body, you’re just adding unnecessary strain to your lower back.

    The Bottom Line on Picking Your Stool

    Don’t cheap out on a plastic stool that’ll crack the first time you lean on it; get something with actual weight and heavy-duty casters that won’t dive into a puddle of oil.

    Your spine isn’t invincible, so prioritize a seat that actually supports your weight instead of just letting you hover uncomfortably over the floor.

    Think about your workspace before you buy—if you’re constantly sliding under chassis, you need smooth rollers, not something that gets stuck on every little pebble in your garage.

    Don't Ignore the Physical Toll

    “Look, you can spend all your money on the best torque wrench or a fancy scanner, but if you’re spending every shift hunched over a chassis without a decent stool, you’re just trading your long-term health for a quick fix. Your back won’t forgive you for being cheap on ergonomics.”

    Nikolai·Osterman

    The Bottom Line on Your Setup

    The Bottom Line on Your Setup.

    At the end of the day, choosing a stool isn’t just about picking a piece of furniture; it’s about deciding how much pain you’re willing to deal with by next Tuesday. We’ve talked about why you can’t just sit on a milk crate if you actually want to protect your spine, and why investing in a heavy-duty rolling stool is way better than buying some cheap plastic thing that’ll snap the first time you lean on it. If you’re going to spend hours hunched over a fender or crawling around a chassis, you need something that supports your weight and actually moves with you. Don’t let a bad seat be the reason you stop working on your own cars.

    Look, I know it feels like spending money on a stool is a waste when you could be buying more socket sets or a new turbo kit. But trust me, your body is the most important tool in your garage, and once you blow out your back, no amount of money is going to fix it easily. Treat your setup with some respect, and it’ll let you stay in the game longer. You don’t need a massive professional shop to do things the right way—you just need the right mindset and the right gear. Get the stool, grab your magnetic tray, and get back under the hood.

    Frequently Asked Questions

    Is it worth spending the extra cash on a rolling stool with a swivel, or is a basic stationary one fine for light DIY stuff?

    Look, if you’re just changing oil once a year, a stationary stool is fine. But if you’re actually spending a few hours under a chassis, get the swivel. Being able to rotate your body without twisting your spine or dragging a heavy seat across the concrete makes a massive difference. For light DIY, it’s a luxury, but once you start working on more complex jobs, that extra mobility saves your back from a lot of unnecessary ache.

    How do I know if a stool's wheels are actually going to handle my garage floor without getting stuck or scratching it?

    Don’t just trust the “heavy-duty” label on the box. If you’re working on a polished concrete floor or a smooth epoxy coating, stay away from those cheap, hard plastic wheels. They’ll scratch your finish and feel like you’re dragging a brick. Look for polyurethane or soft rubber casters. They roll smooth, won’t leave gouges, and actually glide when you’re trying to maneuver under a chassis. If they feel stiff in the store, they’ll be a nightmare in your garage.

    Should I be looking for something with a built-in tool tray, or is that just more junk that'll end up getting covered in grease?

    Honestly? Skip the built-in tray. Most of those integrated compartments are too shallow and end up becoming a graveyard for loose bolts, oily rags, and bits of debris you don’t want rolling around. I’ve seen way too many guys get frustrated when their “convenient” tray spills half their socket set across the shop floor. Just grab a solid stool and keep your tools in a dedicated rolling cart or your magnetic tray. Keep it simple.

  • How to Use a Torque Wrench Correctly

    How to Use a Torque Wrench Correctly

    I still remember the sound of a snapped head bolt echoing through my dad’s garage when I was sixteen. I thought I was being a hero by “muscle-tightening” the lug nuts on an old Civic, but all I did was ruin a perfectly good weekend and a very expensive rotor. That’s the thing about people who tell you that you can just “feel” when a bolt is tight—they’re usually the ones charging you triple at the shop to fix their mess. If you aren’t using a torque wrench, you aren’t actually repairing your car; you’re just playing a high-stakes game of guessing with your hardware.

    Look, I’m not here to sell you on some $500 professional-grade tool that requires a master’s degree to calibrate. I want to show you how to pick a reliable torque wrench that actually works without draining your bank account. I’ll break down the real differences between click-type and digital, tell you which brands are actually worth the grease on your hands, and teach you how to use them so you never have to deal with a snapped stud again.

    Table of Contents

    The Truth About Automotive Fastening Accuracy

    The Truth About Automotive Fastening Accuracy.

    Look, I’ve seen it a thousand times at the shop: some guy tries to tighten his cylinder head bolts by “feel,” and three weeks later, he’s staring at a warped head or a snapped stud. That’s where automotive fastening accuracy actually matters. It isn’t just about making sure things stay on; it’s about the physics of how metal expands and contracts when that engine gets hot. If you’re too loose, you get leaks. If you’re too tight, you’re asking for a disaster.

    Most people think as long as the bolt doesn’t turn anymore, they’re good to go. That’s a lie. You’re either stretching the bolt past its elastic limit or leaving it so loose that vibration will back it out. Preventing bolt over-tightening is just as important as hitting the right number. Whether you’re working in foot-pounds or Newton meters, you need to respect the spec. If you aren’t hitting those exact numbers, you’re basically just playing Russian roulette with your engine components.

    Preventing Bolt Over Tightening and Saving Your Engine

    Preventing Bolt Over Tightening and Saving Your Engine

    Look, I’ve seen guys at the shop try to “feel” their way through a cylinder head installation, and it never ends well. They think they know when a bolt is seated, but they’re actually just praying they don’t snap something. When you’re dealing with aluminum engine blocks or sensitive sensor housings, there is zero room for guesswork. Preventing bolt over-tightening isn’t just about being careful; it’s about respecting the limits of the metal you’re working with. If you crank down too hard, you’re not just tightening a fastener—you’re potentially warping a component or stripping threads that’ll cost a fortune to fix.

    If you’re using a click type torque wrench, you need to actually listen for that snap and stop immediately. Don’t let the momentum of your arm carry you past the set point. I always tell my friends that if you’re constantly second-guessing your strength, you’re doing it wrong. Precision beats brute force every single time when you’re trying to keep an engine from leaking or, even worse, cracking under pressure.

    Five Ways to Not Screw Up Your Torque Settings

    • Stop using your torque wrench to loosen stuck bolts; that’s a fast way to ruin the calibration and waste your money. Use a breaker bar for the heavy lifting and save the torque wrench for the actual tightening.
    • Always dial it back to zero after you’re done. If you leave a click-type wrench under tension in your toolbox, the internal spring loses its accuracy, and you’ll be guessing on the next job.
    • Don’t go chasing the highest number possible. Most people think “tighter is better,” but if you overdo it on an aluminum head, you’re going to strip the threads and end up with a massive repair bill.
    • Use a smooth, steady pull. If you jerk the wrench or snap it like you’re trying to crack a whip, you’re going to blow right past the click point and end up over-torquing everything anyway.
    • Keep your eyes on the specs, not your gut. Every engine has its own set of rules, so grab the service manual or look up the manufacturer’s torque sequence instead of just “feeling it out” like a hack.

    The Bottom Line: Don't Wing It

    Stop relying on “feel” when you’re tightening critical components; if the manual gives you a spec, use a torque wrench to hit it exactly.

    Using the right tool saves you money in the long run by preventing snapped studs and warped gaskets that turn a quick fix into a nightmare.

    Treat your torque wrench like a precision instrument—don’t leave it dialed to a high setting when you’re done, or you’ll ruin its calibration.

    ## The Cost of "Tight Enough"

    “I’ve seen guys snap a head bolt or warp a rotor just because they thought ‘tight enough’ was good enough. In this job, you learn pretty quick that guessing with a breaker bar is just a fast way to turn a cheap repair into a massive headache.”

    Nikolai·Osterman

    Bottom Line: Don't Leave It to Luck

    Bottom Line: Don't Leave It to Luck.

    Look, at the end of the day, using a torque wrench isn’t about being a perfectionist or showing off; it’s about avoiding a massive, expensive headache down the road. We’ve talked about why guessing is a recipe for disaster, how over-tightening can snap a stud clean off, and why precision is the only way to keep your engine components seated exactly how the engineers intended. If you skip this step, you’re basically playing Russian roulette with your hardware. Whether you’re doing a simple oil pan bolt or something more serious like head studs, getting that click right is the difference between a job well done and a trip back to the mechanic with a broken engine.

    I know it can feel a bit tedious when you just want to get the car back on the road, but trust me, the extra five minutes spent checking your specs is worth every second. My dad always told me that the best mechanics aren’t the ones who work the fastest, but the ones who do it right the first time. You don’t need a fancy degree or a million-dollar shop to maintain your ride; you just need the right tools and the discipline to use them. Grab a wrench, follow the manual, and take control of your own repairs. You’ve got this.

    Frequently Asked Questions

    Is it actually worth buying an expensive digital one, or can I just get a decent click-type for the driveway?

    Look, if you’re just doing oil changes or rotating tires in your driveway, a solid click-type is more than enough. They’re rugged, they don’t need batteries, and they get the job done. Save your cash for better sockets or a decent jack. Digital ones are cool for precision work on high-end builds, but for most of us? A decent click-type is the workhorse you actually need. Don’t overcomplicate it.

    Do I really need to wind the setting back down to zero every time I'm done using it?

    Yeah, you absolutely do. It’s not just some extra step to annoy you; it’s about the spring inside. If you leave it dialed to a high setting, that internal spring stays under constant tension while it’s sitting in your toolbox. Over time, that weakens the spring and kills your accuracy. If you want to stop guessing and actually trust your readings, wind it back to zero every single time you’re finished.

    How do I know if my wrench is still accurate, or if it's just lying to me after a few years of use?

    Look, I’ve seen plenty of guys swear by a wrench that’s actually been lying to them for years. If you’ve been dropping it on the concrete or leaving it cranked tight in your toolbox, it’s probably drifted. The only way to know for sure is to get it professionally calibrated. Don’t just guess; if you’re working on something expensive like cylinder heads, send it out. It’s cheaper than replacing a snapped stud.

  • Choosing a Screwdriver Set for Cars

    Choosing a Screwdriver Set for Cars

    I spent my Saturday morning stuck under a dashboard, cursing a stripped screw because the cheap, “all-in-one” screwdriver set I bought at a big-box store had handles that felt like they were made of recycled milk jugs. There is this massive lie in the automotive world that you need to drop a grand on a professional-grade kit just to change a sensor or tighten a trim piece. Honestly, most of those flashy, 100-piece sets are just expensive clutter that you’ll never actually use, and they’ll definitely fail you when you’re elbow-deep in a cramped engine bay.

    I’m not here to sell you on some overpriced brand name or a kit that’s mostly filler. My goal is to cut through the noise and tell you exactly which drivers actually matter when you’re working on a real car. I’ll show you how to pick a screwdriver set that has the right grip, the right steel, and the right variety to ensure you don’t get ripped off or stuck halfway through a job. Let’s get into what actually works.

    Table of Contents

    Mastering Phillips vs Slotted Drivers Without the Guesswork

    Mastering Phillips vs Slotted Drivers Without the Guesswork

    Look, I’ve seen way too many guys strip a screw head just because they tried to force a flathead into a cross-shaped slot. It’s a rookie mistake, but it happens even to people who think they know what they’re doing. When you’re dealing with phillips vs slotted drivers, the rule is simple: match the tip to the screw perfectly. If there’s any wiggle room, you’re going to chew up the metal, and then you’re stuck with a nightmare of a job. I always tell my buddies to look for a driver that seats deep and stays put.

    If you want to make your life easier, don’t sleep on the magnetic tip screwdriver benefits. When you’re leaning over a cramped engine bay trying to reach a bolt tucked behind the battery, you don’t want your screw falling into the abyss of the subframe. A solid magnet keeps everything steady so you can actually focus on the turn instead of fishing for hardware with a coat hanger. It’s a small detail, but it’s the difference between a quick fix and a total headache.

    Why Magnetic Tip Screwdriver Benefits Save Your Sanity Under the Hood

    Why Magnetic Tip Screwdriver Benefits Save Your Sanity Under the Hood

    Look, I’ve spent enough hours hunched over a cramped engine bay to know that the smallest mistake can turn a quick fix into a nightmare. There is nothing quite like the soul-crushing feeling of dropping a screw into the dark, greasy abyss of a subframe. You’ll spend the next forty minutes fishing for it with a coat hanger, cursing your luck. This is exactly why the magnetic tip screwdriver benefits aren’t just some luxury; they are a survival tool. When you’re working in tight spots where you can’t even see what you’re doing, that magnetic pull keeps the hardware locked onto the shaft so you can actually focus on the task instead of playing scavenger hunt.

    Beyond just holding the screw, a good magnet helps you feel the engagement. It gives you that extra bit of control when you’re navigating around sensitive sensors or plastic trim that’s prone to cracking. If you’re investing in professional grade tool kits, don’t cheap out on the tips. You want something that holds a charge so that when you’re reaching deep into a dashboard or under a seat, that fastener stays exactly where it belongs. It’s about working smarter, not harder.

    Don't Get Stuck: 5 Pro Tips for Picking Your Next Set

    • Stop buying those cheap, mystery-brand sets from the big-box stores. They’re fine for hanging a picture in the living room, but the moment you try to crack a stubborn screw on a sensor housing, the tip is going to strip or snap. Invest in a set with hardened steel tips that can actually take a bit of torque.
    • Size matters more than you think. A lot of guys think one medium screwdriver covers everything, but if the tip doesn’t fit the screw head perfectly, you’re just turning that screw into a smooth, useless crater. Make sure your set has a good range of both long and short shafts so you can reach into tight engine bays without hitting the frame.
    • Get yourself some insulated handles. I don’t care if you aren’t working on live wires every day; a handle with a solid, non-slip grip makes a massive difference when your hands are sweaty or covered in a bit of oil. If the handle is flimsy plastic, it’s going to crack the first time you have to put some real pressure behind it.
    • Look for a set that includes precision drivers. I’m talking the tiny ones for interior trim clips or electrical components. There’s nothing more frustrating than trying to pry a plastic panel off with a massive flathead and snapping the clip because you didn’t have the right scale of tool.
    • Organization is your best friend. If your set comes in a cheap plastic case that breaks after a month, get a dedicated tool roll or a sturdy organizer. I keep mine in a way where I can see every size at a glance. If you’re constantly digging through a pile of loose drivers, you’re wasting time you could be using to actually finish the job.

    The Bottom Line Before You Start Wrenching

    Stop using the wrong size; a stripped screw head is a nightmare that turns a five-minute fix into a two-hour headache.

    Invest in magnetic tips—I’ve spent way too much time fishing tiny screws out of engine bays, and it’s a waste of your time.

    You don’t need a massive, expensive kit; just get a solid set of Phillips and slotted drivers that actually fit your hardware properly.

    ## Don't Get Stuck with Junk

    “Look, I’ve seen too many people spend forty bucks on a cheap, flimsy screwdriver set only to have the tip strip the head of a bolt halfway through the job. At that point, you aren’t just losing time; you’re making a simple fix a nightmare. Buy a decent set once, and you won’t be cursing your tools every time you’re elbow-deep in an engine bay.”

    Nikolai·Osterman

    Don't Let a Bad Tool Stop You

    Don't Let a Bad Tool Stop You.

    Look, at the end of the day, you don’t need a massive, overpriced rolling toolbox to start working on your own ride. It really comes down to the basics: knowing the difference between your Phillips and slotted heads so you don’t strip a screw, and investing in a few magnetic tips so you aren’t fishing for dropped fasteners in a dark engine bay for twenty minutes. If you get the right screwdriver set, you’re already ahead of most people who just wait for a tow truck. Just remember that quality over quantity is the name of the game when you’re staring down a tight bolt in a cramped corner.

    I know it can feel intimidating when you first pop the hood and see a mess of wires and plastic, but don’t let that stop you. Every pro I know started exactly where you are—probably frustrated and covered in a bit of grease. Once you have the right tools in your hand, that intimidation turns into actual confidence. Stop letting shops overcharge you for simple stuff that you could have handled in your own driveway. Grab a decent set, keep your patience, and just start turning things. You’ve got this.

    Frequently Asked Questions

    Should I go for a cheap multi-piece set or just invest in a few high-quality drivers that won't strip my bolts?

    Look, I’ve seen too many guys buy those $10 bargain bins, only to realize halfway through a job that the tip is too soft. They strip a screw head, and suddenly a ten-minute fix turns into a three-hour nightmare with an extractor kit. Do yourself a favor: skip the massive, cheap sets. Buy a few high-quality, driver-specific tools. It’s better to have three drivers that actually grip than twenty that just ruin your hardware.

    How do I know if I need a precision set for those tiny sensor screws or just a standard heavy-duty kit?

    Look, don’t try to force a standard driver into a sensor housing; you’ll strip the screw head and then you’re really stuck. If you’re working on interior trim, dashboard electronics, or those tiny plastic sensor mounts, grab a precision set. But for anything structural, engine covers, or battery terminals, stick to your heavy-duty kit. Basically, if the screw looks like it belongs on a toy, go precision. If it looks like it’s holding the car together, go heavy-duty.

    Is it actually worth getting a ratcheting screwdriver, or is that just another gimmick that'll break on me?

    Look, I get why you’re skeptical. Most “gadget” tools are just marketing fluff, but a decent ratcheting screwdriver isn’t one of them. When you’re cramped in a wheel well or reaching behind a dash, you aren’t going to have the room to flip a standard driver over and over. It’s a massive time-saver. Just don’t buy the cheapest junk you find at a big-box store; get something with a solid metal mechanism so it doesn’t snap mid-job.