Category: Tools

  • Tools for Compressing Brake Calipers

    Tools for Compressing Brake Calipers

    I remember being ten years old, hunched over my dad’s old sedan in the driveway, trying to force a stuck piston back into place with a pair of pliers and a lot of sheer desperation. I ended up scarring the metal and nearly breaking my thumb, all because I thought I could muscle my way through a job that actually required the right gear. Most people think you need a massive, expensive professional kit to handle a brake job, but honestly, that’s just a way for shops to inflate your bill. The truth is, if you’re staring at a stubborn piston, you don’t need a master’s degree; you just need a decent brake caliper tool to do the heavy lifting for you.

    I’m not here to sell you on some overpriced, shiny gadget that’ll sit in your toolbox for five years. My goal is to cut through the noise and show you exactly what works when you’re actually under the car getting grease under your fingernails. I’ll walk you through the different types of tools out there, how to pick one that won’t snap on you, and how to use it without stripping your hardware. Let’s get this done the right way.

    Table of Contents

    Mastering the Brake Caliper Piston Compressor
    Mastering the Brake Caliper Piston Compressor technique.

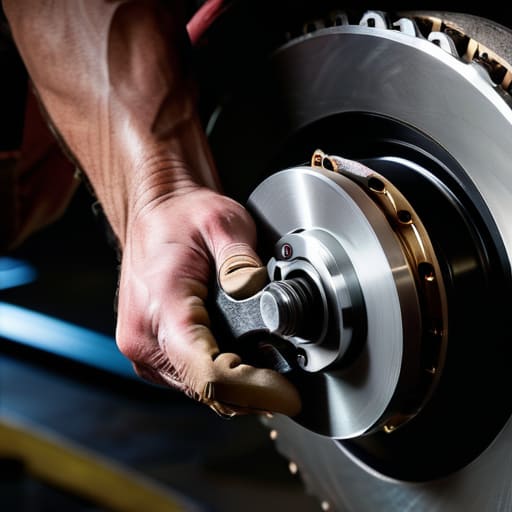
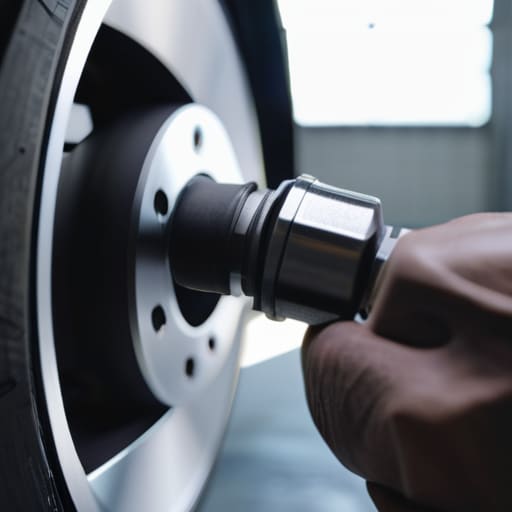
    Once you’ve got your tool in hand, the real work begins. When you’re learning how to compress brake pistons, the biggest mistake I see people make is trying to force it with a C-clamp or a screwdriver. Stop right there. If you force a piston back unevenly, you risk damaging the internal seals or even scoring the cylinder wall, which turns a simple brake pad replacement into a massive headache. You want to apply steady, even pressure. If you’re working on a rear caliper with an integrated parking brake, remember that some models actually require you to rotate the piston as you push it back rather than just squeezing it straight in.

    I usually grab my disc brake maintenance kit before I even lift the car, because having the right setup prevents that mid-job frustration where you’re hunting for a wrench while your hands are covered in brake dust. Take a second to clean the piston surface with some brake cleaner before you start compressing; you don’t want to push decades of grime and grit right past your new seals. Just take it slow, listen to the mechanism, and don’t rush the process.

    The Truth About Professional Automotive Brake Service Tools
    The Truth About Professional Automotive Brake Service Tools

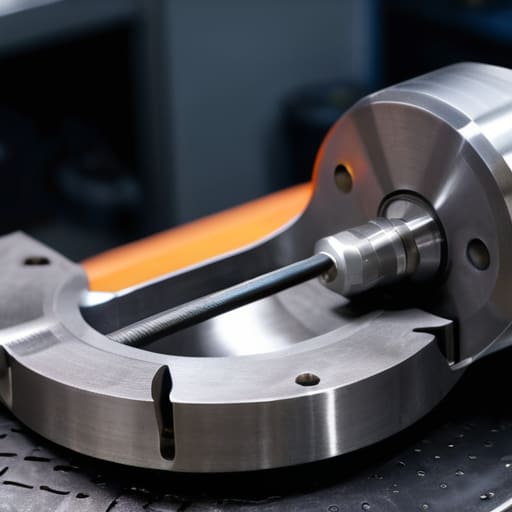
    Look, I’ve seen plenty of guys walk into the shop with a cheap, generic kit they bought online, only to realize halfway through the job that their tools are useless. There is a massive difference between a flimsy piece of stamped metal and actual automotive brake service tools that can handle the pressure. When you’re dealing with a stubborn piston that refuses to budge, a low-quality tool is going to flex, slip, or worse, damage the seal. I’ve spent way too many afternoons cleaning up the mess caused by someone trying to force a cheap tool where it doesn’t belong.

    If you’re serious about doing this right, you need to understand the difference between a basic screw-type compressor and a proper caliper spreader tool. Some cars, especially the newer ones with integrated electronic parking brakes, won’t play nice with the old-school methods. You don’t want to be guessing how to compress brake pistons on a modern build; you want a tool that fits the specific application. Investing a little more upfront in a decent kit might feel steep, but it beats paying a professional to fix the damage you did while trying to save a few bucks.

    5 Pro-Tips to Save Your Sanity (and Your Calipers)

    • Don’t just force it. If that piston feels like it’s fighting you, stop. You might have a seized caliper or a stuck slide pin. Forcing a compressor against a seized piston is a fast way to crack something expensive.
    • Get a tool that handles rear brakes. If you’re working on a newer car, you can’t just squeeze the piston back; most rear calipers need to be rotated while you compress them. If your tool doesn’t have the screw mechanism for that, you’re going to have a bad time.
    • Keep your parts organized. I can’t tell you how many times I’ve seen someone finish a brake job only to realize they have one extra bolt left over. Use a magnetic tray—or even just a couple of egg cartons—to keep your caliper bolts and clips from rolling into the abyss.
    • Clean the hardware first. Before you even touch the compressor, take a wire brush to the caliper bracket and the slide pins. There’s no point in using a high-end tool if you’re just compressing the piston back into a pile of brake dust and rust.
    • Use the right amount of grease. When you’re putting things back together, don’t skip the high-temp brake lube on the slide pins. A good tool gets the job done, but proper lubrication keeps the job from needing to be redone in two weeks.

    The Bottom Line on Getting the Job Done

    Don’t try to force a piston back with a C-clamp and a prayer; a dedicated caliper tool saves your seals and keeps you from fighting the hardware for an hour.

    You don’t need a $500 professional kit to do a decent job, but skipping the right tool is a fast way to end up with bent parts or a ruined brake job.

    Once you have the right compressor in your hand, most brake jobs become a simple matter of patience rather than brute strength.

    ## Don't Fight Your Brakes

    “Look, you can try to force that piston back with a C-clamp and a prayer, but you’re just asking for a leak or a bent seal. Get a decent caliper tool; it turns a frustrating hour of fighting your car into a ten-minute job that actually gets done right.”

    Nikolai·Osterman

    Don't Let the Shop Overcharge You
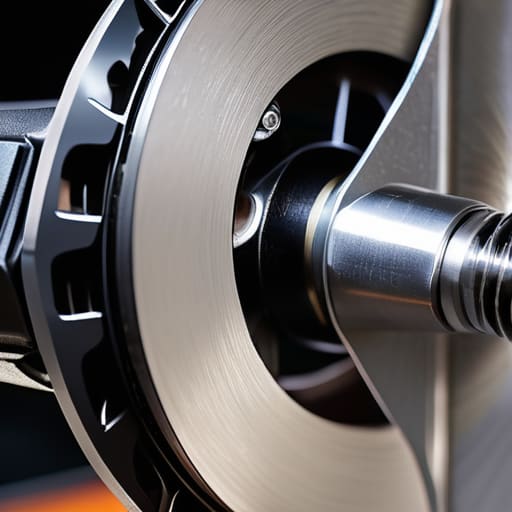
    Don't Let the Shop Overcharge You.

    Look, at the end of the day, whether you’re using a heavy-duty professional compressor or a basic wind-back tool for a rear caliper, the goal is the same: doing the job right without mangling your hardware. We’ve covered why you can’t just go shoving a C-clamp against a piston and hope for the best, and why investing in a decent, dedicated tool actually saves you money in the long run. You don’t need a massive rolling toolbox to handle a brake job; you just need to understand the mechanics of what you’re pushing against so you don’t end up with a blown seal or a cracked housing.

    I know it can feel intimidating when you’re staring down a set of greasy rotors and a pile of new pads, but I promise you, you’ve got this. Every time you finish a repair yourself, you’re taking power back from the big shops that thrive on people being too afraid to get their hands dirty. Keep that magnetic tray handy, take your time with the compression, and don’t be afraid to make a bit of a mess. Once you realize that most of these “complex” repairs are just a matter of having the right tool and a little bit of patience, the garage becomes your playground instead of your enemy.

    Frequently Asked Questions

    Can I just use a C-clamp to compress the piston, or am I actually going to damage something?

    Look, I get it. You’re in the middle of a job and you just want to grab the C-clamp from your toolbox and get it over with. On a basic rear caliper, you might get away with it, but it’s risky. If you apply pressure unevenly, you can cock the piston or even crack the seal. If you’ve got an electronic parking brake, a C-clamp will absolutely wreck your setup. Just get the proper tool.

    Do I need a different kind of tool if my car has an electronic parking brake?

    Yeah, you definitely need to be careful here. If your ride has an electronic parking brake (EPB), you can’t just crank that piston back with a standard compressor. If you try to force it, you’ll likely fry the expensive electronic actuator motor. Most newer cars need a scan tool to put the system into “service mode” first, or a specific EPB retraction tool. Don’t wing it—you’ll end up with a much bigger repair bill.

    How do I know if my caliper piston is actually stuck or if the tool just isn't working right?

    Look, I’ve been there—staring at a piston that won’t budge while sweating through my hoodie. First, check your brake fluid reservoir. If it’s topped off to the brim, the fluid has nowhere to go, and that’s why the piston feels stuck. If the fluid level is fine, check your tool’s alignment. If you’re hitting it at an angle, you’re just fighting physics. If it still won’t move, you might actually have a seized caliper.
  • How to Use an Oil Filter Wrench

    How to Use an Oil Filter Wrench

    I was halfway under my dad’s old Corolla last Saturday, knuckles bleeding and sweating through my favorite hoodie, when I realized I’d spent twenty minutes wrestling with a filter that wouldn’t budge. I was trying to use a pair of pliers like some kind of genius, only to end up stripping the casing and making a massive, oily mess on my driveway. That’s the thing: people think you need a specialized shop setup to handle basic maintenance, but honestly, most of that struggle comes down to not having the right oil filter wrench in your hand before you start.

    I’m not here to sell you some overpriced, professional-grade kit that you’ll only use once a year. Instead, I’m going to show you exactly which types of tools actually work for different engine layouts and how to pick one that won’t slip when things get really tight. Whether you’re working on a modern sensor-heavy engine or an old-school tuner, I’ll give you the straight truth on how to get the job done without getting ripped off or wasting your entire afternoon.

    Table of Contents

    Guide Overview

    Total Time: 15-30 minutes
    Estimated Cost: $10-40
    Difficulty: Beginner

    Tools & Supplies

    • Oil filter wrench (Cap style, strap, or claw type)
    • Socket set and ratchet (To loosen drain plug)
    • Replacement oil filter (1 unit)
    • Engine oil (As specified by vehicle manual)
    • Shop towels (1 roll)

    Step-by-Step Instructions

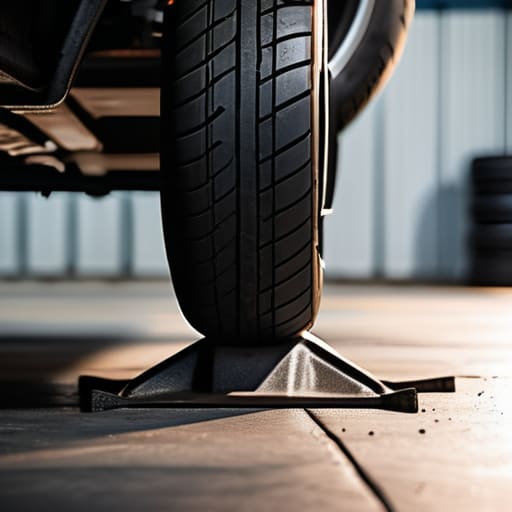
    • 1. Before you even touch the filter, make sure you’ve got your car safely jacked up and supported by jack stands. I’ve seen too many people try to slide under a car held up by nothing but a hydraulic jack, and trust me, that’s a mistake you only make once. Once you’re settled, let the oil drain from the pan for a few minutes so you aren’t working in a total mess.
    • 2. Locate the filter and get a good look at how much room you actually have to work with. Some engines have plenty of clearance, but others are tucked way up near the manifold or behind a frame rail. If it’s tight, you might need a swivel adapter for your wrench to get the right angle, otherwise, you’re just going to end up stripping the housing.
    • 3. Grab your wrench and fit it onto the filter. If you’re using a strap-style wrench, make sure it’s pulled tight enough so it doesn’t slip when you start applying pressure. If you’re using a cap-style wrench that fits over the end, ensure it’s seated perfectly on the notches. You want to avoid that dreaded “rounding off” of the metal, which turns a five-minute job into a two-hour nightmare.
    • 4. Now, start turning the wrench counter-clockwise to loosen the filter. Don’t go at it with everything you’ve got right away; start with a gentle pressure to make sure the wrench is holding firm. If it feels like it’s slipping, stop, reposition, and try again. Once it breaks loose, it should start spinning pretty easily.
    • 5. Once the filter is off, take a second to grab a clean rag and wipe down the mounting surface on the engine block. You want to make sure there’s no grit or old gasket stuck there. Then, take your new filter and smear a little fresh oil onto the new rubber gasket. This is a pro tip that ensures a good seal and prevents the filter from getting stuck the next time you do this.
    • 6. Screw the new filter on by hand first. This is important because if you use a wrench to tighten it, you’ll likely over-tighten it, and you’ll be fighting it like crazy at your next oil change. Just spin it until the gasket makes contact, and then give it another three-quarters of a turn by hand. That’s usually the sweet spot for a leak-free seal.
    • 7. Double-check everything by starting the engine for a minute and looking underneath for any drips. If it looks dry, you’re golden. If you see a leak, don’t panic—you probably just didn’t get a tight enough seal or the gasket didn’t seat right. Just shut it down, tighten it up a hair, and you’ll be back on the road in no time.

    Mastering Stubborn Oil Filter Removal Without a Mechanic

    Mastering Stubborn Oil Filter Removal Without a Mechanic

    Look, we’ve all been there—you’re under the chassis, knuckles are bleeding, and that filter just won’t budge. When you’re dealing with a stubborn oil filter removal, the biggest mistake is just cranking harder with the same tool. If you’re using a cheap strap wrench and it keeps slipping, stop. You’re likely just marring the metal and making it worse. Sometimes you need to switch it up and grab a universal oil filter tool that grips the housing more securely. If the filter is stuck due to heat cycles, let the engine cool down for a bit; sometimes a little temperature change is all it takes to break that seal.

    Another thing I’ve learned from working in the shop is that your choice of tool matters based on what’s under the hood. If you have a cartridge-style system, you’ll need specific oil filter cap wrench types rather than the standard canister grabbers. Don’t just wing it with whatever is in your junk drawer. Having the right automotive hand tools ready before you get greasy saves you a massive headache and keeps you from stripping the housing, which is a nightmare to fix later.

    Finding the Right Universal Oil Filter Tool for Your Job

    Finding the Right Universal Oil Filter Tool for Your Job

    Look, I’ve seen guys waste way too much money buying a specific tool for one car, only to find out it doesn’t fit the next one. If you’re serious about DIY car maintenance tools, don’t just buy a single-use piece of metal. You want a universal oil filter tool that actually gives you some grip. I usually lean toward the adjustable plier-style wrenches or the heavy-duty strap versions. They’re versatile enough to handle everything from my old project tuners to the newer, tighter engine bays I deal with at the shop.

    The real trick is knowing the different oil filter cap wrench types before you even get under the chassis. Some modern cars use plastic housings that need a specific socket to avoid cracking them, while older rigs just need a standard claw wrench for a solid grip. If you pick the wrong one, you’re just begging for a headache. Getting the right fit isn’t just about convenience; it’s the most important step in preventing oil leaks during change later on. Just grab something solid that won’t slip, and you’ll save yourself a lot of frustration.

    Pro Tips to Save Your Knuckles and Your Time

    • Don’t over-tighten the new filter when you’re putting it back on; just hand-tighten it plus maybe a quarter turn. If you crank it down with a wrench like you’re tightening a lug nut, you’re just making your next oil change a nightmare.
    • Always check the old rubber gasket before you install the new one. I’ve seen so many people leave the old seal stuck to the engine block, which causes a massive leak that’ll leave you stranded. It’s a rookie mistake that’s way too easy to make.
    • If you’re working in a tight spot, skip the big heavy tools and grab a strap-style wrench. They’re way more forgiving when you’re maneuvering around frame rails or tight engine bays where a standard socket won’t fit.
    • Keep a little bit of fresh oil on the new filter’s gasket before you spin it on. It helps create a better seal and stops that rubber from grabbing onto the engine block and tearing when you try to take it off next time.
    • If the filter is absolutely seized and spinning in place, try using a bit of penetrating oil around the base. Give it a few minutes to soak in before you start wrestling with it again; it saves a lot of unnecessary frustration.

    The Bottom Line on Getting the Job Done

    Don’t waste money on a generic kit that doesn’t fit your specific filter; take five minutes to check your car’s manual or measure the diameter first so you aren’t stuck halfway through an oil change.

    If a filter is stuck, don’t just go at it with brute force and risk stripping the housing—switch to a better tool or try a different style of wrench rather than just getting frustrated.

    Keeping a decent wrench in your toolbox pays for itself the very first time you avoid a shop’s “specialty tool” fee.

    ## The Real Cost of a Cheap Tool

    “Look, you can spend fifty bucks on a fancy kit or five bucks on a piece of junk, but if that wrench slips and rounds off your filter housing, you’re looking at a much bigger headache than just an oil change. Don’t let a bad tool turn a simple DIY job into a reason to call a tow truck.”

    Nikolai·Osterman

    Don't Let a Stuck Filter Win

    Don't Let a Stuck Filter Win.

    At the end of the day, getting that old filter off isn’t about brute force; it’s about having the right leverage and the right tool in your hand. We’ve talked about everything from choosing a universal tool that actually fits to the specific tricks for when a filter is seized tight against the block. Remember, if you’re struggling, don’t just keep cranking and risk stripping the housing or cracking something else. Stop, take a breath, switch to a better wrench, and approach it with a bit of patience. Once you have the right setup, it’s just a matter of steady, controlled pressure until that seal finally breaks.

    Look, I know it can be intimidating when you’re staring down a greasy engine bay for the first time, but don’t let a little bit of oil and a stubborn bolt keep you from taking control. Every time you finish a job like this on your own, you’re proving that you don’t need to hand over your paycheck to a shop for something you can do in your own driveway. Keep practicing, keep learning, and trust your hands. You’ve got this, and honestly, there’s no better feeling than shutting the hood on a job well done and knowing you did it yourself.

    Frequently Asked Questions

    Should I use a strap wrench or a metal claw type if my filter is tucked in a really tight spot?

    If you’re dealing with a tight squeeze, go with the strap wrench. Those metal claw types are great when you’ve got room to swing, but they’re bulky and you’ll probably end up smashing your knuckles against the frame or a subframe. A strap wrench is much slimmer and lets you get a decent grip in those narrow gaps. Just make sure the strap is high-quality so it doesn’t slip and strip the filter.

    Is it worth buying a high-end tool, or can I just use a cheap one from the auto parts store for basic oil changes?

    Look, if you’re just doing routine oil changes on a standard sedan, don’t blow your paycheck on a professional-grade tool. A decent one from the auto parts store works just fine. But, if you’re working on something with a tight engine bay or a filter that’s been baked on for years, that cheap plastic one might just slip and strip the casing. Buy mid-range—it’s the sweet spot for reliability without the overkill.

    What do I do if the filter housing is plastic and I'm worried about cracking it with a wrench?

    Look, I’ve seen this happen way too many times in the shop. If you’ve got a plastic housing, stop using those heavy-duty metal strap wrenches immediately. You’ll crack it before you even loosen the seal. Grab a dedicated plastic-specific socket tool instead—they distribute the pressure way more evenly. If you’re stuck using what you’ve got, go slow and use hand pressure only. Don’t go full-force like you’re working on an old Chevy.

  • Importance of Using Jack Stands

    Importance of Using Jack Stands

    I still remember the sound of my dad’s old sedan groaning when a cheap, unbranded floor jack slipped while I was halfway under the chassis. I was twelve, covered in grit, and staring up at a ton of steel that felt way too close for comfort. That split second taught me more about mechanics than any textbook ever could: you don’t mess around with your life just to save a few bucks. Most people think they can just wing it with whatever’s in the trunk, but if you aren’t using high-quality jack stands, you’re basically playing Russian roulette with your car.

    I’m not here to sell you on some overpriced, professional-grade shop equipment that you’ll never use. My goal is to cut through the marketing fluff and show you exactly what you need to keep your skin intact while you’re working. I’ll break down the different styles, what to look for in terms of weight ratings, and how to set them up properly so you can focus on the repair instead of worrying about the car shifting. I’ve seen enough near-misses to know that safety isn’t a luxury—it’s the bare minimum.

    Table of Contents

    Decoding Weight Capacity Ratings Before You Lift

    Decoding Weight Capacity Ratings Before You Lift.

    When you’re browsing the aisles at a parts store or scrolling through gear online, you’re going to see a bunch of numbers thrown around. Don’t just grab the cheapest pair because they look “sturdy enough.” You need to actually understand those weight capacity ratings before you even think about getting under the chassis. It’s not just about the weight of the car itself; you have to account for the fact that you’re lifting a massive hunk of steel that’s concentrated on specific points. If you’re working on a lightweight tuner, a basic set might do, but if you’re tackling a heavy SUV, you need heavy duty garage equipment that won’t buckle under the pressure.

    I’ve seen guys try to wing it with stands that were rated for a sedan while working on a truck, and that’s how accidents happen. Always check the rating for a pair of stands, not just a single unit, because that’s how they’re usually sold and used. Whether you’re looking at ratchet vs pin style jack stands, the capacity is your absolute baseline for safety. If the math doesn’t add up, walk away from the purchase.

    Ratchet vs Pin Style Jack Stands What Actually Works

    Ratchet vs Pin Style Jack Stands What Actually Works

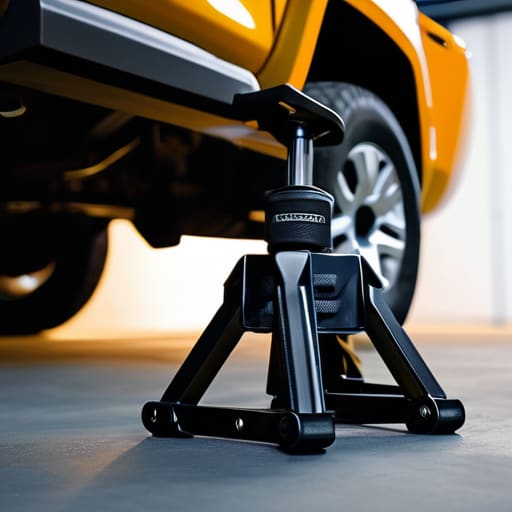
    When you’re staring at a wall of options at the hardware store, you’ll mostly run into two designs: the ratchet mechanism and the classic pin style. Ratchet stands are super popular because they’re fast. You just pump the handle, and the teeth click into place. They’re great for quick turnarounds, but I’ve always been a bit wary of them. If a tooth gets bumped or if there’s a bit of debris in the mechanism, you’re playing a risky game with your vehicle support stability.

    If you ask me, the pin style is the way to go if you actually care about peace of mind. You manually slide a solid steel pin into the desired height notch. There’s no mechanical “clicking” that could fail you; it’s just metal on metal. It takes a few extra seconds, but that’s a small price to pay for knowing your car isn’t going anywhere. When it comes to automotive lifting safety, I’ll take the extra effort of a pin every single time. It’s about removing as many points of failure as possible before you get under the chassis.

    5 Pro Tips to Keep You From Getting Crushed

    • Always, and I mean always, use jack stands. I’ve seen guys try to slide under a car held up by nothing but a hydraulic jack, and let me tell you, those seals fail without warning. A jack is for lifting; stands are for holding.
    • Double-check your contact points. Don’t just shove a stand under any random piece of metal you see. Look for the reinforced pinch welds or the designated frame rails. If you hit a floor pan or a hollow part of the subframe, you’re going to punch a hole right through it.
    • Get your weight distributed. If you’re pulling a heavy transmission or working on one side of the car, don’t just rely on one stand. Use two or even three if you need to stabilize the load. A wobbling car is a dangerous car.
    • The “Shake Test” is non-negotiable. Once the car is up on the stands, give the bumper a firm, intentional shove. If the car feels even slightly unstable or shifts on the stands, get back under the jack and reset everything. If it doesn’t pass the shake test, it’s not safe to crawl under.
    • Watch out for uneven ground. I’ve seen rookies try to set up shop on a driveway that slopes just a couple of degrees. Even a slight tilt can make a jack stand tip or slide. Find a flat, concrete spot—preferably something solid like a garage floor—before you even think about lifting.

    The Bottom Line: Don't Risk It

    Always double-check the weight rating on your stands against your actual vehicle weight; “close enough” is how people end up in the hospital.

    Pick a style—ratchet or pin—that you actually feel confident operating, because a stand is useless if you’re too nervous to trust it.

    Never, ever rely on a hydraulic jack alone to hold the car up while you’re working; the jack gets it up, but the stands keep you alive.

    The Golden Rule of the Garage

    Look, I’ve seen guys try to save five bucks by using whatever old, rusted-out stands they found in a corner, but let me tell you: a jack is for lifting, but a stand is for living. If you aren’t 100% sure those stands can hold your ride, stay out from under it.

    Nikolai·Osterman

    Don't Cut Corners on Your Safety

    Don't Cut Corners on Your Safety.

    At the end of the day, picking the right jack stands comes down to two things: knowing your vehicle’s weight and choosing a mechanism you actually trust. Whether you decide to go with the quick adjustment of a ratchet style or the rock-solid stability of a pin-style stand, just make sure you aren’t playing guessing games with your equipment. Check those capacity ratings one more time, ensure your surface is level, and for the love of everything, never, ever trust a hydraulic jack to hold the weight while you’re underneath. If you follow these basics, you’re already ahead of most of the people walking into a professional shop.

    I know it can feel intimidating when you’re staring at a massive hunk of steel and wondering if you’ve got the right setup, but that’s how you learn. Every time you get under a car safely, you’re building the confidence to tackle something even bigger next weekend. Don’t let the fear of making a mistake keep you from getting your hands dirty. Grab your tools, set your stands properly, and take control of your own machine. You’ve got this, and honestly, there’s no better feeling than knowing you did the work yourself without risking it all on a cheap shortcut.

    Frequently Asked Questions

    Is it actually safe to use jack stands on a concrete garage floor, or do I need a wood base to keep them from sinking?

    If your garage floor is solid, poured concrete, you’re usually fine. Most jack stands are designed for that. But here’s the thing: if you’re working on an older slab that’s cracking or if you’re on asphalt, those small metal feet can sink or tilt, and that’s when things get sketchy. I always keep a couple of scraps of 3/4-inch plywood handy. Spreading that weight out just gives me peace of mind.

    Can I mix and match different brands of jack stands, or is that asking for trouble?

    Look, I’ve seen guys try to save a few bucks by grabbing whatever’s on sale, but mixing brands is asking for trouble. Every manufacturer has different tolerances and build qualities. If one stand settles differently than the other, you’re looking at an uneven load that could shift or even collapse. Just stick to one matching set. It’s not worth the risk of your car—or you—ending up on the pavement.

    How do I know if I'm actually hitting the right jack point on my car without crushing a rocker panel?

    Look, I’ve seen too many guys panic when they hear that sickening crunch of a crushed rocker panel. Don’t wing it. Grab your owner’s manual—it’s the only source that actually matters for your specific chassis. If you can’t find it, look for those little notches or reinforced metal ribs under the side skirts. If you’re unsure, use a floor jack to lift it slightly first, find the solid spot, and then slide your stands under.

  • Testing Car Electrical Systems With a Multimeter

    Testing Car Electrical Systems With a Multimeter

    I remember sitting on my dad’s oil-stained garage floor when I was twelve, staring at a dead battery and feeling completely helpless. I thought I needed a whole new electrical system or a massive loan to fix it, but all I really needed was to understand how to use a multimeter. Most shops will try to tell you that an electrical issue means you need a whole new ECU or a massive wiring harness overhaul, charging you hundreds just to “diagnose” it. That’s a load of crap. Usually, it’s just a single bad ground or a blown fuse that you could have found in five minutes if you weren’t guessing in the dark.

    I’m not here to give you some textbook lecture on electrical engineering or sell you on a thousand-dollar piece of gear you’ll never use. My goal is to show you how to grab a decent multimeter, poke around the sensors and wires, and actually see what’s happening with your power supply. I’ll give you the straight truth on what to test and how to read the numbers, so you can stop getting ripped off and start trusting your own hands.

    Table of Contents

    Digital Multimeter vs Analog Choosing Your Real Tool

    Digital Multimeter vs Analog Choosing Your Real Tool

    When you’re staring at a wall of tools at the shop, you’ll see these two types of testers, and honestly, it can get confusing. The old-school analog versions use a needle that swings across a scale. Some veteran techs swear by them because they’re great for watching slow, steady fluctuations in voltage, but for most of us, they’re just a headache to read accurately. If you aren’t precise with your eyes, you’ll misread the scale and end up chasing a ghost in your wiring.

    For anyone starting out or just trying to get through a weekend project without losing their mind, go with a digital one. When you’re deep into automotive electrical troubleshooting, you need numbers you can actually trust. A digital display gives you a clear, steady reading, which makes tasks like continuity testing basics a whole lot easier. You aren’t guessing if that needle is on the 5 or the 10; you just see the exact decimal point. It’s more reliable, harder to mess up, and frankly, it’s just more efficient when you’re trying to find a short in a harness.

    Measuring Ac vs Dc Voltage Without Wasting Time

    Measuring Ac vs Dc Voltage Without Wasting Time

    This is where most people get stuck and end up blowing a fuse or, worse, damaging their meter. In a car, almost everything you’re touching—the battery, the starter, the fuel pump—runs on DC (Direct Current). If you leave your dial set to AC while poking at the battery terminals, you aren’t going to get a useful reading, and you’re just wasting your time. When you’re deep into automotive electrical troubleshooting, you need to be certain that your dial is pointed toward that straight line symbol.

    Now, don’t get confused; you will encounter AC (Alternating Current) if you start testing things like the actual wall outlets in your garage or certain specialized inverter systems. The key is to switch your settings to the wavy line icon for AC. I’ve seen guys struggle for an hour thinking a component was dead, only to realize they were just on the wrong setting. Mastering measuring AC vs DC voltage is basically the “don’t trip over your own feet” rule of electrical work. Get the setting right first, then start probing.

    Pro Tips to Keep You From Blowing a Fuse (Literally)

    • Always check your leads before you start poking around; if the insulation is cracked or the metal tips are corroded, you’re going to get garbage readings or, worse, a nasty shock.
    • Don’t just trust the first number you see—car electrical systems can be noisy, so take a few readings over a minute to make sure the voltage isn’t just jumping around.
    • If you’re testing a battery, make sure the car is off and everything is shut down; trying to test a live system while the alternator is cranking will just confuse your meter and your brain.
    • Keep your probes clean of grease and oil, especially when working in a shop like mine; a layer of gunk on the tip acts like an insulator and’ll make you think a circuit is dead when it’s actually fine.
    • Learn to read your continuity setting properly—it’s the fastest way to find a broken wire in a harness, but don’t use it on a live circuit unless you want to see your meter go up in smoke.

    The Bottom Line: Don't Fly Blind

    Stick with a digital multimeter; analog tools are cool for nostalgia, but you need the precision and ease of a digital readout when you’re chasing a ghost in a wiring harness.

    Always double-check your settings—switching between AC and DC by mistake is the fastest way to get a junk reading or, worse, blow a fuse in your meter.

    Stop guessing which part is dead; use your meter to isolate the problem to a specific fuse, wire, or sensor so you aren’t throwing money at parts you don’t actually need.

    ## Stop Guessing, Start Testing

    “Look, you can spend three hours staring at a wiring harness praying for a miracle, or you can spend five minutes with a multimeter and actually see where the juice is stopping. Don’t let a mechanic charge you a hundred bucks just to tell you a fuse is blown—trust the numbers, not your gut.”

    Nikolai·Osterman

    Stop Guessing and Start Testing

    Stop Guessing and Start Testing with meters.

    Look, we’ve covered a lot of ground here. We talked about why you’re probably better off sticking with a solid digital multimeter instead of messing around with those old analog needles, and we broke down the difference between AC and DC so you don’t end up blowing a fuse—or worse, your meter. At the end of the day, whether you’re chasing a parasitic drain that’s killing your battery overnight or trying to see if a sensor is actually sending a signal, the goal is the same: get accurate data. Don’t just swap parts blindly hoping the car starts; use your meter to actually see what’s happening in the circuit.

    I know it can feel a bit intimidating when you’re staring at a mess of wires and a screen full of numbers, but I promise you, it gets easier. Every time you use your multimeter to solve a mystery, you’re getting one step closer to being the person who knows their stuff. You don’t need to be a master electrical engineer to keep your ride on the road; you just need the right tool and the guts to use it. So, grab your meter, keep that patience high, and stop letting the mystery under the hood get the better of you. You’ve got this.

    Frequently Asked Questions

    Do I really need a high-end multimeter, or can I just get a cheap one from a hardware store to start?

    Look, I get it. You don’t want to drop a hundred bucks on a tool you might only use twice. If you’re just checking if a battery is dead or a fuse is blown, a cheap hardware store meter will get the job done. But if you’re digging into sensitive sensors or ECU wiring, those cheap ones can be wildly inaccurate. Grab something mid-range with a decent auto-ranging feature—it’ll save you more headaches than it costs.

    How do I know if I'm actually getting a reading or if my probes are just making bad contact with a corroded wire?

    That’s the million-dollar question. If your reading is jumping all over the place, you’re likely fighting corrosion. First, check your probe tips; if they look dull or crusty, clean them. Next, try scraping the wire insulation back a bit to hit fresh copper. If you’re still unsure, use a jumper wire to bypass the suspected bad connection. If the reading stabilizes, you’ve found your culprit. Don’t trust a floating number.

    Can I use a multimeter to find a parasitic drain that's killing my battery overnight?

    Yeah, you definitely can, and honestly, it’s way better than just buying a new battery every month. If your car’s sitting dead in the morning, you’ve likely got a parasitic drain—something’s staying awake when it should be sleeping. Set your meter to Amps, pull a fuse to isolate circuits, and see what’s pulling juice. It takes a little patience, but it’ll save you a massive headache (and a tow truck).

  • Benefits of Using an Impact Wrench

    Benefits of Using an Impact Wrench

    I still remember the first time I tried to swap out a brake caliper on my old sedan in my dad’s garage. I spent forty-five minutes sweating, cursing, and nearly snapping a lug nut because I was trying to muscle everything with a standard breaker bar. My knuckles were shredded, and I felt like a total amateur. That was the day I realized that brute force is a lie; you don’t need bigger muscles, you just need a decent impact wrench to do the heavy lifting for you. There is nothing quite like that sudden, sharp rat-tat-tat sound when a stubborn, rusted bolt finally gives up the fight and spins free.

    Look, I’m not here to sell you on some overpriced, professional-grade pneumatic setup that costs more than your first car. I’ve spent enough time under hoods to know that most of the “must-have” gear lists out there are just ways to empty your wallet. My goal is to give you the straight truth about what actually works for a DIYer. I’m going to break down which models are worth your hard-earned cash and which ones are just expensive paperweights, so you can get back to fixing your ride without the headache.

    Table of Contents

    Battery Powered vs Pneumatic Impact Tools Pick Your Fighter

    Battery Powered vs Pneumatic Impact Tools Pick Your Fighter

    If you’re setting up a home garage, you’re eventually going to face the classic debate: battery powered vs pneumatic impact tools. I remember when my dad only ever used air lines. Pneumatic tools are the old-school heavyweights—they’re lightweight, incredibly fast, and you never have to worry about a battery dying halfway through a brake job. But man, those hoses are a pain. You’re constantly tripping over them or hunting for a compressor that actually has enough CFM to keep up with you.

    On the flip side, cordless tech has come a long way since I started out. Nowadays, I find myself reaching for my subcompact cordless impact drivers more often than not. They give you total freedom to move around the car without being tethered to a wall or a tank. The downside? You have to be mindful of your battery life and make sure you’re using automotive socket sets for impact use so you don’t shatter a cheap chrome socket when the tool hits full power. If you want pure, raw muscle for the heavy stuff, go air; if you want to actually enjoy your Saturday afternoon, go cordless.

    High Torque Fastening Solutions for the Diyer

    High Torque Fastening Solutions for the Diyer

    Look, if you’re moving past basic oil changes and starting to tackle things like suspension components or lug nuts, you can’t just wing it with whatever cheap tool you found in a clearance bin. You need real high torque fastening solutions that won’t strip your bolts or leave you stranded halfway through a job. I’ve seen too many guys try to force a low-end tool onto a seized axle bolt, only to end up snapping the head clean off. It’s a nightmare you don’t want to deal with on a Saturday afternoon.

    When you’re dealing with heavy-duty hardware, the most important thing to remember is that more power isn’t always better—it’s about control. You have to actually pay attention to the torque specifications for impact wrenches provided by the manufacturer, especially on critical parts like cylinder head bolts. If you just pull the trigger and hope for the best, you’re asking for trouble. Grab a decent set of automotive socket sets for impact use to match your power, and you’ll actually be able to finish the job without breaking your tools or your spirit.

    5 Ways to Not Ruin Your Car (or Your Hands) Using an Impact Wrench

    • Don’t go full throttle immediately. If you’re working on something delicate, like a bracket near a sensor, start with short bursts. You don’t want to snap a bolt head off just because you were too eager to get the job done.
    • Use impact-rated sockets only. I’ve seen guys try to use their shiny chrome set from the kitchen drawer, and let me tell you, those things can shatter like glass under the vibration. Get the black oxide impact sockets—they’re built for the abuse.
    • Watch your torque settings. Just because the tool can rip a bolt out doesn’t mean it should. If you’re tightening things back up, always double-check your specs. Over-tightening is just as bad as leaving something loose, and it’s a massive headache to fix later.
    • Keep your workspace clean. If you’re using a pneumatic wrench, make sure your air lines aren’t leaking and your compressor is drained. Nothing kills my mood faster than a tool losing power halfway through a job because of some moisture in the line.
    • Listen to the tool. A good impact wrench has a rhythm. If it starts sounding weird—like it’s struggling or hitting a metal-on-metal grind that doesn’t sound right—stop. It’s usually a sign that you’re either hitting a seized bolt or the tool itself is crying for help.

    The Bottom Line Before You Start Wrenching

    Don’t get blinded by big torque numbers on the box; what actually matters is whether the tool fits your workspace and if you can actually control it without snapping a bolt.

    If you’re working in a home garage without a massive air compressor setup, just go cordless—the convenience and freedom to move around the car are worth every penny.

    Investing in a decent impact wrench isn’t about being fancy, it’s about saving your knuckles and your sanity when you’re dealing with years of road salt and rust.

    The Real Cost of Skipping This Tool

    You can spend two hours sweating and swearing over a seized lug nut with a breaker bar, or you can spend two seconds with a decent impact wrench and get back to actually enjoying your build. Don’t let a stubborn bolt ruin your entire weekend.

    Nikolai·Osterman

    Don't Let a Rusty Bolt Win

    Don't Let a Rusty Bolt Win.

    Look, choosing the right impact wrench isn’t about buying the most expensive tool on the shelf just because it has a flashy brand name. It’s about knowing your setup. If you’ve got a dedicated garage space and a compressor, those pneumatic tools are going to give you unmatched longevity and power. But if you’re working out of a small driveway or a cramped apartment garage like I used to, a solid cordless brushless model is going to be your best friend. You’ve weighed the torque requirements, you’ve decided between air and battery, and you’ve looked at the budget. Now, it’s time to stop researching and actually start turning wrenches.

    At the end of the day, the goal isn’t to own a massive collection of tools; it’s to have the confidence to open your hood and say, “I can handle this.” There is a specific kind of satisfaction you get when you crack a seized bolt loose without breaking a sweat, and that feeling is worth every penny you invest in your gear. Don’t let the complexity of modern cars intimidate you. Grab your tools, stay patient, and remember that every pro mechanic started exactly where you are right now. You’ve got this.

    Frequently Asked Questions

    Do I really need a high-torque model for basic brake jobs, or is that just overkill?

    Look, for a standard brake job, a massive high-torque beast is definitely overkill. You’re mostly just dealing with caliper bolts and maybe a couple of stubborn bracket screws. If you show up with a heavy-duty monster, you’re just gonna end up snapping something because you’ve got too much power for a small bolt. Grab a mid-range cordless model instead. It’s enough muscle to get the job done without turning a simple brake swap into a nightmare.

    If I go with a cordless one, how much battery life am I actually going to get before I'm stuck mid-job?

    Look, I’ve been stuck mid-job more times than I’d like to admit. If you’re running a standard 5.0Ah battery, you’ll usually get through a decent brake job or swapping out some suspension components without sweating it. But if you’re hammering away at heavy-duty subframe bolts all day, expect that juice to drain fast. My advice? Don’t cheap out on the batteries. Grab a high-capacity one so you aren’t staring at a dead tool while your car’s in pieces.

    Will an impact wrench strip out my bolts if I'm not careful, or is it safe for everything under the hood?

    Look, I’ll be real with you: yeah, you can absolutely wreck a bolt if you’re careless. An impact wrench has a ton of raw power, and if you just hammer away at a tiny sensor bolt or something fragile, you’re going to have a bad time. My rule of thumb? Use the impact for the heavy, rusted stuff like lug nuts or suspension bolts. For anything delicate, stick to a hand ratchet. Just don’t go full throttle on everything.

  • Essential Socket Set Guide

    Essential Socket Set Guide

    I still remember the first time I tried to swap out an alternator on my old Civic, thinking I could just wing it with a cheap, flimsy kit I found at a big-box store. Halfway through the job, I was stuck in the driveway, knuckles bleeding and sweating, because the one specific size I actually needed was missing from that useless junk pile. It’s a total scam when companies try to sell you those massive, 200-piece “everything but the kitchen sink” kits that are mostly just filler. You don’t need a mountain of cheap metal; you need a solid, reliable socket set that won’t strip your bolts the second things get tight.

    Look, I’m not here to sell you on some professional-grade tool chest that costs more than your car. My goal is to cut through the marketing noise and tell you exactly what’s worth your hard-earned cash and what’s just expensive clutter. I’m going to break down the different types of drives, the essential sizes you’ll actually use, and how to spot quality before you swipe your card. By the time we’re done, you’ll have the confidence to stop guessing and start getting the job done right.

    Table of Contents

    Metric vs Imperial Socket Sets Knowing the Truth Under Your Hood

    Metric vs Imperial Socket Sets Knowing the Truth Under Your Hood

    Here is the deal: if you walk into a shop and start grabbing random tools, you’re going to strip a bolt before you even realize what happened. Most modern cars—especially the Japanese tuners I spend my weekends messing with—are almost entirely metric. If you’re working on something newer, you’re going to be living in that world of 8mm to 22mm. But don’t go thinking you can ignore the imperial stuff entirely. If you ever find yourself tinkering with an old American muscle car or a vintage truck, you’ll realize pretty quickly that a 13mm won’t save you when you actually need a 1/2 inch.

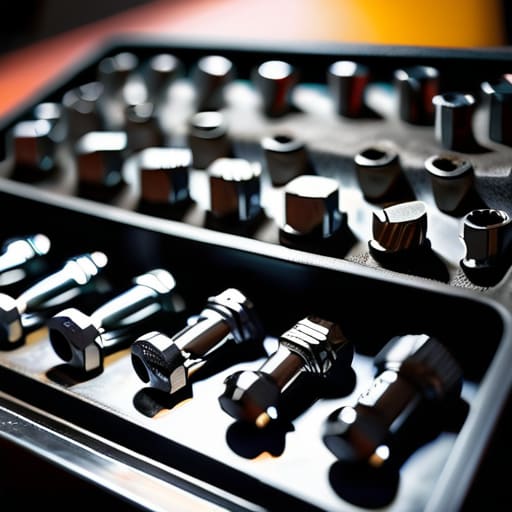
    When you’re building out your automotive tool kits, you really need to decide if you’re going all-in on one or keeping a hybrid setup. I’ve seen guys try to “make it work” by using a slightly loose imperial socket on a metric bolt, and let me tell you, that’s the fastest way to turn a simple fix into a nightmare. Don’t be that guy. It’s better to invest in a decent set that covers both bases so you aren’t stuck halfway through a job because your tool choice was “close enough.”

    Deep Socket vs Shallow Socket the Tools That Actually Get Results

    Deep Socket vs Shallow Socket the Tools That Actually Get Results

    If you’ve ever been halfway through a job only to realize you can’t reach a bolt because there’s a frame rail or a coolant hose in the way, you’ve learned the hard way why you need both. Shallow sockets are your go-to for most basic stuff—changing oil pans or working on exposed components where space isn’t an issue. They’re quick, easy to maneuver, and keep your profile low. But don’t let that fool you into thinking they’re the only ones you need in your automotive tool kits.

    That’s where the deep socket comes in. When you’re dealing with long threaded studs or bolts buried deep inside an engine bay, a shallow socket just won’t cut it. You need that extra length to seat the tool properly so you don’t round off the edges of the fastener. I’ve seen way too many beginners strip a bolt because they tried to use a shallow socket on something that clearly needed more reach. Mastering the deep socket vs shallow socket distinction is honestly one of the easiest ways to stop fighting your car and start actually fixing it.

    Don't Waste Your Cash: 5 Ways to Build a Kit That Actually Works

    • Don’t buy those cheap, massive 200-piece sets from the big-box stores. Half of those sockets are sizes you’ll never touch, and the metal is so soft you’ll round off a bolt head within the first week. Get a smaller, high-quality set instead; I’d rather have ten tools that don’t strip my fasteners than a hundred that do.
    • Invest in a decent ratchet with a high tooth count. There is nothing more frustrating than being wedged into a tight engine bay with only two inches of clearance and having a ratchet that skips every time you try to turn it. You want something that engages instantly so you aren’t fighting the tool more than the bolt.
    • Get yourself some extensions and a universal joint (swivel). You’re going to run into situations where there’s a bracket or a hose blocking your direct line of sight. If you don’t have a way to reach around obstacles, you’re just going to end up swearing at a piece of plastic instead of actually fixing the car.
    • Keep your sockets organized from day one. I learned this the hard way in my dad’s garage—losing a 10mm socket mid-job is a nightmare that kills your momentum. Use a socket rail or a dedicated tray. If you don’t know exactly where your tools are, you’re going to spend more time hunting than wrenching.
    • Always check the fit before you put your weight into it. If the socket feels “loose” or wobbly on the bolt, stop immediately. That’s how you end up with a rounded-off head that requires an extractor kit and two hours of extra headache. If it doesn’t seat perfectly, find the right size or walk away.

    The Bottom Line Before You Start Wrenching

    Stop wasting money on massive, 300-piece kits that are mostly junk; focus on getting a solid selection of metric and imperial sockets in both deep and shallow lengths.

    Always check your car’s specs before buying—if you’re working on a Japanese tuner, you’re going to live and die by your metric set.

    Don’t get stuck halfway through a job because you’re missing a specific depth; having both deep sockets for recessed bolts and shallow ones for tight spaces is the only way to actually finish what you started.

    The Real Cost of a Cheap Set

    I’ve seen too many people buy some cheap, no-name socket set just to save twenty bucks, only to have a stripped bolt or a rounded-off nut turn a ten-minute fix into a three-hour nightmare. At the end of the day, you aren’t just buying metal; you’re buying the confidence that when you pull that wrench, the bolt actually turns instead of snapping off in the engine block.

    Nikolai·Osterman

    Getting Your Hands Dirty

    Getting Your Hands Dirty with basic tools.

    Look, at the end of the day, you don’t need a massive, overpriced rolling chest full of every tool ever made to get through a weekend project. It really comes down to the basics we just talked about: knowing whether you’re grabbing metric or imperial so you don’t strip a bolt, and picking between deep or shallow sockets so you aren’t fighting a losing battle against a tight engine bay. If you invest in a decent set that covers these fundamentals, you’re already ahead of 90% of the people who walk into a shop and just hand over their keys because they’re intimidated. Don’t let a lack of specialized gear stop you from making a simple fix.

    My dad always told me that the most important tool in the garage isn’t the one that costs the most; it’s the one you actually know how to use. Every time you successfully torque down a bolt or swap out a sensor yourself, you’re taking a bit of that power back from the big shops. It might be frustrating when a socket slips or you realize you’re one size off, but that’s just part of the learning curve. Keep showing up, keep learning, and keep wrenching. Once you realize that most of what’s under the hood is just a series of manageable problems, you’ll realize you’ve been in control the whole time.

    Frequently Asked Questions

    How do I know if I should buy a single ratchet or a full socket set to start with?

    Look, if you’re just starting out, don’t waste your money on a single ratchet. You’ll get halfway through a job, realize you’re missing a 10mm, and then you’re stuck staring at a bolt you can’t turn. It’s frustrating and a total time-sink. Grab a decent starter set. It’s more upfront cash, but having all those sizes in one organized case saves you from the “missing socket” headache every single time.

    Is it actually worth spending more on a high-end brand, or can I get away with the cheap stuff from a big-box store?

    Look, I’ll give it to you straight: don’t go buying a $500 professional kit on day one, but stay away from those $10 mystery sets from the big-box aisles. They’ll round off your bolts faster than you can say “oops.” Get something mid-range from a decent brand. You want tools that won’t snap when things get tight or greasy. Save your money for parts, but don’t cheap out on the things actually touching your engine.

    What’s the difference between a 1/4-inch, 3/8-inch, and 1/2-inch drive, and which one do I actually need for most jobs?

    Think of drive size as the muscle behind your wrench. The 1/4-inch is your small-scale specialist—perfect for tight engine bays and delicate sensors where you don’t want to snap anything. The 3/8-inch is the real MVP; it’s the sweet spot for about 80% of everything I do. Then you’ve got the 1/2-inch, which is pure brute force for lug nuts and suspension bolts. If you’re just starting, grab a solid 3/8-inch set first.