I remember sitting in my dad’s garage when I was twelve, staring at a spongy brake pedal that felt more like a marshmallow than a safety feature. My old man was swearing under his breath because we’d been pumping the pedal for twenty minutes, but we were just chasing air bubbles around the lines like crazy. That was the moment I realized that most people think you need a professional shop setup to do a proper flush, but that’s a total lie. Honestly, you don’t need a specialized hydraulic rig to get the job done; you just need a decent brake bleeder kit and a bit of patience to stop those bubbles from coming back.
In this guide, I’m going to strip away all the technical jargon and show you how to actually use your gear without making a massive mess on your driveway. I’ll walk you through the different types of kits out there so you don’t waste your hard-earned money on junk that leaks, and I’ll give you my personal workflow for getting every last bit of air out of the lines. By the time we’re done, you’ll have the confidence to handle your own brakes like a pro.
Table of Contents
- Step-by-Step Instructions
- Mastering the Brake Line Bleeding Process Without the Stress
- Using a Vacuum Brake Bleeder Tool Like a Pro
- Pro Tips to Keep You From Ruining Your Brakes
- The Bottom Line on Bleeding Your Brakes
- ## Don't Let Air in the Lines Cost You
- Don't Leave Your Safety to Chance
- Frequently Asked Questions
Guide Overview
Tools & Supplies
- Brake bleeder kit (vacuum pump or pressure bleeder)
- Wrench or spanner (to loosen bleeder valve)
- Container (to catch old fluid)
- Rags (to clean spills)
- Fresh brake fluid (correct DOT rating per manual)
- Clear plastic tubing (to fit bleeder valve)
- Nitrile gloves (to protect skin from chemicals)
Step-by-Step Instructions
- 1. Before you even touch a wrench, you need to get your workspace ready and grab some fresh brake fluid. Don’t go digging through the back of your cabinet for old, crusty bottles; brake fluid is hygroscopic, meaning it sucks moisture out of the air, so always use a fresh, sealed bottle. Make sure you have your bleeder kit, a clear tube that fits tight on the nipple, and a catch container ready to go.
- 2. Start by jacking up the car and getting it stable on jack stands. Never, and I mean never, work on a car supported only by a hydraulic jack. Once you’re set, find the bleeder valve on the caliper. It’s usually a small metal nipple sticking out of the brake assembly. Wipe it down with a clean rag first so you don’t accidentally force any dirt or grit into your brake lines when you open it up.
- 3. Take your clear tubing from the kit and slide one end over the bleeder nipple. Put the other end into your catch container, making sure the end of the tube is submerged in a little bit of old fluid or just sitting at the bottom. This prevents air from being sucked back into the system through the tube, which is a rookie mistake that’ll leave you doing the whole job twice.
- 4. Now, get an assistant to sit in the driver’s seat. They need to pump the brake pedal several times to build pressure and then hold it down firm at the very bottom. While they are holding that pressure, you go ahead and slowly crack the bleeder valve open with your wrench. You’ll see old, dark fluid and air bubbles rushing through the clear tube.
- 5. Once the flow slows down, close the valve immediately before your assistant lets go of the pedal. If they release the pedal while the valve is still open, you’ll suck a huge gulp of air right back into the lines, and you’ll have to start the whole process over again. This is the part where most people lose their patience, so just stay in sync with your helper.
- 6. Repeat this “pump, hold, open, close” cycle until the fluid coming through the tube looks clean and, more importantly, shows zero air bubbles. You want that fluid to look like fresh honey, not a foamy milkshake. It’s a repetitive process, but if you rush it, you’re going to end up with a spongy pedal that feels like stepping on a marshmallow.
- 7. Once you’ve cleared the air from all four corners (always start with the wheel furthest from the master cylinder), top off your reservoir with the new fluid you opened earlier. Check the level one last time, pump the brakes a few times to seat everything, and test the pedal feel before you even think about driving. If it feels firm, you’re good to go.
Mastering the Brake Line Bleeding Process Without the Stress
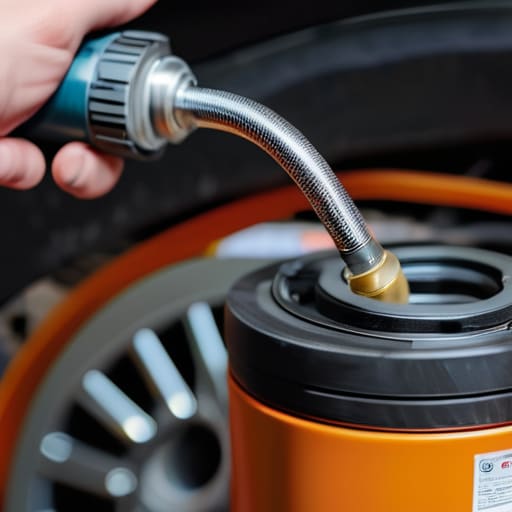
Look, the biggest headache during the brake line bleeding process isn’t usually the mechanics—it’s the tiny air bubbles that sneak back in when you aren’t looking. If you’re doing this the old-school way with two people, you have to be perfectly in sync. If the person pumping the pedal lets up before you close that bleeder valve, you’ve just sucked air right back into the system. To avoid that frustration, I usually recommend investing in a decent vacuum brake bleeder tool. It lets you work solo and keeps the pressure consistent, which takes a massive amount of the guesswork out of it.
Another thing I’ve learned from working on everything from my dad’s old sedans to modern sensor-heavy builds is that patience is your best tool. Don’t rush the brake fluid replacement procedure just to get finished. If the pedal still feels spongy, you haven’t finished the job. You want that firm, responsive pedal feel that tells you the system is actually safe. Take the extra ten minutes to cycle through the lines one more time; it’s better to be thorough now than to realize you missed a bubble when you’re halfway down the highway.
Using a Vacuum Brake Bleeder Tool Like a Pro
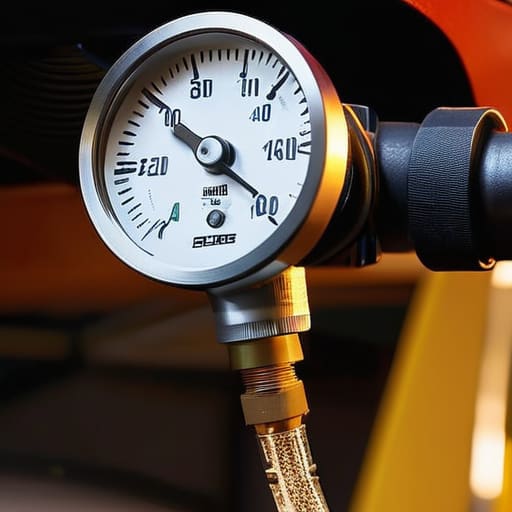
If you’re working solo and don’t have a buddy to pump the pedal for you, a vacuum brake bleeder tool is going to be your best friend. It basically does the heavy lifting by sucking the old fluid and air bubbles through the caliper yourself. The trick I’ve learned from messing around in my dad’s garage is to keep your eye on the vacuum gauge. If you see the pressure dropping too fast, you probably have a leak at the connection point. You want a steady, consistent pull to ensure you’re actually removing air from brake lines rather than just sucking in extra air through a loose fitting.
One thing most people mess up is letting the master cylinder run dry during the process. If that reservoir hits empty, you’ve just sucked a massive gulp of air into the whole system, and you’ll have to start the entire brake fluid replacement procedure from scratch. I always keep a spare bottle of fluid on the fender and top it off every few minutes. It’s a little extra work, but it’s the only way to guarantee that firm, responsive pedal feel you’re actually looking for.
Pro Tips to Keep You From Ruining Your Brakes
- Don’t let that master cylinder run dry. If you let the reservoir get empty while you’re bleeding, you’re just sucking air back into the whole system, and then you’re starting from scratch. Keep an eye on the level like it’s your paycheck.
- Check your fittings before you start cranking. There’s nothing worse than getting halfway through a job only to realize your bleeder screw is rounded off or seized. A little penetrating oil goes a long way in preventing a massive headache.
- Use fresh fluid every single time. Don’t try to be cheap and reuse the old stuff sitting in a half-open bottle. Brake fluid is hygroscopic, meaning it sucks moisture out of the air, and old, wet fluid is exactly what’s killing your brake performance.
- Make sure your connections are airtight. If you’re using a vacuum bleeder, even a tiny leak in the hose or the adapter will make the whole process useless. If you see bubbles that aren’t coming from the caliper, you’ve got a leak in your kit.
- Clean the area around the bleeder screw before you touch it. You don’t want decades of road grime and salt falling straight into your brake lines the second you crack that valve open. A quick wipe with some brake cleaner saves you a lot of mess later.
The Bottom Line on Bleeding Your Brakes
Don’t go overboard on expensive gear; a decent manual bleeder kit or a solid vacuum pump is all you really need to get the job done right.
Air is your biggest enemy—if you feel even a tiny bit of sponge in the pedal, you haven’t finished the job, so keep at it until it’s firm.
Always keep an eye on your brake fluid reservoir while you’re working; letting it run dry halfway through is a fast way to suck air back into the whole system and restart your headache.
## Don't Let Air in the Lines Cost You
Look, a brake bleeder kit isn’t some luxury item for guys with fancy shops; it’s the difference between a pedal that feels solid and one that feels like you’re stepping into a sponge. Don’t waste your money paying a mechanic to do what you can do in your own driveway with the right tool and a little bit of grit.
Nikolai·Osterman
Don't Leave Your Safety to Chance
Look, at the end of the day, bleeding your brakes isn’t some high-level wizardry that requires a shop full of expensive pneumatic tools. Whether you decided to go the traditional route with a buddy pumping the pedal or you invested in a solid vacuum bleeder to do the heavy lifting for you, the goal is the same: zero air in those lines. Just remember to keep a close eye on your master cylinder reservoir so you don’t suck air back in halfway through, and always double-check your connections. If you’ve followed the steps and your pedal feels firm and responsive, you’ve done the job right.
I know it can feel intimidating when you’re staring down a brake line for the first time, but don’t let that stop you. Every time you pick up a wrench and tackle a job yourself, you’re taking back control from the shops that try to charge you a premium for things you can do in your own driveway. It’s about more than just saving a few bucks; it’s about the confidence that comes from knowing your car is safe because you were the one who worked on it. Grab your tools, keep your workspace clean, and just keep turning. You’ve got this.
Frequently Asked Questions
Is it actually worth spending the extra cash on a vacuum bleeder, or can I just stick to the old-school two-person method?
Look, if you’ve got a buddy who doesn’t mind getting yelled at while they pump the pedal, the old-school way works fine. It’s free, and it gets the job done. But if you’re working solo or doing a full system flush, a vacuum bleeder is a lifesaver. It saves you the headache of chasing air bubbles and keeps things consistent. If you can swing the extra cash, get the vacuum tool. Your sanity is worth it.
How do I know if I've actually gotten all the air out of the lines, or if I'm just wasting my time?
Look, I’ve been there—standing there pumping the pedal for twenty minutes wondering if I’m actually doing anything. The real test is the pedal feel. If it’s still spongy or sinks straight to the floor, you’ve still got air bubbles hiding in the lines. You want it to feel firm, like you’re pushing against a brick wall. If you’re using a vacuum bleeder, keep going until that fluid coming out is crystal clear and bubble-free.
Can I use any random brake fluid I have lying around, or am I going to ruin my seals if I don't get the specific type?
Look, don’t do that. I’ve seen guys try to save a few bucks by grabbing some old bottle from the garage, and it’s not worth the headache. Using the wrong fluid—like mixing DOT 3 with DOT 5—can wreck your seals and turn your brake system into a gummy mess. Check your owner’s manual or the reservoir cap; it’ll tell you exactly what you need. Just get the right stuff. It’s cheaper than a full rebuild.
