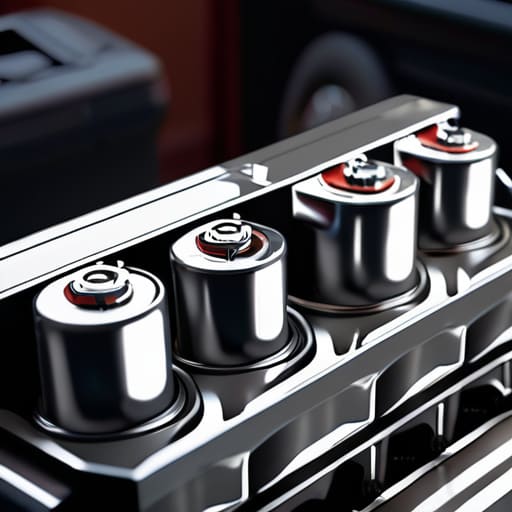
I remember sitting in my dad’s driveway when I was twelve, staring at a dead sedan and feeling that sinking pit in my stomach because I thought a simple battery replacement was going to cost me a week’s worth of allowance at the local shop. I could smell the faint, metallic tang of old acid and hear that dreaded, hollow click-click-click of a starter motor that just couldn’t find the strength to turn. Most shops will look at you like you’re clueless and try to tack on a “diagnostic fee” just to tell you what you already know: your battery is toast. It’s a total racket, and honestly, it’s one of the easiest ways people get ripped off for something you can do in your own driveway with a single wrench.
I’m not here to give you some textbook lecture or a list of overly complicated warnings that make you feel like you’re handling live explosives. My goal is to walk you through this process exactly how I do it at the shop—straightforward, dirty hands included. I’m going to show you the real-world steps to get that new unit in safely and correctly so you can stop overpaying for basic maintenance.
Table of Contents
Learning How to Test Battery Voltage Yourself

Before you go dropping a hundred bucks on a new unit, you need to figure out if the battery is actually toast or if something else is acting up. I’ve seen plenty of guys rush into a purchase when the real issue was just a loose connection or a bad ground. The best way to start is by grabbing a multimeter. Set it to DC voltage and touch the probes to the terminals while the engine is off. A healthy, fully charged battery should sit somewhere around 12.6 volts. If you’re seeing numbers significantly lower than that, you’re looking at one of the clearest signs of a dying car battery.
If the voltage looks okay while the car is sitting, crank the engine and watch that screen again. If the reading drops like a stone while the starter is turning, that’s a massive red flag. You also want to check the voltage while the engine is running to distinguish between alternator vs battery symptoms. If you see a steady jump to around 14 volts, your charging system is doing its job. If not, you might have a bigger electrical headache on your hands than just a simple swap.
Is It the Alternator vs Battery Symptoms

This is where a lot of people get stuck and end up paying for a part they don’t actually need. I’ve seen it a dozen times at the shop: a customer comes in thinking they need a whole new unit, but the real culprit is actually the charging system. One of the biggest tells when trying to figure out alternator vs battery symptoms is how your lights behave. If your headlights dim or flicker while you’re idling, but they brighten up significantly when you rev the engine, that’s a massive red flag that your alternator isn’t pushing enough juice back into the system.
On the flip side, if your car just won’t crank or sounds like it’s struggling through mud, you’re likely looking at the signs of a dying car battery. A bad alternator usually kills a battery eventually because it can’t keep it topped off, but a dead battery won’t fix a broken alternator. If you’ve already checked your voltage and it’s steady while the engine is running, stop chasing your tail looking for a battery issue—it’s time to look at that alternator.
Pro Tips to Keep You From Making a Mess of It
- Always disconnect the negative terminal first. I know it sounds backwards, but if your wrench touches the car’s metal frame while you’re loosening the positive side, you’re going to see some nasty sparks and potentially fry your electronics.
- Clean those terminals like you actually care about your car. If they’re covered in that white, crusty acid buildup, grab a wire brush and some baking soda water. A bad connection is just as useless as a dead battery.
- Don’t just shove the new battery in and call it a day. Make sure the hold-down bracket is tight. If that battery can wiggle, it’s going to vibrate, and vibration is the fastest way to kill a new cell.
- Check your vent tubes if your car uses them. Some setups have a small tube to vent gases away from the cabin. If you forget to reconnect that little piece of plastic, you’re basically turning your car into a gas leak waiting to happen.
- Grab a cheap multimeter while you’re at it. Once the new battery is in, check the voltage while the engine is running. If it’s not sitting somewhere between 13.7 and 14.7 volts, your alternator is the real problem, not the battery you just bought.
The Bottom Line on Your Battery
Don’t just assume it’s a dead battery when your car won’t start; use a multimeter to check your voltage first so you don’t waste money replacing parts that actually work.
If you notice your lights dimming or your electronics acting glitchy while you’re driving, it’s likely your alternator acting up rather than the battery itself.
Swapping a battery is one of the easiest ways to save a massive chunk of cash, so don’t let the fear of a little grease and a wrench keep you from doing it yourself.
## Don't Let a Dead Battery Hold You Hostage
“Most shops will try to tell you it’s some high-tech electrical nightmare just to pad the bill, but honestly? A battery is just a box of chemicals and some terminals. If you can handle a wrench and follow a simple diagram, you can save yourself a hundred bucks and do it yourself.”
Nikolai·Osterman
Wrapping It All Up

Look, at the end of the day, it’s all about knowing the difference between a dead cell and a failing alternator before you start throwing money at parts you don’t need. We covered how to check your voltage and how to spot those tell-tale symptoms that scream “new battery needed.” If you’ve done the math and confirmed the battery is the culprit, you’re already halfway there. Just remember to keep your terminals clean and double-check your connections before you tighten everything down. It’s a simple process, but if you rush it, you’re just asking for a headache later on. Don’t let the complexity of modern electrical systems scare you off; once you master the basics, the rest is just mechanical muscle memory.
I know it feels a bit intimidating the first time you pop that hood and stare at a mess of wires, but trust me, you’ve got this. Every time you handle a repair yourself, you’re taking back control from the shops that want to charge you a premium for a twenty-minute job. My dad always told me that the best way to learn is to get your hands dirty, and he was right. You don’t need a fancy diagnostic computer to be your own mechanic; you just need a bit of patience and the right tools. So, grab that wrench, clear some space in the driveway, and stop overpaying for the basics.
Frequently Asked Questions
Do I need to worry about my car's computer settings resetting once I disconnect the terminals?
Honestly, you might see a few annoying glitches, but don’t sweat it. When you pull the terminals, the ECU loses its “memory,” so you might notice your radio presets are gone or your idle feels a little funky for the first few miles. Sometimes, window auto-up/down features need a quick reset, too. It’s not a blown computer; it’s just the car re-learning its settings. Give it a drive, and it’ll settle back down.
How do I know if I should just replace the battery or if my cables are too corroded to fix?
Look, don’t just throw money at a new battery if your cables are trashed. If you see that nasty white or blue crusty buildup, try cleaning it first with some baking soda and water. But here’s the real test: if the wires feel brittle, look cracked, or the metal terminals are actually rotting away, cleaning won’t save them. In that case, swap the cables too. Otherwise, you’re just putting a fresh battery on a bad connection.
Is there a specific order I should follow when hooking up the new battery so I don't cause a spark?
Look, if you want to avoid that annoying spark or, worse, a fried sensor, there’s a specific way to do this. When you’re installing the new one, always connect the positive (red) terminal first, then the negative (black). When you’re taking the old one out, it’s the exact opposite—negative first. Just remember: “Positive in, Negative out.” It feels a bit backwards, but it keeps you from accidentally grounding out and shorting something expensive.
