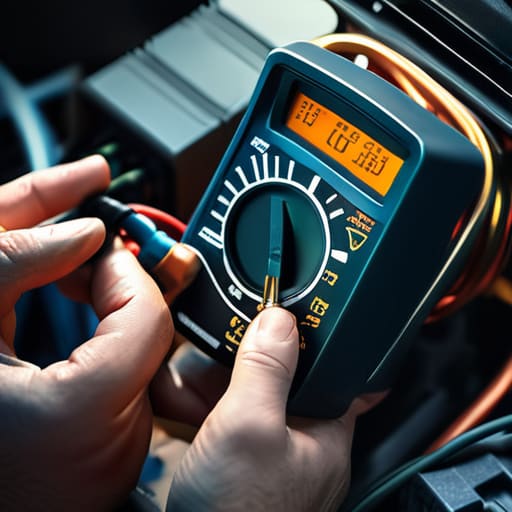
I remember sitting in my driveway last summer, staring at my old Silvia after it refused to turn over for the third time in a week. My buddy told me I needed a brand new alternator and a couple hundred bucks to fix it, but something felt off. Instead of just handing over my cash, I pulled out my multimeter to run some proper alternator testing right there on the concrete. It turns out, the alternator was fine—it was just a loose, corroded ground wire that was messing with the voltage. Most shops will try to sell you a whole new assembly when all you really need is a clean connection and a little bit of diagnostic logic.
I’m not here to give you a lecture or some textbook theory that doesn’t apply to a real-world garage. This guide is about getting you in and out of your driveway with the right answers. I’m going to show you exactly how to use a multimeter to confirm if your charging system is actually dying or if you’re just being sold a bill of goods. We’ll walk through the voltage checks and load tests step-by-step so you can stop guessing and start fixing.
Table of Contents
Guide Overview
Tools & Supplies
- Multimeter for measuring voltage and continuity
- Battery charger or jump starter to ensure stable base voltage
- Work light to illuminate engine bay components
- Rag or microfiber cloth 1 quantity
- Safety glasses 1 pair
Step-by-Step Instructions
- 1. Before you even pop the hood, grab a decent multimeter—the cheap kind works, but don’t expect it to be surgical. Make sure your car is turned off and you’ve got enough space to move around the engine bay without hitting anything sharp. If you’re working on a tuner or something low to the ground, watch your head because you’ll be leaning in deep.
- 2. Start with a baseline reading by checking your battery while the engine is off. Set your multimeter to DC voltage and touch the probes to the battery terminals; you’re looking for a reading around 12.6 volts. If your battery is already sitting below 12 volts while the car is dead, you might not even have an alternator problem—you might just have a dying battery that needs replacing first.
- 3. Now, fire up the engine and let it idle for a minute so everything stabilizes. Switch your multimeter back to the DC voltage setting and touch the probes to the battery terminals again while the engine is running. A healthy alternator should be pushing that number up into the 13.5 to 14.7 volt range. If it stays stuck at 12 volts or starts dropping, your alternator isn’t doing its job.
- 4. If the numbers look okay at idle, let’s put it under some stress. Turn on the headlights, the AC on max, and the radio—basically, load up the electrical system like you would on a long night drive. Check the voltage again. If the reading dips significantly below 13 volts when all those accessories are pulling power, your alternator is struggling to keep up with the demand.
- 5. Next, we need to check for any physical red flags. While the engine is running, take a quick look at the serpentine belt and the alternator pulley. Listen for any screeching, grinding, or whining sounds. If you see the belt slipping or if the alternator itself sounds like it’s full of marbles in a blender, that’s a clear sign of mechanical failure that no amount of voltage testing can hide.
- 6. Finally, do a quick visual inspection of the wiring. Look for any corroded terminals or frayed wires leading to the back of the alternator. Sometimes the component is perfectly fine, but a loose or dirty connection is bottlenecking the power before it ever reaches your battery. Just make sure everything is tight and clean before you go out and drop a hundred bucks on a new unit.
Spotting the Real Signs of a Failing Alternator

Most people wait until their car won’t start in a grocery store parking lot before they even think about their charging system, but you can usually catch it way sooner. One of the biggest red flags is seeing your headlights flicker or dim when you’re idling at a stoplight. If your dashboard lights start acting possessed or you notice a weird, whining noise coming from the engine bay, that’s a massive hint. It’s basically your car’s way of telling you that the alternator output voltage is dropping below what the electronics need to stay stable.
Another thing to watch for is a battery that constantly dies, even after you’ve just replaced it. If you’re doing some automotive electrical system troubleshooting and realize the battery is fine but it just won’t hold a charge, the alternator isn’t doing its job of feeding it. Sometimes it’s not even a total failure; a faulty diode can cause “dirty” electricity that messes with your sensors. Don’t ignore these little glitches—catching them early means you’re just swapping a part instead of getting stranded on the shoulder.
Testing Alternator With Multimeter for Real Truths
Once you’ve got your multimeter set to DC volts, you’re basically looking for the truth that a dashboard light won’t tell you. Start with the engine off; you should see a reading around 12.6 volts, which is your battery’s baseline. When you crank the engine, that’s when the real magic—or the real headache—happens. You’re looking for a steady alternator output voltage somewhere between 13.5 and 14.7 volts. If that number stays flat or drops while the engine is running, you’ve caught the culprit red-handed.
Don’t stop there, though. If you want to be thorough with your automotive electrical system troubleshooting, try a quick load test. Turn on the headlights, the AC, and the radio all at once. This puts stress on the system, and if your voltage plunges below 13 volts under that load, your alternator is likely on its last legs. It’s a simple way to see if the unit can actually handle a real-world driving scenario or if it’s just faking a healthy reading when nothing is plugged in.
Pro Tips to Keep You From Wasting Time and Money
- Don’t just trust the dashboard lights; a flickering headlight or a dim cabin is often the first real sign your alternator is struggling to keep up before the battery dies completely.
- Always check your battery terminals for corrosion first—I’ve seen way too many people buy a brand new alternator only to realize they just had a crusty connection blocking the charge.
- If you’re testing with a multimeter, make sure the engine is actually running when you take your reading; testing a resting alternator won’t tell you if it can actually handle the electrical load under pressure.
- Keep an eye (and ear) out for a high-pitched whining noise coming from the engine bay, which usually means the internal bearings are shot and you’re on borrowed time.
- Grab a cheap belt tension tester or just give the serpentine belt a good squeeze; a slipping belt can mimic a bad alternator by preventing it from spinning at the right speed.
The Bottom Line on Your Alternator
Don’t let a mechanic talk you into a full replacement until you’ve actually verified the voltage with a multimeter; sometimes it’s just a loose belt or a dying battery.
If you notice your headlights dimming or your dashboard lights acting twitchy, stop ignoring it—that’s your car’s way of telling you the charging system is about to quit.
You don’t need a shop full of expensive diagnostic gear to get the job done, just a basic multimeter and the patience to check your connections properly.
## The Truth Under the Hood
“Don’t let a shop talk you into a thousand-dollar replacement just because a warning light popped up. Most of the time, the alternator isn’t dead—you just haven’t checked the connections or grabbed a multimeter to see what’s actually happening.”
Nikolai·Osterman
Don't Let a Dead Battery Stop You
Look, testing an alternator doesn’t have to be some mysterious ritual performed by a guy in a clean jumpsuit charging you a hundred bucks just to plug in a meter. We’ve covered the basics: keep an eye out for those dimming headlights or that annoying battery light, grab your multimeter, and actually verify the voltage instead of just guessing. Whether you’re checking the output while the engine is running or testing the battery under load, the numbers don’t lie. If you aren’t seeing that steady range between 13.5 and 14.5 volts, you’ve found your culprit. It’s about being methodical and using the right diagnostic steps to confirm the problem before you go out and drop a fortune on a brand-new part you might not even need.
At the end of the day, my goal is to make sure you feel confident enough to pop that hood yourself. There is a certain kind of satisfaction that comes from hearing your engine roar to life because you fixed it with nothing but a basic tool kit and a little bit of grit. Don’t let the complexity of modern cars intimidate you; they’re just machines, and you’re more than capable of handling them. Stop letting the fear of a breakdown or a massive repair bill keep you on the sidelines. Grab your tools, trust your process, and take control of your ride.
Frequently Asked Questions
If my multimeter shows the voltage is fine while the engine is running, could the alternator still be failing under a heavy load?
Yeah, absolutely. That’s a classic trap. A multimeter reading a steady 14 volts while idling doesn’t mean everything’s golden. The real test is when you throw a heavy load at it—crank the AC to max, turn on the headlights, and plug in a charger. If that voltage dips significantly under pressure, your alternator is struggling to keep up. It might pass the “easy” test but fail when you actually need it.
Can a bad battery actually trick me into thinking the alternator is the problem?
100%. This happens all the time in the shop. If your battery is shot or has a dead cell, it can’t hold a charge, which makes the alternator work overtime trying to compensate. You’ll see those weird voltage fluctuations on your multimeter and think the alternator is dying, but really, it’s just struggling to fill a broken bucket. Always test your battery’s health before you go dropping hundreds on a new alternator.
Is it worth trying to repair the internal brushes and voltage regulator, or am I better off just swapping in a whole new unit?
Look, if you’re working on a vintage tuner, go ahead and swap the brushes or the regulator. It’s satisfying and keeps the original unit intact. But for your daily driver? Honestly, just swap the whole unit. Modern alternators are packed with sensitive electronics, and once one part starts failing, the rest of the internal assembly is usually toast. Don’t waste your weekend chasing a ghost; just get a reliable replacement and move on.
