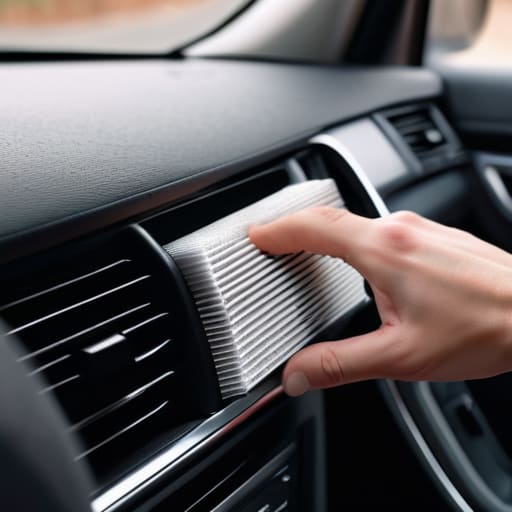
Ever notice how your car starts smelling like a damp basement the second you crank up the AC? Most shops will try to tell you it’s some deep-seated issue with your evaporator core or a massive leak in the system, but honestly, that’s usually just a way to pad the invoice. Nine times out of ten, you’re just breathing in dust and debris because you’re overdue for a simple cabin air filter replacement. I remember the first time I saw a customer get hit with a two-hundred-dollar bill for this; I almost lost it. It’s a total scam to charge that much for something that basically just sits in a plastic housing behind your glovebox.
I’m not here to give you some overly technical lecture or a manual that reads like a textbook. I’m going to show you exactly how to tackle this job yourself, from finding the clips to making sure you don’t accidentally snap any plastic tabs. You don’t need a specialized shop tool or a degree to get this done; you just need a few minutes and a little bit of patience. By the end of this, you’ll have cleaner air and a much heavier wallet.
Table of Contents
- Step-by-Step Instructions
- Spotting the Signs of a Dirty Cabin Filter Before Its Too Late
- Mastering Automotive Hvac Maintenance Without a Mechanics Degree
- Pro Tips to Keep Your Air Clean (Without Getting Ripped Off)
- The Bottom Line on Your Cabin Filter
- The Truth About Your HVAC
- Don't Let Them Fleece You
- Frequently Asked Questions
Guide Overview
Tools & Supplies
- Flashlight to locate the filter housing
- Screwdriver (if your vehicle requires removing a panel)
- Replacement cabin air filter (1 unit)
- Microfiber cloth or vacuum (1 unit for cleaning debris)
Step-by-Step Instructions
- 1. First, grab your owner’s manual or just do a quick search online for your specific make and model to see where yours is tucked away. On most cars, it’s hiding right behind the glove box, but in some of the older Japanese tuners I work on, it might be tucked under the dashboard near the passenger footwell. You don’t want to be tearing apart the dash blindly.
- 2. Once you’ve located it, open your glove box and look for the side bumpers or clips holding it in place. You’ll usually need to squeeze these inward to let the door drop down lower than its normal position. If it feels like you’re going to snap something, stop and look closer—there’s usually a little plastic tab you’re missing.
- 3. With the glove box hanging down, you should see a rectangular plastic cover. This is the housing for your filter. Most of the time, it’s just held on by two little plastic tabs that you can pop off with your fingers. Just be careful not to go too heavy-handed here, since that plastic gets brittle over time from the heat under the dash.
- 4. Slide the old filter out slowly. This is the part where you’ll probably see a bunch of leaves, dust, or even dead bugs that have been chilling in there for months. Pay close attention to the airflow arrows printed on the side of the old filter. You need to know which way the air was moving so you don’t install the new one backward.
- 5. Take a quick look inside the empty slot and use a vacuum or even just your hand to clear out any loose debris. You don’t want that old dirt falling onto your brand-new filter the second you slide it in. It’s a small but crucial step if you actually want the air to stay clean.
- 6. Take your fresh filter and slide it into the housing, making sure those airflow arrows are pointing in the same direction as the old one. It should fit snugly without you having to force it. If it’s buckling or bending, it’s probably facing the wrong way.
- 7. Finally, snap the plastic cover back into place until you hear it click, then lift your glove box back up and secure those side tabs. Give the fan a quick spin to make sure you aren’t smelling anything weird. If the air feels crisp and the box is back together, you’re officially done and just saved yourself a trip to the shop.
Spotting the Signs of a Dirty Cabin Filter Before Its Too Late
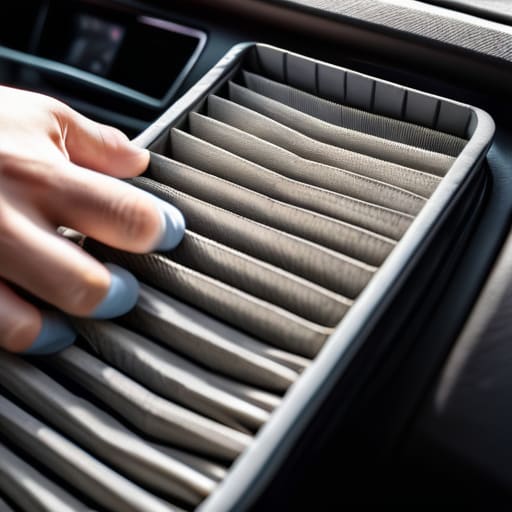
You don’t always have to wait for a scheduled service to know something is off. Honestly, your car will usually tell you when it’s struggling. The most obvious signs of a dirty cabin filter are when you turn on your AC or heater and notice a weird, musty smell—kind of like old gym socks—hitting you in the face. If you’re driving and notice the airflow feels weak or sluggish, even when the fan is cranked to max, that’s a huge red flag. It usually means the filter is so choked with dust and debris that the air literally can’t get through.
Another thing to watch for is how much junk you’re breathing in. If you notice more dust settling on your dashboard or if your eyes start feeling itchy during a drive, your car interior air quality has likely taken a hit. Keeping up with your automotive HVAC maintenance isn’t just about the machine; it’s about not breathing in whatever pollen or road grime is trapped in that old paper. If you’re noticing these symptoms, don’t wait for the manual—just grab a new filter and swap it out.
Mastering Automotive Hvac Maintenance Without a Mechanics Degree
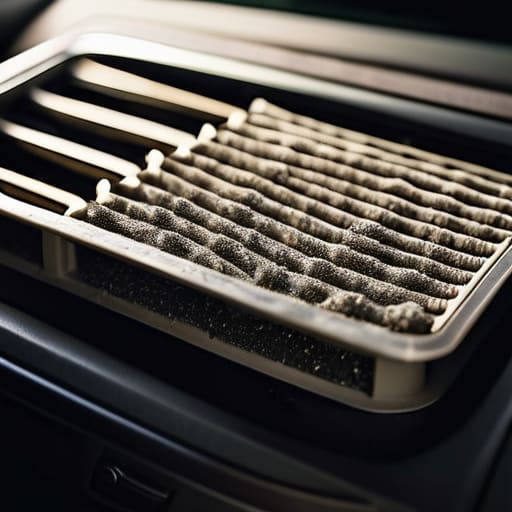
Look, you don’t need to be a master tech to handle basic automotive HVAC maintenance, but you do need to stop treating your car like a sealed tomb. Most people ignore the air they breathe until it starts smelling like old gym socks, but by then, you’re already dealing with a mess. If you want to maintain high car interior air quality, you have to be proactive. Don’t just wait for the airflow to get weak; keep an eye on your environment. If you live somewhere with high pollen or heavy construction dust, you’re going to need to shorten your standard cabin filter replacement interval.
I always tell the guys at the shop that the best way to learn how to change a car air filter is to just stop overthinking it. Once you realize it’s basically just a plastic housing and a piece of pleated paper, the intimidation factor disappears. If you really want to go the extra mile, look into upgrading to HEPA cabin air filters. They’re a bit pricier, but they do a way better job of catching the fine particles that cheap filters miss. It’s a small investment that keeps your lungs—and your lungs’ housing—way cleaner.
Pro Tips to Keep Your Air Clean (Without Getting Ripped Off)
- Check your owner’s manual before you buy anything. Don’t just grab whatever looks cheap at the auto parts store; some of those generic filters are basically just paper and won’t catch the fine dust or pollen that actually makes you sneeze.
- Pay close attention to the airflow arrows. Every filter has a little arrow on the side showing which way the air is supposed to move. If you flip it around, you’re basically fighting your car’s HVAC system, and it’s going to sound like a jet engine through your vents.
- Take a quick photo of the old filter before you pull it out. It sounds stupid, but if you’re working in a tight spot or under a dashboard, it’s easy to forget exactly how it was seated. A quick snap on your phone saves you a massive headache later.
- Don’t skip the vacuuming. While you’ve got that old, nasty filter out, take a shop vac and clean out the housing area. You’ll be surprised how much leaf litter and debris hides in there, and you don’t want that junk falling into your new filter.
- Buy a pack of two. Honestly, if you’re already under there and have the tools out, just grab a second one. It’s way easier to swap it out once a year than to wait until you’re breathing in dust and wondering why your defroster isn’t working right.
The Bottom Line on Your Cabin Filter
Don’t let a shop charge you $50 or more for a five-minute job; once you know where the filter sits, you can swap it yourself for the price of the part alone.
If your AC starts smelling like old gym socks or your airflow feels weak, don’t ignore it—that’s your filter begging to be replaced.
Keeping this filter fresh isn’t just about your nose; it keeps your HVAC system from working overtime and prevents dust from settling deep into your vents.
The Truth About Your HVAC
Most shops will try to sell you a full AC recharge when the real problem is just a five-dollar piece of paper choked with dust and dead leaves. Don’t let them charge you a hundred bucks for a job that takes you ten minutes and zero tools.
Nikolai·Osterman
Don't Let Them Fleece You
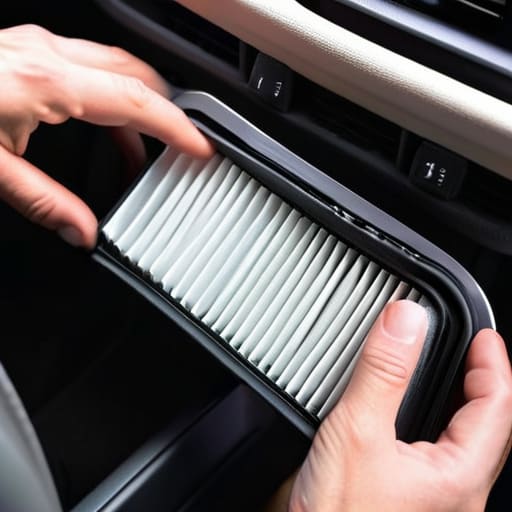
At the end of the day, swapping out your cabin air filter is one of those small wins that makes a massive difference in how your car feels to drive. You’ve learned how to spot the stale smells, how to track down the filter housing, and how to get the new one seated perfectly without breaking a sweat. It’s a simple task, but it keeps the dust, pollen, and nasty road grime out of your lungs and away from your HVAC system. Seriously, don’t let a shop charge you a hundred bucks for something that takes less than ten minutes and costs a fraction of that at the parts store. Just remember to check the airflow direction on the new filter—getting that wrong is a rookie mistake that’ll just make you frustrated later.
Look, I get it. Most people feel intimidated when they pop the hood or look under the dash, thinking they need a specialized degree just to breathe clean air. But that’s exactly how some shops keep their margins high. Once you realize that maintenance is just patience and the right tool, the whole world of car care starts to open up. Every time you do a job like this yourself, you’re taking a bit of control back from the industry. Keep turning wrenches, keep asking questions, and stop overpaying for things you can clearly do with your own two hands. You’ve got this.
Frequently Asked Questions
Is there a difference between the cabin air filter and the engine air filter, or am I looking for the same thing?
Look, this is a super common mix-up, so don’t sweat it. They’re definitely not the same thing. Think of it this way: the engine air filter protects your motor from breathing in dirt and grit, while the cabin air filter is strictly for you and your passengers. One keeps the car running; the other keeps the air you’re breathing clean. They’re usually in totally different spots, so don’t go digging under the hood for the cabin one.
Can I just blow the dust out of the old filter with some compressed air instead of buying a new one?
Look, I get the temptation to save a few bucks, but honestly? Don’t do it. Blowing out a filter with compressed air might clear some surface dust, but it won’t touch the microscopic particles or the grime stuck deep in the pleats. Plus, you’re probably just pushing more junk deeper into the housing. A new filter costs maybe twenty bucks—that’s way cheaper than a mechanic charging you a labor fee to clean out a clogged HVAC system.
If I can't find the filter slot behind the glovebox, is it hidden somewhere else in the dashboard?
Yeah, it happens more than you’d think. Not every car follows the “drop the glovebox” rule. If you’re staring at a blank wall behind the glovebox, check under the passenger-side dashboard or even near the footwell. Some manufacturers hide them behind a plastic access panel or even under the hood near the cowl. Grab your flashlight—it’s usually tucked away in some tight, annoying spot to save on assembly costs. Don’t sweat it, just keep looking.
