You ever notice how your dashboard lights start acting possessed right before your car decides it’s done for the day? Most people see that dimming headlight or flickering dash and immediately think they need to drop a thousand bucks at a dealership for an alternator replacement. Honestly, that’s just a massive money grab. I remember my first week at the shop, watching a guy freak out because his car died at a red light, only to realize it was just a loose terminal and a tired alternator. It’s not some high-level electrical wizardry; it’s just a part that wears out, and it’s way easier to swap than the service advisors want you to believe.
I’m not here to give you some textbook lecture or sell you on fancy diagnostic computers you don’t need. I’m going to walk you through the real-world process of an alternator replacement using the same logic I use when I’m working on my own Japanese tuners in the garage. I’ll show you exactly which bolts to watch out for, how to avoid frying your ECU, and how to get the job done without getting ripped off. Let’s get to work.
Table of Contents
- Step-by-Step Instructions
- Spotting the Truth Common Alternator Symptoms and Signs
- How to Test Alternator With Multimeter and Voltage Regulator Testing
- Pro-Tips to Keep You From Making a Mess of the Job
- The Bottom Line on Swapping Your Alternator
- ## The Real Cost of Hesitation
- Getting Back on the Road
- Frequently Asked Questions
Guide Overview
Tools & Supplies
- Socket set and ratchet for removing mounting bolts
- Wrench set for electrical terminals and belt tensioners
- Screwdriver for securing electrical connectors or clips
- Pliers for adjusting or removing serpentine belt tensioners
- New alternator compatible with your vehicle model
- Multimeter to test voltage before and after installation
Step-by-Step Instructions
- 1. First things first, you need to disconnect the battery. I can’t stress this enough—if you start messing with the alternator while the battery is still hooked up, you’re asking for a massive spark or a blown fuse. Use a wrench to loosen the negative terminal first, pull it off, and tuck it aside so it can’t touch the post.
- 2. Next, you’ve gotta clear a path. Depending on what you’re driving, you might need to move some plastic trim or even pull a belt shield out of the way. I usually grab my flashlight and inspect the area to make sure I’m not going to smash my knuckles on a radiator hose or an air intake tube while I’m working.
- 3. Now, get ready to loosen the serpentine belt. You’ll need a long-handled wrench or a breaker bar to rotate the tensioner pulley. Once you apply enough pressure to release the tension, slide the belt off the alternator pulley. Don’t let the belt snap back and hit you; keep a steady hand and guide it so it doesn’t get tangled in the fan.
- 4. Unplug the electrical connections. You’ll see a heavy-gauge wire bolted to the back of the alternator and a smaller plastic wiring harness. Use a socket to remove the nut on the main power wire, then carefully unclip the plastic connector. If that connector feels brittle or stuck, don’t force it—just give it a little wiggle until it pops free.
- 5. It’s time to unbolt the old unit. Most alternators are held in place by two or three long bolts. I like to keep my magnetic parts tray right next to me so these bolts don’t end up lost in the bottom of the engine bay. Loosen them in stages so the alternator doesn’t tilt and pinch your fingers.
- 6. Pull the old alternator out and get your new one ready. Before you drop the new one in, take a second to wipe down the mounting surface with a clean rag. You don’t want any old grime or grit getting trapped between the new unit and the engine block, as that can cause vibrations later on.
- 7. Reverse the whole process to get back on the road. Bolt the new alternator in, reconnect your wires, and then use that tensioner to slide the belt back over the pulley. Once everything is tight, reconnect the battery and start the engine. If you hear a smooth hum instead of a screeching belt, you’ve nailed it.
Spotting the Truth Common Alternator Symptoms and Signs

Look, most people wait until they’re stranded in a dark parking lot before they even think about their charging system. By then, it’s usually too late. You need to pay attention to the little things before they turn into a massive headache. If you notice your headlights getting dim or your dashboard lights flickering like a bad horror movie, that’s a huge red flag. Another dead giveaway is a battery that looks brand new but keeps dying overnight. That’s usually because the alternator isn’t actually pushing enough juice back into the cells while you drive.
If you want to be certain before you start tearing things apart, don’t just guess. Grab a multimeter and learn how to test alternator with multimeter settings. You’re looking for a steady reading—usually between 13.5 and 14.5 volts while the engine is running. If the numbers are jumping all over the place or staying low, you’ve found your culprit. It’s much better to catch these alternator symptoms and signs early than to find yourself staring at a dead engine when you’re already late for work.
How to Test Alternator With Multimeter and Voltage Regulator Testing
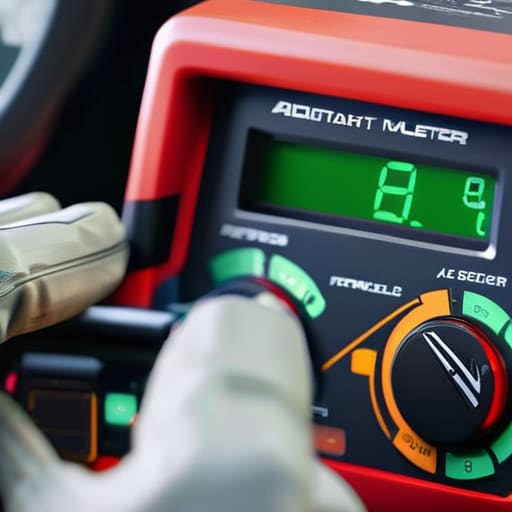
Before you go tearing everything apart, you need to be 100% sure the alternator is actually the culprit. I’ve seen guys spend three hours on a teardown only to realize they just had a loose battery terminal. To do this right, you’ll need to know how to test alternator with multimeter settings. Set your meter to DC volts, connect the leads to the battery terminals, and start the engine. You’re looking for a steady reading between 13.5 and 14.7 volts. If that number stays low or fluctuates wildly while the engine is running, you’ve definitely got a problem.
If the voltage is steady but your lights are still flickering or dimming, you might be looking at a specific issue with voltage regulator testing. The regulator is what keeps the output consistent, and when it fails, it can cook your battery or leave you stranded. It’s a common headache in automotive electrical system repair, but catching it early saves you from a much bigger bill later. Just keep your multimeter steady and watch those numbers—they don’t lie.
Pro-Tips to Keep You From Making a Mess of the Job
- Don’t skip the battery disconnect. Seriously. You’re working right next to the main power source, and if your wrench slips and touches the frame while you’re loosening the B-terminal, you’re going to see some nasty sparks and potentially fry your ECU.
- Grab a can of electrical contact cleaner before you start. While you’ve got the old unit out, spray down those connector pins. Most of the “broken” alternators I see in the shop are actually just dealing with crusty, corroded connections that are killing the signal.
- Keep your magnetic parts tray handy—I keep mine in my back pocket for a reason. Between the mounting bolts and the smaller wiring clips, it’s way too easy to drop a bolt into the deep recesses of the engine bay where you’ll never find it again.
- Check your drive belt while you’re in there. If you’re already going through the trouble of stripping the belt to get the alternator out, check it for cracks or glazing. It’s better to spend twenty bucks on a new belt now than to have it snap on the highway next week.
- Double-check your mounting bolts’ torque. You don’t want them loose enough to vibrate out, but you also don’t want to go overboard and strip the threads in the engine block. Just get them snug and solid, then move on.
The Bottom Line on Swapping Your Alternator
Don’t just guess based on a dim dashboard light; use a multimeter to confirm the alternator is actually the culprit before you start tearing things apart.
Most of the “scary” part of this job is just managing the battery connection and keeping track of your bolts—keep that magnetic tray handy so you don’t lose them.
You don’t need to pay a shop’s massive labor markup for this; if you’ve got the basic tools and a little patience, you can get this done in your own driveway.
## The Real Cost of Hesitation
Most shops will try to sell you a whole new charging system when all you really need is a new alternator and twenty minutes of your time. Don’t let a little bit of electrical fear turn a simple fix into a massive bill; once you’ve got the right socket in your hand, the car is yours again.
Nikolai·Osterman
Getting Back on the Road

Look, swapping out an alternator might seem like a massive headache when you first see those wires and bolts, but we just broke it down. You learned how to spot the warning signs like dimming headlights or a dying battery, how to use a multimeter to confirm the culprit, and the actual steps to get that old unit out and the new one in. Just remember to keep your workspace clean and double-check your connections before you even think about turning that key. If you took your time and didn’t rush through the testing phase, you’ve already done the hardest part of the job.
At the end of the day, the goal isn’t just to fix a car; it’s about knowing that you aren’t at the mercy of a shop’s high hourly rate for something you could have done in your own driveway. Every time you pick up a wrench and tackle a job like this, you’re building a level of confidence that no textbook can teach you. Don’t let the complexity of modern engines intimidate you. Grab your tools, keep your head down, and remember that you are more than capable of maintaining your own ride. I’ll see you in the next one.
Frequently Asked Questions
If I replace the alternator and my lights are still dim, could it be a bad ground wire or the battery itself?
Honestly, yeah, it definitely could be. If you just swapped the alternator and your lights are still dim, don’t go buying another one just yet. You’re likely looking at a bad ground wire or a dying battery. If that ground connection is corroded or loose, the electricity can’t flow properly, no matter how good the new alternator is. Check your battery terminals for crusty buildup first—it’s a simple fix that saves a lot of headache.
Do I really need to replace the serpentine belt at the same time, or can I just reuse the old one?
Look, I get the temptation to save a few bucks, but honestly? Just swap the belt too. If you’re already in there pulling the alternator, you’ve done 90% of the hard work. It’s a cheap part, and if that old belt snaps or slips a week from now, you’re right back to square one, covered in grease, doing the whole job again. Do it once, do it right.
Is it safe to just jump-start my car to get to the parts store, or am I going to fry my ECU?
Look, I get the panic—you’re stuck and just want to move. You can jump-start it to get to the parts store, but don’t go driving around like that. If your alternator is totally shot, that jump-start is just a temporary band-aid. The second you disconnect the donor car, your battery is on its own. If the voltage drops too low or spikes weirdly while you’re driving, you’re definitely risking your ECU. Get it to the shop, then stop.
