I was elbow-deep in a greasy engine bay last Tuesday when a customer came in, looking absolutely crushed because a shop quoted him four hundred bucks just to swap a belt. I almost laughed, but I kept it professional. The truth is, most shops see a simple job and think they can charge you for the “luxury” of their expertise, but an alternator belt replacement isn’t some high-level surgical procedure. It’s just a matter of knowing which way the tensioner moves and making sure you don’t drop a bolt into the abyss of your radiator fan.
I’m not here to give you some sanitized, textbook lecture that assumes you own a professional-grade hydraulic lift. Instead, I’m going to walk you through the real-world way to get this done using basic tools you probably already have in your trunk. I’ll show you how to spot the cracks before they snap, how to line everything up without losing your mind, and how to finish the job without getting ripped off. Let’s get your hands dirty and save your cash instead.
Table of Contents
- Step-by-Step Instructions
- Spotting the Symptoms of a Worn Serpentine Belt Early
- The Essential Tools Needed for Belt Replacement Today
- Pro Tips to Save Your Sanity (and Your Hands)
- The Bottom Line on Your Belt
- ## Don't Wait for the Silence
- Don't Let Them Gatekeep Your Own Car
- Frequently Asked Questions
Guide Overview
Tools & Supplies
- Socket set and ratchet to loosen tensioner bolts
- Long-handled wrench or breaker bar for leverage on the tensioner
- Flashlight to inspect pulley alignment
- New serpentine/alternator belt (1)
- Shop rags for cleaning grease (1)
Step-by-Step Instructions
- 1. First things first, you gotta make sure the car isn’t going to jump up and bite you. Turn the engine off, pop the hood, and disconnect the negative battery terminal. I don’t care if you think it’s unnecessary; if your wrench slips and touches the frame while that terminal is live, you’re looking at a massive shower of sparks and a dead electrical system.
- 2. Grab your flashlight and get a good look at the belt routing. Most cars have a little sticker under the hood showing you exactly how the belt snakes around the pulleys, but if yours is missing, take a clear photo with your phone. You’ll thank me later when you’re staring at a pile of new rubber and can’t remember if the tensioner goes clockwise or counter-clockwise.
- 3. Now you need to find the tensioner—it’s usually a spring-loaded pulley that keeps the belt tight. Depending on your car, you’ll likely need a long-handled wrench or a breaker bar to get enough leverage. Place the tool on the tensioner bolt and slowly rotate it to compress the spring; this creates the slack you need to slip the old belt off the pulleys.
- 4. Once the tension is released, pull the old, crusty belt off the top pulley and just slide it out of the loop. Take a second to inspect the pulleys while the belt is off. If you see any heavy buildup of grime or if a pulley feels wobbly when you nudge it, that’s a sign you might have a bigger problem than just a worn belt.
- 5. Grab your new belt and start threading it through the pulleys, following that photo you took earlier. This is the part where most people get frustrated, so don’t rush it. Make sure the grooves of the belt are seated perfectly in the grooves of the pulleys; if it’s even slightly off-center, it’ll shred itself the second you start the engine.
- 6. Once the belt is seated, you’ll need to release the tensioner one more time to slip the last loop over the final pulley. This is usually a bit of a tight squeeze, so use your weight to hold the tensioner back steady so the belt doesn’t pop out of place.
- 7. Finally, reconnect your battery terminal and fire the engine up. Pop the hood and let it idle for a minute while you watch the belt work. If you see any excessive flapping or hear a high-pitched squeal, shut it down immediately—you probably didn’t seat the belt right or the tensioner isn’t doing its job.
Spotting the Symptoms of a Worn Serpentine Belt Early
You don’t always have to wait for a loud screech to know something is wrong. Most people ignore those tiny warning signs until they’re stranded on the shoulder of a highway, but if you’re paying attention, you can catch it early. The biggest giveaway is usually a high-pitched squeal, especially when you first start the car or when you’re turning the wheel all the way to one side. If you hear that, it’s a massive red flag for symptoms of a worn serpentine belt. Another thing to watch for is any visible fraying or cracks on the underside of the belt—if it looks like an old piece of dried-out rubber, it’s already past its prime.
I also tell my buddies to keep an eye on their electronics. If your headlights are flickering or your battery light pops up on the dash, it might not be the battery at all; it could be that the belt is slipping and not turning the alternator properly. While you’re under there, do a quick alternator pulley inspection to make sure the pulleys are spinning smooth and aren’t wobbling. It only takes a second, but it can save you a massive headache later.
The Essential Tools Needed for Belt Replacement Today
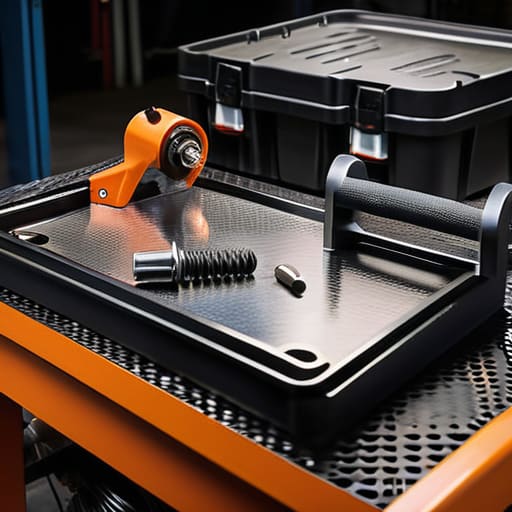
Look, you don’t need a massive rolling tool chest to get this done, but you can’t just wing it with a pair of pliers and a prayer. Most of the time, you’re looking at a standard set of sockets and a long-handled breaker bar or a dedicated tensioner tool. If your car has an automatic tensioner, that long handle is going to be your best friend for making that automotive belt tensioner adjustment without stripping a bolt. I always keep my magnetic parts tray handy because, trust me, once those small mounting bolts start rolling around a greasy garage floor, your afternoon just got a lot longer.
While you’ve got everything laid out, take a second to grab a flashlight. You really want to perform a quick alternator pulley inspection while the belt is off. It’s way easier to spot a wobbly pulley or a bearing that sounds like a bag of marbles when you aren’t fighting a rubber belt for access. If you find the pulley is shot, just replacing the belt is a waste of time. Get it right the first time so you aren’t crawling back under the hood next week.
Pro Tips to Save Your Sanity (and Your Hands)
- Take a photo of the belt routing before you even touch a wrench. Seriously. Most belts have a weird path around the pulleys, and once that thing is off, it’s easy to forget exactly how it was supposed to sit. Don’t be the guy staring at a pile of pulleys wondering where the tensioner goes.
- Check your tensioner while you’re in there. If the belt was slipping because the tensioner is shot, putting a brand new belt on is just a waste of your money. Give it a little wiggle; if it feels loose or makes a clicking sound, swap it out now.
- Keep your hands clear of the “pinch zones.” When you’re loosening the tensioner, it’s got a lot of stored energy. If that arm slips, it’ll snap back hard. I’ve seen enough busted knuckles to know that being too fast is the easiest way to end up in the ER.
- Don’t go overboard with the lubricant. Some people try to use spray to help the belt slide over the pulleys, but most modern serpentine belts are designed to run dry. Too much lube can cause it to slip or degrade the rubber way faster than it should.
- Double-check the belt’s “ribs.” When you’re installing the new one, make sure those grooves are seated perfectly in the pulley tracks. If it’s even slightly off-center, it’ll shred itself within the first ten miles, and you’ll be right back under the hood.
The Bottom Line on Your Belt
Don’t wait for that squeal to turn into a snap; catching a fraying belt early saves you from a roadside breakdown and a much bigger repair bill later.
You don’t need a shop full of expensive gear to get this done, just a decent set of tools and the patience to make sure everything is seated right.
Most shops will try to charge you an arm and a leg for something you can do in your own driveway in under an hour if you just take the time to do it yourself.
## Don't Wait for the Silence
“A squealing belt is basically your car begging for help; if you ignore it until the rubber snaps and leaves you stranded on the shoulder, you’re not just paying for a new belt—you’re paying for the tow truck and the mechanic’s ’emergency’ markup too.”
Nikolai·Osterman
Don't Let Them Gatekeep Your Own Car
Look, swapping that belt isn’t some high-level engineering feat that requires a specialized shop or a massive invoice. We’ve covered it all: from hearing that high-pitched squeal that tells you something is wrong, to grabbing your tensioner tool and getting that new belt seated perfectly in the grooves. Once you’ve checked the alignment and made sure everything is tight, you’re done. It really comes down to paying attention to the small sounds and having the right basic tools on hand before a tiny rubber part turns into a massive breakdown on the side of the highway.
At the end of the day, I want you to realize that the gap between “I can’t do that” and “I just did that” is much smaller than the guys at the dealership want you to think. Every time you pick up a wrench and tackle a job like this yourself, you’re taking back control of your wallet and your vehicle. It might be a little messy, and you’ll probably end up with some grease under your fingernails, but that’s just part of the process. Keep your hands dirty and keep learning, because once you realize you can do this, you’ll never look at a repair shop the same way again.
Frequently Asked Questions
Is it okay to keep using my car if I hear a slight squealing sound, or am I asking for a breakdown?
Look, if it’s just a slight squeal, you aren’t going to die on the side of the road immediately, but you’re playing with fire. That sound is usually the belt slipping or cracking. If that belt snaps while you’re driving, you lose your power steering and your alternator goes dead instantly. You’ll be stranded. Don’t ignore it—check the tension or look for cracks today before it turns into a much more expensive headache.
Do I really need to buy a brand-name belt, or can I grab a cheaper one from the local parts store?
Look, I get the temptation to save a few bucks at the local shop, but don’t cheap out here. A generic, off-brand belt is usually made of lower-grade rubber that cracks or squeals way sooner than it should. If that belt snaps while you’re driving, you’re stranded. Stick to a reputable brand like Gates or Continental. It’ll cost you an extra ten or fifteen bucks now, but it saves you a massive headache later.
How do I know if I actually need a new belt or if it's just the tensioner acting up?
It’s a common headache. If you hear a high-pitched squeal that goes away once the engine warms up, that’s usually a slipping belt. But if you’re hearing a rhythmic chirping or a heavy rattling—especially when the car is idling—that’s likely your tensioner bearing giving up the ghost. Check the belt for cracks first; if the rubber looks solid but the noise is constant, grab a flashlight and see if the tensioner pulley is wobbling.
