I’ve seen it happen a dozen times at the shop: a customer brings in a car that’s overheating, and the mechanic immediately starts talking about a blown head gasket or a cracked engine block. It sounds terrifying, and it’s usually expensive as hell, but half the time, the actual culprit is just a five-dollar piece of metal. Most people skip radiator cap testing because they think it’s too small of a detail to matter, but that little cap is what keeps your coolant from boiling over when things get hot. If that seal is shot, you aren’t looking at a dead engine; you’re just looking at a cheap fix that everyone else is overcomplicating.
I’m not here to sell you on some high-end diagnostic software or a massive overhaul. I want to show you how to grab a simple pressure tester and figure out if your cap is actually doing its job or just venting steam like a tea kettle. I’ll walk you through the exact steps I use in the garage so you can stop guessing and start fixing things the right way. Let’s get into it.
Table of Contents
- Step-by-Step Instructions
- Spotting the Signs of a Faulty Radiator Cap
- Mastering the Cooling System Pressure Test Yourself
- Pro Tips to Keep You From Making a Mess
- The Bottom Line on Your Radiator Cap
- ## Don't Let a Five-Dollar Part Ruin Your Engine
- Don't Leave Your Cooling System to Chance
- Frequently Asked Questions
Guide Overview
Tools & Supplies
- Radiator Cap Tester/Pressure Tester Kit (to simulate system pressure)
- Rag or Cloth (to clean the cap seal area)
- Radiator Cap (replacement if test fails)
- Distilled Water (small amount for testing if needed)
Step-by-Step Instructions
- 1. First things first, make sure the engine is completely cold. I cannot stress this enough. If you try to mess with a radiator cap on a hot engine, you’re looking at a face full of boiling coolant, and that’s a trip to the ER you don’t want. Let it sit for at least an hour until the radiator feels cool to the touch.
- 2. Grab a radiator cap tester kit—you can find these at any local auto parts store for pretty cheap. Once you’ve got it, remove the old cap from the radiator and check the pressure rating stamped on the bottom of it. You’ll see a number followed by “psi” or “kPa.” Write that down because you’re going to need it to know if your tester is actually doing its job.
- 3. Place the tester unit onto the radiator neck, making sure the rubber seal on the tester is seated perfectly. If it’s crooked, you’re going to get a false reading, and I don’t want you chasing ghosts thinking you have a leak when you really just have a bad seal on your tool.
- 4. Start pumping the handle on the tester to build up pressure. You want to pump it up until the gauge hits the specific PSI number that was stamped on your old cap. Once you hit that target, stop pumping and just watch the needle for a few minutes.
- 5. Keep a close eye on that needle. If the pressure drops significantly while you’re just sitting there, you’ve got a problem. A tiny bit of movement is usually okay, but if it’s dropping fast, your cap is shot or you’ve got a serious leak somewhere in your cooling system that needs immediate attention.
- 6. If the pressure holds steady without any major drops, your cap is likely still good to go. If it fails the test, don’t try to “fix” it; just head to the parts store and buy a new one that matches the exact pressure rating of your original. It’s a cheap fix that saves you from a massive overheat later.
Spotting the Signs of a Faulty Radiator Cap
Before you even pull out the testing tools, your car usually tries to tell you something is wrong. One of the biggest signs of a faulty radiator cap is seeing coolant leaking around the cap itself or noticing a weird, sweet smell coming from under the hood. If you see dried, crusty residue around the filler neck, that’s a dead giveaway that the seal isn’t doing its job. I’ve seen plenty of guys assume they have a massive leak in a hose, only to realize the cap just wasn’t holding the pressure it was supposed to.
You also need to keep a close eye on your temp gauge. If you’re dealing with sudden engine overheating causes that don’t seem to make sense, don’t immediately go out and buy a new water pump. A cap that can’t maintain the proper radiator cap pressure rating will let the coolant boil off way too early, sending your temps skyrocketing. During your routine coolant reservoir inspection, check if the level is constantly dropping. If you’re topping it off every week, your cap is likely the culprit, letting pressure escape and boiling your coolant right out of the system.
Mastering the Cooling System Pressure Test Yourself
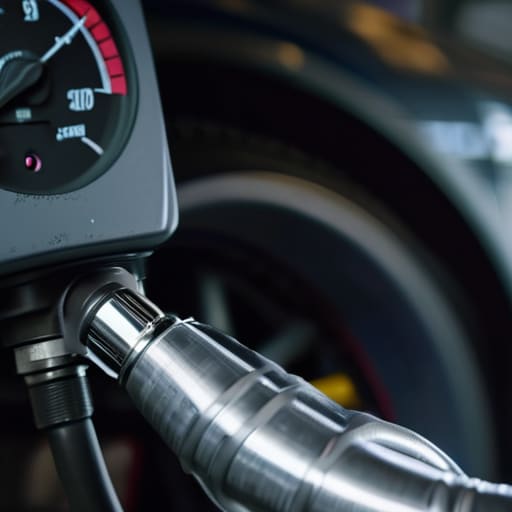
Look, if you’re serious about DIY maintenance, don’t just stop at the cap. Once you’ve confirmed the cap is actually holding pressure, you really need to perform a full cooling system pressure test. I’ve seen plenty of guys swap out a cap only to realize they had a hairline crack in a hose or a weeping water pump all along. If you pump the system up and the needle on the tester starts dropping immediately, you aren’t looking at a cap issue—you’re looking at a leak somewhere else in the loop.
While you’ve got the system pressurized, take a second to do a quick coolant reservoir inspection. Check for any signs of oily residue or “milkshake” looking sludge in the tank; that’s usually a red flag for a head gasket issue rather than just a bad seal. My advice? Don’t rush the process. It’s better to spend an extra twenty minutes hunting down a tiny leak now than to end up staring at a smoking hood on the highway later because you skipped the details.
Pro Tips to Keep You From Making a Mess
- Never, and I mean never, try to crack that cap open when the engine is hot. I’ve seen guys lose more than just a little skin to pressurized steam, and it’s not worth the risk. Let it cool completely.
- Check the rubber seal on the underside of the cap every single time you pull it off. If that rubber looks cracked, feels mushy, or has chunks missing, just toss the cap and buy a new one. It’s a cheap part that prevents massive headaches.
- Keep an eye on the spring tension. If you’re testing it and the cap feels “mushy” or doesn’t provide that solid resistance when you press it, the spring is shot. A weak spring means your cooling system won’t hold the pressure it needs to prevent boiling.
- Clean the area around the radiator neck before you even think about putting a new cap on. If there’s grit or old coolant crust sitting in there, you’re just going to ruin the new seal immediately.
- Don’t just buy the cheapest generic cap you find on a random site. Make sure the PSI rating on the new cap matches exactly what your owner’s manual says. If you put a low-pressure cap on a system that needs high pressure, you’re asking for an overheat.
The Bottom Line on Your Radiator Cap
Don’t let a cheap, five-dollar part turn into a thousand-dollar engine overheat; if the cap isn’t holding pressure, swap it out immediately.
A pressure test is the only way to know for sure—guessing based on how the car “feels” is how you end up stranded on the shoulder.
Always check your cap’s rating before buying a replacement, because the wrong pressure level can wreck your entire cooling system.
## Don't Let a Five-Dollar Part Ruin Your Engine
Look, you can spend hundreds on coolant and new hoses, but if that radiator cap isn’t holding pressure, you’re just throwing money into a boiling engine. Don’t guess and hope for the best; test the cap first so you aren’t chasing ghosts when the temp gauge starts climbing.
Nikolai·Osterman
Don't Leave Your Cooling System to Chance
At the end of the day, testing your radiator cap isn’t some complex science experiment; it’s just basic maintenance that keeps you from a massive headache. We’ve gone over how to spot those early warning signs like overheating or coolant loss, and we walked through the actual process of using a pressure tester to see if that cap is actually doing its job. If you saw the pressure dropping or noticed the spring felt mushy, you’ve already saved yourself from a potentially blown head gasket. Remember, a cheap cap is a tiny investment compared to the cost of a tow truck and a ruined engine. Don’t just swap it out blindly, though—make sure you’re actually confirming the failure so you aren’t just throwing parts at a problem.
I know it can feel intimidating when you’re staring at a steaming engine bay, but honestly, once you get the hang of these small diagnostic steps, you realize how much control you actually have. You don’t need to wait for a mechanic to tell you what’s wrong or hand over a couple hundred bucks for something you could have verified in ten minutes. Keep your tools ready, stay patient, and trust your gut when something doesn’t feel right under the hood. You’ve got this, and your car will definitely thank you for it.
Frequently Asked Questions
If my cap looks brand new but I'm still losing coolant, could it still be the culprit?
Look, I’ve seen this a dozen times. Just because the cap looks shiny and new doesn’t mean the internals are actually doing their job. If that spring is weak or the seal is slightly off, it won’t hold the pressure your system needs. It might look perfect on the outside, but if it’s letting pressure bleed off, your coolant’s going to escape. Don’t trust the aesthetics—test it or swap it.
Is it worth buying a high-end pressure tester, or can I get away with a cheap one from a local parts store?
Look, if you’re just checking your daily driver once a year, a cheap kit from the local parts store is totally fine. They get the job done. But if you’re planning on doing a lot of DIY work or working on older, finicky imports, grab a decent mid-range set. The cheap ones can sometimes leak at the seals, which gives you a false reading. Don’t waste time chasing a leak that isn’t even there.
Can I just swap in a cap from a different car if I can't find the exact match for my engine?
Look, I get the temptation to just grab whatever’s sitting on a shelf, but please don’t do that. Radiator caps aren’t “one size fits all.” They’re precision parts designed to hold a specific PSI to keep your coolant from boiling over. If you put a cap on that’s rated for too much pressure, you’ll blow a hose or crack your radiator. If it’s too low, your engine’s gonna overheat. Stick to the exact spec for your car.
