Author: Nikolai·Osterman

  • How to Rotate Your Tires

    How to Rotate Your Tires

    I remember watching my dad struggle with a set of unevenly worn front tires on an old sedan back in my garage, and the shop owner tried to tell him he needed a whole new set just because the tread looked “off.” That’s total nonsense. Most people think they need a specialized lift or a professional setup to keep their rubber even, but honestly, a basic tire rotation guide is all you really need to stop wasting money. You don’t need a fancy degree or a bay at a dealership to make sure your tires wear down at the same rate; you just need to understand the pattern and not get intimidated by the jack.

    In this guide, I’m stripping away all the dealership fluff and giving you the straight truth on how to do this yourself. I’ll walk you through the specific patterns for different drive trains, the exact tools you should have in your trunk, and the common mistakes that actually end up causing more harm than good. My goal isn’t to turn you into a master mechanic overnight, but to make sure you have the confidence to handle this simple task so you can keep your hard-earned cash in your pocket instead of the shop’s.

    Table of Contents

    Guide Overview

    Total Time: 30-60 minutes
    Estimated Cost: $0 (assuming tools are owned)

    Tools & Supplies

    • Jack to lift the vehicle safely
    • Jack stands to secure the vehicle
    • Lug wrench or impact wrench to remove nuts
    • Torque wrench to tighten nuts to spec
    • Wheel chocks to prevent rolling
    • Gloves for hand protection

    Step-by-Step Instructions

    • 1. First things first, find a flat, solid spot to park. You don’t want to be doing this on a slope or on soft dirt because once that jack starts moving, you’re in real trouble. Grab your lug wrench and your jack, and make sure you’ve got your wheel chocks handy to block the tires that aren’t moving.
    • 2. Before you even think about lifting the car, grab your lug wrench and loosen the nuts on each wheel. You don’t want to take them all the way off yet; just crack them loose while the tire is still touching the ground. It’s way easier to break them loose with the weight of the car holding the wheel in place.
    • 3. Now, get your jack under a solid frame point—check your owner’s manual if you aren’t sure, because you don’t want to be jacked up on a plastic trim piece. Lift the car until the tire is off the ground, then slide a jack stand under the frame for safety. Never, and I mean never, trust just a hydraulic jack while you’re working under or near the car.
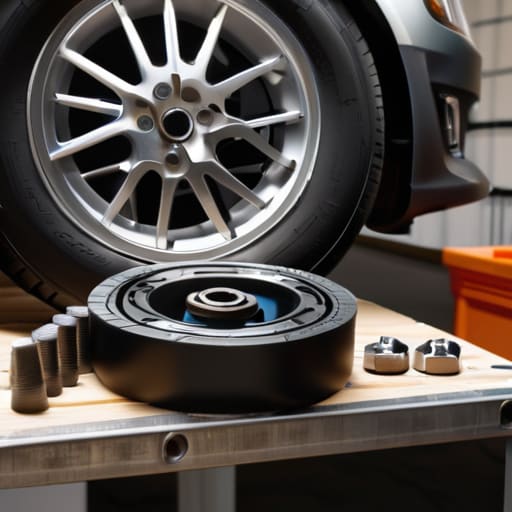
    • 4. Once the car is stable, finish unscrewing the lug nuts and pull the wheels off. This is where I usually grab my magnetic parts tray from my pocket so I don’t lose any of the hardware in the grass or the garage floor. Keep the nuts in order so you don’t get confused when it’s time to put them back on.
    • 5. Now you need to move the tires according to your car’s specific pattern. If you’ve got a front-wheel-drive car, you’ll usually move the front tires straight back to the rear, and the rear tires go to the front but cross them over to the opposite sides. If you’re working on an All-Wheel Drive setup, double-check your manual because the pattern might be totally different.
    • 6. Slide the tires back onto the hubs, making sure they sit flush against the mounting surface. Put the lug nuts back on by hand and tighten them as much as you can without a wrench. This helps prevent the wheel from wobbling or threading the bolts incorrectly while you’re getting things ready.
    • 7. Lower the jack until the tires are touching the ground again, then take your wrench and tighten those lug nuts for real. You want to do this in a star pattern—not just going in a circle—to make sure the pressure is even across the wheel. Give them one last firm tug, pull your tools inside, and you’re done.

    Mastering Jack and Lug Wrench Usage Without the Stress
    Mastering Jack and Lug Wrench Usage Without the Stress

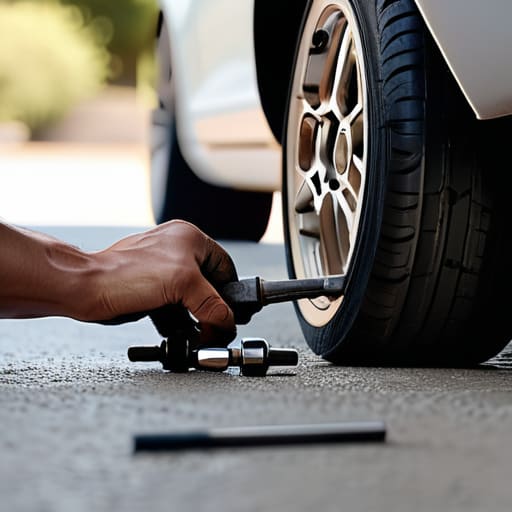
    Look, I’ve seen plenty of guys struggle with a stuck lug nut or, worse, a jack that starts to slip because they weren’t paying attention. When it comes to jack and lug wrench usage, the biggest mistake is rushing. Before you even lift the car, make sure you’re on level ground—concrete is your best friend here. Once you crack those lug nuts loose while the car is still on the ground, you’ve already won half the battle. Trying to break them loose while the wheel is spinning in the air is a recipe for a massive headache and a lot of wasted energy.

    Once the car is up, don’t just toss the jack anywhere. Find a solid frame point; if you lift on the wrong spot, you’re looking at expensive body damage. When you’re tightening everything back up, remember to use a star pattern. It’s not just some textbook rule; it ensures the wheel sits perfectly flush against the hub. Getting this right is a huge part of tire lifespan extension, because an unevenly seated wheel is going to cause vibrations that’ll drive you crazy. Just take your time and stay focused.

    Cracking the Code of Tire Rotation Patterns for Longevity

    Cracking the Code of Tire Rotation Patterns for Longevity

    Look, I see people at the shop all the time who think you just swap the fronts with the rears and call it a day. That’s a mistake. If you want actual tire lifespan extension, you have to understand how your specific setup moves. For a standard front-wheel-drive car, you’re usually looking at an X-pattern, where the rear tires move straight to the opposite front corners. But if you’re driving something with an AWD system, you can’t just wing it; you need to check your manual for the specific all-wheel drive tire rotation sequence, or you might end up stressing the drivetrain.

    The whole point of mastering these different tire rotation patterns is to fight off uneven wear before it starts. If you notice the inside edge of your tread is wearing faster than the outside, you’re likely dealing with alignment issues or just a bad rotation habit. Stick to your automotive maintenance schedule and don’t skip these intervals. It’s way cheaper to spend twenty minutes in your driveway now than to drop a few hundred bucks on a fresh set of rubber because you got lazy.

    Pro Tips to Keep You from Making a Mess of It

    • Double-check your tire pressure before you even touch a lug nut. There’s no point in rotating everything perfectly only to realize one of them was low to begin with, and it’ll mess up your readings once they’re back on the ground.
    • Don’t go overboard with the impact wrench. I see guys at the shop over-tighten everything until they strip the studs, and then they’re stuck with a massive bill. Hand-tighten them first, then use a torque wrench to get them just right.
    • Keep a close eye on your tread depth while you’ve got the wheels off. If one tire is looking way more worn than the others, rotating it might just be a band-aid for an alignment issue you need to actually fix.
    • Always grab a clean rag to wipe down the mounting surfaces on the rim. If there’s grit or rust sitting between the wheel and the hub, it can cause vibrations that feel like a death wobble once you hit highway speeds.
    • Remember that your spare might be a “donut.” If you’re rotating a set and one of your main tires is shot, don’t try to force a temporary spare into your regular rotation pattern; it’s not built for that kind of abuse.

    The Bottom Line on Keeping Your Rubber Healthy

    Don’t let a shop charge you fifty bucks for something you can do in twenty minutes; just keep your lug wrench and a jack handy so you aren’t stuck waiting on an appointment.

    Pay attention to your tread—if you’re rotating them and one side looks way more worn than the rest, you’ve probably got an alignment issue that needs more than just a quick swap.

    Consistency is everything, so don’t wait until your tires look bald to check them; stick to a regular rotation schedule and you’ll squeeze way more life out of your investment.

    The Real Reason to Rotate

    Most shops will charge you a premium just to move some rubber around, but honestly? It’s not rocket science. If you take twenty minutes to swap your tires yourself, you aren’t just saving cash—you’re making sure you aren’t buying a whole new set of tires a year earlier than you should.

    Nikolai·Osterman

    Don't Let the Shop Overcharge You
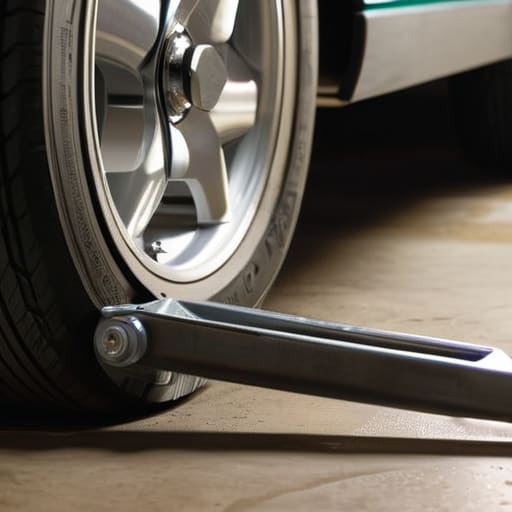
    Don't Let the Shop Overcharge You.

    Look, at the end of the day, rotating your tires isn’t some mystical ritual that requires a master certification. It really just comes down to three things: having a solid jack, knowing your specific rotation pattern, and making sure you actually torque those lug nuts down properly. If you can manage those basics, you’re already ahead of most drivers who just blindly trust whatever a shop tells them. You’ve learned how to handle the gear and how to spot the wear patterns, which means you aren’t just guessing anymore—you’re actually taking control of your vehicle’s lifespan.

    I know it can feel a little intimidating the first time you’re staring at a heavy wheel and a greasy lug nut, but trust me, the feeling of doing it yourself is unmatched. There’s a massive sense of pride in knowing that your car is running better because you put in the work, not because you handed over a credit card. Don’t let the fear of making a mistake keep you in the passenger seat. Grab your tools, get a little grease under your fingernails, and just start doing it. Your wallet and your car will definitely thank you in the long run.

    Frequently Asked Questions

    How often should I actually be doing this if I'm not driving a ton?

    Look, I get it. If your car is mostly just sitting in the driveway or you’re only hitting the grocery store, the manual’s “every 5,000 miles” rule feels like overkill. But don’t let it sit forever. Even if you aren’t putting miles on it, rubber degrades and weight distribution still matters. Honestly? Just aim for once a year or every six months. It’s easier to spend twenty minutes now than to replace a whole set of tires later.

    Do I need to worry about rotating my spare tire too, or is that just extra work?

    Honestly, don’t sweat it. If it’s just sitting in your trunk, you don’t need to worry about rotating it with the others. The goal of rotation is to even out the tread wear on the tires actually touching the pavement. Since your spare isn’t doing any work, it’ll stay exactly as it is. Just make sure you check the air pressure in it every few months so it isn’t flat when you actually need it.

    Is it safe to rotate them myself if I don't have a torque wrench to tighten the lugs?

    Look, I’ll be real with you: it’s doable, but it’s not ideal. If you’re just using the lug wrench that came with the car, you’re mostly relying on muscle memory to avoid over-tightening or leaving them loose. It’s risky because uneven torque can warp your brake rotors. If you can’t swing a torque wrench right now, just make sure you tighten them in a star pattern and double-check them after your first drive.
  • How to Replace Brake Pads

    How to Replace Brake Pads

    I was working on a customer’s sedan last Tuesday when I heard that high-pitched, rhythmic squeal—the kind that makes your stomach drop every time you hit the pedal. The service advisor already had a quote ready for a full rotor resurfacing and a “premium” service package, totaling something close to a car payment. It’s honestly ridiculous. Most shops will try to sell you a whole overhaul when all you really need is a straightforward brake pad replacement. They count on you being too intimidated by the grease and the heavy metal to realize that you’re essentially just swapping out a couple of parts.

    I’m not here to give you some textbook lecture or a list of “safety precautions” that sounds like a legal disclaimer. I’m going to show you how to get this done with the basic tools you probably already have in your garage. My goal is to walk you through the actual, gritty reality of a brake pad replacement so you can stop handing your hard-earned money to mechanics for things you can do yourself. If you’ve got a bit of patience and a steady hand, you’ve got enough to handle this.

    Table of Contents

    Listen Closely Decoding Those Squealing Brake Sounds Causes

    Listen Closely Decoding Those Squealing Brake Sounds Causes

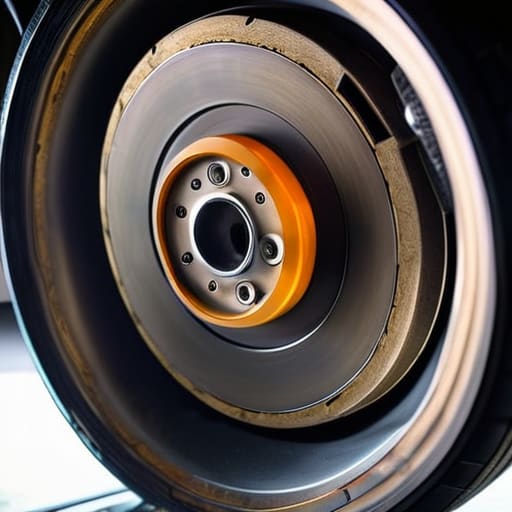
    If you hear a high-pitched screeching every time you hit the pedal, don’t just turn up the radio and hope it goes away. Most of the time, that sound is actually a built-in alarm system. Many pads come equipped with little metal tabs called brake pad wear indicators that scrape against the rotor once the friction material gets too thin. It’s a deliberate design meant to let you know that your stopping power is getting compromised before you actually hit metal-on-metal.

    Sometimes, though, the noise isn’t a warning—it’s just a symptom of how you’re driving or what you’ve got installed. If you’re running ceramic vs semi-metallic brake pads, you might notice different acoustic profiles; ceramics are generally quieter, while some metallic blends can be a bit more vocal. You might also be dealing with simple glazed rotors or even just some grit stuck in the assembly. Either way, pay attention to these squealing brake sounds causes early. Catching it now means you’re just swapping pads, rather than paying a shop to resurface your rotors or replace the whole caliper assembly because you waited too long.

    Spotting the Signs of Worn Brake Pads Before Its Too Late

    Spotting the Signs of Worn Brake Pads Before Its Too Late

    Most people wait until they hear that high-pitched screeching to even think about their brakes, but by then, you’re already playing catch-up. One of the easiest signs of worn brake pads to catch is a subtle vibration in your steering wheel or brake pedal when you’re slowing down. It’s not just an annoyance; it’s your car telling you that the friction material is getting thin and things are starting to get uneven. If you feel a rhythmic pulsing, you’re likely dealing with warped rotors, which is a much bigger headache than just swapping out a set of pads.

    Another thing to keep an eye on is the dashboard. A lot of modern cars have specific brake pad wear indicators built into the sensor system, so if that light pops up, don’t just ignore it or cover it with some electrical tape. I’ve seen plenty of guys ignore these warnings only to end up facing a massive bill because they ruined their rotors. Catching it early is the difference between a quick, cheap DIY job and a total overhaul that drains your bank account.

    Don't Mess This Up: 5 Pro-Tips for a Smooth Brake Job

    • Grab a C-clamp or a brake piston compressor before you start; trying to force that piston back into the caliper with a screwdriver is a recipe for a scratched seal and a massive headache.
    • Clean your rotors with brake cleaner before you put the new pads on; if there’s any leftover grease or grime from the factory, your brakes are going to feel spongy and won’t bite right away.
    • Don’t forget to lube the slide pins with high-temp silicone grease; if those pins seize up because you were too lazy to clean them, your new pads will wear down unevenly and you’ll be right back under the car in a month.
    • Always check your brake fluid level in the reservoir after you compress the pistons; pushing that fluid back up the lines can cause it to overflow, so keep a rag handy to catch the mess.
    • Use a torque wrench on your caliper bolts instead of just guessing; I’ve seen too many guys over-tighten them and snap a bolt, or leave them loose and end up with a terrifying rattling sound while driving.

    The Bottom Line on Your Brakes

    Don’t ignore those squeals or vibrations; they aren’t just annoying noises, they’re your car telling you that your stopping power is literally disappearing.

    You don’t need a shop’s diagnostic computer to know your pads are shot—if you see metal-on-metal or feel the pedal go soft, it’s time to get to work.

    Most shops will try to upsell you a whole brake job, but if you’ve got a basic jack and some decent wrenches, swapping the pads yourself is a rite of passage that saves you a massive chunk of change.

    ## Don't Let Them Fleece You

    “Most shops will try to tell you that your rotors are shot or that you need a whole new caliper system the second you mention a squeak, but honestly? Nine times out of ten, you just need a decent jack, a socket set, and twenty minutes to swap the pads yourself.”

    Nikolai·Osterman

    Don't Let Them Fleece You

    Don't Let Them Fleece You: Brake Repair

    Look, at the end of the day, replacing your brake pads isn’t some mysterious dark art reserved for guys with master certifications. We’ve covered the warning signs—from that high-pitched squeal that keeps you up at night to the feeling of your steering wheel vibrating when you hit the pedal. If you can recognize those sounds and symptoms early, you’re already ahead of 90% of drivers. Just remember to grab a decent jack, keep your parts organized in a tray so you don’t lose those tiny clips, and never skip the cleaning step before you slap the new pads in. It’s all about being proactive rather than waiting for a metal-on-metal grinding sound to tell you your rotors are toast.

    I know it feels intimidating the first time you crawl under your car, but honestly, that’s where the real confidence comes from. There is a specific kind of satisfaction you get from hearing your car stop smooth and quiet, knowing you did that work yourself without handing over a month’s worth of grocery money to a dealership. Don’t let the complexity of modern cars scare you off; most of the time, it’s just a matter of having the right socket and a little bit of grit. Keep your tools ready, stay focused, and I’ll see you in the next one.

    Frequently Asked Questions

    Do I really need to replace the rotors at the same time as the pads, or can I just swap the pads and call it a day?

    Look, I get it—you want to save the cash. If your rotors are still smooth and don’t have any deep grooves or heavy warping, you can usually just swap the pads. But if you feel that steering wheel shaking when you hit the brakes, your rotors are toast. Slapping new pads on beat-up rotors is just asking for noise and uneven wear. Do the job right once; don’t make me fix it again later.

    How do I know if my brake calipers are actually fine, or if I'm about to deal with a much bigger, more expensive headache?

    Look, if your pads are fresh but the car still pulls to one side or you feel a rhythmic pulsing when braking, your calipers are likely the culprit. Check for uneven pad wear—if one side is shredded and the other looks brand new, that caliper is sticking. Also, if you see fluid leaking around the piston or the brake pedal feels “mushy,” stop driving. That’s a massive headache waiting to happen.

    Is there a specific way to "bed in" new pads so they don't squeal or lose stopping power right after I install them?

    Yeah, don’t skip this part. If you just slam on the brakes immediately, you’ll glaze those pads and ruin them before you even leave the driveway. You need to “bed” them to transfer a thin layer of friction material onto the rotors. Find an empty stretch of road, get up to about 45 mph, and brake down to 10 mph firmly—but don’t stop completely. Do that five or six times. It ensures they grab right.

  • Essential Socket Set Guide

    Essential Socket Set Guide

    I still remember the first time I tried to swap out an alternator on my old Civic, thinking I could just wing it with a cheap, flimsy kit I found at a big-box store. Halfway through the job, I was stuck in the driveway, knuckles bleeding and sweating, because the one specific size I actually needed was missing from that useless junk pile. It’s a total scam when companies try to sell you those massive, 200-piece “everything but the kitchen sink” kits that are mostly just filler. You don’t need a mountain of cheap metal; you need a solid, reliable socket set that won’t strip your bolts the second things get tight.

    Look, I’m not here to sell you on some professional-grade tool chest that costs more than your car. My goal is to cut through the marketing noise and tell you exactly what’s worth your hard-earned cash and what’s just expensive clutter. I’m going to break down the different types of drives, the essential sizes you’ll actually use, and how to spot quality before you swipe your card. By the time we’re done, you’ll have the confidence to stop guessing and start getting the job done right.

    Table of Contents

    Metric vs Imperial Socket Sets Knowing the Truth Under Your Hood

    Metric vs Imperial Socket Sets Knowing the Truth Under Your Hood

    Here is the deal: if you walk into a shop and start grabbing random tools, you’re going to strip a bolt before you even realize what happened. Most modern cars—especially the Japanese tuners I spend my weekends messing with—are almost entirely metric. If you’re working on something newer, you’re going to be living in that world of 8mm to 22mm. But don’t go thinking you can ignore the imperial stuff entirely. If you ever find yourself tinkering with an old American muscle car or a vintage truck, you’ll realize pretty quickly that a 13mm won’t save you when you actually need a 1/2 inch.

    When you’re building out your automotive tool kits, you really need to decide if you’re going all-in on one or keeping a hybrid setup. I’ve seen guys try to “make it work” by using a slightly loose imperial socket on a metric bolt, and let me tell you, that’s the fastest way to turn a simple fix into a nightmare. Don’t be that guy. It’s better to invest in a decent set that covers both bases so you aren’t stuck halfway through a job because your tool choice was “close enough.”

    Deep Socket vs Shallow Socket the Tools That Actually Get Results

    Deep Socket vs Shallow Socket the Tools That Actually Get Results

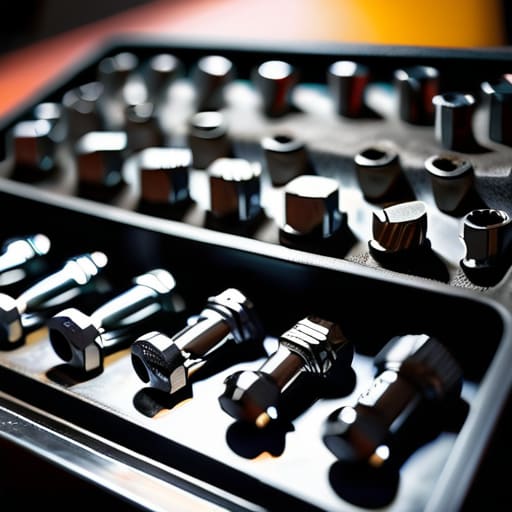
    If you’ve ever been halfway through a job only to realize you can’t reach a bolt because there’s a frame rail or a coolant hose in the way, you’ve learned the hard way why you need both. Shallow sockets are your go-to for most basic stuff—changing oil pans or working on exposed components where space isn’t an issue. They’re quick, easy to maneuver, and keep your profile low. But don’t let that fool you into thinking they’re the only ones you need in your automotive tool kits.

    That’s where the deep socket comes in. When you’re dealing with long threaded studs or bolts buried deep inside an engine bay, a shallow socket just won’t cut it. You need that extra length to seat the tool properly so you don’t round off the edges of the fastener. I’ve seen way too many beginners strip a bolt because they tried to use a shallow socket on something that clearly needed more reach. Mastering the deep socket vs shallow socket distinction is honestly one of the easiest ways to stop fighting your car and start actually fixing it.

    Don't Waste Your Cash: 5 Ways to Build a Kit That Actually Works

    • Don’t buy those cheap, massive 200-piece sets from the big-box stores. Half of those sockets are sizes you’ll never touch, and the metal is so soft you’ll round off a bolt head within the first week. Get a smaller, high-quality set instead; I’d rather have ten tools that don’t strip my fasteners than a hundred that do.
    • Invest in a decent ratchet with a high tooth count. There is nothing more frustrating than being wedged into a tight engine bay with only two inches of clearance and having a ratchet that skips every time you try to turn it. You want something that engages instantly so you aren’t fighting the tool more than the bolt.
    • Get yourself some extensions and a universal joint (swivel). You’re going to run into situations where there’s a bracket or a hose blocking your direct line of sight. If you don’t have a way to reach around obstacles, you’re just going to end up swearing at a piece of plastic instead of actually fixing the car.
    • Keep your sockets organized from day one. I learned this the hard way in my dad’s garage—losing a 10mm socket mid-job is a nightmare that kills your momentum. Use a socket rail or a dedicated tray. If you don’t know exactly where your tools are, you’re going to spend more time hunting than wrenching.
    • Always check the fit before you put your weight into it. If the socket feels “loose” or wobbly on the bolt, stop immediately. That’s how you end up with a rounded-off head that requires an extractor kit and two hours of extra headache. If it doesn’t seat perfectly, find the right size or walk away.

    The Bottom Line Before You Start Wrenching

    Stop wasting money on massive, 300-piece kits that are mostly junk; focus on getting a solid selection of metric and imperial sockets in both deep and shallow lengths.

    Always check your car’s specs before buying—if you’re working on a Japanese tuner, you’re going to live and die by your metric set.

    Don’t get stuck halfway through a job because you’re missing a specific depth; having both deep sockets for recessed bolts and shallow ones for tight spaces is the only way to actually finish what you started.

    The Real Cost of a Cheap Set

    I’ve seen too many people buy some cheap, no-name socket set just to save twenty bucks, only to have a stripped bolt or a rounded-off nut turn a ten-minute fix into a three-hour nightmare. At the end of the day, you aren’t just buying metal; you’re buying the confidence that when you pull that wrench, the bolt actually turns instead of snapping off in the engine block.

    Nikolai·Osterman

    Getting Your Hands Dirty

    Getting Your Hands Dirty with basic tools.

    Look, at the end of the day, you don’t need a massive, overpriced rolling chest full of every tool ever made to get through a weekend project. It really comes down to the basics we just talked about: knowing whether you’re grabbing metric or imperial so you don’t strip a bolt, and picking between deep or shallow sockets so you aren’t fighting a losing battle against a tight engine bay. If you invest in a decent set that covers these fundamentals, you’re already ahead of 90% of the people who walk into a shop and just hand over their keys because they’re intimidated. Don’t let a lack of specialized gear stop you from making a simple fix.

    My dad always told me that the most important tool in the garage isn’t the one that costs the most; it’s the one you actually know how to use. Every time you successfully torque down a bolt or swap out a sensor yourself, you’re taking a bit of that power back from the big shops. It might be frustrating when a socket slips or you realize you’re one size off, but that’s just part of the learning curve. Keep showing up, keep learning, and keep wrenching. Once you realize that most of what’s under the hood is just a series of manageable problems, you’ll realize you’ve been in control the whole time.

    Frequently Asked Questions

    How do I know if I should buy a single ratchet or a full socket set to start with?

    Look, if you’re just starting out, don’t waste your money on a single ratchet. You’ll get halfway through a job, realize you’re missing a 10mm, and then you’re stuck staring at a bolt you can’t turn. It’s frustrating and a total time-sink. Grab a decent starter set. It’s more upfront cash, but having all those sizes in one organized case saves you from the “missing socket” headache every single time.

    Is it actually worth spending more on a high-end brand, or can I get away with the cheap stuff from a big-box store?

    Look, I’ll give it to you straight: don’t go buying a $500 professional kit on day one, but stay away from those $10 mystery sets from the big-box aisles. They’ll round off your bolts faster than you can say “oops.” Get something mid-range from a decent brand. You want tools that won’t snap when things get tight or greasy. Save your money for parts, but don’t cheap out on the things actually touching your engine.

    What’s the difference between a 1/4-inch, 3/8-inch, and 1/2-inch drive, and which one do I actually need for most jobs?

    Think of drive size as the muscle behind your wrench. The 1/4-inch is your small-scale specialist—perfect for tight engine bays and delicate sensors where you don’t want to snap anything. The 3/8-inch is the real MVP; it’s the sweet spot for about 80% of everything I do. Then you’ve got the 1/2-inch, which is pure brute force for lug nuts and suspension bolts. If you’re just starting, grab a solid 3/8-inch set first.