Category: Maintenance

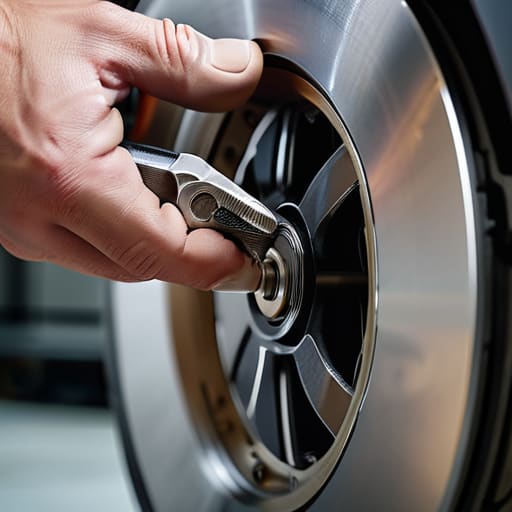
  • Servicing Brake Calipers

    Servicing Brake Calipers

    Ever pull into a shop only to have a mechanic tell you that you need a whole new braking system when all you really needed was a proper brake caliper service? It drives me crazy. I remember one Saturday back when I was helping my dad in the garage; we had a customer come in panicking about a “dead” caliper on his old sedan, but once we cleaned out the grit and lubricated the slide pins, the thing worked like new. Most shops will try to sell you the most expensive replacement part possible, but the truth is, a lot of the time, your calipers aren’t broken—they’re just stubborn.

    I’m not here to give you some textbook lecture or a list of fancy tools you can’t afford. I’m going to walk you through exactly how to tackle this job yourself, from cleaning off the crusty buildup to making sure those pins move freely. You’re going to get the straight truth on what parts actually matter and how to avoid the common mistakes that end up costing you double. Grab your magnetic tray and let’s get to work.

    Table of Contents

    Guide Overview

    Total Time: 1-3 hours per wheel
    Estimated Cost: $40-150
    Difficulty: Intermediate

    Tools & Supplies

    • Jack and jack stands for vehicle lifting
    • Socket set and wrenches for caliper bolts
    • C-clamp or brake piston compressor for piston retraction
    • Wire brush for cleaning components
    • Brake pads (one set per axle)
    • Brake cleaner spray (1-2 cans)
    • High-temperature brake grease (1 small tube)
    • Brake fluid (1 bottle)

    Step-by-Step Instructions

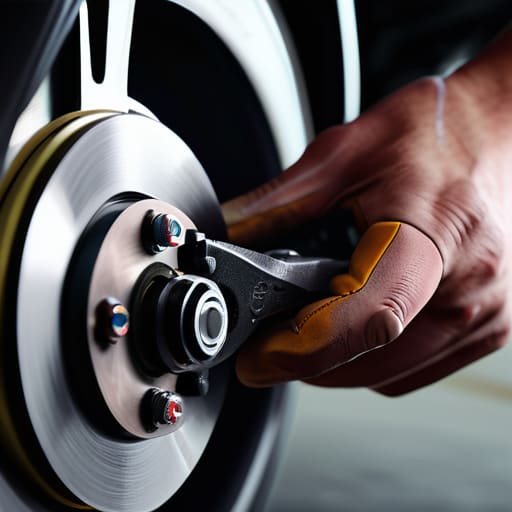
    • 1. First things first, you gotta get the car off the ground. Don’t even think about working on a car held up by just a hydraulic jack—it’s a recipe for a disaster you don’t want. Use jack stands to secure the vehicle, and once it’s stable, take the wheel off and set it aside. I usually keep my wheel bolts in a little dish so they don’t roll under the workbench.
    • 2. Once the wheel is out of the way, locate the caliper mounting bolts. Depending on what you’re driving, these might be on the back or the front of the caliper. Grab your socket set and loosen them up, but don’t just yank them out. If they feel stuck, give them a little tap with a wrench to break the tension, but don’t go overboard and strip the heads.
    • 3. Now, carefully lift the caliper off the rotor. This is where most people mess up: do not let the caliper hang by the rubber brake hose. That hose is fragile, and if you stretch it, you’re looking at a much more expensive repair than just a service. Use a piece of old bungee cord or a coat hanger to tie the caliper to the suspension so it stays put.
    • 4. Take a look at your brake pads. If they’re uneven or looking thin, swap them out for new ones. While you’ve got everything apart, grab a can of brake cleaner and scrub down the rotor. You want to get rid of any grit, dust, or old grease that’s hanging around. It makes a massive difference in how smooth your brakes feel once you’re back on the road.
    • 5. Before you put the new pads in, you’ll probably need to compress the caliper piston back into its housing. You can use a C-clamp or a dedicated brake tool for this. Just make sure you check your brake fluid reservoir under the hood first; as you push the piston back, the fluid level will rise, and you don’t want it overflowing all over your engine bay.
    • 6. Slide your new pads into the bracket, making sure they sit flush and aren’t cocked at an angle. If your kit came with some high-temp brake grease, apply a tiny bit to the back of the pads where they touch the piston. Don’t get any grease on the actual friction surface of the pad or the rotor, or you’ll ruin your stopping power instantly.
    • 7. Once the pads are seated, slide the caliper back over them and tighten those mounting bolts back down. Don’t just “hand tighten” them—give them a good, firm pull with your wrench so they don’t vibrate loose. Finally, put the wheel back on, lower the car, and pump the brake pedal a few times before you even think about shifting into gear. You need to seat those pads against the rotor first.

    Spotting the Signs of a Seizing Caliper Early

    Spotting the Signs of a Seizing Caliper Early.

    You don’t always have to wait for a total breakdown to know something is wrong. Usually, your car tries to tell you something is up long before you’re stranded on the shoulder. One of the biggest giveaways is checking your brake pad wear patterns. If you notice one pad is significantly thinner than the other on the same wheel, that’s a massive red flag. It means the piston isn’t retracting properly, which is a classic sign of a seizing caliper.

    Keep an ear out for any weird grinding or a constant, low-pitched squeal even when you aren’t touching the pedal. If you feel a strange pulling sensation to one side when you hit the brakes, stop what you’re doing and take a look. Sometimes, you might even smell something sweet or acrid—that’s often just the heat from a stuck pad cooking the friction material. Catching these signs of a seizing caliper early can save you from a much more expensive job, like a full caliper piston replacement, down the road.

    Decoding Strange Brake Pad Wear Patterns

    Decoding Strange Brake Pad Wear Patterns.

    If you pull your pads out and they look like they’ve been chewed on, pay attention. One of the biggest giveaways of a failing unit is uneven brake pad wear patterns. If the inner pad is worn down to a metal nub while the outer pad looks brand new, you’re looking at a classic case of a stuck piston. It’s not just about the pads, though; sometimes the slide pins are just bone-dry and seized up. This is exactly why I’m such a stickler for proper brake caliper lubrication during every single teardown. If those pins can’t move freely, the caliper can’t center itself, and you’re basically dragging your brakes every time you hit the pedal.

    You might also notice “tapered” wear, where the pad is thicker on one end than the other. That’s usually a sign that the caliper is tilting because it’s struggling to compress. Don’t just slap on new pads and call it a day—that’s how you end up needing a full caliper piston replacement a month later. Take a second to look at the hardware and make sure everything is sliding smooth.

    Pro Tips to Save Your Sanity (and Your Wallet)

    • Don’t even think about forcing that piston back in without a proper brake spreader tool; if you try to use a C-clamp on a modern caliper, you’re probably going to crack something or mess up the seal.
    • Always, and I mean always, clean your contact points with a wire brush before putting things back together; if there’s even a tiny bit of grit left in that bracket, you’re just asking for the pads to bind up again.
    • Get yourself a decent bottle of brake fluid and don’t settle for the cheap stuff—using the wrong spec is a fast track to a spongy pedal and a massive headache.
    • Keep your grease organized; use a dedicated high-temp silicone brake lube for the slide pins, and for the love of everything, don’t get any on the actual friction surfaces of the pads or the rotors.
    • Double-check your torque specs on the caliper bolts; I’ve seen too many guys just “feel” it’s tight enough, only to have a bolt shake loose halfway through a drive because they didn’t use a real torque wrench.

    The Bottom Line on Your Brakes

    Don’t wait for a smell or a pull to the side; if you notice uneven pad wear, your caliper is likely already starting to act up.

    You don’t need a massive shop setup to fix this, but you do need to be patient with the cleaning process—don’t rush the brake cleaner part.

    Most “expensive” brake jobs are just basic maintenance that a little bit of grease and the right socket set could have handled at home.

    ## The Truth About Your Brakes

    “Mechanics love to charge a premium for ‘caliper replacement’ when half the time, you just need a good soak in some cleaner, a bit of grease, and the patience to get a stubborn piston moving again.”

    Nikolai·Osterman

    Don't Overthink It, Just Get It Done

    Don't Overthink It, Just Get It Done.

    Look, servicing your calipers isn’t some mysterious ritual reserved for master techs with fancy diagnostic computers. If you’ve learned to spot that uneven pad wear or felt that weird pull when you hit the pedal, you’ve already done the hard part. Just remember: keep your cleaning thorough, make sure those slide pins are actually lubricated instead of just shoved back in, and always, always double-check your torque specs. It’s really just about being methodical and not cutting corners when it comes to the safety-critical stuff. If you take the time to do it right the first time, you aren’t just saving a massive headache at the shop—you’re making sure your car stays reliable for the long haul.

    At the end of the day, I know how intimidating it feels to stare down a greasy brake assembly for the first time. It’s easy to think you’re going to mess something up or end up with a pile of leftover bolts, but that’s just part of the learning curve. Every time you get your hands dirty and successfully fix something yourself, you’re taking a bit of that power back from the big-name dealerships. Don’t let a little bit of brake dust or a stubborn bolt keep you from owning your machine. Keep your tools organized, stay patient, and I’ll see you in the next one.

    Frequently Asked Questions

    Is it actually worth replacing the whole caliper, or can I just swap out the seals and get back on the road?

    Look, I get why you’d want to just swap the seals—it’s cheaper and feels easier. But honestly? If the caliper is seizing, the piston is likely pitted or the internal bore is corroded. Slapping new seals on a damaged surface is just a temporary band-aid that’ll fail you in a month. Save yourself the headache and the extra trips to the parts store: just buy a new unit. It’s better for your peace of mind.

    How do I know if I need to bleed the brakes myself, or if I'm gonna end up with air in the lines and a mushy pedal?

    If your brake pedal feels like you’re stepping on a wet sponge or it sinks straight to the floor, you’ve definitely got air in the lines. If you just swapped pads or opened the system, you’re gonna have to bleed them. But if the pedal is just a little soft after a long drive, you might just have old, moisture-heavy fluid. Don’t guess—if it feels mushy, bleed ’em. Better to do it yourself than trust a shop to do it right.

    Can I just use any generic brake grease, or am I gonna ruin the rubber boots if I don't get the high-temp stuff?

    Look, don’t just grab whatever cheap grease is sitting on your workbench. If you use regular lithium grease or something petroleum-based, it’s going to swell and tear those rubber boots in no time. Once those boots fail, dirt gets in, and you’re looking at a seized piston. Stick to a high-temp, silicone-based brake lubricant. It’s a small difference in price, but it’ll save you from having to redo the whole job next month.

  • Troubleshooting Serpentine Belt Noises

    Troubleshooting Serpentine Belt Noises

    I remember being ten years old in my dad’s garage, trying to keep my hands clean while he leaned over the engine bay of an old sedan. Suddenly, this piercing, high-pitched shriek cut through the sound of the radio, and my dad just sighed, wiped his hands on a rag, and pointed toward the front of the engine. That unmistakable serpentine belt squeal is one of those sounds that makes your stomach drop because you immediately think you’re looking at a massive repair bill. Most people hear that noise and think they need to rush to a dealership just to get a quote, but honestly, that’s how you get ripped off.

    I’m not here to give you some textbook lecture or tell you that you need a specialized diagnostic computer to figure this out. My goal is to give you the straight truth based on what I actually see on the shop floor every day. I’m going to walk you through exactly what that noise is telling you and how you can diagnose it yourself with basic tools. We’ll figure out if it’s just a loose tensioner or if you actually need a new belt, so you can stop stressing and get back on the road.

    Table of Contents

    Spotting the Real Serpentine Belt Replacement Signs

    Spotting the Real Serpentine Belt Replacement Signs

    You don’t always need to wait for a deafening scream to know something is off. Sometimes, the warning signs are more subtle. If you notice a rhythmic chirping or a slight vibration while the engine is idling, pay attention. I’ve seen plenty of guys ignore a minor engine bay screeching sound only to have the belt snap entirely while they’re merging onto the highway. Another big one is looking at the belt itself—if you see cracks, fraying on the edges, or a “glazed” look where the rubber seems shiny and smooth, that belt is toast. It’s lost its grip, and no amount of belt conditioner effectiveness is going to save it at that point.

    You also have to play detective with the noise. If the sound changes pitch when you turn the steering wheel or crank the AC, you might be looking at serpentine belt tensioner failure rather than just a bad belt. It’s easy to mistake a dying component for a simple belt issue, so keep an eye out for any worn pulley symptoms like wobbling or uneven rotation. If a pulley looks like it’s dancing, that’s your cue to stop driving and start wrenching.

    Is It a Worn Pulley or an Alternator Bearing Noise

    Is It a Worn Pulley or an Alternator Bearing Noise?

    Here’s the thing: not every screeching sound is coming from the rubber itself. Sometimes, the belt is actually fine, but it’s being driven by a component that’s dying underneath it. If you hear a grinding or whining noise that changes pitch when you turn on your headlights or AC, you might be dealing with alternator bearing noise rather than a simple belt issue. I’ve seen plenty of guys buy a brand-new belt only to realize the alternator was the real culprit all along.

    To figure it out, you’ve got to play detective. A classic way to narrow it down is to use a bit of water on the ribbed side of the belt while the engine is running. If the noise vanishes instantly, it’s a belt issue. If the sound stays exactly the same, you’re likely looking at worn pulley symptoms or a failing component. Keep an eye out for a belt that looks perfectly healthy but still produces an engine bay screeching sound; that’s a huge red flag that a pulley bearing is toast or you’ve got a serpentine belt tensioner failure on your hands.

    5 Quick Ways to Pinpoint the Problem Before You Start Tearing Things Apart

    • Grab a spray bottle with a little water and lightly mist the belt while the engine is running. If the noise suddenly stops or changes, you’re definitely looking at a belt issue—likely just dried out or glazed—rather than a failing bearing.
    • Check the belt’s “ribs” for any fraying or chunks missing. If you see cracks on the underside of the belt, it’s done. Don’t try to tighten the tensioner to fix it; just swap the belt out.
    • Don’t forget to check your tensioner. If the belt is fine but the squeal is constant, your tensioner might not be applying enough pressure. Give it a visual check to see if it’s bouncing or vibrating way too much while the car’s idling.
    • Look for “glazing,” which is basically when the belt gets too hot and turns shiny and smooth. A glazed belt can’t grip the pulleys properly, which causes that high-pitched scream every time you accelerate.
    • Inspect the pulleys for any misalignment. If a pulley is sitting even a fraction of an inch off-center, it’s going to pull the belt at an angle, causing it to squeal and wear down way faster than it should.

    The Bottom Line on That Squeal

    Don’t just swap the belt immediately—check if the noise is actually coming from a bad pulley or an alternator bearing first so you don’t waste money.

    If you see cracks, fraying, or glazing on the underside of the belt, it’s time to pull it out and get a new one before it snaps and leaves you stranded.

    Most of the time, a squeal is just a sign of tension or wear, and if you catch it early with a simple visual check, you can avoid a massive repair bill later.

    Listen to Your Engine

    That screeching sound isn’t just annoying; it’s your car’s way of telling you something is slipping or dying. Don’t wait for the belt to snap and leave you stranded on the shoulder—catch the noise early, grab a wrench, and handle it before a small squeal turns into a massive headache.

    Nikolai·Osterman

    Don't Let a Little Noise Scare You Off

    Don't Let a Little Noise Scare You Off

    Look, at the end of the day, that squeal is just your car’s way of talking to you. Whether it’s a belt that’s lost its grip, a pulley that’s seen better days, or an alternator bearing that’s finally giving up the ghost, the key is to listen before it breaks. We’ve covered how to tell the difference between a simple belt replacement and a more annoying pulley issue, and hopefully, you now know that a loud noise doesn’t always mean you’re looking at a massive, expensive repair bill. Just remember to check the tension and look for cracks before you go buying parts you might not even need.

    I know it can feel intimidating when you’re staring into a crowded engine bay, but don’t let the complexity of modern cars get in your head. Most of the time, fixing a squeal is just about getting your hands dirty and having the right tools ready. You don’t need to be a master technician to take control of your own maintenance; you just need to be willing to learn. Stop letting the fear of the unknown keep you from doing the work yourself. Grab your tools, stay patient, and take it one bolt at a time. You’ve got this.

    Frequently Asked Questions

    Can I just spray some belt dressing on it to stop the noise, or is that just a temporary band-aid?

    Look, I’ve seen guys do this in the shop, and honestly? It’s a total band-aid. Spraying belt dressing might kill the noise for a day or two, but it doesn’t actually fix the underlying issue—whether that’s a glazed belt or a dying tensioner. It just gums up the works and hides the symptom. If you’re just trying to get home, fine, but don’t let it trick you into thinking the problem went away.

    How do I know if the tensioner is actually bad or if it's just the belt itself losing its grip?

    The easiest way to tell is by looking at the tensioner while the engine’s running. If you see the tensioner arm bouncing or vibrating like crazy, that’s a dead giveaway—the internal spring is shot. But if the tensioner stays steady and the belt is the only thing dancing around, you’re probably just dealing with a glazed or loose belt. Check for cracks on the belt first; if it looks smooth and shiny, it’s lost its grip.

    Is it safe to keep driving if the squeal only happens when I first start the car in the morning?

    Look, if it only screams for a few seconds when you first fire it up and then goes quiet, you aren’t in immediate danger of being stranded. It’s usually just moisture or a slightly loose belt tensioner. But don’t get complacent. That “morning squeal” is a warning shot. If you ignore it, the belt eventually slips or snaps, and then you’re dealing with a dead battery or overheating. Check the tension soon.

  • Cleaning Corrosion From Battery Terminals

    Cleaning Corrosion From Battery Terminals

    I was staring at my dad’s old sedan last Tuesday, cursing under my breath because the engine just wouldn’t turn over, even though the battery was brand new. I felt like a total idiot, but after a quick look, I realized the culprit wasn’t some expensive electrical failure—it was just a nasty layer of white, crusty oxidation choking the life out of the connections. Most people think they need a whole new alternator or a shop visit when their car acts up, but half the time, a little battery terminal cleaning is the only thing standing between you and a dead engine.

    I’m not here to sell you on some overpriced, fancy chemical spray that promises miracles. I just want to show you how to do this right with stuff you probably already have in your garage. In this guide, I’m going to walk you through the exact process I use at the shop to clear out that buildup and ensure your connection is solid. We’re going to keep it simple, keep it cheap, and make sure you don’t get ripped off by a mechanic for a fix you could’ve handled in ten minutes.

    Table of Contents

    Guide Overview

    Total Time: 15-30 minutes
    Estimated Cost: $5-15
    Difficulty: Beginner

    Tools & Supplies

    • Wire brush or battery terminal brush for scrubbing corrosion
    • Wrench or socket set for loosening terminal nuts
    • Rag or microfiber cloth for wiping surfaces
    • Baking soda and water mixture (1 tablespoon baking soda to 1 cup water)
    • Distilled water for rinsing
    • Petroleum jelly or dielectric grease for protection

    Step-by-Step Instructions

    • 1. First things first, you need to get your hands on a 10mm wrench—that’s the most common size for terminal bolts, but double-check yours just in case. Once you’ve got it, loosen the nut on the negative terminal (the one with the minus sign) first. I always tell people: always start with the negative so you don’t accidentally create a massive spark if your wrench touches the frame while you’re working.
    • 2. Now that the negative cable is off, move over to the positive terminal and loosen that one too. Once both cables are disconnected, pull them away from the battery posts and set them aside. Make sure they aren’t touching anything metal while you’re working, or you might accidentally short something out.
    • 3. Take a look at those battery posts. If you see that nasty, white, crusty powder, that’s corrosion, and it’s basically a wall blocking your electricity. Grab a stiff wire brush or even an old toothbrush if you’re working in a tight spot. Scrub the terminals and the inside of the cable clamps until you see the actual metal again. It’s a bit of a workout, but don’t stop until it’s shiny.
    • 4. If the buildup is really thick and stubborn, you can make a quick DIY cleaning solution. Mix a little bit of baking soda and water into a paste and apply it to the corrosion. It’ll fizz up like crazy—that’s just the chemical reaction working its magic. Scrub it again, then rinse the whole mess off with some fresh water and dry everything thoroughly with a rag.
    • 5. Before you put everything back together, take a second to check the battery cables for any cracks or fraying. If the wires look like they’re about to snap, no amount of cleaning is going to fix the problem; you’ll need to replace the whole cable. If they look solid, go ahead and slide the positive terminal back onto the post first, then the negative.
    • 6. Tighten those nuts down so the clamps are rock solid. You shouldn’t be able to wiggle the cables by hand at all. If they’re loose, your car might struggle to start or even die while you’re driving, which is exactly the kind of unreliable mess we’re trying to avoid.
    • 7. As a final pro tip, grab a tiny bit of petroleum jelly or some dedicated terminal protector spray and smear it over the clean connections. This creates a barrier that keeps oxygen and moisture away, which means you won’t have to deal with this same headache again in a few months.

    Mastering Corrosion Removal Methods With Simple Household Tools

    Mastering Corrosion Removal Methods With Simple Household Tools

    Look, you don’t always need to run out and buy some expensive, specialized chemical cleaner from the auto parts store. Most of the time, you can handle the heavy lifting with stuff you already have in your kitchen. My go-to is a simple baking soda and water solution. Just mix a few tablespoons of baking soda into a small cup of warm water and pour it directly onto those crusty, blue-green deposits. You’ll actually see it start to fizz and bubble—that’s the chemical reaction working to neutralize the acid. It’s a lifesaver for basic automotive battery maintenance when you’re working on a budget.

    Once you’ve scrubbed everything clean with an old toothbrush or a wire brush, don’t just slap the cables back on and call it a day. This is where most people mess up. To actually help with preventing terminal oxidation in the future, I always recommend a quick dielectric grease application once the connections are dry. Slather a thin layer over the metal posts and the inside of the clamps. It creates a barrier that keeps moisture and air from getting back in there, so you aren’t stuck repeating this whole process in three months.

    Preventing Terminal Oxidation and Tightening Battery Clamps for Good

    Preventing Terminal Oxidation and Tightening Battery Clamps for Good

    Once you’ve got everything shiny and clean, you can’t just bolt it all back together and walk away. If you want to stop the cycle of constant scrubbing, you need to focus on preventing terminal oxidation before it even starts. I always keep a small tub of dielectric grease in my kit for this exact reason. After you’ve tightened everything down, smear a thin layer over the metal connections. It creates a barrier that keeps moisture and oxygen from hitting the lead, which is basically what causes that nasty white crust to grow in the first place.

    While you’re at it, don’t overlook the physical connection itself. There is nothing worse than a car that cranks slowly because of a loose connection. When you’re tightening battery clamps, make sure they aren’t just “snug”—they need to be firm enough that you can’t wiggle them by hand. If you can move the terminal even a tiny bit, you’re asking for intermittent electrical issues or a dead battery. A solid, grease-protected connection is the secret to making your automotive battery maintenance actually last.

    Pro Tips to Keep Your Connection Solid

    • Always disconnect the negative terminal first; it’s a simple safety move that keeps you from accidentally shorting out your electrical system if your wrench touches something it shouldn’t.
    • Don’t just tighten the clamps until your knuckles bleed; you want them snug enough that they don’t wiggle, but if you overdo it, you’ll strip the threads and end up with a much bigger headache.
    • If you see a massive amount of white, crusty powder, don’t just scrape it off with a screwdriver—you’ll likely just mash it deeper into the metal, so use a dedicated wire brush to actually lift it out.
    • Keep a can of terminal protector spray or even just a thin layer of petroleum jelly in your toolbox; it creates a barrier that stops oxygen from hitting the metal and starting that corrosion cycle all over again.
    • Check your connections every few months, especially if you’ve been driving in heavy rain or extreme heat, because vibration and weather can loosen things up more than you’d think.

    The Bottom Line on Keeping Your Battery Alive

    Don’t wait for a dead engine to check your terminals; catching that white, crusty buildup early is way easier than dealing with a car that won’t crank on a Monday morning.

    You don’t need a fancy shop kit to fix this—a simple wire brush, some baking soda, and a bit of elbow grease are usually all it takes to get things flowing again.

    Once you’ve got them clean, don’t just walk away; apply a little protectant and make sure those clamps are tight so you aren’t constantly fighting the same problem next month.

    ## The Real Cost of Neglect

    “A mechanic might charge you a hundred bucks just to scrape some green crust off your battery, but it’s really just five minutes of your time and a wire brush. Don’t let a little oxidation turn a simple fix into a dead car and an empty wallet.”

    Nikolai·Osterman

    Don't Leave It to Chance

    Clean battery terminals: Don't Leave It to Chance.

    Look, keeping your battery terminals clean isn’t some high-level engineering feat; it’s just basic maintenance that keeps you from getting stranded. We’ve covered everything from using a simple wire brush to scrubbing away that nasty white crust, to making sure your clamps are actually tight enough to hold a charge. Remember, once you’ve cleared the junk away, applying a bit of petroleum jelly or a dedicated protector is what actually makes the difference in stopping that oxidation from creeping back next week. Don’t just clean it and walk away—seal the deal so you aren’t doing this same job again in a month.

    At the end of the day, my goal is to make sure you feel confident every time you turn that key in the ignition. You don’t need to drop a few hundred bucks at a shop just to have someone spray some cleaner on your battery and call it a day. If you can handle a screwdriver and a bit of elbow grease, you can handle this. Taking ownership of these small, greasy tasks is how you stop getting ripped off and start truly understanding your machine. Keep that magnetic tray handy, stay focused, and just keep turning wrenches.

    Frequently Asked Questions

    Is it actually dangerous to clean the terminals while the battery is still connected to the car?

    Look, I’m not going to tell you it’s impossible, but it’s definitely not smart. If your wrench slips and touches both the positive terminal and a metal part of the car at the same time, you’re going to see a massive spark and potentially fry your car’s electronics. I’ve seen it happen. Do yourself a favor: disconnect the negative cable first. It takes ten seconds and keeps you from turning a simple cleaning job into a massive headache.

    How do I know if my battery is actually dying versus just having dirty connections?

    It’s a classic headache, but here’s the deal: if your car cranks slow or the lights dim when you try to start it, that’s usually a connection issue. If the car starts fine but dies randomly while you’re driving, or if the battery is more than three or four years old, the cell itself is likely toast. Clean those terminals first. If the symptoms stick around, grab a multimeter and check the voltage.

    If I see a ton of white powder, does that mean my battery is leaking acid or is it just normal corrosion?

    Look, seeing that white, crusty powder is super common, so don’t panic. Usually, it’s just a reaction between the battery gases and your terminal connections—standard corrosion. However, if you notice the battery casing itself looks wet, smells like rotten eggs, or has actual liquid seeping out, that’s a different story. That means you’ve got an acid leak, and you need to swap that battery out immediately before it eats through your car’s wiring.

  • Measuring Tire Tread Depth

    Measuring Tire Tread Depth

    I remember my first week at the shop, watching a senior tech try to sell a customer a full set of premium tires just because they looked “a bit thin.” It rubbed me the wrong way, because honestly, most people get intimidated by the jargon and end up paying for something they don’t actually need yet. You don’t need a computerized laser scanner or a fancy service bay to know if your rubber is shot; a simple tread depth check is something you can do in your driveway in about thirty seconds.

    I’m not here to sell you a brand name or walk you through some high-tech diagnostic ritual that costs a hundred bucks. My goal is to give you the straight truth on how to eyeball your tires and use a basic coin to see if you’re actually safe or just being hustled. I’ll show you exactly what to look for so you can stop guessing and start taking control of your own maintenance.

    Table of Contents

    The Truth About Measuring Tire Tread With a Gauge

    The Truth About Measuring Tire Tread With a Gauge

    Look, I get it. The penny trick is a classic, and it works in a pinch if you’re stuck in your driveway. But if you’re serious about your car, relying on a coin is basically just guessing. When I’m working on a build or checking out a customer’s ride, I always reach for a dedicated tool. Measuring tire tread with a gauge gives you a decimal reading that actually means something. A penny tells you if you’re “okay,” but a gauge tells you exactly how much life you have left before things get sketchy.

    The real reason you want that precision isn’t just about passing a state inspection; it’s about wet road driving safety. When those grooves get shallow, your tires lose their ability to channel water away from the contact patch. That’s when you start dealing with hydroplaning, and honestly, that’s a terrifying feeling when you’re hitting highway speeds. If you notice uneven wear, it might also point to something else wrong, like bad alignment or worn suspension. Getting an accurate number helps you spot those tire wear patterns early, so you aren’t caught off guard by a blowout.

    Dont Get Caught Breaking Legal Tire Tread Limits

    Look, I’ve seen too many guys get pulled over or, worse, lose control on the highway because they thought they could squeeze another few months out of bald tires. Most states have strict legal tire tread limits, usually sitting at 2/32 of an inch. If a cop sees your treads are down to nothing, you aren’t just looking at a hefty fine; you’re looking at a failed inspection that could keep your car off the road until you drop some cash on new rubber.

    But it’s not just about avoiding a ticket from a highway patrol officer. When you’re dealing with wet road driving safety, those grooves in your tires are doing the heavy lifting to channel water away from your contact patch. If your tread is too shallow, you’re basically driving on a layer of water, which leads straight to hydroplaning—and that’s a quick way to end up in a ditch. Don’t wait for a cop to tell you your tires are junk; if they look smooth, they’re dangerous.

    Pro Tips for Not Getting Stranded

    • Don’t just check one spot. Tires wear unevenly depending on your alignment, so grab that penny and test the inner edge, the outer edge, and the middle to get the full picture.
    • Watch out for “patchy” wear. If you see weird little divots or one side looks smoother than the rest, it’s not just about the depth—your suspension is probably screaming for help.
    • Check your sidewalls while you’re down there. If you see any cracks, bulges, or deep cuts, the tread depth doesn’t even matter; that tire is a ticking time bomb and needs to go.
    • Keep an eye on the age, too. Even if the tread looks deep, if your tires are older than six years, the rubber gets hard and loses its grip. Check the DOT code on the side to see when they were actually born.
    • Use a flashlight. It sounds basic, but trying to inspect tires in a dark garage or under a dim streetlamp is how you miss the small stuff. Get some good light on those grooves so you aren’t guessing.

    The Bottom Line on Your Rubber

    You don’t need to buy some fancy, overpriced gauge to know if your tires are shot; the old penny trick works just fine if you’re on a budget.

    Don’t wait until you’re driving in the rain to check your tread—if you’re hitting those legal limits, you’re basically driving on slicks and asking for hydroplaning.

    Checking your tread is one of those five-minute jobs that saves you from a massive headache and a much more expensive repair bill down the road.

    ## The Real Cost of Cutting Corners

    Look, a mechanic might tell you your tires are “fine” just to move on to the next job, but your car doesn’t lie. If you’re feeling that hydroplaning shimmy or seeing Lincoln’s head in the tread, you aren’t just driving on old rubber—you’re driving on a prayer.

    Nikolai·Osterman

    Don't Leave Your Safety to Chance

    Don't Leave Your Safety to Chance.

    Look, we’ve covered the essentials: whether you’re using a professional gauge or the old-school penny trick, the goal is the same. You need to know exactly what you’re working with before you hit the highway. Don’t get lazy and assume your tires are fine just because they look “okay” from a distance. Between staying on the right side of the law and making sure you actually have enough traction to handle a sudden rainstorm, checking your tread is one of those non-negotiable tasks. It’s a five-minute job that can literally save your life and keep you from getting a massive, unnecessary bill at the tire shop.

    At the end of the day, keeping your car in top shape isn’t about being a master mechanic; it’s about being proactive. Most people wait until something goes wrong—a loud noise, a vibration, or a flat—to finally pay attention to their vehicle. Don’t be that person. Take control of your own maintenance and stop letting uncertainty drive your car. Grab that penny, check your rubber, and drive with some actual confidence. You’ve got this, and honestly, your car will thank you for it.

    Frequently Asked Questions

    If my tread looks okay but I still feel the car sliding on wet roads, what's actually going on?

    If your tread looks fine but you’re still hydroplaning, your rubber is likely toast. Tires aren’t just about depth; they’re about the compound. Over time, heat and road grime make the rubber harden—we call it “dry rot.” Once that rubber loses its grip, it doesn’t matter how deep the grooves are; you’re basically driving on hard plastic. If they feel slick or look cracked, stop gambling with your safety and swap them out.

    Does it matter if the wear is uneven, or is it just about the overall depth?

    Look, depth is only half the story. If your tread is deep but wearing unevenly—like one side is bald while the other is fine—you’ve got a real problem. That usually means your alignment is shot or your suspension is acting up. Driving on uneven tires is a recipe for a blowout or constant pulling to one side. Don’t just check the numbers; look at the pattern. If it looks wonky, get it checked.

    Can I just use a ruler, or is there a specific way to measure so I don't get a false reading?

    Look, you can use a ruler, but it’s a headache. Unless you’ve got a steady hand and a ruler with millimeter markings, you’re just guessing. If you’re off by even a tiny bit, you might think you’re safe when you’re actually riding on bald rubber. Honestly? Just grab a cheap tread depth gauge from the parts store. It’s a five-dollar tool that gives you a real number instead of a “close enough” guess.

  • Identifying and Fixing Radiator Leaks

    Identifying and Fixing Radiator Leaks

    I remember being ten years old, kneeling on my dad’s oil-stained driveway, staring at a neon-green puddle spreading under his old sedan. The smell was unmistakable—that sickly sweet, chemical scent that hits you right in the back of your throat. My dad didn’t call a tow truck or panic; he just grabbed a flashlight and told me to watch closely. That’s when I first learned that radiator leaks aren’t some mysterious, engine-killing curse that requires a $2,000 shop bill. They’re usually just a sign that a hose is tired or a plastic tank has finally given up the ghost.

    I’m not here to give you some textbook lecture or sell you on a “professional-grade” kit you don’t need. My goal is simple: I want to show you how to spot the source, figure out if it’s a quick fix or a real problem, and get you back on the road without getting ripped off. We’re going to look at the actual hardware, the common failure points, and the no-nonsense steps to handle it yourself. You’ve got the tools; you just need the right way to use them.

    Table of Contents

    Checking for Coolant Leaks Before Your Engine Quits

    Checking for coolant leaks before your engine quits.

    You don’t always need to see a puddle on your driveway to know something is wrong. Sometimes, the signs are much more subtle, happening right while you’re driving to work. Keep a close eye on your dashboard; if you see your engine temperature gauge rising toward the red zone, that’s your car screaming for help. It’s one of the most common engine overheating symptoms I see at the shop, and by the time the steam starts pouring out from under the hood, you’ve usually waited way too long.

    Another thing to watch for is a sudden drop in your coolant level. If you notice you’re topping off your reservoir every few days, you’re dealing with some serious coolant loss causes that need immediate attention. I always tell people to do a visual inspection when the engine is completely cold. Look for crusty, white, or brightly colored residue around the hoses and connections. Even a tiny bit of dried buildup can point to a slow drip that’ll eventually turn into a massive headache.

    The Real Coolant Loss Causes They Wont Tell You

    The Real Coolant Loss Causes They Wont Tell You

    Look, most shops will immediately tell you that you need a whole new radiator, but that’s often a massive money grab. One of the most common coolant loss causes I see in the shop is actually a simple radiator cap failure. That little cap is designed to maintain specific pressure in your cooling system; if the seal goes bad or the spring gets weak, the coolant just boils off or escapes through the overflow. It’s a cheap part, but if you ignore it, you’re looking at much bigger problems down the road.

    Another thing that gets overlooked is a hairline crack in a heater hose or a failing water pump seal. These aren’t always obvious until you notice your engine temperature gauge rising while you’re sitting in traffic. Sometimes the leak only happens when the system is under full pressure, meaning you won’t see a puddle on your driveway, but your reservoir is still dropping. If you’re seeing those early engine overheating symptoms, don’t just keep topping it off with water and hope for the best—find the actual source before you warp a head gasket.

    5 Ways to Keep Your Cooling System From Trashing Your Engine

    • Don’t just eyeball the level; use a dedicated coolant tester. Sometimes the leak is so slow it’s just evaporating, and you won’t see a puddle, but your sensors will definitely tell you something is wrong when the temp starts climbing.
    • Check your hoses for “soft spots” or cracks. If a hose feels spongy or looks like it’s bulging, it’s a ticking time bomb. I’ve seen way too many people wait until the hose actually bursts on the highway to realize they needed a $20 part.
    • Keep an eye on your radiator cap. It’s a tiny part that people always overlook, but if that seal is shot, you’re going to lose pressure and coolant. It’s one of the easiest, cheapest fixes you can do in your own driveway.
    • Use a pressure tester if you can’t find the source. If you’re staring at a dry engine bay and still losing fluid, rent or buy a pressure tester. It forces the coolant out of the leak point so you aren’t just guessing where the drip is coming from.
    • Never, ever mix different types of coolant. I know it’s tempting to just grab whatever is on sale at the auto parts store, but mixing colors or chemistries can create a sludge that clogs your entire system. Stick to what your manual says.

    The Bottom Line: Don't Let a Small Leak Turn Into a Big Bill

    Keep a close eye on your temperature gauge and coolant levels; catching a leak early usually means a cheap fix instead of a blown head gasket.

    Most leaks aren’t some mysterious engine failure—they’re usually just a cracked hose, a loose clamp, or a worn-out radiator cap that you can swap out yourself.

    If you see a puddle, don’t just top off the fluid and ignore it; find the source so you aren’t constantly chasing a losing battle under your hood.

    ## The Cost of Waiting

    “Look, a small drip under your car isn’t just a mess on your driveway—it’s a ticking clock. You can either spend twenty bucks on a new hose today, or you can spend a thousand bucks on a blown head gasket next week when your engine decides it’s had enough.”

    Nikolai·Osterman

    Don't Let a Small Leak Turn Into a Big Headache

    Don't Let a Small Leak Turn Into a Big Headache

    Look, at the end of the day, fixing a radiator leak isn’t about being a master mechanic; it’s about staying ahead of the game. Whether you’re dealing with a cracked hose, a tiny pinhole in the core, or a failing water pump, the goal is the same: catch it before your temperature gauge starts climbing into the red. If you can spot those early warning signs—the sweet smell of coolant or that telltale puddle on your driveway—you’ve already won half the battle. Don’t let a minor drip turn into a blown head gasket or a completely dead engine just because you were too busy to look under the hood. Grab your tools, check your levels, and stay proactive.

    I know it can feel intimidating when you see a mess of hoses and metal, but I promise you, you’re more capable than you think. My dad always told me that most people only call a shop when things are already broken, but the real pros are the ones who understand their own machines. You don’t need a fancy certification to take care of your ride; you just need a bit of patience and the willingness to get your hands a little dirty. So, next time you see something off, don’t just ignore it and hope for the best. Take control of your car and keep it running on your own terms.

    Frequently Asked Questions

    Can I just keep topping off the coolant until I actually have time to fix the leak?

    Look, I get the temptation to just keep dumping more coolant in to avoid a shop visit, but you’re playing a dangerous game. You can do it as a temporary band-aid, sure, but keep a massive eye on your temp gauge. If that needle starts creeping up, stop immediately. If you run dry because you were too busy to fix the leak, you aren’t just looking at a new hose—you’re looking at a blown head gasket.

    How do I tell if the leak is coming from a simple hose or if the actual radiator core is shot?

    To figure this out, grab a flashlight and get low. If you see crusty, dried coolant or a wet spot right where a rubber hose meets a metal clamp, you’re probably looking at a cheap hose fix. But, if the fluid is seeping directly through the thin metal fins of the radiator itself, that core is toast. Check the seams and the tank connections; if the leak is coming from the radiator’s body, it’s time for a replacement.

    Is it worth trying to patch a small leak with a temporary sealant, or am I just asking for a bigger headache later?

    Look, I’ll be real with you: sealant is basically just a band-aid for a broken bone. If you’re stuck on the side of the road or just need to limp the car home to avoid a tow, go for it. But don’t make it a habit. Those additives can gunk up your heater core or clog your passages, turning a cheap leak into a massive repair bill. Patch it to survive, then fix it for real.

  • How to Replace Burnt Out Light Bulbs

    How to Replace Burnt Out Light Bulbs

    Ever had that sinking feeling when you’re pulling into a dark driveway and realize one of your headlights is totally dead? Most shops will try to tell you it’s a complex electrical issue or charge you an insane labor fee just to twist a plastic connector, but that’s a total lie. I remember my first week at the shop, watching a senior tech charge a customer way too much for a simple bulb replacement that took him all of three minutes. Honestly, it’s one of those things that makes my blood boil because it’s such a basic fix that anyone with a little patience can handle.

    I’m not here to give you some textbook lecture or a manual full of jargon you’ll never use. Instead, I’m going to walk you through the actual, greasy reality of getting it done right without breaking your bank account. We’ll cover exactly which tools you need to grab from your kit, how to avoid frying the new bulb with your bare hands, and the quickest way to get back on the road. Let’s just get under the hood and get to work.

    Table of Contents

    Guide Overview

    Total Time: 5-15 minutes
    Estimated Cost: $5-$30
    Difficulty: Beginner

    Tools & Supplies

    • Ladder or step stool for reaching high fixtures
    • Work gloves to protect hands from heat or breakage
    • Replacement light bulb (matching wattage/base) 1 unit
    • Microfiber cloth for cleaning the fixture 1 unit

    Step-by-Step Instructions

    • 1. First things first, make sure the car is completely off and the keys are out of the ignition. If you’ve just been driving, give the headlights a few minutes to cool down so you don’t end up with a nasty burn when you reach into that housing.
    • 2. Pop the hood and locate the back of the headlight assembly. Depending on what you’re driving, you might see a plastic dust cover or a rubber boot sealing the unit; just unclip or twist that cover off to get to the wiring.
    • 3. Once you’ve got access, you’ll see a plastic connector plugged directly into the base of the bulb. Give it a firm but steady pull—don’t just yank on the wires or you’ll rip them out—and slide it off the bulb base.
    • 4. Now, grab the old bulb. Most of these use a simple twist-lock mechanism, so give it a small turn counter-clockwise until it feels loose, then pull it straight out. If it’s a clip-in style, you might need to press a small metal tab to release it.
    • 5. Grab your new bulb, but here is the most important part: do not touch the glass with your bare fingers. The oils from your skin can actually create hot spots on the glass when it heats up, which will cause the new bulb to burn out way faster than it should. If you do touch it, just wipe it down with some isopropyl alcohol.
    • 6. Line up the tabs on your new bulb with the slots in the housing and press it in. Give it a little twist until it clicks into place so it’s not rattling around in there.
    • 7. Plug that wiring connector back onto the bulb base, push your dust cover or rubber boot back on to keep the moisture out, and then test the lights before you close the hood. There’s nothing worse than finishing a job only to realize you bought the wrong part number.

    Finding the Right Fit With a Car Bulb Compatibility Checker

    Finding the Right Fit With a Car Bulb Compatibility Checker

    Look, I’ve seen guys spend two hours tearing apart a headlight assembly only to realize they bought the wrong part. It’s a massive waste of time and money. Before you even touch your toolbox, you need to use a car bulb compatibility checker. Most of these tools are free online—you just plug in your year, make, and model, and it spits out exactly what you need. It’s way more reliable than just guessing based on what looks similar in the box, because even a tiny difference in the base or wattage can fry your automotive electrical components.

    If you’re planning on doing more than just basic maintenance, this is also the best time to decide on a halogen vs led upgrade. If you go the LED route, the compatibility checker is even more critical to make sure the new driver won’t throw a “bulb out” error code on your dashboard. Don’t just grab whatever is cheapest on the shelf; take five minutes to verify the specs first. It’ll save you from the headache of having to go back to the parts store for a second time.

    Mastering Bulb Installation Tools for a Pro Finish

    Mastering Bulb Installation Tools for a Pro Finish

    Look, you don’t need a full professional setup, but if you’re tired of scraping your knuckles against the fender, a few specific bulb installation tools make life a lot easier. I always keep a small set of needle-nose pliers and a specialized bulb extractor in my kit. When you’re working in those tight, cramped spots behind a headlight assembly, trying to use your bare fingers is a recipe for frustration and a lot of wasted time. Using the right reach tool lets you seat the bulb perfectly without having to contort your body into a shape it wasn’t meant to go.

    One thing I can’t stress enough: never touch the glass with your bare hands. Even if you’re just replacing burnt out automotive bulbs, the oils from your skin can create hot spots on the glass. This eventually leads to the bulb blowing prematurely, which totally defeats the purpose of your hard work. If you accidentally touch it, grab some isopropyl alcohol and a clean rag to wipe it down before you plug it in. It’s a small step in your automotive lighting maintenance routine, but it’s the difference between a fix that lasts and one that fails in a week.

    Pro Tips to Keep Your Lights from Quitting Again

    • For the love of everything, don’t touch the glass. If you grab a new halogen bulb with your bare fingers, the oils from your skin will bake onto the glass the second it heats up, causing it to crack or burn out way too fast. Use gloves or even a clean paper towel.
    • Check your seals every single time. When you’re popping that housing back together, make sure the rubber gasket is seated perfectly. If it’s even slightly crooked, you’re basically inviting moisture to turn your headlight into a little aquarium.
    • Don’t just replace one bulb and call it a day. Bulbs usually die in pairs because they’ve been running the same hours under the same heat. If your driver-side headlight just went, your passenger side is probably right behind it. Swap both so your light output stays even.
    • Give your connections a quick inspection while you’re in there. Look for any signs of corrosion or melted plastic on the socket. If the metal looks crusty or green, a quick clean with some contact cleaner will save you from a massive headache later.
    • Test the lights before you screw everything back together. It’s a total pain to realize you forgot a clip or a screw once the whole assembly is back in place. Turn the switch on, make sure it glows, and then finish the job.

    The Bottom Line on Swapping Your Bulbs

    Stop guessing on the part number; use a compatibility checker or your owner’s manual so you don’t end up with a bulb that won’t even seat in the housing.

    Don’t touch the glass of the new bulb with your bare hands—the oil from your skin can cause it to overheat and burn out way sooner than it should.

    You don’t need a professional shop to handle this; just grab the right small tools, take your time, and you’ll save yourself a massive markup at the dealership.

    Don't Overthink the Small Stuff

    A blown bulb isn’t a reason to drop a few hundred bucks at a shop; it’s just a five-minute job that’s waiting for you to grab a new one and get back on the road.

    Nikolai·Osterman

    Don't Leave It to Chance

    Don't Leave It to Chance: Bulb replacement.

    Look, swapping out a bulb isn’t some high-level engineering feat, but it is easy to mess up if you’re rushing. Just remember: double-check that compatibility so you aren’t stuck with a part that doesn’t fit, and never touch the glass of a new halogen bulb with your bare fingers—the oils from your skin will bake onto the surface and kill the bulb way faster than it should. If you’ve got the right tools and you’ve followed these steps, you’ve already done more than most people realize. You’ve successfully navigated the most common little headache that keeps cars off the road, and you did it without paying a shop’s inflated labor rate.

    At the end of the day, my goal is to see you get comfortable under that hood. Every time you tackle a small job like this, you’re building the confidence to handle something bigger down the line. Don’t let the complexity of modern cars intimidate you; most of the time, it’s just a matter of having the right tool and a little bit of patience. You don’t need to be a master technician to take care of your own ride. Keep your hands dirty, keep learning, and most importantly, stop letting mechanics overcharge you for things you can clearly do yourself.

    Frequently Asked Questions

    Is it actually safe to touch the glass on a new bulb with my bare hands?

    Look, I’ll be straight with you: don’t touch the glass. I know it seems fine, but the oils from your skin stay on that surface. When you turn the lights on, that heat causes those oils to bake onto the bulb, creating hot spots. Eventually, that’s going to cause the glass to crack or the bulb to burn out way sooner than it should. Just grab a clean rag or some gloves and keep those hands off.

    What should I do if the bulb is stuck and won't budge out of the housing?

    Look, I’ve been there. You’re tugging, and it feels like it’s welded in place. Don’t force it, or you’ll crack the housing—then we’re talking a much bigger bill. First, try a little penetrating oil like WD-40 Specialist on the base to break the corrosion. If that fails, use some needle-nose pliers to get a better grip, but be gentle. Sometimes a bit of heat from a hair dryer helps expand the socket just enough to let go.

    How can I tell if it's just a dead bulb or if there's a bigger electrical issue going on?

    Look, if you swap the bulb and it still won’t light up, don’t panic, but don’t assume it’s a miracle either. If a brand-new bulb stays dark, you’re likely looking at a blown fuse or a corroded socket. A quick trick? Check if the other lights on the same circuit are working. If they are, it’s probably just a bad connection or a dead bulb. If everything’s dead, you’ve got an electrical gremlin.

  • Maintaining Transmission Health

    Maintaining Transmission Health

    I was under a beat-up Civic last Tuesday when I heard a customer complaining about a quote he got for a full transmission service. The shop was asking for nearly two grand just to swap out some old fluid and a filter. Honestly, it makes my blood boil. Most of these big-name garages see a worried driver and immediately start quoting prices for parts you don’t even need, acting like a simple fluid change is some kind of black magic only they can perform. They want you to think your car is a ticking time bomb so you’ll hand over your paycheck, but that’s just not how it works.

    I’m not here to sell you a miracle or some overpriced additive; I’m here to give you the straight truth. I’ll show you exactly how to handle a transmission service yourself without getting lost in a sea of technical jargon or unnecessary expenses. We’re going to talk about the actual tools you need, the specific signs that your fluid is shot, and how to get the job done right the first time. If you’ve got a little patience and a decent socket set, you can keep your ride running smooth and keep your money in your pocket.

    Table of Contents

    Decoding Transmission Overheating Symptoms Before They Strike

    Decoding Transmission Overheating Symptoms Before They Strike

    If you start smelling something sweet or burnt while you’re idling at a red light, don’t just roll your eyes and keep driving. That’s usually the first red flag that your fluid is cooking. One of the most common transmission overheating symptoms is a sudden loss of power or a weird, slipping sensation when you try to accelerate. If the car feels like it’s struggling to find the right gear, your fluid might be too thin from the heat to actually build the pressure needed to move those internal components.

    You also need to keep a close eye on any strange noises. A high-pitched whining or a low humming coming from under the center console isn’t just “character”—it’s a cry for help. If you ignore these signs of transmission failure, you’re moving straight from a simple fluid swap into the territory of a massive repair bill. Catching these issues early is the difference between a quick fix and a nightmare scenario where you’re forced to decide between a costly repair or a full unit replacement.

    Why Your Transmission Fluid Change Interval Actually Matters Much More

    Why Your Transmission Fluid Change Interval Actually Matters Much More

    Look, I see this all the time at the shop: guys waiting until their car starts slipping or making that nasty grinding noise before they even think about looking under the hood. By then, you aren’t just looking at a simple fluid swap; you’re staring down the massive cost of transmission repair that can easily eat up your entire savings. The thing is, your transmission fluid isn’t just a lubricant; it’s the lifeblood that manages heat and keeps those internal components moving smoothly.

    If you ignore your specific transmission fluid change interval, that fluid starts to break down, losing its ability to protect the gears from friction. Once that happens, you’re basically inviting metal shavings to circulate through your system, which is a one-way ticket to a total meltdown. I’d much rather see you spend a little time and a few bucks on regular maintenance now than have to decide between a transmission rebuild vs service later. Keeping up with the schedule is the easiest way to make sure you’re driving a reliable machine rather than a ticking time bomb.

    5 Things I Do to Keep My Trans From Quitting on Me

    • Check your fluid color every single time you’re doing an oil change. If it looks like dark coffee or smells burnt, you’re already playing catch-up; fresh fluid should be bright and clear.
    • Stop ignoring those tiny leaks. If you see red puddles on your driveway, don’t just wipe it up—find the source, because running low on fluid is the fastest way to shred your internal gears.
    • Don’t just drain and fill; if you’re doing a full service, try to get as much of that old, sludge-filled fluid out as possible. A simple drain often leaves half the junk sitting in the pan.
    • Get yourself a decent magnetic parts tray for the bolts. I’ve dropped enough transmission pan bolts into the abyss to know that losing one during a service is a massive headache you don’t need.
    • Watch your temperature during heavy loads. If you’re towing or driving hard in the heat, your transmission is working overtime, so don’t skip out on upgrading to a better cooler if you want it to last.

    The Bottom Line on Keeping Your Gears Smooth

    Stop waiting for a warning light; if your fluid looks like burnt coffee or smells scorched, you’re already behind on maintenance.

    Don’t let a shop scare you into a full rebuild when a simple, timely fluid exchange is all your transmission actually needs to stay healthy.

    Keep a close eye on your temperature and shifting patterns—catching a small overheat early is the difference between a cheap fix and a massive repair bill.

    ## The Real Cost of Skipping a Fluid Change

    “A mechanic might tell you a full transmission rebuild is ‘just how it goes’ when things start slipping, but half the time, they’re just looking at the mess caused by old, burnt fluid that should’ve been swapped out months ago. Don’t let a fifty-dollar fluid change turn into a five-thousand-dollar nightmare.”

    Nikolai·Osterman

    Don't Get Ripped Off: The Bottom Line

    Don't Get Ripped Off: The Bottom Line

    At the end of the day, keeping your transmission healthy isn’t some mystery reserved for master techs with expensive scanners. We’ve talked about catching those overheating symptoms before they turn into a total meltdown and why you can’t just ignore your fluid change intervals. If you stay on top of the fluid quality and actually listen to what your car is telling you through shifts and smells, you’re already ahead of 90% of drivers on the road. It’s about being proactive rather than reactive. Don’t wait for a massive repair bill to realize that a simple fluid swap could have saved your entire drivetrain.

    Look, I know getting under a car can feel intimidating when you’re staring at a mess of hoses and sensors, but I promise you’re more capable than you think. You don’t need a specialized degree to be your own advocate; you just need the right tools and the willingness to get your hands dirty. Every time you handle a basic service yourself, you’re taking back control from the shops that thrive on your ignorance. Grab your gear, take it one step at a time, and remember that the goal isn’t just a working car—it’s the peace of mind that comes with knowing exactly what’s happening under your hood.

    Frequently Asked Questions

    Is it actually safe to drain and refill the fluid myself, or am I going to mess up the fluid level and cause more damage?

    Look, I get the anxiety. It feels like you’re playing Russian roulette with your gearbox. But honestly? It’s safe as long as you don’t wing it. The biggest mistake people make is guessing the level. You can’t just pour it in and call it a day; you have to check it while the engine is running and at the right temperature. Grab a dipstick, stay patient, and follow the manual. Do it right, and you’re golden.

    If my fluid looks dark or smells burnt, does that mean I need a full flush or just a simple pan drop?

    Look, if your fluid is dark or smells like it’s been sitting in a fryer, you’ve got a problem. Honestly? I’d lean toward a simple pan drop and filter change first. A full pressurized flush on old, neglected fluid can sometimes dislodge gunk that ends up clogging your valve body, which turns a cheap fix into a massive headache. Change the pan, swap the filter, and see if the color clears up.

    Can I use any generic ATF from the local auto parts store, or am I going to fry my sensors if I don't get the exact spec?

    Look, I get the temptation to grab the cheapest bottle on the shelf, but please don’t do that. Modern transmissions are basically computers filled with fluid; they’re way more sensitive than the old gearboxes my dad used to work on. If you use a generic fluid that doesn’t meet your manufacturer’s specific spec, you risk messing up the friction modifiers. That’s how you end up with slipping gears or fried sensors. Stick to the spec.

  • Inspecting Steering System Components

    Inspecting Steering System Components

    I remember being sixteen, working under my dad’s old sedan, when I first felt that weird, rhythmic shudder through the steering wheel. It wasn’t just a vibration; it felt like the car was fighting me every time I tried to take a corner. Most shops will see that and immediately try to sell you a whole new rack or a massive service package that costs more than your monthly rent. They treat a simple steering inspection like it’s some high-tech mystery that only someone with a computer and a fancy degree can solve, but honestly? Most of the time, it’s just a worn-out tie rod or a loose bolt that you could find with a flashlight and a bit of grit.

    I’m not here to sell you a lifestyle or a specialized diagnostic suite. My goal is to show you exactly what I look for when I’m under a car, from the grease-stained reality of worn bushings to the subtle signs of a failing pump. I’m going to walk you through a real, hands-on steering inspection so you can stop guessing and start knowing. You don’t need a master technician’s license to figure out if your car is safe; you just need to know where to look.

    Table of Contents

    Spotting Those Sneaky Wheel Alignment Symptoms

    Spotting Those Sneaky Wheel Alignment Symptoms.

    The first thing you’ll probably notice isn’t a loud noise, but the way the car actually behaves when you’re cruising. If you find yourself constantly making tiny corrections just to keep the car traveling in a straight line, you’re looking at classic wheel alignment symptoms. It’s that annoying feeling where you let go of the wheel for a split second on a flat road and the car immediately starts drifting toward the shoulder. Don’t mistake this for just “old car character”—it’s usually a sign that your toe or camber settings are totally out of whack.

    Another big red flag is when you feel a constant, rhythmic shimmy through the rim. While people often jump to conclusion about steering wheel vibration causes being a bad tire, it’s frequently tied to how your suspension is sitting. If the vibration gets worse as you pick up speed, your alignment is likely fighting against your tires, which will eat through your tread way faster than it should. Keep an eye on your tire wear patterns, too; if you see heavy wear on just the inside or outside edges, your alignment is definitely screaming for help.

    Why Steering Wheel Vibration Causes Should Never Be Ignored

    Why Steering Wheel Vibration Causes Should Never Be Ignored

    If your steering wheel starts dancing in your hands, don’t just turn up the radio and pretend it isn’t happening. That shaking is your car’s way of screaming for attention. Most of the time, you’re looking at steering wheel vibration causes like an unbalanced tire or a bent rim, but it can get way more serious than that. If you ignore it, you aren’t just dealing with a shaky ride; you’re actively letting parts wear down that shouldn’t be.

    The real danger is when that vibration is tied to something deeper in the guts of your car. For example, if the shaking comes with a whining noise or a heavy feeling when you turn, you might be staring down a potential power steering pump failure. That’s a much more expensive headache than just getting a tire balanced. It could also be a sign that your steering linkage is getting loose or worn out. Honestly, it’s better to catch these steering system warning signs early during a quick visual check rather than waiting until a component actually snaps while you’re hitting highway speeds.

    5 Quick Ways to Check Your Steering Before You Hit the Shop

    • Grab a flashlight and look behind those front tires. You’re hunting for torn rubber boots on your tie rods or ball joints; if you see grease splattered everywhere, that boot is busted and your parts are gonna wear out fast.
    • Get in the driver’s seat and wiggle the wheel back and forth while the car is parked. If you hear a clicking or popping sound coming from underneath you, you’re likely looking at a worn-out intermediate shaft or a bad steering rack.
    • Check your tire tread for “cupping” or uneven wear patterns. If one side of the tire looks smoother than the other, your alignment is off, and you’re basically throwing money away by replacing tires too early.
    • Watch for any fluid leaks on your driveway, specifically near the front center of the car. If you see oily spots, your power steering pump or the rack itself might be weeping, which is a massive headache if it goes totally dry.
    • Pay attention to how much effort it takes to turn. If the steering suddenly feels heavy or “notchy” at certain spots in the rotation, don’t just assume it’s a bad day—it’s usually a sign that something mechanical is binding up.

    The Bottom Line on Your Steering

    Pay attention to how the car actually feels when you’re driving; if it’s pulling to one side or vibrating, your car is trying to tell you something before a small fix turns into a massive bill.

    Don’t let a mechanic talk you into a full rack-and-pinion replacement until you’ve actually checked the basics like tie rod ends and bushings yourself.

    Regular inspections aren’t just about safety—they’re about saving your tires from getting chewed up by bad alignment, which is a total waste of money.

    ## The Cost of Ignoring the Small Stuff

    “A mechanic might try to tell you it’s just an expensive alignment job, but honestly? Most of the time, you’re just ignoring a worn-out tie rod or a loose bushing that’s begging to be replaced before it snaps.”

    Nikolai·Osterman

    Don't Wait Until You're Stranded

    Don't Wait Until You're Stranded: Car Repair

    At the end of the day, keeping your steering tight isn’t about being a master mechanic; it’s about paying attention to the cues your car is already giving you. Whether you’re noticing a weird pull to the left, feeling that annoying vibration through the wheel, or hearing a rhythmic clunk every time you hit a bump, those aren’t just “character quirks” of an old car. They are early warning signs that something in your tie rods, ball joints, or alignment is failing. Catching these issues while they’re still just a nuisance is the difference between a quick, cheap fix in my shop and a massive, expensive repair bill—or worse, a complete loss of control on the highway.

    I know it can feel intimidating to crawl under a car or even just poke around the wheel wells, but I promise you, you are more capable than you think. You don’t need a fancy diagnostic computer to know when something feels off. Grab a flashlight, take a look at your components, and trust your gut. Once you start understanding how these parts work together, you’ll stop feeling like a victim to whatever the guy at the service counter tells you. Stay proactive, keep your tools ready, and take control of your own ride.

    Frequently Asked Questions

    Is it possible to tell if my tie rod ends are shot just by looking under the car, or do I need to actually drive it?

    You can definitely spot a bad tie rod just by looking, but you’ll need a jack to get the wheel off. Once it’s up, grab the tire at the 3 and 9 o’clock positions and try to shake it. If there’s any play or a clicking sound, that joint is toast. If it feels solid, you’re likely okay, but a visual check won’t catch everything—driving it helps you feel those subtle vibrations.

    If my car is pulling to one side but the steering wheel isn't shaking, is it still a steering issue or could it just be bad tires?

    Honestly, it could be either. If the wheel isn’t shaking, you probably don’t have a major balance issue or a bent rim, but that pull is still a red flag. It’s usually one of two things: your alignment is off, or you’ve got uneven tire wear. Check your tread—if one side looks more worn than the other, your tires are just following the path your bad alignment set for them.

    How can I tell the difference between a power steering fluid leak and just some old grime sitting on the rack?

    The easiest way is the “clean cloth test.” Grab a rag and wipe down the rack and boots. If it’s just old grime, you’ll get a dark, crusty smear that stays on the cloth. If it’s a leak, the fluid will look oily, feel slippery, and—most importantly—it’ll keep dripping even after you wipe it clean. If that rag comes away looking like fresh engine oil, you’ve definitely got a leak.

  • Checking Suspension Components for Wear

    Checking Suspension Components for Wear

    I remember one of my first big headaches at the shop, working on a customer’s sedan that had been making this rhythmic, sickening thud every time they hit a pebble. The service advisor wanted to quote them for a full replacement of every single component in the front end, just to be safe. Honestly, it drove me crazy. Most shops try to turn a simple suspension inspection into a massive, multi-thousand dollar invoice because they think you won’t know the difference between a worn-out bushing and a blown strut. They want you to believe that if your ride feels off, you need to gut the whole system, but that’s usually just expensive guesswork.

    I’m not here to sell you a whole new assembly when all you really need is a new sway bar link. In this guide, I’m going to show you how to do a real, honest suspension inspection yourself using nothing but a flashlight and a pair of eyes. I’ll teach you exactly what to look for—from leaking oil on the shocks to cracked rubber—so you can stop the guesswork and know for sure what’s actually broken.

    Table of Contents

    Spotting the Real Signs of Worn Suspension

    Spotting the Real Signs of Worn Suspension

    You don’t always need a diagnostic scanner to know something is off; usually, your car tells you through how it feels under your feet. If you notice the car feels floaty or takes a second too long to settle after hitting a bump, you’re likely looking at shock absorber replacement signs. When the dampening effect is gone, your car starts bouncing like a pogo stick, which absolutely kills your car ride quality. It’s not just annoying, though—it makes every pothole feel like a personal attack on your spine.

    Keep an eye out for anything that messes with your vehicle handling stability, especially when you’re taking a corner or braking hard. If the front end dives aggressively when you hit the brakes, or if the car feels like it’s wandering across the lane, your suspension components are probably struggling to keep things steady. You might even see uneven tire wear, where the tread looks scrubbed down in weird patches. These are classic signs of worn suspension that most people ignore until a part actually snaps. Don’t wait for a loud clunk to tell you it’s time to take a look.

    Restoring Your Car Ride Quality Without the Shop Price Tag

    Restoring Your Car Ride Quality Without the Shop Price Tag

    Look, I’ve seen too many guys get hit with a $1,200 bill just because a mechanic decided a simple part swap was a “major overhaul.” If you’ve already spotted the signs of worn suspension—like that annoying bouncing after a bump—you don’t necessarily need to hand over your entire paycheck. Most of the time, it’s about isolating the specific part that’s failed. If your car feels like a boat on the highway, you’re likely looking at a simple shock absorber replacement, which is way more manageable than most shops want you to believe.

    Before you book an appointment, grab your jack and a decent set of wrenches. You can often restore your car ride quality just by replacing a single worn bushing or a leaking strut. It’s about being surgical rather than just throwing parts at the problem. If you take the time to identify the exact suspension component wear happening under your wheel well, you can buy the parts yourself and save a massive chunk of change. Just stay patient and don’t rush the process; it’s better to do it right once than to do it cheap twice.

    My Quick Checklist for Spotting Trouble Before It Gets Expensive

    • Grab a flashlight and look behind your tires for any oily residue on the struts; if a shock looks wet or greasy, it’s leaking fluid and it’s basically dead.
    • Get in the driver’s seat and push down hard on each corner of the car to see how it bounces back—if it keeps oscillating like a boat on a wavy lake, your shocks aren’t doing their job.
    • Do a visual sweep of your bushings to see if the rubber is cracked, dry-rotted, or completely missing; once that rubber goes, you’re looking at metal-on-metal contact.
    • Check your tire tread for “cupping” or uneven dips; if the rubber looks wavy instead of smooth, your suspension is likely bouncing unevenly and eating your tires alive.
    • Give your sway bar links a quick wiggle when the car is up on jack stands; if there’s any significant play or a clicking sound, those little parts are shot and need replacing.

    The Bottom Line on Your Ride

    Don’t wait for a total blowout; if you’re feeling weird vibrations or hearing new clunks, grab a flashlight and check your bushings and struts before a small fix turns into a massive bill.

    You don’t need a master mechanic’s certification to spot the obvious, but you do need to be honest with yourself about how your car is handling.

    Keeping your suspension tight isn’t just about comfort—it’s about making sure your tires actually grip the road when you need them to most.

    The Truth About That Clunking Sound

    Most shops will try to tell you that you need a whole new suspension overhaul the second they hear a rattle, but half the time, it’s just a single worn-out bushing or a loose sway bar link. Don’t let them scare you into a massive bill; grab a flashlight, get under there, and find the actual source before you spend a dime you don’t have to.

    Nikolai·Osterman

    Bottom Line: Don't Let the Clunks Win

    Bottom Line: Don't Let the Clunks Win.

    Look, at the end of the day, checking your suspension isn’t some high-level engineering feat. It’s really just about paying attention to what your car is trying to tell you. Whether you’re spotting a leaking strut, feeling a weird wobble in the steering wheel, or noticing your tires wearing down unevenly, these are all early warning signs that you can catch before they turn into a massive repair bill. You don’t need a specialized diagnostic computer to realize a ball joint is shot; you just need to get under there with a flashlight and actually look at the components. If you stay on top of these small checks, you’ll save yourself a massive headache down the road.

    I know it can feel intimidating when you see a mess of metal and rubber underneath your chassis, but I promise you, it’s manageable. Most of the time, the difference between a smooth ride and a dangerous, shaky mess is just a little bit of preventative maintenance and the willingness to get your hands dirty. Don’t let a shady shop convince you that everything under the car is “broken” just to pad their invoice. Grab your tools, trust your eyes, and take control of your own machine. You’ve got this.

    Frequently Asked Questions

    Is it actually safe to keep driving if I only hear a slight squeak when I hit bumps?

    Look, a slight squeak isn’t an immediate “pull over and call a tow truck” emergency, but don’t ignore it. Usually, it’s just a dry bushing or a worn shock absorber starting to give up. It’s annoying, sure, but it’s a warning shot. If it stays a squeak, you’ve got time to plan a fix. But if that squeak turns into a heavy clunk or the car starts wandering, stop driving it. That’s when things get dangerous.

    How can I tell if it's just a bad shock absorber or if my entire strut assembly needs to be replaced?

    Look, it’s a common question. If you just see some oil leaking down the side of the strut body, that’s a dead giveaway—your shock is shot. But if the car feels bouncy or you’re hearing clunks when you hit bumps, you’ve likely got play in the mount or the bushings. Before you drop a ton on a full assembly, check those mounts first. Sometimes it’s just a worn-out part, not the whole unit.

    Do I really need to buy professional tools to check my bushings, or can I get away with basic stuff I already have in my garage?

    Honestly? You don’t need a $500 specialty kit. If you’re just checking for cracks or excessive play, a decent flashlight and a pry bar you probably already have in the garage are plenty. Use the pry bar to gently nudge the control arm; if the bushing squishes or tears like old bread, you’ve found your culprit. Just don’t go trying to press new ones in without a proper kit—that’s where things get messy.

  • Cleaning the Vehicle Fuel System

    Cleaning the Vehicle Fuel System

    I remember sitting in my dad’s garage when I was twelve, watching him struggle with a customer’s sedan that was idling like a lawnmower. The shop owner tried to charge that guy three hundred bucks for a “specialized pressurized flush,” claiming it was the only way to fix the hesitation. It was a total scam. Most of the time, you don’t need some high-tech, overpriced machine to fix a sluggish engine; you just need a solid understanding of fuel system cleaning and the right additives to clear out the carbon buildup. It’s frustrating how many shops try to gatekeep basic maintenance by making it sound like rocket science.

    I’m not here to sell you on some magic liquid that promises to turn your junker into a supercar overnight. What I am going to do is give you the straight truth about what actually works and what’s just marketing fluff. I’ll walk you through the real-world ways to handle fuel system cleaning so you can keep your car running smooth without getting ripped off. We’re going to keep it simple, practical, and completely honest.

    Table of Contents

    How Carbon Deposit Removal Restores Your Ride

    How Carbon Deposit Removal Restores Your Ride

    Think of your engine like a high-performance tuner I’m working on in my garage—if the airflow or the fuel delivery is choked up, it’s never going to hit its stride. Over time, those tiny bits of soot and burnt fuel build up on your valves and injectors. This gunk basically acts like a clog in a straw, forcing your engine to work twice as hard just to stay running. Once you get through a proper carbon deposit removal, you’ll notice the car feels way more responsive. It’s not magic; you’re just letting the engine breathe and eat properly again.

    Beyond just feeling better when you step on the gas, you’re looking at some serious engine performance improvement. When your injectors aren’t spraying a fine mist but are instead dribbling fuel because of buildup, you’re wasting gas and killing your efficiency. By keeping things clean, you’re improving fuel mileage and making sure you aren’t leaving money at the pump. It’s just basic preventative engine maintenance that keeps those expensive sensors from freaking out later on.

    The Real Gasoline Additive Benefits You Need to Know

    The Real Gasoline Additive Benefits You Need to Know

    Look, I’ve seen plenty of guys dump a cheap bottle of mystery liquid into their tank and expect a miracle. That’s not how this works. Real gasoline additive benefits come down to chemistry, not magic. When you use a high-quality cleaner, you’re basically sending in a microscopic cleaning crew to scrub the internal surfaces of your fuel rails and injectors. It’s about preventative engine maintenance—catching that buildup before it turns into a hard crust that requires a professional fuel injector cleaning service to fix.

    If you’re noticing your car feels a bit sluggish or you’re hitting the gas harder just to keep up with traffic, a good additive can help with improving fuel mileage. When those injectors spray a fine, consistent mist instead of a messy stream, you get a much cleaner burn. That’s where you see the real engine performance improvement. It’s not about gaining fifty horsepower overnight; it’s about getting back the power your car had when it actually left the factory. Just don’t overthink it—pick a reputable brand, follow the instructions, and keep that fuel system clear.

    5 Ways to Keep Your Fuel System from Turning into a Mess

    • Don’t wait for a stumble. If your car starts feeling sluggish or idling like it’s about to die, that’s your signal that gunk is already building up. Catch it early before you’re staring at a massive repair bill.
    • Stop buying the cheapest “mystery liquid” at the gas station. Most of those bottom-shelf additives are basically just colored water. Spend the extra five bucks on a reputable brand that actually has the chemistry to break down carbon.
    • Keep your fuel tank from getting too low. Running on fumes constantly pulls the nasty sediment from the bottom of the tank straight into your fuel pump and injectors. Try to keep at least a quarter tank in there at all times.
    • Use a high-quality fuel filter if your car has an external one. It’s a cheap part, and if you let it get clogged with debris, you’re forcing your fuel pump to work twice as hard just to keep the engine breathing.
    • If you’re driving an older car that sits around a lot, use a stabilizer. Old gas turns into a sticky, varnish-like nightmare that’ll clog your injectors faster than you can say “mechanic shop.”

    The Bottom Line on Keeping Your Fuel System Clean

    Don’t wait for a check engine light to act; regular cleaning stops carbon buildup before it starts killing your MPG.

    You don’t need to spend a fortune at a shop—using a decent fuel additive every few thousand miles is an easy win for your engine.

    Keeping your injectors clean isn’t just about power; it’s about avoiding those massive repair bills that mechanics love to charge for.

    ## Don't Let Gunk Dictate Your Repair Bill

    Most people think a rough idle or a sudden drop in MPG means they need a whole new fuel pump or a trip to a high-end shop, but half the time, it’s just carbon buildup playing games with your sensors. You don’t need a master tech to fix it; you just need to clear out the gunk before it turns a simple cleaning into a massive bill.

    Nikolai·Osterman

    Don't Wait for the Check Engine Light

    Don't Wait for the Check Engine Light.

    Look, at the end of the day, keeping your fuel system clean isn’t some high-level engineering mystery. We’ve talked about how scrubbing out those nasty carbon deposits can actually bring back your lost power, and how using a decent additive can stop gunk from building up in the first place. It really comes down to being proactive instead of reactive. If you wait until your car is stuttering at a red light or your MPG drops through the floor, you’re already playing catch-up with a problem that could have been solved for the price of a bottle of cleaner and twenty minutes of your time. Don’t let neglect turn a simple maintenance task into a massive repair bill.

    I know it can feel intimidating when you look under the hood and see a maze of wires and hoses, but I promise you, you’ve got this. You don’t need a master technician’s certificate to take care of your machine; you just need to show up and stay consistent. Every little bit of maintenance you do now is an investment in making sure your car stays reliable for the long haul. Stop letting the fear of “doing it wrong” keep you from taking control of your own vehicle. Grab your tools, stay patient, and start treating your car like the machine it is.

    Frequently Asked Questions

    How often should I actually be doing this so I'm not just wasting money on unnecessary additives?

    Look, I get it. Nobody wants to throw money down the drain. If you’re driving a modern car and keeping up with regular oil changes, you don’t need to dump an additive in every single tank. Honestly, once every 3,000 to 5,000 miles is plenty to keep the gunk from building up. If you notice your idle getting rough or your MPG dropping, that’s your cue to act. Otherwise, don’t overdo it.

    Can I just use a cheap bottle of cleaner from a gas station, or do I need something more heavy-duty?

    Look, I get it—those $5 bottles at the pump are tempting when you’re on a budget. If you’re just trying to keep things fresh between oil changes, they’re fine. But if your car is actually idling rough or feeling sluggish, don’t waste your time. You need something with a higher concentration of PEA (polyetheramine). It’s the heavy hitter that actually eats through carbon. Save the cheap stuff for maintenance; buy the good stuff for repairs.

    Will cleaning my fuel system actually fix a rough idle, or am I just masking a bigger problem?

    Look, if your car is stumbling at a red light, cleaning the fuel system might actually fix it—especially if carbon buildup is choking your injectors. But don’t get it twisted: if you clean everything out and that rough idle stays, you’re looking at something deeper, like a vacuum leak or a failing sensor. Clean the system first to rule out the easy stuff, but if it doesn’t smooth out, stop wasting money on additives and start diagnosing.