Category: Maintenance

  • Diagnosing Noisy Brakes

    Diagnosing Noisy Brakes

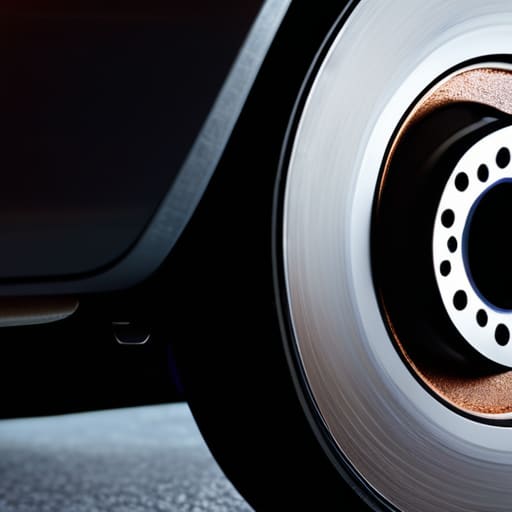
    I remember sitting in my dad’s garage last summer, working on an old Silvia, when that high-pitched, ear-piercing screech hit me every time I tapped the pedal. My first instinct wasn’t to panic about a total system failure, but to reach for my magnetic parts tray and get to work. Most people hear that sound and immediately think they need to drop a thousand bucks at a dealership for a “complete brake overhaul,” but that’s usually just a total scam. Most of the time, brake pad noise is just your car’s way of telling you a specific part is worn down, and it’s rarely as catastrophic as the service advisors want you to believe.

    I’m not here to give you some textbook lecture or tell you to buy expensive diagnostic computers. I’ve spent enough hours covered in grease to know that you can figure this out with a basic jack and a little bit of patience. My goal is to cut through the nonsense and show you exactly how to identify what that sound is actually telling you. I’ll walk you through the real causes of that grinding or squealing so you can fix it yourself without getting ripped off.

    Table of Contents

    Why Do Brakes Squeak When You Just Want Peace

    Why Do Brakes Squeak When You Just Want Peace

    Look, I get it. You’re cruising down the highway, music up, and suddenly there’s this high-pitched chirp every time you hit the pedal. It’s annoying, but honestly, it’s usually your car’s way of talking to you. Most of the time, that sound is just a built-in warning. A lot of pads have these tiny metal tabs called wear indicators. When the friction material gets too thin, that tab scrapes against the disc to let you know it’s time for a brake pad replacement. It’s not a disaster; it’s just a heads-up.

    Sometimes, though, it’s a bit more annoying than a simple warning. If you’ve been neglecting your car, you might just be dealing with heavy brake dust buildup trapped between the components. It sounds minor, but that grit can cause some nasty vibrations. On the flip side, if the sound is more of a grinding or a heavy shudder, you might be looking at actual brake rotor damage symptoms. If you ignore the squeak for too long, you’re going to end up spending way more at the shop than you would have if you’d just swapped the pads when they first started acting up.

    Spotting the Real Brake Pad Replacement Signs Before They Cost You

    Spotting the Real Brake Pad Replacement Signs Before They Cost You

    You don’t always have to wait for that high-pitched scream to know something is up. One of the first brake pad replacement signs I usually see in the shop is a subtle vibration through the pedal when you’re slowing down. If the steering wheel starts shaking or the pedal feels “pulsy,” you’re likely dealing with uneven wear or some serious brake rotor damage symptoms. Don’t just ignore it thinking it’ll go away; that’s how a cheap pad swap turns into a much more expensive job.

    Keep an eye on your wheels, too. While a little bit of dark soot is normal, an insane amount of brake dust buildup can sometimes point to pads that are wearing down way faster than they should. Also, if you feel the car pulling to one side when you brake, you might be looking at brake caliper issues rather than just the pads themselves. If you catch these things early during a quick visual check, you can save yourself a massive headache and a much larger bill at the mechanic.

    5 Ways to Stop the Squeal Without Getting Ripped Off

    • Check your wear indicators first. Most pads have a little metal tab that scrapes against the rotor when the material gets low—it’s designed to make that annoying chirping sound to warn you. If you hear it, don’t ignore it; just get some new pads before you ruin the rotors.
    • Don’t just slap new pads on and call it a day. If you’re doing this yourself, make sure you clean the caliper slide pins and apply some high-temp brake grease to the contact points. If those pins get stuck, your brakes will drag and start squealing all over again.
    • Watch out for cheap, low-quality pads. I’ve seen guys try to save twenty bucks on some generic brand from a big-box store, but those often have metal shavings in the compound that scream every time you touch the pedal. Stick to decent ceramic or semi-metallic pads.
    • Keep an eye on your rotors. If you’ve been hearing a rhythmic grinding or a wobble while braking, your pads might be fine, but your rotors are likely warped or scored. You can’t just put new pads on a beat-up rotor and expect silence.
    • Dust is a silent killer. Sometimes that high-pitched squeak is just a buildup of brake dust and road grime trapped between the pad and the piston. A quick blast with some brake cleaner can sometimes solve the problem, but if it keeps coming back, you’ve got a deeper issue.

    The Bottom Line on Your Brakes

    Don’t ignore that high-pitched squeal; it’s usually just your wear indicators doing their job to tell you the pads are getting thin.

    If you start feeling a pulsing or vibration in the pedal, stop ignoring it—that’s a sign your rotors are warped and need attention.

    Most of the time, you don’t need a massive shop bill to fix this; if you’ve got a basic jack and some decent tools, you can swap these out yourself and save a ton of cash.

    ## Listen to the Metal

    “That high-pitched squeal isn’t just an annoying sound; it’s your car literally begging you to stop ignoring it. Don’t wait until you’re hearing metal grinding on metal, because by then, you aren’t just replacing pads anymore—you’re paying for new rotors, too.”

    Nikolai·Osterman

    Don't Let the Noise Get to You

    Don't Let the Noise Get to You.

    Look, at the end of the day, that squealing or grinding isn’t a death sentence for your car; it’s just your vehicle trying to talk to you. We covered how a little bit of high-pitched chirping usually just means your wear indicators are doing their job, and how a heavy grinding sound is a much more serious signal that you’re hitting metal-on-metal. Whether it’s just a bit of dust in the calipers or your pads being completely shot, the goal is the same: identify the sound early so you aren’t staring at a massive repair bill for new rotors later. If you’ve been paying attention to those signs we talked about, you’re already ahead of 90% of the drivers on the road.

    I know it can feel intimidating when you hear something weird coming from under the chassis, but don’t let it shake your confidence. Most of the time, it’s a straightforward fix that just requires a decent jack, a few sockets, and a little bit of grit and patience. You don’t need to be a master technician to take control of your own maintenance and stop letting shops overcharge you for the simple stuff. Grab your tools, trust your ears, and just remember that you’ve got this.

    Frequently Asked Questions

    Is that grinding sound actually the metal rubbing, or just a weird noise from the sensors?

    Look, if it’s a high-pitched squeal, that’s usually just the wear indicator sensor doing its job—it’s basically a built-in alarm telling you pads are getting thin. But if you’re hearing a heavy, rhythmic grinding, that’s a different story. That’s metal-on-metal. It means your pads are likely gone and you’re chewing into the rotors. Don’t ignore a grind; that’s not a sensor, that’s your stopping power disappearing in real-time.

    Can I just use some brake cleaner to stop the squeaking, or is that a waste of time?

    Look, I get the temptation—it’s cheap and easy. If the squeak is just caused by some light dust or road grime buildup, a quick spray of brake cleaner might quiet it down for a bit. But honestly? Most of the time, it’s a waste of money. If your pads are actually worn down to the metal, no amount of cleaner is going to fix that. You’re just spraying expensive liquid on a mechanical problem.

    How do I know if I can wait another month to fix them, or if I need to pull over right now?

    Look, here’s the deal: if it’s just a light squeal when you tap the pedal, you’ve usually got a little breathing room to schedule a fix next month. But if you feel a heavy vibration in the pedal, hear a grinding metal-on-metal sound, or the car pulls to one side when you brake? Stop driving. That’s not a “wait and see” situation—that’s a “pull over before you ruin your rotors or lose control” situation.

  • How to Safely Clean an Engine Bay

    How to Safely Clean an Engine Bay

    I remember standing over my dad’s old sedan back in high school, staring at a layer of sludge so thick I couldn’t even tell where the plastic covers ended and the metal began. Most shops will tell you that you need a specialized steam machine or a professional detailer to handle it, but honestly? That’s just a way to inflate the bill. Real engine cleaning isn’t about fancy equipment; it’s about knowing which grime is harmless and which buildup is actually hiding a leaking gasket or a cracked hose. You don’t need a shop’s worth of expensive gear to see what’s actually going on under your hood.

    In this guide, I’m skipping the fluff and showing you how to do this right without stripping your wiring or drowning your sensors. I’ll walk you through the exact degreasers I use in the shop and the step-by-step process to get that grime off safely. My goal is to give you the confidence to grab a brush and a spray bottle so you can stop guessing and start seeing the truth about your car’s condition. Let’s get to work.

    Table of Contents

    Guide Overview

    Total Time: 1-2 hours
    Estimated Cost: $20-50
    Difficulty: Beginner

    Tools & Supplies

    • Degreaser spray nozzle for targeted application
    • Soft-bristle brushes for scrubbing crevices
    • Shop vacuum or compressed air for drying
    • Engine degreaser (1 can)
    • Microfiber towels (3-5 cloths)
    • Plastic bags and tape for covering sensitive electronics

    Step-by-Step Instructions

    • 1. First things first, clear out the junk. I’m talking about those old leaves, twigs, and random debris that settle in the crevices near your windshield wipers. If you spray water into a pile of dried leaves, you’re just making sludge that can clog your drain lines. Grab a shop vac or even just a stiff brush and get that loose crap out of there before you even think about touching a hose.
    • 2. You’ve got to protect the sensitive stuff. Modern engines are basically giant computers on wheels, and the last thing you want is water getting into your alternator or your fuse box. I always grab a couple of plastic grocery bags and some rubber bands to wrap up the electrical connectors and any exposed sensors. It’s a five-minute job that saves you a massive headache later.
    • 3. Now, grab your degreaser. Don’t go buying some overpriced “professional grade” stuff that costs fifty bucks; a decent can of engine degreaser from the local auto shop works just fine. Spray it liberally over the dirty areas, but try to avoid getting it directly onto the intake or any sensitive wiring. Let it sit for maybe ten minutes so it can actually eat through the grime, but don’t let it dry completely on the surface.
    • 4. Get a brush in there. If you’re trying to clean around tight spots or those stubborn oil stains, a cheap paintbrush or an old toothbrush is your best friend. Scrub the areas where the degreaser is sitting to help break up the heavy buildup. It’s all about mechanical action here—the more you agitate that grease, the easier it’ll wash away.
    • 5. Time for the rinse, but keep it low-pressure. This is where most people mess up. Do not hit your engine with a high-pressure power washer like you’re cleaning a driveway; you’ll blast water right into places it shouldn’t be. Use a garden hose on a gentle spray setting and rinse from the top down. You’ll see the dirty water running off, and honestly, it’s one of the most satisfying parts of the whole process.
    • 6. Dry everything out as much as you can. I usually grab some compressed air if I have it, but if you’re working from your home driveway, a few clean microfiber towels will do the trick. Pay extra attention to those electrical connections you covered up. You want to make sure there isn’t any standing water sitting in the nooks and crannies before you start the car.
    • 7. Finally, pop the plastic covers off and fire it up. Once the engine is running, let it idle for a few minutes. The heat from the engine will help evaporate any remaining moisture that you couldn’t get to with a towel. Just keep an eye on your gauges to make sure everything looks normal, and then you’re good to go.

    Removing Oil Buildup From Engines Without the Fancy Shop Tools

    Removing Oil Buildup From Engines Without the Fancy Shop Tools

    Look, you don’t need a $500 pressurized steam cleaner or a professional-grade setup to tackle thick sludge. Most of the time, you’re just dealing with old, baked-on grime that’s been sitting there since your last oil change. If you’re removing oil buildup from engines at home, my best advice is to grab a decent can of automotive degreaser and a couple of stiff-bristled nylon brushes. The secret isn’t the price of the tool; it’s the dwell time. Spray your degreaser on, let it sit for a few minutes so it can actually break down the chemistry of the oil, and then scrub. It’s more about patience than power.

    The biggest mistake I see beginners make, though, is being too aggressive with the water. If you’re cleaning engine bay safely, you have to treat the electronics like they’re made of glass. I always tell people to wrap their alternator and fuse box in plastic bags before they even touch a hose. If you aren’t careful about preventing electrical damage during cleaning, you’re going to trade a little bit of grease for a massive electrical headache that’ll cost way more than a mechanic’s visit.

    Cleaning Engine Components Safely to Avoid a Messy Mistake

    Cleaning Engine Components Safely to Avoid a Messy Mistake

    Look, I’ve seen plenty of guys go into a job thinking they can just blast everything with a hose and call it a day, only to end up with a car that won’t start. If you want to focus on cleaning engine components without turning your ride into a paperweight, you have to respect the electronics. Before you even touch a spray bottle, grab some plastic bags and electrical tape. Cover your alternator, the fuse box, and any exposed sensors you can find. Preventing electrical damage during cleaning is the difference between a successful weekend project and a massive headache at the shop.

    Once you’ve shielded the sensitive stuff, you can get more aggressive with your automotive degreaser application. Instead of soaking the whole bay at once, work in small sections. Use a stiff-bristled brush to agitate the thickest grime around the valve covers or near the oil filter. If you try to spray everything down in one go, you’re just going to end up with a muddy slurry running into every crevice. Take your time and let the chemicals do the heavy lifting so you aren’t scrubbing until your hands go numb.

    Pro Tips to Keep You From Making a Massive Mess

    • Cover your electrical stuff first. I’ve seen guys spray degreaser straight onto an alternator or a sensitive sensor and spend the next three hours chasing phantom electrical issues. Wrap your alternator, fuse box, and air intake in some plastic bags and tape them down tight before you even touch the water.
    • Don’t go overboard with the pressure washer. I get it, it feels satisfying, but high-pressure water is a great way to force moisture into connectors where it doesn’t belong. Use a standard garden hose or a low-pressure spray; you want to wash the grime away, not blast it into your wiring harness.
    • Work in stages, not all at once. If you douse the whole engine bay in degreaser and then walk away to grab a coffee, that stuff is going to dry into a crusty mess that’s even harder to get off. Spray a section, let it sit for a minute to break down the oil, scrub it, and rinse it immediately.
    • Keep a dedicated brush handy. You can’t get into the tight nooks and crannies around the valve cover or the fuel rails with just a hose. I always keep a cheap, stiff-bristled nylon brush in my kit—it’s the only way to actually lift the heavy sludge out of the corners.
    • Dry it out properly before you start the car. This is where most beginners mess up. Once you’re done rinsing, use some compressed air if you have it to blow water out of the spark plug wells and electrical plugs. If you don’t have air, just let it sit in the sun for a good while. You don’t want to turn that key and hear a misfire because of leftover moisture.

    The Bottom Line on Keeping Your Engine Clean

    Don’t let a layer of sludge scare you off; you don’t need a professional steam cleaner to get the job done, just some decent degreaser and a bit of elbow grease.

    Protect your electronics at all costs—cover those sensors and connectors before you start spraying, or you’ll turn a simple cleaning into a massive headache.

    Cleaning isn’t just about looks; it’s about being able to spot actual leaks and cracks before they turn into a breakdown on the side of the road.

    ## The Real Reason to Clean Your Engine

    Most people think cleaning an engine is just about making it look pretty for a car show, but it’s actually about visibility. You can’t fix what you can’t see, and you definitely can’t spot a slow oil leak or a cracked vacuum line if it’s buried under two inches of old grease and road grime.

    Nikolai·Osterman

    Getting the Job Done

    Getting the Job Done cleaning an engine.

    Look, cleaning an engine isn’t some mystical ritual that requires a master certification. We’ve covered the essentials: you don’t need a pressurized steam cleaner to tackle that thick grime, and you definitely don’t need to go blasting sensitive sensors with high-pressure water if you know how to work smart. By focusing on targeted degreasing and being careful with your components, you’ve basically done more for your car’s longevity than most people do in a year of scheduled oil changes. Just remember to keep your connections dry and don’t rush the process, because a little patience saves you from a massive headache later.

    At the end of the day, my goal isn’t just to show you how to wipe away dirt; it’s about getting you comfortable enough to actually look under the hood without feeling intimidated. Most shops will try to charge you a premium just for doing what you can do yourself with a brush and some decent chemicals. Don’t let them. Once you see how much easier it is to spot a leak or a cracked hose on a clean engine, you’ll realize that you’re in control of your machine. Grab your tools, keep that magnetic tray handy, and just start working. You’ve got this.

    Frequently Asked Questions

    Is it actually safe to spray water near all those sensitive sensors and electrical connectors?

    Look, I get why you’re nervous. Seeing all those wires and plugs makes you want to steer clear. Honestly? It’s risky if you’re just blasting it with a high-pressure hose like you’re washing a driveway. That’s how you force water into a connector and end up with a nightmare electrical ghost. Stick to a damp rag or a light misting. If you must spray, keep the pressure low and avoid the sensitive spots.

    How do I know if the grime I'm seeing is just surface dirt or if it's actually a sign of a leaking gasket?

    Look, it’s easy to panic when you see a layer of black gunk, but don’t sweat it yet. If the grime is dry, dusty, and spread evenly across everything, it’s probably just road salt and spilled fluids that have settled over time. But if you see a fresh, wet “weeping” look—especially around a seam or a bolt head—that’s a leak. If it feels oily to the touch, you’ve likely got a gasket issue.

    Can I use a regular pressure washer, or am I going to end up blowing something apart?

    Look, I’ve seen guys turn a simple wash into a nightmare because they went full power-washer mode. Honestly? Don’t do it. You’re asking for trouble. Those high-pressure streams can blast water straight into electrical connectors, sensors, or even your alternator, and once that moisture gets in there, you’re looking at expensive sensor failures or even a car that won’t start. Stick to a garden hose with a decent spray nozzle—it’s safer and gets the job done.

  • When to Resurface Brake Rotors

    When to Resurface Brake Rotors

    I was working a shift at the shop last Tuesday when a guy came in, looking totally defeated because a mechanic told him he needed a full set of brand-new rotors just because he felt a slight shimmy in the pedal. It’s the same old story: shops trying to upsell you on parts you don’t actually need. Honestly, it drives me crazy. Most of the time, you aren’t looking at a total failure; you’re just dealing with uneven wear that can be fixed with simple brake rotor resurfacing. You don’t need to drop hundreds of dollars on shiny new metal when the core of your current setup is still perfectly solid.

    I’m not here to give you some textbook lecture or sell you on fancy equipment you’ll never use. My goal is to give you the real-world truth about when you can actually save your old rotors and when you really do need to replace them. I’ll walk you through the process, the tools you actually need, and how to tell if your job is worth the effort. Let’s get into it so you can stop overpaying and start doing it right.

    Table of Contents

    Identifying Warped Brake Rotor Signs Before They Cost You

    Identifying Warped Brake Rotor Signs Before They Cost You

    You don’t always need a diagnostic scanner to know something is off; usually, your car will tell you through your hands and feet. The most obvious brake pulsation symptoms show up as a rhythmic shimmy or vibration in the steering wheel when you’re slowing down from highway speeds. If you feel a pulsing sensation through the brake pedal itself, that’s a dead giveaway that your rotors aren’t hitting the pads evenly anymore.

    Another thing to watch for is that annoying squealing or grinding noise that persists even after you’ve swapped out your pads. Sometimes, what feels like a simple pad issue is actually the rotor surface being uneven, which can lead to uneven wear patterns. I always tell people to pay attention to how the car “feels” during deceleration. If it feels inconsistent or shaky, you’re likely looking at warped brake rotor signs that need immediate attention. Catching these small tells early is the difference between a quick shop visit and having to replace your entire braking assembly because you ignored the warning signs.

    Brake Pulsation Symptoms You Shouldnt Ignore

    Brake Pulsation Symptoms You Shouldnt Ignore

    If you feel a rhythmic thumping or a shuddering sensation through the brake pedal when slowing down, those are classic brake pulsation symptoms that you can’t just ignore. It’s not just an annoying vibration; it’s your car telling you that the contact surface between your pads and the rotor isn’t flat anymore. Sometimes it feels like you’re driving over tiny speed bumps every time you hit the pedal. If that sensation is accompanied by a high-pitched squeal or a heavy feeling in the pedal, you’re likely dealing with uneven wear or heat spots that have physically altered the metal.

    You also need to keep an eye on how your steering wheel reacts. If the wheel starts shaking violently in your hands specifically when you apply pressure to the brakes, the issue is likely centered on the front rotors. I’ve seen plenty of people try to power through this, but ignoring it usually leads to more expensive headaches down the road. Before you jump straight into a full brake pad replacement vs resurfacing debate, pay attention to whether the vibration is constant or only happens under heavy braking. That distinction tells you exactly how much life is actually left in your setup.

    Pro Tips for Resurfacing Without Making a Mess of Things

    • Check your minimum thickness before you even start. If those rotors are already too thin, resurfacing them is just a fast track to a brake failure, and no amount of patience will fix that.
    • Don’t skip the cleaning step. After you’re done machining, those rotors are going to be covered in fine metal dust and oils; hit them down with some brake cleaner so they don’t mess up your new pads.
    • Get a decent lathe or a specialized resurfacing tool. You can try to DIY it with some sandpaper and a drill, but if you want a smooth, even surface that doesn’t vibrate, you need something that actually cuts consistent grooves.
    • Always bed in your new pads. Once you’ve got those fresh, flat rotors installed, don’t just go out and slam on the brakes. Do a few controlled stops to let the pad material transfer properly to the rotor surface.
    • Keep an eye on your calipers while you’re at it. There’s no point in getting a perfect rotor surface if your caliper piston is sticking and causing uneven wear from the jump.

    The Bottom Line on Your Rotors

    Don’t rush to the parts store just because you feel a shake; if your rotors aren’t cracked or too thin, resurfacing is a much cheaper way to get that smooth braking feeling back.

    Pay attention to your steering wheel and brake pedal—if they’re pulsing or vibrating, your rotors are likely warped and need immediate attention before they mess up your pads too.

    You don’t need a massive shop setup to handle this, just the right tools and a bit of patience to ensure the surface is even and safe for your next drive.

    ## The Real Truth About Your Rotors

    “Look, most shops will try to sell you a whole new set of rotors the second they feel a vibration, but if the thickness is still good, don’t let them rip you off. Resurfacing them is usually all you need to get that smooth braking feeling back without draining your bank account.”

    Nikolai·Osterman

    The Bottom Line on Your Brakes

    The Bottom Line on Your Brakes.

    Look, at the end of the day, resurfacing your rotors is all about recognizing those early warning signs—the steering wheel shake, the pedal pulsation, or that annoying vibration—before they turn into a full-blown emergency. You don’t always have to go out and drop hundreds of bucks on a brand-new set of rotors just because they aren’t perfectly flat anymore. If the thickness is still within the manufacturer’s specs, resurfacing is a massive money-saver that gets your braking performance back to where it needs to be. Just make sure you’re measuring that minimum thickness carefully; you don’t want to shave off too much and end up with thin, unreliable metal.

    I know it can feel intimidating when you’re staring at your brake assembly and wondering if you’re about to mess something up, but I promise you, it’s manageable. Most of the time, it’s just about having the right tools and a little bit of patience. Don’t let a shop talk you into an expensive replacement just because they can. Take it one bolt at a time, keep your workspace clean, and trust your gut. Once you get that first smooth stop after doing the work yourself, you’ll realize that you’re more than capable of handling what’s under your hood.

    Frequently Asked Questions

    How do I know if my rotors are too thin to be resurfaced safely?

    Look, you can’t just eyeball this. You need a micrometer to check the actual thickness against the “discard” spec listed in your service manual. Every rotor has a minimum thickness limit—once you hit that, resurfacing is a no-go because the heat will warp them instantly or, worse, they’ll crack under pressure. If you’re too close to that limit, don’t risk it. Just grab a new set. It’s not worth a brake failure.

    Is it actually better to just buy new rotors instead of paying to have these machined?

    Look, I get why you’re asking. It seems easier to just grab a fresh set online. But here’s the truth: if your rotors still have plenty of thickness left, machining them is way cheaper and keeps your original parts in the game. If they’re thin or have deep grooves, don’t bother—just swap them. But if they’re solid, resurfacing saves you a ton of cash and keeps your braking smooth.

    Can I resurface my rotors at home with a hand tool, or do I really need a lathe?

    Look, I’ll be straight with you: forget the idea of using a hand tool to resurface them. You might be able to sand down some light surface rust, but that isn’t “resurfacing.” To actually get a flat, true surface, you need a lathe. Trying to DIY it with hand tools is just asking for uneven braking and a massive headache. If you don’t have a lathe, take them to a local shop to get them turned.

  • Repairing Small Cracks in Windshields

    Repairing Small Cracks in Windshields

    I was working on a customer’s sedan last Tuesday when I saw them staring at a tiny chip in their glass like it was a death sentence. The service advisor was already hovering, probably ready to quote them a few hundred bucks for a full replacement. It honestly drives me nuts how shops try to turn minor windshield cracks into these massive, expensive emergencies just to pad their margins. Most of the time, you aren’t looking at a total failure; you’re just looking at a fixable problem that doesn’t require a professional’s invoice to solve.

    I’m not here to sell you some overpriced kit or tell you that you need a specialized degree to handle this. My goal is to give you the straight truth on how to assess the damage and, more importantly, how to patch it up yourself using basic tools. I’ll show you exactly when a chip is a DIY job and when you actually need to see a pro, so you can keep your money in your pocket and your car on the road.

    Table of Contents

    Cracked Windshield vs Rock Chip Know the Real Difference

    Cracked Windshield vs Rock Chip Know the Real Difference

    Look, I see this all the time at the shop: someone comes in panicking because they think they need a whole new windshield, when really it’s just a minor annoyance. The main thing you need to understand is the difference between a cracked windshield vs rock chip. A chip is usually just a small pit or a “star” pattern caused by a pebble hitting the glass. It’s localized. A crack, on the other hand, is a line that actually travels through the glass. Once that line starts moving, you’re dealing with a much bigger headache.

    The reason I get so worked up about this is the auto glass structural integrity. Your windshield isn’t just there so you can see; it’s actually a structural component that helps keep the roof from collapsing in a rollover and provides support for your airbags. A tiny chip is a quick fix with a windshield crack repair kit, but a long crack compromises that strength. If that line is long enough to catch your eye while you’re driving, it’s no longer just a cosmetic issue—it’s a safety risk.

    The Truth About Windshield Temperature Stress Cracks

    The Truth About Windshield Temperature Stress Cracks

    Here’s the thing about temperature stress cracks: they aren’t caused by a flying pebble or a stray piece of gravel. Instead, they usually happen because of extreme thermal shock. If you’ve been blasting the AC on full blast on a blistering summer day, or if you’re cranking the heater to combat a freezing morning, that sudden shift in temperature can cause the glass to expand or contract unevenly. This tension eventually snaps, creating a crack that looks more like a long, thin line than a typical starburst.

    The real headache is that these aren’t always easy to catch early. Unlike a visible chip, these can pop up out of nowhere, often right in your line of sight. It’s important to understand the safety implications of cracked glass here; while a small stress crack might seem cosmetic, it can compromise the auto glass structural integrity over time. If the crack starts to spiderweb across the view, you’re looking at a much more expensive replacement rather than a quick fix with a basic kit.

    5 Pro Moves to Keep That Crack from Spreading

    • Grab some clear packing tape and slap it over the chip immediately. It sounds janky, but it keeps dirt and moisture from getting deep into the crack, which makes the actual repair way cleaner later on.
    • Watch your temperature swings like a hawk. If you’ve got a chip, don’t blast the defroster on max when it’s freezing outside, and don’t crank the AC on a hot day. That sudden thermal shock is exactly what makes a tiny chip turn into a spiderweb.
    • Stop using your windshield wipers like they’re scrubbing a floor. If there’s grit or sand on the glass, those blades just act like sandpaper and can actually deepen a small nick or scratch the surface around a crack.
    • Avoid the temptation to “pressure wash” the crack away. I’ve seen guys try to blast dirt out of a chip with a high-pressure nozzle, and all they do is force water and debris deeper into the laminate, making it impossible to fix.
    • Keep a close eye on your parking spots. If you notice you’re always parking under old, leafy trees or near construction zones, you’re just asking for more flying debris. It’s better to park in the clear than to deal with a $500 replacement bill.

    The Bottom Line on Your Cracked Glass

    Catch it early; a tiny chip is a cheap DIY fix with some resin, but if you wait until it turns into a full crack, you’re looking at a massive bill for a total replacement.

    Watch your temperature swings; if you’ve got a small chip, don’t blast the AC on max or crank the defroster right away, or that thermal shock will turn a small nick into a spiderweb instantly.

    Don’t let shops bully you; if they tell you a small chip needs a whole new windshield, get a second opinion—most of the time, a little patience and the right kit can save your wallet.

    ## Stop Ignoring the Small Stuff

    “Look, I’ve seen too many people ignore a tiny chip until it turns into a spiderweb across their entire field of vision. A crack isn’t just an eyesore; it’s a structural weakness that’s gonna grow the second the temperature shifts or you hit a pothole. Fix it while it’s cheap and easy, before you’re staring down a massive bill for a full replacement.”

    Nikolai·Osterman

    Don't Wait Until It's Too Late

    Don't Wait Until It's Too Late.

    Look, at the end of the day, whether you’re dealing with a tiny little rock chip or a stress crack that’s starting to spiderweb across your view, the lesson is the same: don’t ignore it. If you catch a chip early, you can usually slap some resin on it and save yourself a massive headache. But if you let that little imperfection sit there while you drive through temperature swings or hit another pothole, you’re looking at a full windshield replacement that’ll cost you a limb. Knowing the difference between a simple fix and a total failure is the first step to staying ahead of the repair bill.

    I know it can feel intimidating when you see something wrong with your car, but you don’t have to be a master technician to take care of your ride. Most of the time, it’s just about being observant and acting before a small problem turns into a safety hazard. Grab your tools, do your research, and take control of your own maintenance. You’ve got this, and honestly, keeping your car in one piece is way more satisfying than handing over a stack of hundreds to a shop for something you could have managed yourself.

    Frequently Asked Questions

    Can I actually fix a long crack myself with a DIY kit, or is that just a waste of money?

    Look, I’ll be straight with you: if that crack is longer than a few inches or looks like a spiderweb, a DIY kit is probably just gonna waste your time and money. Those kits are great for tiny chips, but they can’t bridge a long gap. If you try to force it, you’ll likely just end up with a mess and a windshield that’s even more unstable. Save your cash and just get it replaced.

    How do I know if a crack is just a cosmetic annoyance or if it's actually going to fail an inspection?

    Look, here’s the deal: if that crack is sitting right in your line of sight, it’s a safety hazard, period. Most inspectors will flag anything that messes with your visibility. But even if it’s off to the side, check the length. If it’s longer than a credit card or looks like it’s spidering out, it’s a structural fail waiting to happen. Don’t wait for it to shatter; patch it before the inspector does.

    Is it worth trying to patch a chip if it’s already starting to spread across the glass?

    Look, I’ll be straight with you: if that chip is already spidering out, you’re playing a losing game. Once the crack starts traveling, resin won’t be able to catch up and stabilize the structural integrity of the glass. You can try to patch it to save a few bucks, but honestly? You’re just delaying the inevitable. At that point, it’s safer to stop messing around and just look into a full replacement before it fails on you.

  • Testing Your Alternator for Functionality

    Testing Your Alternator for Functionality

    I remember sitting in my driveway last summer, staring at my old Silvia after it refused to turn over for the third time in a week. My buddy told me I needed a brand new alternator and a couple hundred bucks to fix it, but something felt off. Instead of just handing over my cash, I pulled out my multimeter to run some proper alternator testing right there on the concrete. It turns out, the alternator was fine—it was just a loose, corroded ground wire that was messing with the voltage. Most shops will try to sell you a whole new assembly when all you really need is a clean connection and a little bit of diagnostic logic.

    I’m not here to give you a lecture or some textbook theory that doesn’t apply to a real-world garage. This guide is about getting you in and out of your driveway with the right answers. I’m going to show you exactly how to use a multimeter to confirm if your charging system is actually dying or if you’re just being sold a bill of goods. We’ll walk through the voltage checks and load tests step-by-step so you can stop guessing and start fixing.

    Table of Contents

    Guide Overview

    Total Time: 30-60 minutes
    Estimated Cost: $0-20
    Difficulty: Beginner

    Tools & Supplies

    • Multimeter for measuring voltage and continuity
    • Battery charger or jump starter to ensure stable base voltage
    • Work light to illuminate engine bay components
    • Rag or microfiber cloth 1 quantity
    • Safety glasses 1 pair

    Step-by-Step Instructions

    • 1. Before you even pop the hood, grab a decent multimeter—the cheap kind works, but don’t expect it to be surgical. Make sure your car is turned off and you’ve got enough space to move around the engine bay without hitting anything sharp. If you’re working on a tuner or something low to the ground, watch your head because you’ll be leaning in deep.
    • 2. Start with a baseline reading by checking your battery while the engine is off. Set your multimeter to DC voltage and touch the probes to the battery terminals; you’re looking for a reading around 12.6 volts. If your battery is already sitting below 12 volts while the car is dead, you might not even have an alternator problem—you might just have a dying battery that needs replacing first.
    • 3. Now, fire up the engine and let it idle for a minute so everything stabilizes. Switch your multimeter back to the DC voltage setting and touch the probes to the battery terminals again while the engine is running. A healthy alternator should be pushing that number up into the 13.5 to 14.7 volt range. If it stays stuck at 12 volts or starts dropping, your alternator isn’t doing its job.
    • 4. If the numbers look okay at idle, let’s put it under some stress. Turn on the headlights, the AC on max, and the radio—basically, load up the electrical system like you would on a long night drive. Check the voltage again. If the reading dips significantly below 13 volts when all those accessories are pulling power, your alternator is struggling to keep up with the demand.
    • 5. Next, we need to check for any physical red flags. While the engine is running, take a quick look at the serpentine belt and the alternator pulley. Listen for any screeching, grinding, or whining sounds. If you see the belt slipping or if the alternator itself sounds like it’s full of marbles in a blender, that’s a clear sign of mechanical failure that no amount of voltage testing can hide.
    • 6. Finally, do a quick visual inspection of the wiring. Look for any corroded terminals or frayed wires leading to the back of the alternator. Sometimes the component is perfectly fine, but a loose or dirty connection is bottlenecking the power before it ever reaches your battery. Just make sure everything is tight and clean before you go out and drop a hundred bucks on a new unit.

    Spotting the Real Signs of a Failing Alternator

    Spotting the Real Signs of a Failing Alternator

    Most people wait until their car won’t start in a grocery store parking lot before they even think about their charging system, but you can usually catch it way sooner. One of the biggest red flags is seeing your headlights flicker or dim when you’re idling at a stoplight. If your dashboard lights start acting possessed or you notice a weird, whining noise coming from the engine bay, that’s a massive hint. It’s basically your car’s way of telling you that the alternator output voltage is dropping below what the electronics need to stay stable.

    Another thing to watch for is a battery that constantly dies, even after you’ve just replaced it. If you’re doing some automotive electrical system troubleshooting and realize the battery is fine but it just won’t hold a charge, the alternator isn’t doing its job of feeding it. Sometimes it’s not even a total failure; a faulty diode can cause “dirty” electricity that messes with your sensors. Don’t ignore these little glitches—catching them early means you’re just swapping a part instead of getting stranded on the shoulder.

    Testing Alternator With Multimeter for Real Truths

    Testing Alternator With Multimeter for Real Truths

    Once you’ve got your multimeter set to DC volts, you’re basically looking for the truth that a dashboard light won’t tell you. Start with the engine off; you should see a reading around 12.6 volts, which is your battery’s baseline. When you crank the engine, that’s when the real magic—or the real headache—happens. You’re looking for a steady alternator output voltage somewhere between 13.5 and 14.7 volts. If that number stays flat or drops while the engine is running, you’ve caught the culprit red-handed.

    Don’t stop there, though. If you want to be thorough with your automotive electrical system troubleshooting, try a quick load test. Turn on the headlights, the AC, and the radio all at once. This puts stress on the system, and if your voltage plunges below 13 volts under that load, your alternator is likely on its last legs. It’s a simple way to see if the unit can actually handle a real-world driving scenario or if it’s just faking a healthy reading when nothing is plugged in.

    Pro Tips to Keep You From Wasting Time and Money

    • Don’t just trust the dashboard lights; a flickering headlight or a dim cabin is often the first real sign your alternator is struggling to keep up before the battery dies completely.
    • Always check your battery terminals for corrosion first—I’ve seen way too many people buy a brand new alternator only to realize they just had a crusty connection blocking the charge.
    • If you’re testing with a multimeter, make sure the engine is actually running when you take your reading; testing a resting alternator won’t tell you if it can actually handle the electrical load under pressure.
    • Keep an eye (and ear) out for a high-pitched whining noise coming from the engine bay, which usually means the internal bearings are shot and you’re on borrowed time.
    • Grab a cheap belt tension tester or just give the serpentine belt a good squeeze; a slipping belt can mimic a bad alternator by preventing it from spinning at the right speed.

    The Bottom Line on Your Alternator

    Don’t let a mechanic talk you into a full replacement until you’ve actually verified the voltage with a multimeter; sometimes it’s just a loose belt or a dying battery.

    If you notice your headlights dimming or your dashboard lights acting twitchy, stop ignoring it—that’s your car’s way of telling you the charging system is about to quit.

    You don’t need a shop full of expensive diagnostic gear to get the job done, just a basic multimeter and the patience to check your connections properly.

    ## The Truth Under the Hood

    “Don’t let a shop talk you into a thousand-dollar replacement just because a warning light popped up. Most of the time, the alternator isn’t dead—you just haven’t checked the connections or grabbed a multimeter to see what’s actually happening.”

    Nikolai·Osterman

    Don't Let a Dead Battery Stop You

    Don't Let a Dead Battery Stop You.

    Look, testing an alternator doesn’t have to be some mysterious ritual performed by a guy in a clean jumpsuit charging you a hundred bucks just to plug in a meter. We’ve covered the basics: keep an eye out for those dimming headlights or that annoying battery light, grab your multimeter, and actually verify the voltage instead of just guessing. Whether you’re checking the output while the engine is running or testing the battery under load, the numbers don’t lie. If you aren’t seeing that steady range between 13.5 and 14.5 volts, you’ve found your culprit. It’s about being methodical and using the right diagnostic steps to confirm the problem before you go out and drop a fortune on a brand-new part you might not even need.

    At the end of the day, my goal is to make sure you feel confident enough to pop that hood yourself. There is a certain kind of satisfaction that comes from hearing your engine roar to life because you fixed it with nothing but a basic tool kit and a little bit of grit. Don’t let the complexity of modern cars intimidate you; they’re just machines, and you’re more than capable of handling them. Stop letting the fear of a breakdown or a massive repair bill keep you on the sidelines. Grab your tools, trust your process, and take control of your ride.

    Frequently Asked Questions

    If my multimeter shows the voltage is fine while the engine is running, could the alternator still be failing under a heavy load?

    Yeah, absolutely. That’s a classic trap. A multimeter reading a steady 14 volts while idling doesn’t mean everything’s golden. The real test is when you throw a heavy load at it—crank the AC to max, turn on the headlights, and plug in a charger. If that voltage dips significantly under pressure, your alternator is struggling to keep up. It might pass the “easy” test but fail when you actually need it.

    Can a bad battery actually trick me into thinking the alternator is the problem?

    100%. This happens all the time in the shop. If your battery is shot or has a dead cell, it can’t hold a charge, which makes the alternator work overtime trying to compensate. You’ll see those weird voltage fluctuations on your multimeter and think the alternator is dying, but really, it’s just struggling to fill a broken bucket. Always test your battery’s health before you go dropping hundreds on a new alternator.

    Is it worth trying to repair the internal brushes and voltage regulator, or am I better off just swapping in a whole new unit?

    Look, if you’re working on a vintage tuner, go ahead and swap the brushes or the regulator. It’s satisfying and keeps the original unit intact. But for your daily driver? Honestly, just swap the whole unit. Modern alternators are packed with sensitive electronics, and once one part starts failing, the rest of the internal assembly is usually toast. Don’t waste your weekend chasing a ghost; just get a reliable replacement and move on.

  • Checking Essential Vehicle Fluid Levels

    Checking Essential Vehicle Fluid Levels

    I still remember the smell of burnt maple syrup and scorched metal hitting my nose when my dad’s old sedan finally gave up the ghost on a Tuesday afternoon. We thought it was a blown head gasket, but it turned out to be something way more basic: someone had just ignored the fluid levels for months until the engine literally cooked itself. It’s infuriating how many shops try to turn a simple check into a $500 “diagnostic service” when all you really needed was a $10 bottle of coolant and five minutes of your time.

    I’m not here to give you some textbook lecture or sell you on expensive additives you don’t need. My goal is to strip away the jargon and show you exactly how to keep an eye on what’s actually happening under your hood. I’ll walk you through the real-world way to monitor your vitals so you can catch a leak before it becomes a catastrophe. Consider this your no-BS guide to making sure your car stays on the road and out of the repair shop’s waiting room.

    Table of Contents

    Mastering the Art of How to Read Dipsticks

    Mastering the Art of How to Read Dipsticks

    Look, I’ve seen way too many people panic because they think they’ve ruined their engine, when really they just didn’t know how to interpret a piece of metal on a stick. When you’re learning how to read dipsticks, the first thing you need to do is grab a clean, lint-free rag—don’t use a paper towel that’s going to shred and leave bits in your oil. Pull the stick out, wipe it completely dry, and then reinsert it all the way. If you don’t seat it fully, you’re going to get a reading that’s totally useless, and you’ll end up chasing ghosts.

    Once you pull it back out, look at those two marks—usually dots or lines at the top and bottom. You want your oil sitting right in the middle or slightly above the bottom mark. If it’s hovering near the bottom, those are clear signs of low engine fluids that you can’t ignore. Also, pay attention to the texture. If the oil looks like a milky milkshake instead of clear amber, you’ve got a coolant leak, and that’s a much bigger problem than just being low.

    The Real Importance of Fluid Levels in Cars

    The Real Importance of Fluid Levels in Cars

    Look, I’ve seen too many people treat their car like a black box that magically works until it suddenly doesn’t. That’s not how it works. Think of your engine like your own body; if you aren’t hydrated, you’re going to crash. The importance of fluid levels in cars can’t be overstated because these liquids are the only thing preventing metal-on-metal contact that can turn your daily driver into a very expensive paperweight. When you’re checking vehicle fluid levels, you aren’t just doing a chore—you’re literally performing a health check to prevent a catastrophic meltdown.

    If you start noticing weird smells, a grinding sound, or even just a dashboard light popping up, don’t ignore it. Those are the classic signs of low engine fluids trying to tell you something is wrong. Most mechanics will try to upsell you on a massive service, but half the time, you just need to top something off or find a small leak. Keeping an eye on your automotive fluid maintenance schedule is the easiest way to make sure you aren’t getting ripped off later for a repair that could have been avoided with five minutes of your time.

    Pro-Tips to Keep Your Fluids from Turning Into a Mess

    • Level ground is non-negotiable. If you’re checking your oil or coolant on a steep driveway, your readings are going to be total garbage. Park on flat ground so the fluid actually sits where it’s supposed to.
    • Don’t just look at the color; smell it. If your oil smells like burnt toast or your coolant looks like a muddy milkshake, you’ve got a bigger problem than just low levels. That’s your signal to stop driving and start investigating.
    • Always check your fluids when the engine is at the right temperature. For oil, you usually want it cool; for coolant, you absolutely do NOT want to touch that cap while it’s hot unless you want a face full of steam. Read the manual, don’t wing it.
    • Keep a dedicated rag or some shop towels handy. There’s nothing worse than pulling a dipstick out, seeing it’s covered in old grime, and having no way to wipe it clean before you get a real reading.
    • Stop treating fluid top-offs like a permanent fix. If you’re adding a quart of oil every single week, you don’t just have “low fluids”—you have a leak. Find the source before you burn through your whole budget at the auto parts store.

    The Bottom Line Before You Start Wrenching

    Don’t just look at the level; check the color and smell, because sludge or a burnt scent tells a much bigger story than a dipstick ever could.

    Stop guessing with “close enough”—if a manual says it needs a specific grade of oil or coolant, use exactly that, or you’re just asking for a massive repair bill later.

    Make checking your fluids a habit, not a reaction to a warning light, because by the time that light hits your dash, the damage is usually already done.

    ## The Truth About Your Fluids

    Look, your car isn’t just a hunk of metal; it’s a living thing that breathes through these fluids. If you ignore a low dipstick today, you aren’t just saving a few bucks—you’re basically signing a death warrant for your engine.

    Nikolai·Osterman

    Bottom Line: Don't Leave It to Chance

    Bottom Line: Don't Leave It to Chance.

    Look, at the end of the day, keeping up with your fluids isn’t some high-level engineering task. It’s just about being proactive. We’ve talked about how to actually read a dipstick without guessing, why those levels matter so much for your engine’s life, and how a little bit of regular checking can save you from a massive repair bill down the line. If you can grab a rag and spend five minutes looking at your oil, coolant, or brake fluid, you’re already ahead of ninety percent of drivers on the road. Don’t let a simple, preventable mistake turn into a tow truck ride and a several-hundred-dollar headache.

    I know it can feel intimidating when you first pop the hood and see a mess of hoses and sensors, but I promise you, it’s not as scary as the shops make it sound. You don’t need to be a master mechanic to take ownership of what you drive. Once you start trusting your own eyes and understanding what’s actually happening under there, you’ll feel a lot more confident every time you turn the key. Just keep your tools handy, stay patient, and remember: you’ve got this.

    Frequently Asked Questions

    What should I do if my oil looks milky or like a chocolate milkshake instead of just being low?

    Look, if you pull that dipstick and see something that looks like a chocolate milkshake, stop driving immediately. That milky texture means coolant is leaking into your oil, usually because of a blown head gasket or a cracked block. It’s not just a “low oil” problem; it’s a major engine killer. Don’t try to just top it off and hope for the best. Get it to a shop before you turn a repair into a total engine replacement.

    Is it actually dangerous to top off my coolant if the level is just a little bit below the line?

    Look, if it’s just a tiny bit below the line, you’re fine to top it off, but don’t go overboard. The biggest mistake I see is people filling it right to the brim. You need to leave some room for that coolant to expand when the engine gets hot. If you overfill it, you’re just asking for pressure to build up and blow a seal or leak out of the overflow. Just hit the line and stop.

    How can I tell if a fluid level is dropping because of a slow leak or if my car is just burning it off?

    The easiest way to tell? Look at the ground. If you see fresh puddles or spots under your car after it’s been sitting, you’ve got a leak. But if the ground is bone dry and your oil level is still dropping, your engine is likely burning it off—usually due to worn piston rings or bad seals. Check your exhaust too; blue smoke means it’s burning, while a leak is just a mess on your driveway.

  • Inspecting Engine Belts for Wear

    Inspecting Engine Belts for Wear

    I still remember the sound of my dad’s old sedan screaming on the highway—that high-pitched, rhythmic chirping that meant something was seriously wrong. We ended up stranded on the shoulder because a worn-out serpentine belt finally decided to give up the ghost. Most shops will try to tell you that a proper belt inspection requires some high-tech diagnostic scanner or a specialized tension meter that costs a fortune, but honestly? That’s mostly just a way to pad the invoice. You don’t need a computer to tell you when a piece of rubber is about to fail you; you just need to know what to look for with your own eyes.

    I’m not here to give you some textbook lecture or sell you on expensive shop equipment you’ll never use. My goal is to show you how to do a real belt inspection using nothing but a flashlight and a bit of common sense. I’ll walk you through the specific cracks, fraying, and glazing that actually matter, so you can catch a problem before it leaves you stranded. We’re going to keep your car on the road and your money in your pocket.

    Table of Contents

    Spotting Those Early Engine Belt Wear Signs

    Spotting Those Early Engine Belt Wear Signs.

    You don’t need a fancy diagnostic scanner to know something’s off; usually, your ears and eyes will tell you the story before the car actually dies on you. The first thing I always tell people to listen for is a high-pitched squeal, especially when you first start the engine or when you’re turning the wheel. That’s a classic sign of slipping, and it often means your tensioner is struggling. While you’re listening, grab a flashlight and look for cracked rubber belt symptoms like small fissures running across the ribbed side of the belt. If those cracks look deep or the edges are fraying, you’re playing with fire.

    Another thing to watch for is the texture of the material itself. If the belt looks shiny or “glazed,” it’s been overheating from too much friction, which means it’s lost its grip. I also recommend a quick belt pulley alignment check while you’re at it. If you see any uneven wear patterns on one side of the belt, one of your pulleys might be sitting crooked. Catching these little red flags early is the difference between a quick, cheap fix and a massive headache later on.

    Cracked Rubber Belt Symptoms You Cant Ignore

    Cracked Rubber Belt Symptoms You Cant Ignore

    If you start hearing a high-pitched squeal every time you crank the engine or turn the steering wheel, pay attention. That’s usually your car’s way of screaming that the rubber is losing its grip. It’s one of those classic cracked rubber belt symptoms that people try to ignore, thinking it’s just a minor annoyance. But honestly, that noise is often caused by the belt slipping because it’s either too worn or the tensioner is failing. If you hear it, don’t just turn up the radio; it’s a sign that the material is degrading.

    Another thing to watch for is excessive vibration or a rhythmic slapping sound coming from under the hood. If the belt looks like it’s jumping or dancing while the engine is idling, you’re likely looking at a serious issue with your belt pulley alignment check or a dying tensioner. You really don’t want to push past this point. Ignoring these red flags can lead to a sudden snap, and if that happens to be your timing belt, the timing belt failure consequences can literally turn your engine into a very expensive paperweight overnight.

    Pro Tips for Getting the Job Done Right

    • Get a decent flashlight. You aren’t going to see the fine hairline cracks tucked deep in the grooves of the belt if you’re just squinting in the dark.
    • Use the “thumb test” to check tension. If you press down on the longest stretch of the belt and it feels loose or flops around like a wet noodle, it’s time for a replacement.
    • Watch out for glazing. If the sides of the belt look shiny or smooth instead of matte, it’s slipping, which is usually a sign it’s been overheating or is just plain old.
    • Listen to the engine when you first start it up. A high-pitched squeal is a massive red flag that your belt is slipping or the tensioner is acting up.
    • Don’t just look at the belt; check the pulleys too. If a pulley is wobbling or looks crooked, a brand new belt won’t save you—you’ll just snap the new one in a week.

    The Bottom Line on Your Belts

    Don’t wait for a loud squeal or a snapped belt to take action; if you see cracks or fraying during a quick visual check, it’s already time to swap it out.

    A little bit of regular inspection under the hood can save you from a massive headache—and a much bigger repair bill—down the road.

    You don’t need a shop manual to spot trouble; just keep an eye out for any weird noises or visual damage, and you’ll stay ahead of the game.

    ## The Golden Rule of Belts

    Look, a belt is just a strip of rubber, but once it snaps, it turns a simple inspection into a massive headache involving your water pump or alternator. Don’t let a five-minute visual check turn into a three-day shop visit just because you were too busy to look under the hood.

    Nikolai·Osterman

    Don't Let a Cheap Belt Break Your Bank

    Don't Let a Cheap Belt Break Your Bank

    Look, checking your belts doesn’t take a whole afternoon or a specialized diagnostic computer. If you’ve been watching out for those tiny cracks in the rubber, listening for that annoying high-pitched squeal when you start the engine, or just checking for fraying edges, you’re already ahead of 90% of drivers. The goal isn’t to become a master mechanic overnight; it’s just about catching the small, cheap problems before they turn into a massive headache. Replacing a belt is a straightforward job that saves you from a dead battery or, even worse, an overheated engine in the middle of rush hour. Stay proactive, keep an eye on that tension, and don’t ignore the warning signs.

    At the end of the day, I really believe that once you start looking under your own hood, you stop feeling like a victim to whatever the shop tells you. There’s a certain kind of confidence that comes from knowing your car is solid because you actually checked it yourself. You don’t need a fancy degree or a lift to take control of your maintenance; you just need to show up and pay attention. Grab your flashlight, pop the hood, and take ownership of your ride. It’s much better to spend twenty minutes inspecting a belt now than twenty hours waiting for a tow truck later.

    Frequently Asked Questions

    How do I tell the difference between a belt that's just old and one that's actually about to snap?

    Look, there’s a fine line between “aged” and “imminent failure.” If the belt is just slightly discolored or has tiny surface cracks, you’ve got some breathing room. But if you see deep chunks missing, fraying edges, or if the belt is glazing over and looking shiny/slick, that’s a ticking time bomb. If it’s squealing every time you start the car, it’s already telling you it’s done. Don’t gamble on it.

    Is it worth trying to tighten a squealing belt myself, or should I just swap it out immediately?

    Honestly? Don’t waste your time trying to “tighten” it. If it’s squealing, it’s usually telling you something is wrong—either the belt is worn thin, or your tensioner is shot. You might get a temporary fix by cranking down a bolt, but you’re just masking the real issue. Just swap the belt out. It’s a cheap part, and it beats getting stranded because you tried to play doctor with a dying piece of rubber.

    Can I use a generic belt from a local parts store, or do I really need to find the exact OEM match for my engine?

    Look, I get why you’d want to grab whatever’s on the shelf to save a few bucks, but don’t just grab a random belt. Most decent local parts stores carry “equivalent” brands that work fine, but you still need to match the exact specs—length, width, and rib count—for your specific engine. If it’s off by even a hair, it’ll squeal or slip. Stick to a reputable brand; you don’t need the expensive OEM logo, just the right fit.

  • Replacing Worn Windshield Wiper Blades

    Replacing Worn Windshield Wiper Blades

    Ever find yourself white-knuckling the steering wheel during a downpour because your windshield looks like it’s covered in smeared grease? Most people think they need to head to the dealership or wait for a “service special” to fix that annoying streaking, but honestly, that’s just a way to drain your wallet. The truth is, wiper blade replacement is one of those tasks that mechanics love to overcharge for, even though it’s basically a five-minute job. I remember my first real storm driving home from a late shift; the old blades just chattered across the glass, leaving me totally blind. It was a wake-up call that I should’ve handled my own maintenance instead of just hoping for the best.

    I’m not here to give you some overly complicated manual or sell you on expensive, fancy gadgets you don’t need. I’m going to show you exactly how to grab the right parts and swap them out yourself without breaking a sweat. We’re going to cover how to identify your specific blade size and the proper way to click them into place so you don’t snap the wiper arm. Let’s get it done.

    Table of Contents

    Guide Overview

    Total Time: 10-20 minutes
    Estimated Cost: $15-50
    Difficulty: Beginner

    Tools & Supplies

    • Microfiber cloth to protect windshield
    • Owner's manual to verify wiper type
    • New wiper blade set (driver and passenger side)
    • Glass cleaner to prep surface

    Step-by-Step Instructions

    • 1. First things first, grab your new blades and make sure they actually match your car. I’ve seen guys buy the wrong size and spend twenty minutes trying to force a fit, which is a total waste of time. Check your owner’s manual or just pop into the auto parts store and double-check the length before you head home.
    • 2. Lift the wiper arm up away from the windshield. You want it standing straight up like it’s in a “salute” position. Be careful here, though—if you let that metal arm snap back down without a blade on it, it’ll crack your windshield, and that’s a much more expensive headache than just buying new wipers.
    • 3. Look at where the blade connects to the arm. Most cars use a simple “J-hook” style, which is basically a little metal hook at the end of the arm. You’ll usually see a small tab or a button on the underside of the connector; press that tab firmly to release the tension holding the old blade in place.
    • 4. Once the tab is pressed, slide the old blade down and out of the hook. Once it’s free, set it aside. Before you do anything else, take a clean rag and wipe down the metal arm and the area where the blade sits. You don’t want to trap old grit or dirt under your brand-new rubber.
    • 5. Take your new blade and line up its connector with the hook on the arm. It should slide right in. You’ll know it’s secure when you hear a solid click or feel it lock into place. Give it a quick, firm tug to make sure it isn’t going anywhere.
    • 6. Slowly lower the wiper arm back onto the glass. Don’t just let it fly; guide it down gently so you don’t stress the mechanism. Once it’s seated, turn on your wipers and give them a quick spray of washer fluid to make sure they’re sweeping clean without any weird skipping or dragging.

    Spotting the Signs of Worn Wiper Blades Before Its Too Late

    Spotting the Signs of Worn Wiper Blades Before Its Too Late

    You don’t always have to wait for a downpour to realize your blades are shot. Honestly, most people wait until they’re driving through a storm and can barely see the lines on the road, but that’s when it gets dangerous. One of the biggest signs of worn wiper blades is that annoying, rhythmic chattering sound they make across the glass. If they’re jumping or skipping instead of gliding smoothly, the rubber has likely hardened or cracked from sitting out in the sun.

    Another dead giveaway is those annoying streaks that refuse to clear, no matter how much fluid you spray. If you notice “ghosting” or a cloudy film left behind, your blades aren’t making full contact anymore. I always tell people to keep an eye out for physical damage like tiny tears or chunks missing from the rubber edge. Catching these things early is just part of solid automotive maintenance tips that save you from a massive headache later. Don’t wait for a visibility crisis to realize you need a quick swap.

    How to Change Windshield Wipers Without Breaking a Sweat

    How to Change Windshield Wipers Without Breaking a Sweat

    Look, I’ve seen plenty of people struggle with this because they treat it like a high-stakes surgery, but it’s really not that deep. The biggest mistake I see is people rushing the process and accidentally snapping the wiper arm back against the glass. If that metal arm slams down without a blade attached, you’re looking at a cracked windshield and a much more expensive afternoon. My best piece of advice? Grab a thick towel and lay it right over the glass before you start. It acts as a buffer so if things slip, you aren’t paying for a new windshield on top of new blades.

    Another thing that trips people up is getting the wrong gear. Don’t just grab whatever’s on sale at the big-box store without checking your manual first. Knowing the correct wiper blade size for your specific make and model is the difference between a smooth swipe and a constant, annoying chatter. If you’re looking for more automotive maintenance tips to keep your visibility sharp, just remember: check your blades every time the seasons shift. It takes two minutes and keeps you from driving blind.

    Pro Tips to Keep Your Wipers From Acting Up

    • Don’t just buy the cheapest blades at the big-box store; if you want them to actually last through a storm, spend the extra few bucks on a decent brand that uses high-quality rubber.
    • Before you snap the new ones on, give the wiper arm itself a quick wipe with a clean rag to get rid of any grit or road grime that could scratch your windshield.
    • If your new blades start streaking right away, check the tension on the wiper arm—sometimes they aren’t seated perfectly in the clip, and that’s all it takes to mess up the contact.
    • Protect your windshield while you’re working; if you accidentally lift that metal wiper arm too far back without a blade attached, it can snap back and crack your glass in a heartbeat.
    • Once the new blades are on, do a quick test spray of your washer fluid to make sure everything is aligned and sweeping the glass smoothly before you head out on the road.

    The Bottom Line on Keeping Your Vision Clear

    Don’t wait for a storm to realize your wipers are shot; if they’re streaking or squealing now, just swap them out.

    You don’t need a mechanic for this—grab the right size at the parts store, spend five minutes on it, and save yourself the shop fee.

    Check your wiper connections before you buy new ones so you aren’t stuck with a blade that doesn’t actually fit your arm.

    The Real Cost of Neglect

    “Don’t let a shop charge you fifty bucks for a ten-minute job just because you’re scared of a little plastic clip; keeping your visibility clear shouldn’t break your bank or your spirit.”

    Nikolai·Osterman

    Don't Let the Rain Catch You Off Guard

    Don't Let the Rain Catch You Off Guard.

    At the end of the day, swapping out your wipers is one of those small wins that keeps your car feeling reliable. We covered how to spot those annoying streaks before they turn into a safety hazard, the right way to unclip the old blades without snapping the wiper arm, and how to make sure the new ones are seated perfectly. It’s a quick process, but if you rush it, you might end up with a scratched windshield or a blade that flies off on the highway. Just remember to double-check the connection before you turn the ignition back on; it only takes a second and saves you a massive headache later.

    I know it can feel intimidating when you first look under the hood or reach into those tight gaps, but honestly, this is exactly how you build confidence. You don’t need to be a master technician to handle the basics, and you definitely shouldn’t be paying shop labor rates for a job that takes ten minutes in your own driveway. Every time you tackle a small fix like this, you’re taking control of your machine and keeping more money in your pocket. Keep that magnetic tray handy, stay patient, and just keep turning wrenches. You’ve got this.

    Frequently Asked Questions

    How do I know which specific blade size I need if my car manual is missing?

    If your manual’s gone missing, don’t sweat it. First, grab a tape measure and just measure the old blades from end to end—that’s usually the easiest way. If you want to be 100% sure, pull up your car’s year, make, and model on a site like RockAuto or even just Google it. Most parts sites have a fitment guide that’ll tell you exactly what fits your specific windshield. Just double-check both sides; they aren’t always the same length.

    Is it actually worth buying the expensive blades, or can I just grab the cheap ones from the big-box store?

    Look, I get the temptation to grab the $5 generic set, but honestly? You usually get what you pay for. Cheap blades tend to chatter or leave those annoying streaks across your view after just a few weeks of sun and rain. If you’re on a tight budget, go for it, but if you actually care about seeing clearly during a downpour, spend the extra few bucks on a decent mid-range brand. It’ll save you the headache of replacing them twice.

    My wipers are still streaking even after I put on brand new ones—what else could be wrong?

    That’s frustrating, I get it. If brand new blades aren’t cutting it, the problem usually isn’t the rubber—it’s the glass. You’ve probably got a layer of road grime, tree sap, or even old oil buildup that the new blades can’t scrub off. Grab some glass cleaner or even a bit of isopropyl alcohol and a microfiber towel. Scrub that windshield down real good. If it still streaks, your wiper arms might be bent and not applying even pressure.

  • How to Replace Engine and Cabin Air Filters

    How to Replace Engine and Cabin Air Filters

    I was working on a beat-up old sedan last week when a customer came in, looking totally stressed because the shop told him he needed a “major intake system overhaul” just to fix a sluggish engine. I almost lost it. The guy was looking at a bill for hundreds of dollars when all his car actually needed was a simple air filter replacement. It kills me how some shops try to dress up the most basic maintenance as some high-tech, expensive surgery just to pad their margins. Honestly, if your car feels like it’s gasping for breath, it’s usually not a mystery—it’s just choking on dust.

    Look, I’m not here to give you some textbook lecture or sell you on fancy additives you don’t need. I’m going to show you exactly how to handle an air filter replacement yourself, without the headache or the massive markup. I’ll walk you through what to look for, how to spot a bad one, and how to swap it out in under five minutes. You’ve got this, and I’m going to make sure you don’t get ripped off.

    Table of Contents

    Spotting the Signs of a Clogged Filter Before It Costs You

    Spotting the Signs of a Clogged Filter Before It Costs You

    You don’t always have to wait for a dashboard light to tell you something is wrong. Usually, your car will start “talking” to you through how it drives. If you notice your engine feels sluggish or you’re getting significantly worse gas mileage, it’s a huge red flag. A choked-out filter makes the engine work twice as hard just to breathe, which is a total killer for improving fuel efficiency. If you’re constantly hitting the gas just to keep up with traffic, your car is likely gasping for air.

    Another thing to watch for is how your cabin feels. If you turn on the AC and it feels like a weak breeze instead of a blast, or if you start noticing a musty smell, that’s a clear sign of a clogged filter. It’s not just about the engine, though; it’s about your HVAC system performance and the air you’re actually breathing. If the vents feel weak or the air quality inside the car just feels off, don’t ignore it. Catching these small issues early keeps you from turning a cheap fix into a massive headache.

    Mastering Your Vehicle Maintenance Schedule Without a Mechanics Degree

    Mastering Your Vehicle Maintenance Schedule Without a Mechanics Degree

    Look, you don’t need a massive binder full of technical jargon to stay on top of things. Most shops try to make the vehicle maintenance schedule seem like some complex, high-stakes puzzle just to justify their labor rates. In reality, it’s mostly about rhythm. I always tell my friends to just pick a milestone—like every oil change or every six months—and make that their trigger for a quick inspection. If you can check your oil, you can definitely check a filter.

    Don’t get bogged down in the fine print of your owner’s manual, either. Just focus on the stuff that actually impacts how your car feels on the road. For example, keeping your engine breathing clean air is one of the easiest ways of improving fuel efficiency without spending a dime on fancy additives. It’s about being proactive rather than reactive. If you wait until the car is sputtering to look at your logs, you’ve already lost the battle. Just stay consistent, and you’ll find you’re saving a ton of money in the long run.

    Pro Tips to Keep Your Engine Breathing Easy

    • Don’t just eyeball it; if you see a thick layer of gray dust or debris stuck in the pleats, it’s already time for a swap.
    • Grab a can of compressed air to blow out the airbox housing before you drop the new filter in—you don’t want old grit falling onto your clean sensor.
    • Check your owner’s manual for the actual interval, but honestly, if you live somewhere dusty or near a construction site, expect to change it more often than the book says.
    • Never try to “clean” a paper filter by washing it; you’ll just ruin the fibers and end up sucking dirt straight into your intake.
    • Make sure the rubber seal on the new filter sits perfectly flush in the housing; if it’s crooked, you’re basically letting unfiltered air bypass the whole system.

    The Bottom Line on Keeping Your Engine Breathing

    Don’t wait for a dashboard light or a massive drop in MPG; if your filter looks like it’s been through a sandstorm, just swap it out.

    You don’t need a specialized toolkit for this—most cars let you pop the airbox open with just a screwdriver or even your bare hands.

    Checking your filter every few oil changes takes two minutes and can save you hundreds in fuel costs and engine wear down the road.

    The Real Cost of Cutting Corners

    “Mechanics love it when you ignore your air filter because it turns a five-minute swap into a massive bill for engine cleaning later. Don’t give them that satisfaction; just grab a new one, pop it in, and keep your money in your pocket.”

    Nikolai·Osterman

    Don't Let Them Charge You for Five Minutes of Work

    Don't Let Them Charge You for Five Minutes of Work.

    Look, at the end of the day, swapping an air filter isn’t some high-level engineering feat. We’ve covered how to spot that sluggish acceleration, how to keep track of your mileage without feeling overwhelmed, and why letting that debris build up is just throwing money out the window. It really comes down to two things: staying observant and having that one new filter sitting in your trunk when you need it. Once you realize that most of these “maintenance tasks” are just simple mechanical movements, you stop being a victim to the service advisor’s sales pitch. You’ve got the signs to watch for and the schedule to follow; now you just need to actually do the work.

    I know it can feel intimidating when you first pop that hood and see all those wires and plastic housings, but I promise you, it gets easier. Every time you grab your tools and handle a repair yourself, you’re taking back control of your ride and your wallet. Don’t let the fear of “doing it wrong” keep you stuck in a cycle of expensive shop visits. Just grab a new filter, take your time, and trust your hands. You’re more capable than any mechanic wants you to believe, and honestly, your car will probably run better for it.

    Frequently Asked Questions

    Can I just blow the dust out with some compressed air instead of buying a new one?

    Look, I get the temptation to save a few bucks, but honestly? Don’t do it. Blowing out a filter with compressed air might clear the big chunks, but it’s not going to pull the fine grit out of those microscopic pleats. You’re basically just rearranging the dirt. Plus, you risk tearing the paper, which lets debris straight into your engine. Just grab a new one; it’s cheaper than a ruined turbo or engine rebuild.

    How do I know if I need a standard paper filter or one of those reusable oiled ones?

    Look, don’t let the marketing fool you. Check your owner’s manual first—that’s your bible. If it calls for a standard paper filter, stick with it. They’re cheap and they do the job. Those reusable oiled ones can be cool for tuning, but if you over-oil them, you’ll actually gunk up your Mass Air Flow sensor, and then you’re looking at a much more expensive headache. If you’re just daily driving, paper is king.

    Is it actually worth checking the cabin air filter too, or is that just another way for shops to upcharge me?

    Look, I get it—it feels like another way for shops to pad the bill. But here’s the truth: the cabin filter is actually worth your time. While the engine filter keeps the motor breathing, the cabin filter keeps you breathing. If your AC smells funky or the airflow feels weak, it’s probably clogged with dust and dead bugs. It’s usually a five-minute job behind the glovebox. Don’t pay a shop $50 for it.

  • Signs Your Brakes Need Inspection

    Signs Your Brakes Need Inspection

    I remember sitting in my dad’s garage when I was ten, listening to that high-pitched, metal-on-metal screech every time he tapped the pedal on his old sedan. He’d just sigh, grab his wrench, and tell me that most shops would try to sell you a whole new rotor assembly when all you really needed was a simple brake inspection and some fresh pads. It drives me crazy how some mechanics treat a basic check like it’s some kind of complex, high-tech mystery just to pad their service invoices. Most of the time, your car is trying to tell you exactly what’s wrong; you just have to know how to listen.

    I’m not here to give you some textbook lecture or a list of parts you don’t actually need. My goal is to show you how to grab a flashlight, get under there, and do a real brake inspection yourself so you know exactly what’s happening behind those wheels. I’ll walk you through the actual signs of wear and the specific things I look for when I’m on the clock at the shop. No fluff, no gatekeeping—just the honest truth about keeping your stopping power solid without getting ripped off.

    Table of Contents

    Listen Close to Those Annoying Brake Squealing Sounds

    Listen Close to Those Annoying Brake Squealing Sounds

    If you start hearing a high-pitched screech every time you hit the pedal, don’t just turn up the radio and hope it goes away. Most of the time, those brake squealing sounds are actually a built-in warning system. Many pads have a tiny metal tab called a wear indicator designed to scrape against the rotor once the material gets too thin. It’s annoying as hell, but it’s basically your car screaming at you that it’s time for a change before you end up with metal-on-metal grinding that ruins your rotors.

    Beyond the noise, pay attention to how the car actually reacts when you slow down. If you notice a weird vibration or a spongy brake pedal feel, that’s a massive red flag. It could be anything from air in the lines to warped rotors. I always tell people that if the car feels “off” during a stop, your stopping distance safety is officially compromised. Don’t wait until you’re at a red light and the pedal goes straight to the floor to realize something is wrong.

    Watch for the Real Signs of Worn Brake Pads

    Watch for the Real Signs of Worn Brake Pads.

    Beyond just the noise, you need to pay attention to how the car actually behaves when you’re hitting the pedal. One of the biggest red flags is a change in your brake pedal feel. If it suddenly feels spongy, or if it sinks way too close to the floor before the car actually slows down, that’s not just “old car character”—that’s a warning. You might also notice a slight vibration or pulsing through the pedal when you’re slowing down from highway speeds. That usually means your rotors are getting warped, which is a sign that your pads have been overheating or are just worn down too thin.

    Another thing to keep an eye on is your stopping distance safety. If you find yourself having to press harder or earlier just to get the car to come to a halt, don’t just ignore it. It’s easy to think you’re just driving more aggressively, but your car is literally telling you it’s struggling to do its job. If you notice you’re traveling a few extra feet before the weight shifts forward, it’s time to pull the wheels off and do a proper brake component inspection to see exactly how much meat is left on those pads.

    5 Ways to Check Your Brakes Without Getting Ripped Off

    • Grab a flashlight and look through your wheel spokes. You don’t need to take the whole wheel off just to see if your pads are getting dangerously thin; a quick visual check can save you a massive headache later.
    • Get your hands a little dirty and feel the brake rotors for any deep grooves or “lip” around the edge. If the surface feels like a record player with scratches, your rotors are likely warped or too worn to keep things smooth.
    • Pay attention to how the pedal feels under your foot. If it feels spongy or you have to floor it just to get the car to slow down, you probably have air in the lines or a failing master cylinder, and that’s not something to ignore.
    • Check your brake fluid level in the reservoir, but don’t just look at the lines. If the fluid looks dark or murky like old coffee, it’s time for a flush because moisture in that fluid will eat your system from the inside out.
    • Do a quick shake test when the car is on a jack. If you wiggle the wheel and feel any play or clicking, your calipers might be loose or your brake components are shot, which is a huge red flag for your safety.

    The Bottom Line on Your Brakes

    If you’re hearing high-pitched squealing or feeling a weird vibration in the pedal, don’t ignore it—that’s your car telling you something is actually wrong.

    Grab a flashlight and visually check your pad thickness; if they look paper-thin, it’s time to swap them before you end up ruining your rotors too.

    You don’t need to be a master tech to spot the basics, but you do need to be proactive so you don’t get hit with a massive repair bill later.

    Stop Guessing, Start Looking

    A mechanic might tell you that you need a whole new rotor assembly just to get you out the door, but if you actually take five minutes to look at the pad thickness yourself, you might realize you just need a simple pad swap. Don’t let anyone charge you for a problem that’s staring you right in the face.

    Nikolai·Osterman

    Don't Leave Your Safety to Chance
    Don't Leave Your Safety to Chance.

    At the end of the day, checking your brakes isn’t some complex science project; it’s just about paying attention to what your car is trying to tell you. Whether you’re listening for that high-pitched squeal that means the wear indicators are doing their job, or you’re actually getting down on the ground to check the thickness of your pads with a flashlight, you’re taking control. Don’t ignore the vibrations in the pedal or that weird pulling sensation when you hit the brakes. If you catch these things early, you’re looking at a simple pad swap instead of a massive, expensive bill for new rotors or calipers that could have been avoided.

    Look, I know it can feel intimidating to poke around under your car, especially when you’re worried about messing something up. But honestly, most people get overcharged because they’re too afraid to ask questions or look for themselves. Once you realize that maintenance is just patience and the right set of tools, you’ll stop feeling like a victim of the repair shop. Keep that magnetic tray handy, stay observant, and don’t let anyone tell you that you aren’t capable of understanding your own machine. You’ve got this.

    Frequently Asked Questions

    How do I know if it's just the pads wearing down or if my rotors are actually warped?

    Here’s the easiest way to tell: feel the steering wheel or the brake pedal. If you hit the brakes and the whole car starts shaking or the steering wheel vibrates in your hands, that’s almost always warped rotors. If it’s just a high-pitched squeal or a grinding noise but the car feels smooth, you’re likely just down to the wear indicators on your pads. Don’t let a shop charge you for rotors if it’s just pads.

    Is it worth trying to change the brake fluid myself, or is that something I should leave to a shop?

    Honestly? It’s worth doing yourself, but don’t go in blind. Changing fluid is mostly about patience and not letting air bubbles into the lines—that’s where people mess up. If you’ve got a friend to help you pump the pedal or a decent vacuum bleeder, you’re golden. It’s way cheaper than a shop markup, and it’s a solid way to make sure your system stays clean. Just grab a manual and take your time.

    Can I still drive the car if I hear a grinding noise, or am I asking for a total breakdown?

    Look, I’m gonna be straight with you: if you’re hearing grinding, you’re already past the “warning” stage. That’s metal-on-metal contact. You aren’t just wearing down your pads anymore; you’re actively eating into your rotors. You might make it to the shop, but you’re risking a total brake failure or a much more expensive bill for new rotors. Stop driving it and get those pads swapped before you lose stopping power entirely.