Blog

  • Essential Work Lights for Automotive Repair

    Essential Work Lights for Automotive Repair

    I still remember being twelve, stuck under my dad’s old sedan with nothing but a dying, flickering flashlight that felt like it was mocking me. I was trying to find a blown fuse, but all I could see were vague, dancing shadows and a whole lot of frustration. Every time I thought I saw something, the light would dim or shift, leaving me squinting into a black hole. That’s when I realized that having a decent work light isn’t some luxury for professional shops—it’s the difference between actually fixing your car and just getting pissed off in the driveway.

    Look, I’m not here to sell you on some overpriced, tactical LED gadget that costs more than your oil change. Most of the gear marketed to DIYers is just flashy junk designed to eat your paycheck. I’m going to give you the straight truth about what actually works when you’re elbow-deep in an engine bay. We’re going to talk about brightness, battery life that doesn’t quit halfway through a job, and how to find the right shape for those tight, impossible corners. I’ll show you exactly what’s worth your money so you can stop guessing and start wrenching.

    Table of Contents

    Why High Lumen Workshop Lamps Change the Game

    Why High Lumen Workshop Lamps Change the Game

    Look, I’ve spent more hours than I’d like to admit squinting into a dark engine bay, trying to figure out if a leak is oil or just old grime. It’s frustrating and, honestly, a waste of time. That’s where high lumen workshop lamps actually make a difference. When you’ve got serious brightness, you aren’t just seeing shapes; you’re seeing the actual texture of a cracked hose or a tiny hairline fracture in a plastic housing. It turns a guessing game into actual diagnostics.

    Beyond just raw power, the setup matters just as much as the brightness. If you’re working deep in the wheel well or under a chassis, you can’t be holding a flashlight in your teeth like some amateur. I always lean toward magnetic mechanic work lights because they let you stick the light exactly where you need it, leaving both your hands free to actually turn the wrench. Once you stop fighting with shadows and start having proper illumination, you’ll realize how much faster you can actually get the job done.

    Magnetic Mechanic Work Lights That Stick Where You Need Them

    Magnetic Mechanic Work Lights That Stick Where You Need Them

    There is nothing more frustrating than trying to hold a flashlight in your teeth while you’re wrestling with a stubborn bolt in the wheel well. I’ve spent enough hours under lifted chassis to know that if your hands aren’t free, you aren’t actually working—you’re just struggling. That’s where magnetic mechanic work lights become a total lifesaver. I always keep a few of these in my kit because they let you slap the light right onto the frame, strut tower, or any steel surface near the job. It turns a chaotic mess into a controlled environment where you can actually focus on the task at hand.

    When you’re looking for something reliable, don’t just grab the cheapest plastic thing you find. Look for rechargeable battery powered lights that have a decent magnet strength; you don’t want your light sliding off a greasy engine block halfway through a repair. I prefer models that offer a few different brightness modes so you can dial it back when you’re working near sensitive sensors, or crank it up when you’re deep in the dark corners of a transmission tunnel. Having that hands-free inspection lighting makes the difference between a quick fix and a two-hour headache.

    Pro Tips for Not Losing Your Mind (or Your Vision) While Working

    • Get yourself a light with adjustable brightness. You don’t always need a floodlight hitting you in the eyes when you’re just trying to inspect a tiny sensor deep in the engine bay; being able to dim it down saves your eyes from fatigue.
    • Prioritize battery life over everything else. There is nothing more frustrating than being halfway through a brake job only to have your light die on you. If it doesn’t have a decent runtime or a quick-charge option, leave it on the shelf.
    • Look for something waterproof and dust-resistant. You’re working around oil, coolant, and road grime—it’s a fact. If your light can’t handle a little splash or a dusty environment, it’s going to die on you within a month.
    • Go for a light with a wide beam angle. You don’t want a tiny little laser beam that only shows you one bolt at a time; you need a light that spreads out enough to actually illuminate the whole area you’re working in.
    • Always have a backup. Even if you buy the most expensive light on the market, things happen. Keep a cheap, small LED flashlight in your pocket or your toolbox just in case your main setup fails mid-job.

    The Bottom Line on Lighting Up Your Project

    Don’t cheap out on lumens; if you can’t see the tiny cracks in a belt or a leaking gasket clearly, you’re just guessing, and guessing leads to expensive mistakes.

    Look for magnetic bases every single time—being able to slap a light onto a strut tower or a frame rail while you’re using both hands is a total life-saver.

    Invest in something rugged that can take a drop or a splash of oil, because if your light dies halfway through a job, you’re stuck staring at a dark engine bay with no way out.

    The Real Cost of Bad Lighting

    You’d be surprised how many stripped bolts and busted knuckles I see just because a guy was trying to work in the shadows. A cheap flashlight isn’t a tool; it’s a liability. If you can’t see the component clearly, you’re just guessing, and guessing is how you end up paying a professional to fix your mistake.

    Nikolai·Osterman

    Bottom Line: Stop Guessing and Start Seeing

    Bottom Line: Stop Guessing and Start Seeing

    Look, at the end of the day, it doesn’t matter if you’re swapping out a spark plug or hunting for a vacuum leak in a dark corner of the engine bay; if you can’t see the part, you’re just wasting your time. We talked about why you need those high-lumen lamps to kill the shadows and why a magnetic base is a total lifesaver when your hands are full of greasy tools. Investing in decent lighting isn’t some luxury for pro shops; it’s the smartest move you can make to avoid stripping a bolt or missing a hairline crack in a hose. Don’t settle for a dying phone flashlight when you’re halfway through a job.

    I know that staring down a complex repair can feel intimidating, especially when you’re working in cramped, dim spaces that make everything look ten times harder than it actually is. But remember, most of the “magic” mechanics do is just a combination of the right procedure and having the right visibility. Once you get the right light in your hands, you’ll realize that the stuff under your hood isn’t some unsolvable mystery—it’s just a machine waiting to be understood. So, grab your gear, turn on the lights, and get to work. You’ve got this.

    Frequently Asked Questions

    How bright does a light actually need to be before it starts blinding me while I'm working?

    Look, there’s a sweet spot. If you’re just looking for a little extra light to see a bolt, you don’t need a stadium floodlight. For most of my jobs, I aim for something around 500 to 1,000 lumens. Anything higher than that in a tight engine bay is just going to bounce off the chrome and metal, leaving you squinting and seeing spots. You want enough light to see the detail, not a flashbang.

    Is it worth spending extra cash on a rechargeable LED light, or should I just stick to the cheap battery-powered ones?

    Look, if you’re just checking a fuse box once a month, the cheap AA-battery ones are fine. But if you’re actually getting your hands dirty like I am, go rechargeable. There is nothing more frustrating than being halfway through a timing belt job and having your light die on you. The LED ones hold a steady brightness without dimming as the juice drops, and you won’t go broke constantly buying disposables. Spend the extra cash.

    What’s the best way to keep my work light from getting smashed or covered in grease when I'm crawling under the chassis?

    Look, I’ve dropped more than a few lights on concrete or seen them get buried in sludge. If you’re crawling under a chassis, don’t just toss your light on the floor. Get a rugged, silicone-encased LED—the kind that can take a hit without cracking. For the grease, keep a dedicated rag in your back pocket just for wiping the lens. If you can’t see through the grime, you’re basically working blind.

  • Replacing a Leaking Clutch Slave Cylinder

    Replacing a Leaking Clutch Slave Cylinder

    I was under a beat-up Civic last Tuesday, grease up to my elbows, when I heard that dreaded, hollow thud from the pedal assembly. My customer had been told by a shop that he needed a whole new hydraulic system overhaul because his clutch felt like mush, and they were quoting him enough money to buy a decent used car. It’s total nonsense. Most of the time, you’re just looking at a failing clutch slave cylinder, and honestly, it’s one of those fixes that makes people panic way more than they should.

    I’m not here to sell you on some expensive, over-complicated diagnostic service that you don’t actually need. My goal is to give you the straight truth about how to spot a bad clutch slave cylinder and, more importantly, how to swap it out without breaking the bank. I’ve spent enough time in the garage to know that if you have the right wrench and a little bit of patience, you can handle this yourself. Let’s get into the actual grit of the repair so you can stop worrying and start driving.

    Table of Contents

    Spotting the Symptoms of Failing Slave Cylinder Early

    Spotting the Symptoms of Failing Slave Cylinder Early

    The first thing you’re going to notice is a change in your clutch pedal feel. It might start feeling “spongy,” like you’re stepping on a marshmallow instead of a solid mechanical component, or it might suddenly go completely limp and stay stuck to the floor. If you feel like you have to pump the pedal a few times just to get the car to shift properly, that’s a massive red flag. These clutch engagement issues usually mean the internal seals are starting to give up the ghost, and the pressure isn’t being distributed where it needs to go.

    Keep a sharp eye on the ground where you park, too. If you spot a small puddle of oily fluid near the transmission housing, you’re likely looking at a clutch hydraulic system failure in the making. Most of the time, it’s not a massive explosion of fluid, but rather a slow, sneaky leak that catches people off guard. Catching these symptoms early is the difference between a quick afternoon in the driveway and being stranded on the side of the road waiting for a tow truck.

    Why Your Clutch Pedal Feel Suddenly Changes

    Why Your Clutch Pedal Feel Suddenly Changes

    If your pedal suddenly feels “mushy” or like you’re stepping into a bowl of oatmeal, that’s a massive red flag. Usually, when you press down, there’s a crisp, consistent resistance that tells you the system is pressurized and ready to work. But when you start experiencing clutch engagement issues, like the pedal staying stuck to the floor or feeling way too light, it’s a sign that the internal seals are likely shot. It’s not just a minor annoyance; it’s a direct indicator that your hydraulic pressure is bleeding off somewhere it shouldn’t be.

    I’ve seen plenty of guys ignore this, thinking they just need a more aggressive foot, but you can’t muscle your way through a clutch hydraulic system failure. If the pressure isn’t hitting the piston correctly, the lever isn’t moving the fork, and you’re basically just playing with a heavy piece of metal. Once that clutch pedal feel goes wonky, you’re usually on borrowed time before the car refuses to shift into gear entirely. Don’t wait until you’re stranded at a light to figure this out.

    Pro Tips for Dealing with a Dying Slave Cylinder

    • Don’t just top off the fluid and call it a day. If your reservoir is getting low, you’ve got a leak somewhere. Replacing the cylinder is the real fix; just adding more fluid is just masking a problem that’s going to leave you stranded eventually.
    • Grab a decent set of flare nut wrenches. Most of the hydraulic lines connected to the slave cylinder use soft metal fittings that strip way too easily if you try to use a standard open-end wrench. Trust me, your knuckles will thank you.
    • Keep your workspace clean. Even a tiny speck of dirt getting into the hydraulic line during a swap can clog the seals or cause the new cylinder to fail prematurely. It’s a small detail, but it’s the difference between a one-time fix and a headache.
    • Bleed the system thoroughly. Air is the enemy of a smooth clutch. If you feel a “spongy” pedal after your repair, you probably still have air bubbles trapped in the line. You’ll need to pump the pedal or use a vacuum bleeder to get it perfect.
    • Check the master cylinder too. If you put in a brand new slave cylinder and the pedal still feels garbage, the issue might actually be the master cylinder up by your foot. It’s better to know now so you don’t waste time chasing the wrong part.

    The Bottom Line on Your Clutch

    If your pedal feels mushy or you’re seeing fluid pooling near the transmission, don’t ignore it—that’s your slave cylinder telling you it’s about to give up.

    You don’t need a massive shop setup to swap this part; just get yourself a decent jack, some stands, and a little patience to avoid a headache.

    Catching a leak early can save you from a total breakdown on the side of the road and keeps you from getting hit with a massive repair bill at a shop.

    The Truth About That Spongy Pedal

    Most shops will try to tell you your whole clutch assembly is shot, but nine times out of ten, it’s just a cheap slave cylinder acting up. Don’t let them talk you into a massive bill when a little bit of hydraulic pressure and a basic wrench could fix the whole problem.

    Nikolai·Osterman

    Don't Let a Small Leak Stall You Out

    Don't Let a Small Leak Stall You Out.

    Look, at the end of the day, a failing clutch slave cylinder isn’t some mysterious engine failure that requires a master technician and a massive invoice. If you’ve been noticing a mushy pedal, seeing fluid pooling near the transmission, or struggling to get into gear, you’ve already done the hard part by identifying the problem. Just remember that it usually comes down to a simple hydraulic leak or a worn-out seal. Once you’ve grabbed your basic wrenches and a little bit of brake cleaner, you’re well on your way to getting that pressure back where it belongs. Don’t ignore those early warning signs, because a small leak today can turn into a total pedal failure when you’re stuck in traffic tomorrow.

    I know it can feel intimidating when you’re staring at a greasy mess under the chassis, but honestly, you’ve got this. Every time you tackle a job like this, you’re becoming more self-reliant and less dependent on whatever the shop tries to charge you. It’s about that satisfaction of the first smooth shift after you’ve tightened that last bolt yourself. Keep your tools organized, keep that magnetic tray handy, and just take it one step at a time. You don’t need a fancy certification to take control of your ride; you just need the grit to get your hands dirty.

    Frequently Asked Questions

    Can I just top off the clutch fluid and keep driving, or is that asking for trouble?

    Look, I get the temptation to just top it off and keep rolling, but honestly? You’re just putting a band-aid on a bullet wound. If your fluid level is dropping, you’ve got a leak somewhere. Topping it off might buy you a few miles, but eventually, you’ll lose pressure entirely and end up stranded mid-intersection. Don’t risk it. Find the leak, fix the seal, and save yourself the massive headache later.

    Do I really need to replace the whole master cylinder too, or can I just swap out the slave cylinder?

    Look, I get why you’re asking—you want to save the cash. If the master cylinder is still holding pressure and isn’t leaking, you can definitely just swap the slave. But honestly? If one’s gone, the other’s usually right behind it. They share the same fluid, and if your fluid’s been old and nasty, it’s probably eaten away at the seals in both. If you can afford it, do both. It saves you a second headache later.

    How much of a mess am I actually looking at when it comes to bleeding the air out of the system?

    Honestly? It’s more of a “wet” mess than a “disaster” mess. If you’re doing this right, you’ll have some brake fluid splashing around the bleeder screw and dripping down the housing. It’s thin, oily, and eats paint if you’re not careful, so grab a rag and maybe some brake cleaner to wipe things down afterward. Just don’t expect it to stay clean—it’s part of the job.

  • Checking Transmission Fluid Levels

    Checking Transmission Fluid Levels

    I remember one Saturday morning back in my dad’s garage, staring at an old sedan that was shifting so hard it felt like it was trying to kick me out of the driver’s seat. The shop owner told my dad it was a total transmission rebuild—a quote that would’ve cost more than the car was worth. But after a quick, messy transmission fluid check, we realized the fluid was just burnt to a crisp and low. It wasn’t a mechanical death sentence; it was just neglect. Most shops love to make you think your car is a ticking time bomb just so they can charge you for parts you don’t actually need.

    Look, I’m not here to give you some textbook lecture or a manual full of jargon that makes your head spin. I’m going to show you exactly how to perform a transmission fluid check using the same logic I use when I’m under a hood at the shop. I’ll cut through the nonsense and tell you what the color and smell of that fluid actually mean for your wallet. My goal is to make sure you walk away feeling completely confident enough to handle it yourself.

    Table of Contents

    Mastering the Art of Checking Transmission Dipstick Accuracy

    Mastering the Art of Checking Transmission Dipstick Accuracy

    Here’s where most people mess up: they pull the dipstick and think they’re done. If you want an actual reading, you have to account for the transmission fluid temperature impact. Most cars need to be running and at operating temperature for the fluid to expand properly. If you check it cold, you’re going to get a reading that’s way too low, which might lead you to overfill it. Once the engine is warmed up, park on a flat surface—level ground is non-negotiable—and keep the engine idling in Park.

    When you’re finally checking transmission dipstick levels, don’t just look at the line once. Pull it out, wipe it clean with a lint-free rag, reinsert it fully, and then pull it again to get the real measurement. While you’re looking at that level, take a second to actually look at the fluid itself. You’re looking for a bright, translucent red. If it looks dark or you notice a burnt smelling transmission fluid, that’s a massive red flag that your internal components are cooking themselves. Don’t ignore that smell; it’s usually the first sign of trouble.

    Why Transmission Fluid Temperature Impact Changes Everything

    Why Transmission Fluid Temperature Impact Changes Everything

    Here’s the thing most people miss: your transmission isn’t a static system. It’s a living, breathing part of your car that changes based on how hard you’ve been driving. If you try checking transmission dipstick levels while the engine is stone-cold after sitting in the driveway all night, you’re going to get a reading that’s way off. The fluid needs to be at operating temperature to expand and circulate properly, otherwise, you’ll think you’re low when you’re actually fine.

    This is where the transmission fluid temperature impact really messes with your head. If you’re checking it right after a long highway pull, the fluid is thin and hot; if you check it too early, it’s thick and settled. You want to find that sweet spot—usually after a short drive so the fluid is warm but not boiling. If you ignore this, you might start chasing ghosts, thinking you have low transmission fluid symptoms like slipping gears, when really, you just haven’t accounted for the heat. Don’t let a misunderstood reading trick you into a repair you don’t actually need.

    Pro Tips to Keep You From Guessing (And Wasting Money)

    • Keep a clean rag handy before you even touch that dipstick. If you pull it out and it’s covered in old grime or grit, you’re going to get a false reading that makes you think your fluid is low when it actually isn’t. Wipe it clean first.
    • Don’t just look at the level; look at the color and smell. If it looks like dark coffee or smells burnt, you’ve got more than just a low fluid problem on your hands—you’ve likely got internal damage. Fresh fluid should be bright and clear, not murky.
    • Always check the level on a flat surface. I’ve seen guys check their fluid while parked on a steep driveway, and they end up adding way too much fluid because the car is tilted. Find level ground or you’re just playing guessing games.
    • Watch out for “foaming.” If you pull the dipstick and the fluid looks bubbly or milky, you probably have air getting into the system or coolant leaking in. That’s a red flag that means you need to stop driving and figure out why.
    • Use the right fluid, period. If you do need to top it off, don’t just grab whatever generic bottle is on sale. Check your owner’s manual or the transmission pan for the specific spec. Using the wrong stuff is the fastest way to turn a simple check into a total transmission rebuild.

    The Bottom Line on Your Transmission Fluid

    Don’t just eyeball the dipstick while the engine is cold; you’ve got to get that fluid up to operating temperature first, or you’re basically reading a lie.

    Watch the color and smell, not just the level—if it looks like burnt coffee or smells like a bonfire, stop driving and figure out why before you fry your gears.

    Keep it simple and don’t overthink it: checking your fluid is just about being consistent so you can catch a small leak before it turns into a massive repair bill.

    ## Stop Guessing and Start Checking

    “Most shops will try to tell you that checking your transmission fluid is some high-level technical procedure, but honestly? It’s just about getting the temperature right and not being afraid to get your hands a little dirty. If you can read a dipstick, you can save yourself a thousand-dollar mistake.”

    Nikolai·Osterman

    Wrapping It All Up

    Wrapping It All Up: checking transmission fluid.

    Look, checking your transmission fluid isn’t some mystical science, but you can’t just wing it if you want accurate results. We talked about how crucial it is to get that dipstick reading right and, more importantly, why you can’t ignore the operating temperature of the fluid. If you try to check it stone-cold or after a heavy highway pull without letting it settle, you’re basically just guessing. Remember, the goal isn’t just to see if there’s liquid in there; it’s to check the color and smell to make sure your gears aren’t cooking themselves from the inside out.

    At the end of the day, I don’t want you to feel intimidated by what’s under the hood. Most shops will try to tell you that these systems are too complex for a regular person to touch, but that’s usually just a way to pad their invoice. Taking ten minutes every few months to pull that dipstick is the difference between a cheap fluid top-off and a multi-thousand dollar rebuild. Grab your gloves, keep your eyes peeled for any burnt smells, and take control of your own machine. You’ve got this, and your wallet will definitely thank you later.

    Frequently Asked Questions

    Is it a big deal if the fluid looks dark or smells burnt, or should I just keep driving?

    Look, if it’s dark or smells like burnt toast, don’t just keep driving and hope for the best. That smell is a massive red flag—it usually means your fluid has lost its ability to protect your gears from heat. If it’s pitch black and stinks, your transmission is basically cooking itself. You might get away with a fluid flush, but if it’s too far gone, you’re looking at a much bigger repair bill.

    My car doesn't have a dipstick under the hood—how am I supposed to check the level?

    Look, I get it—it’s frustrating when you pop the hood and see nothing but plastic covers. A lot of newer cars are “sealed” systems, meaning they don’t have that easy-access dipstick. Usually, you’ll have to go under the car to find a check plug on the transmission pan, or sometimes it’s hidden deep in the engine bay. If you’re not comfortable crawling underneath, this is one of those times you might actually want a pro.

    If I notice the fluid is low, can I just top it off with any generic fluid, or do I need something specific?

    Look, don’t just grab whatever’s on the bottom shelf at the auto parts store. Using the wrong fluid is a fast track to burning out your clutches and a massive repair bill. Every manufacturer has a specific spec—it might be Dexron, Mercon, or something totally proprietary. Check your owner’s manual or the dipstick itself. If you aren’t 100% sure, ask me or a pro. It’s better to spend an extra ten bucks now than a thousand later.

  • Types of Portable Jump Starters for Vehicles

    Types of Portable Jump Starters for Vehicles

    I was standing in my driveway last Tuesday, staring at my old Silvia, feeling that familiar, hollow click-click-click of a dead battery. It’s that sinking feeling in your gut when you’re already running late and you realize you’re stranded. Most people think they need to call a tow truck or wait around for some Good Samaritan to show up with heavy, old-school jumper cables, but that’s just wasting your time and money. Honestly, if you aren’t carrying a decent portable jump starter in your trunk, you’re basically just asking for a bad day.

    Look, I’m not here to sell you some overpriced gadget with a thousand useless features you’ll never touch. I’ve spent enough time under hoods to know what actually works when you’re stuck in the cold. I’m going to break down exactly what you need to look for so you can stop feeling helpless when your car refuses to turn over. No fluff, no marketing hype—just the straight truth on how to pick a tool that actually does its job so you can get back on the road without the headache.

    Table of Contents

    Understanding Capacity and Peak Current Explained Without the Fluff

    Understanding Capacity and Peak Current Explained Without the Fluff

    Look, when you’re staring at a spec sheet, the numbers can get pretty overwhelming, but you really only need to care about two things: capacity and peak current. Think of capacity like the size of your gas tank; it tells you how many times you can jump a car before the unit itself needs a recharge. If you’re looking for the best jump starter for a dead car battery that you can rely on for a whole weekend of tinkering, you want a higher mAh rating.

    Peak current, on the other hand, is the raw muscle. It’s the burst of power that actually turns the engine over. If you’ve got a massive V8 truck, a tiny unit with high capacity but low peak current is just going to sit there humming while your engine stays dead. You need that massive surge to fight through the resistance of a cold starter motor. Understanding capacity and peak current explained simply like this keeps you from buying a glorified flashlight that lacks the oomph to actually do the job when you’re stranded in a parking lot.

    The Real Lithium Ion Jump Starter Benefits You Need to Know

    The Real Lithium Ion Jump Starter Benefits You Need to Know

    Look, I’ve spent way too many nights hunched over a fender in the cold, wrestling with those old-school, heavy lead-acid packs. They’re massive, they leak, and honestly, they’re a pain to store. Switching to a lithium ion jump starter is probably the single best upgrade you can make for your emergency kit. These things are tiny—you can toss one in your glovebox or even a backpack—but they pack a serious punch. The main lithium ion jump starter benefits come down to weight and readiness; they hold their charge way longer than the old bricks, so when you actually need it, it’s actually there.

    Beyond just being lightweight, these portable units are way smarter. Most modern ones have built-in protection so you don’t accidentally fry your car’s sensitive ECU while trying to get moving. If you’re looking for the best jump starter for dead car battery situations, you want something that feels solid but doesn’t weigh twenty pounds. It’s about having a reliable emergency car battery booster that’s ready to go the second you turn the key and hear nothing but a click.

    5 Things I Wish I Knew Before My First Jump Start

    • Check your cables every few months. I’ve seen way too many people get stranded because the clamps were corroded or the wires had tiny cracks in the insulation. If they look sketchy, toss ’em.
    • Don’t just look at the price tag. Some of those cheap-ass units from random sites claim huge numbers but die the second they hit a cold engine. Buy something from a brand that actually tests their peak amps in real conditions.
    • Keep your jump starter charged, not just in your garage. If you leave it in your trunk for six months without checking it, don’t be surprised when it’s a paperweight the moment you actually need it.
    • Learn the “clamping order” before you’re panicking in a dark parking lot. Positive to positive, negative to a good metal ground on the engine block. Doing it out of order is a fast way to fry your car’s ECU, and that’s an expensive mistake.
    • Match the power to your engine size. If you’re driving a massive V8 truck, that tiny little pocket-sized power bank isn’t going to do squat. You need enough cranking amps to actually turn that heavy steel over.

    The Bottom Line: What to Look For Before You Buy

    Don’t get blinded by the marketing; focus on the peak current and mAh rating to make sure the unit actually has enough juice to turn your engine over.

    Go with lithium-ion if you can afford it—they’re way lighter to toss in your glovebox and won’t leak acid all over your gear like those old lead-acid bricks.

    Always double-check that the jump starter matches your vehicle’s needs, because a tiny unit meant for a scooter isn’t going to do squat for a heavy-duty truck.

    ## The Truth About Getting Stranded

    Look, there is nothing worse than being stuck in a dark parking lot at 11 PM because your battery decided to quit on you. Don’t rely on some stranger with jumper cables and a prayer; get a decent lithium pack in your trunk so you can fix the problem yourself and get home.

    Nikolai·Osterman

    Don't Get Caught Stranded

    Don't Get Caught Stranded without lithium jump starters.

    Look, we’ve covered a lot of ground here, but if you remember nothing else, remember this: don’t just buy the cheapest brick you see on a random website. You need to look at the peak current to ensure it can actually turn over your specific engine, and you should almost always go with lithium-ion if you want something that won’t die on you in the trunk for six months. A jump starter isn’t just another gadget; it’s your insurance policy against a bad morning. Whether you’re dealing with a cold snap or just a forgotten interior light, having the right capacity means the difference between a quick fix and a very expensive tow truck bill.

    At the end of the day, my goal isn’t to turn you into a master mechanic, but I want you to feel like you’ve got a handle on your own ride. There is a certain kind of peace of mind that comes with knowing you aren’t completely helpless when something goes wrong under the hood. Grab a decent unit, toss it in your glovebox, and get back to enjoying the drive. You don’t need a shop full of specialized equipment to stay mobile; you just need the right tool and the guts to use it. Keep your tools ready, and you’ll keep your freedom.

    Frequently Asked Questions

    Can I actually use a small lithium jump starter on a big V8 truck, or am I going to fry something?

    Look, I get why you’re worried about frying something, but you’re not going to blow up your ECU just by connecting it. The real risk isn’t electrical damage; it’s just that the little guy might tap out. If you’ve got a massive V8 with a heavy-duty starter, a tiny lithium pack might struggle to turn that engine over, or it’ll drain itself instantly. Check the peak amps first. If the pack is rated high enough, you’re good to go.

    How often do I need to charge these things so they aren't dead when I actually need them?

    Look, there’s nothing worse than grabbing your jump starter in a rainstorm only to realize it’s a paperweight. Most lithium units hold a charge pretty well, but don’t get lazy. I check mine every three months like clockwork. If you leave it in a freezing garage or a scorching trunk, it’ll drain faster. My rule of thumb? Check the indicator every season. If it’s below 80%, plug it in. Don’t wait for the emergency to find out.

    Is it safe to jump-start a car with a lithium pack if the engine is already running?

    Look, I get why you’re asking—it feels like you’re adding too much juice to the system. Honestly? Don’t do it. If the engine is already running, your alternator is already doing the heavy lifting. Connecting a lithium pack while the car’s live can cause a massive voltage spike that might fry your car’s sensitive sensors or even wreck the jump starter itself. Just wait until the engine’s off. Better safe than replacing an ECU.

  • Replacing the Alternator Belt

    Replacing the Alternator Belt

    I was elbow-deep in a greasy engine bay last Tuesday when a customer came in, looking absolutely crushed because a shop quoted him four hundred bucks just to swap a belt. I almost laughed, but I kept it professional. The truth is, most shops see a simple job and think they can charge you for the “luxury” of their expertise, but an alternator belt replacement isn’t some high-level surgical procedure. It’s just a matter of knowing which way the tensioner moves and making sure you don’t drop a bolt into the abyss of your radiator fan.

    I’m not here to give you some sanitized, textbook lecture that assumes you own a professional-grade hydraulic lift. Instead, I’m going to walk you through the real-world way to get this done using basic tools you probably already have in your trunk. I’ll show you how to spot the cracks before they snap, how to line everything up without losing your mind, and how to finish the job without getting ripped off. Let’s get your hands dirty and save your cash instead.

    Table of Contents

    Guide Overview

    Total Time: 30-60 minutes
    Estimated Cost: $20-50
    Difficulty: Beginner

    Tools & Supplies

    • Socket set and ratchet to loosen tensioner bolts
    • Long-handled wrench or breaker bar for leverage on the tensioner
    • Flashlight to inspect pulley alignment
    • New serpentine/alternator belt (1)
    • Shop rags for cleaning grease (1)

    Step-by-Step Instructions

    • 1. First things first, you gotta make sure the car isn’t going to jump up and bite you. Turn the engine off, pop the hood, and disconnect the negative battery terminal. I don’t care if you think it’s unnecessary; if your wrench slips and touches the frame while that terminal is live, you’re looking at a massive shower of sparks and a dead electrical system.
    • 2. Grab your flashlight and get a good look at the belt routing. Most cars have a little sticker under the hood showing you exactly how the belt snakes around the pulleys, but if yours is missing, take a clear photo with your phone. You’ll thank me later when you’re staring at a pile of new rubber and can’t remember if the tensioner goes clockwise or counter-clockwise.
    • 3. Now you need to find the tensioner—it’s usually a spring-loaded pulley that keeps the belt tight. Depending on your car, you’ll likely need a long-handled wrench or a breaker bar to get enough leverage. Place the tool on the tensioner bolt and slowly rotate it to compress the spring; this creates the slack you need to slip the old belt off the pulleys.
    • 4. Once the tension is released, pull the old, crusty belt off the top pulley and just slide it out of the loop. Take a second to inspect the pulleys while the belt is off. If you see any heavy buildup of grime or if a pulley feels wobbly when you nudge it, that’s a sign you might have a bigger problem than just a worn belt.
    • 5. Grab your new belt and start threading it through the pulleys, following that photo you took earlier. This is the part where most people get frustrated, so don’t rush it. Make sure the grooves of the belt are seated perfectly in the grooves of the pulleys; if it’s even slightly off-center, it’ll shred itself the second you start the engine.
    • 6. Once the belt is seated, you’ll need to release the tensioner one more time to slip the last loop over the final pulley. This is usually a bit of a tight squeeze, so use your weight to hold the tensioner back steady so the belt doesn’t pop out of place.
    • 7. Finally, reconnect your battery terminal and fire the engine up. Pop the hood and let it idle for a minute while you watch the belt work. If you see any excessive flapping or hear a high-pitched squeal, shut it down immediately—you probably didn’t seat the belt right or the tensioner isn’t doing its job.

    Spotting the Symptoms of a Worn Serpentine Belt Early

    Spotting the Symptoms of a Worn Serpentine Belt Early

    You don’t always have to wait for a loud screech to know something is wrong. Most people ignore those tiny warning signs until they’re stranded on the shoulder of a highway, but if you’re paying attention, you can catch it early. The biggest giveaway is usually a high-pitched squeal, especially when you first start the car or when you’re turning the wheel all the way to one side. If you hear that, it’s a massive red flag for symptoms of a worn serpentine belt. Another thing to watch for is any visible fraying or cracks on the underside of the belt—if it looks like an old piece of dried-out rubber, it’s already past its prime.

    I also tell my buddies to keep an eye on their electronics. If your headlights are flickering or your battery light pops up on the dash, it might not be the battery at all; it could be that the belt is slipping and not turning the alternator properly. While you’re under there, do a quick alternator pulley inspection to make sure the pulleys are spinning smooth and aren’t wobbling. It only takes a second, but it can save you a massive headache later.

    The Essential Tools Needed for Belt Replacement Today

    The Essential Tools Needed for Belt Replacement Today.

    Look, you don’t need a massive rolling tool chest to get this done, but you can’t just wing it with a pair of pliers and a prayer. Most of the time, you’re looking at a standard set of sockets and a long-handled breaker bar or a dedicated tensioner tool. If your car has an automatic tensioner, that long handle is going to be your best friend for making that automotive belt tensioner adjustment without stripping a bolt. I always keep my magnetic parts tray handy because, trust me, once those small mounting bolts start rolling around a greasy garage floor, your afternoon just got a lot longer.

    While you’ve got everything laid out, take a second to grab a flashlight. You really want to perform a quick alternator pulley inspection while the belt is off. It’s way easier to spot a wobbly pulley or a bearing that sounds like a bag of marbles when you aren’t fighting a rubber belt for access. If you find the pulley is shot, just replacing the belt is a waste of time. Get it right the first time so you aren’t crawling back under the hood next week.

    Pro Tips to Save Your Sanity (and Your Hands)

    • Take a photo of the belt routing before you even touch a wrench. Seriously. Most belts have a weird path around the pulleys, and once that thing is off, it’s easy to forget exactly how it was supposed to sit. Don’t be the guy staring at a pile of pulleys wondering where the tensioner goes.
    • Check your tensioner while you’re in there. If the belt was slipping because the tensioner is shot, putting a brand new belt on is just a waste of your money. Give it a little wiggle; if it feels loose or makes a clicking sound, swap it out now.
    • Keep your hands clear of the “pinch zones.” When you’re loosening the tensioner, it’s got a lot of stored energy. If that arm slips, it’ll snap back hard. I’ve seen enough busted knuckles to know that being too fast is the easiest way to end up in the ER.
    • Don’t go overboard with the lubricant. Some people try to use spray to help the belt slide over the pulleys, but most modern serpentine belts are designed to run dry. Too much lube can cause it to slip or degrade the rubber way faster than it should.
    • Double-check the belt’s “ribs.” When you’re installing the new one, make sure those grooves are seated perfectly in the pulley tracks. If it’s even slightly off-center, it’ll shred itself within the first ten miles, and you’ll be right back under the hood.

    The Bottom Line on Your Belt

    Don’t wait for that squeal to turn into a snap; catching a fraying belt early saves you from a roadside breakdown and a much bigger repair bill later.

    You don’t need a shop full of expensive gear to get this done, just a decent set of tools and the patience to make sure everything is seated right.

    Most shops will try to charge you an arm and a leg for something you can do in your own driveway in under an hour if you just take the time to do it yourself.

    ## Don't Wait for the Silence

    “A squealing belt is basically your car begging for help; if you ignore it until the rubber snaps and leaves you stranded on the shoulder, you’re not just paying for a new belt—you’re paying for the tow truck and the mechanic’s ’emergency’ markup too.”

    Nikolai·Osterman

    Don't Let Them Gatekeep Your Own Car

    Don't Let Them Gatekeep Your Own Car.

    Look, swapping that belt isn’t some high-level engineering feat that requires a specialized shop or a massive invoice. We’ve covered it all: from hearing that high-pitched squeal that tells you something is wrong, to grabbing your tensioner tool and getting that new belt seated perfectly in the grooves. Once you’ve checked the alignment and made sure everything is tight, you’re done. It really comes down to paying attention to the small sounds and having the right basic tools on hand before a tiny rubber part turns into a massive breakdown on the side of the highway.

    At the end of the day, I want you to realize that the gap between “I can’t do that” and “I just did that” is much smaller than the guys at the dealership want you to think. Every time you pick up a wrench and tackle a job like this yourself, you’re taking back control of your wallet and your vehicle. It might be a little messy, and you’ll probably end up with some grease under your fingernails, but that’s just part of the process. Keep your hands dirty and keep learning, because once you realize you can do this, you’ll never look at a repair shop the same way again.

    Frequently Asked Questions

    Is it okay to keep using my car if I hear a slight squealing sound, or am I asking for a breakdown?

    Look, if it’s just a slight squeal, you aren’t going to die on the side of the road immediately, but you’re playing with fire. That sound is usually the belt slipping or cracking. If that belt snaps while you’re driving, you lose your power steering and your alternator goes dead instantly. You’ll be stranded. Don’t ignore it—check the tension or look for cracks today before it turns into a much more expensive headache.

    Do I really need to buy a brand-name belt, or can I grab a cheaper one from the local parts store?

    Look, I get the temptation to save a few bucks at the local shop, but don’t cheap out here. A generic, off-brand belt is usually made of lower-grade rubber that cracks or squeals way sooner than it should. If that belt snaps while you’re driving, you’re stranded. Stick to a reputable brand like Gates or Continental. It’ll cost you an extra ten or fifteen bucks now, but it saves you a massive headache later.

    How do I know if I actually need a new belt or if it's just the tensioner acting up?

    It’s a common headache. If you hear a high-pitched squeal that goes away once the engine warms up, that’s usually a slipping belt. But if you’re hearing a rhythmic chirping or a heavy rattling—especially when the car is idling—that’s likely your tensioner bearing giving up the ghost. Check the belt for cracks first; if the rubber looks solid but the noise is constant, grab a flashlight and see if the tensioner pulley is wobbling.

  • How to Measure Tire Tread Depth

    How to Measure Tire Tread Depth

    I saw a guy at the shop last week getting quoted a ridiculous fee just for a “comprehensive tire safety inspection.” Honestly, it makes my blood boil. They try to act like tread depth measurement is some kind of high-tech science that requires a specialized computer or a certified specialist to understand. It’s not. Most of the time, you’re just paying for a guy in a clean uniform to squint at your rubber for thirty seconds and tell you what you already know. You don’t need to hand over your paycheck just to find out if your tires are actually safe for a rainy drive home.

    I’m not here to sell you on fancy gadgets or expensive shop services. My goal is to show you how to get an honest reading on your tires using stuff you probably already have in your junk drawer. I’ll walk you through the quick, dirty, and most importantly, accurate ways to check your tread so you can make your own decisions. No fluff, no jargon—just the straight truth about what’s actually happening between your car and the road.

    Table of Contents

    The Quick Penny Test for Tires You Can Do Now

    The Quick Penny Test for Tires You Can Do Now

    Look, you don’t need to go out and buy some fancy digital gauge to know if your rubber is shot. If you’re standing in your driveway and feeling a little uneasy about how your car handles in the rain, just grab a penny from your cup holder. Take that penny, flip it so Lincoln’s head is facing down, and shove it into one of the grooves in your tire.

    If you can see the top of Lincoln’s head, your tread is too shallow. That’s a massive red flag for wet traction safety because you’ve lost the ability to channel water away from the contact patch. When that tread gets too thin, you’re basically driving on slicks, which is a recipe for hydroplaning the second you hit a puddle.

    I tell my friends all the time: don’t wait for a mechanic to tell you you’re unsafe just to upsell you a full set. This little penny test for tires is the fastest way to check your status. If the coin sits deep in the groove, you’re likely fine for now, but if it’s sitting flush, it’s time to start shopping for replacements.

    Understanding Tire Tread Depth Standards Without the Fluff

    Understanding Tire Tread Depth Standards Without the Fluff

    Look, you don’t need to memorize a textbook to understand why these numbers matter. Most shops will talk to you about tire tread depth standards like they’re some kind of secret code, but it’s actually pretty straightforward. Basically, the deeper those grooves are, the better your car can pump water out from under the rubber. When that rubber gets too thin, you lose that vital contact with the road, and that’s when things get sketchy.

    If you want to be precise, most modern tires have built-in tire replacement indicators—little raised bumps sitting inside the grooves. When the tread wears down level with those bumps, you’re officially out of time. It’s not just about saving money on a new set; it’s about hydroplaning prevention. If you’re driving through a heavy downpour and your tires are bald, you aren’t driving anymore—you’re just floating. Keeping an eye on this is one of the easiest ways to keep your daily driver from turning into a literal sled on a wet highway.

    Pro Moves to Keep Your Tires from Failing You

    • Don’t just check one spot; walk around the whole tire and check the inner and outer edges, because uneven wear usually means your alignment is trashed.
    • Grab a dedicated tread depth gauge if you can swing it—it’s way more accurate than a penny and costs less than a decent lunch.
    • Keep an eye out for “wear bars” tucked into the grooves; if the tread is flush with those little bumps, stop driving and go get new rubber immediately.
    • Check your tread depth after a long drive when the tires are warm, as sometimes heat can slightly change how the rubber sits, though it’s mostly to get you in the habit of inspecting them regularly.
    • Watch for uneven patterns like cupping or scalloping while you’re measuring, because that tells you more about your suspension health than the actual depth does.

    The Bottom Line on Your Tread

    Don’t overcomplicate it—if you can see the top of Lincoln’s head in a penny, your tires are toast and you need to shop for new ones immediately.

    Keep an eye on those wear bars; if the tread is flush with those little bumps in the grooves, you’re riding on a prayer and losing grip.

    Checking your tread isn’t just about avoiding a fine; it’s about making sure you actually have enough traction to stop when things get sketchy on a wet road.

    Don't Let a Cheap Set of Tires Cost You a Total Write-off

    Most people think they’re fine until they’re hydroplaning on the highway, but checking your tread isn’t some complex diagnostic—it’s just about not being lazy with a penny so you don’t end up paying for a wreck instead of a new set of rubber.

    Nikolai·Osterman

    Don't Leave It to Chance

    Check tire tread: Don't Leave It to Chance.

    Look, at the end of the day, checking your tread isn’t some complicated diagnostic procedure that requires a high-end scanner. Whether you’re using the old-school penny trick or grabbing a dedicated depth gauge from your toolbox, the goal is the same: knowing exactly where you stand before the weather turns or the highway gets busy. You’ve learned how to spot the wear patterns, how to read the legal limits, and most importantly, how to trust your own eyes instead of just blindly trusting whatever a service advisor tells you at the counter. Keep an eye on those grooves, and don’t ignore the warning signs just because you’re in a rush.

    My dad always used to say that the best way to save money on a car is to stop treating it like a mystery box and start treating it like a machine you actually understand. You don’t need to be a master technician to take ownership of your safety, and you definitely don’t need to pay someone else to tell you your tires are fine when they clearly aren’t. Grab your tools, spend five minutes in your driveway, and take control of your ride. Once you start doing these small, basic checks yourself, you’ll realize that most of what people call “car trouble” is really just a lack of simple maintenance.

    Frequently Asked Questions

    Is it enough to just check one spot on the tire, or do I need to measure all around it?

    Look, checking just one spot is a rookie mistake. I’ve seen guys pass a tire because the center looked fine, only to have the outer edge shred a week later. Tires don’t wear evenly—you might have great tread in the middle but zero grip on the shoulders due to alignment issues. Grab your gauge and check a few spots around the circumference. If one area is bald, the whole tire is toast.

    My tires still have some tread left, but they look cracked or worn on the sides—is that still a problem?

    Yeah, that’s a massive red flag. If the sidewalls are cracking, you’re looking at dry rot. It doesn’t matter if you’ve got plenty of tread left in the middle; those cracks mean the rubber is breaking down and losing its structural integrity. A blowout on the highway is way more dangerous than a worn-out tread. Honestly, if I see sidewall cracking on a car in my bay, I’m telling the customer to swap them out immediately.

    Do I really need to buy one of those little plastic depth gauges, or is the penny trick actually reliable?

    Look, if you’re just doing a quick check in your driveway, the penny trick is totally fine. It gives you a solid “yes” or “no” on whether you’re hitting that danger zone. But if you’re serious about your build or trying to squeeze every last mile out of a set of high-performance rubber, grab a $5 plastic gauge. It’s way more precise than a coin, and honestly, it’s worth it for the peace of mind.

  • Identifying and Fixing Radiator Leaks

    Identifying and Fixing Radiator Leaks

    I remember being ten years old, kneeling on my dad’s oil-stained driveway, staring at a neon-green puddle spreading under his old sedan. The smell was unmistakable—that sickly sweet, chemical scent that hits you right in the back of your throat. My dad didn’t call a tow truck or panic; he just grabbed a flashlight and told me to watch closely. That’s when I first learned that radiator leaks aren’t some mysterious, engine-killing curse that requires a $2,000 shop bill. They’re usually just a sign that a hose is tired or a plastic tank has finally given up the ghost.

    I’m not here to give you some textbook lecture or sell you on a “professional-grade” kit you don’t need. My goal is simple: I want to show you how to spot the source, figure out if it’s a quick fix or a real problem, and get you back on the road without getting ripped off. We’re going to look at the actual hardware, the common failure points, and the no-nonsense steps to handle it yourself. You’ve got the tools; you just need the right way to use them.

    Table of Contents

    Checking for Coolant Leaks Before Your Engine Quits

    Checking for coolant leaks before your engine quits.

    You don’t always need to see a puddle on your driveway to know something is wrong. Sometimes, the signs are much more subtle, happening right while you’re driving to work. Keep a close eye on your dashboard; if you see your engine temperature gauge rising toward the red zone, that’s your car screaming for help. It’s one of the most common engine overheating symptoms I see at the shop, and by the time the steam starts pouring out from under the hood, you’ve usually waited way too long.

    Another thing to watch for is a sudden drop in your coolant level. If you notice you’re topping off your reservoir every few days, you’re dealing with some serious coolant loss causes that need immediate attention. I always tell people to do a visual inspection when the engine is completely cold. Look for crusty, white, or brightly colored residue around the hoses and connections. Even a tiny bit of dried buildup can point to a slow drip that’ll eventually turn into a massive headache.

    The Real Coolant Loss Causes They Wont Tell You

    The Real Coolant Loss Causes They Wont Tell You

    Look, most shops will immediately tell you that you need a whole new radiator, but that’s often a massive money grab. One of the most common coolant loss causes I see in the shop is actually a simple radiator cap failure. That little cap is designed to maintain specific pressure in your cooling system; if the seal goes bad or the spring gets weak, the coolant just boils off or escapes through the overflow. It’s a cheap part, but if you ignore it, you’re looking at much bigger problems down the road.

    Another thing that gets overlooked is a hairline crack in a heater hose or a failing water pump seal. These aren’t always obvious until you notice your engine temperature gauge rising while you’re sitting in traffic. Sometimes the leak only happens when the system is under full pressure, meaning you won’t see a puddle on your driveway, but your reservoir is still dropping. If you’re seeing those early engine overheating symptoms, don’t just keep topping it off with water and hope for the best—find the actual source before you warp a head gasket.

    5 Ways to Keep Your Cooling System From Trashing Your Engine

    • Don’t just eyeball the level; use a dedicated coolant tester. Sometimes the leak is so slow it’s just evaporating, and you won’t see a puddle, but your sensors will definitely tell you something is wrong when the temp starts climbing.
    • Check your hoses for “soft spots” or cracks. If a hose feels spongy or looks like it’s bulging, it’s a ticking time bomb. I’ve seen way too many people wait until the hose actually bursts on the highway to realize they needed a $20 part.
    • Keep an eye on your radiator cap. It’s a tiny part that people always overlook, but if that seal is shot, you’re going to lose pressure and coolant. It’s one of the easiest, cheapest fixes you can do in your own driveway.
    • Use a pressure tester if you can’t find the source. If you’re staring at a dry engine bay and still losing fluid, rent or buy a pressure tester. It forces the coolant out of the leak point so you aren’t just guessing where the drip is coming from.
    • Never, ever mix different types of coolant. I know it’s tempting to just grab whatever is on sale at the auto parts store, but mixing colors or chemistries can create a sludge that clogs your entire system. Stick to what your manual says.

    The Bottom Line: Don't Let a Small Leak Turn Into a Big Bill

    Keep a close eye on your temperature gauge and coolant levels; catching a leak early usually means a cheap fix instead of a blown head gasket.

    Most leaks aren’t some mysterious engine failure—they’re usually just a cracked hose, a loose clamp, or a worn-out radiator cap that you can swap out yourself.

    If you see a puddle, don’t just top off the fluid and ignore it; find the source so you aren’t constantly chasing a losing battle under your hood.

    ## The Cost of Waiting

    “Look, a small drip under your car isn’t just a mess on your driveway—it’s a ticking clock. You can either spend twenty bucks on a new hose today, or you can spend a thousand bucks on a blown head gasket next week when your engine decides it’s had enough.”

    Nikolai·Osterman

    Don't Let a Small Leak Turn Into a Big Headache

    Don't Let a Small Leak Turn Into a Big Headache

    Look, at the end of the day, fixing a radiator leak isn’t about being a master mechanic; it’s about staying ahead of the game. Whether you’re dealing with a cracked hose, a tiny pinhole in the core, or a failing water pump, the goal is the same: catch it before your temperature gauge starts climbing into the red. If you can spot those early warning signs—the sweet smell of coolant or that telltale puddle on your driveway—you’ve already won half the battle. Don’t let a minor drip turn into a blown head gasket or a completely dead engine just because you were too busy to look under the hood. Grab your tools, check your levels, and stay proactive.

    I know it can feel intimidating when you see a mess of hoses and metal, but I promise you, you’re more capable than you think. My dad always told me that most people only call a shop when things are already broken, but the real pros are the ones who understand their own machines. You don’t need a fancy certification to take care of your ride; you just need a bit of patience and the willingness to get your hands a little dirty. So, next time you see something off, don’t just ignore it and hope for the best. Take control of your car and keep it running on your own terms.

    Frequently Asked Questions

    Can I just keep topping off the coolant until I actually have time to fix the leak?

    Look, I get the temptation to just keep dumping more coolant in to avoid a shop visit, but you’re playing a dangerous game. You can do it as a temporary band-aid, sure, but keep a massive eye on your temp gauge. If that needle starts creeping up, stop immediately. If you run dry because you were too busy to fix the leak, you aren’t just looking at a new hose—you’re looking at a blown head gasket.

    How do I tell if the leak is coming from a simple hose or if the actual radiator core is shot?

    To figure this out, grab a flashlight and get low. If you see crusty, dried coolant or a wet spot right where a rubber hose meets a metal clamp, you’re probably looking at a cheap hose fix. But, if the fluid is seeping directly through the thin metal fins of the radiator itself, that core is toast. Check the seams and the tank connections; if the leak is coming from the radiator’s body, it’s time for a replacement.

    Is it worth trying to patch a small leak with a temporary sealant, or am I just asking for a bigger headache later?

    Look, I’ll be real with you: sealant is basically just a band-aid for a broken bone. If you’re stuck on the side of the road or just need to limp the car home to avoid a tow, go for it. But don’t make it a habit. Those additives can gunk up your heater core or clog your passages, turning a cheap leak into a massive repair bill. Patch it to survive, then fix it for real.

  • How to Change Differential Fluid

    How to Change Differential Fluid

    You hear that high-pitched whine coming from under your rear axle every time you hit highway speeds, and your first instinct is to check your bank account to see how much a shop is going to charge you to “diagnose” it. Most mechanics will try to tell you that a differential issue is a massive, expensive job involving gears and housing replacements, but half the time, you’re just looking at a neglected differential fluid change. I remember working on my old buddy’s S13 back in the garage; the rear end sounded like a blender full of marbles, and he was terrified it was totaled. Turns out, the fluid was so old and gritty it looked like black sludge, and a simple swap fixed the whole mess.

    I’m not here to give you some textbook lecture or sell you on fancy, overpriced additives you don’t need. I’m going to show you exactly how to tackle a differential fluid change using nothing more than a basic socket set, a pump, and a little bit of patience. We’re going to walk through the drain and fill process step-by-step so you can stop worrying about that noise and start saving your hard-earned money.

    Table of Contents

    Guide Overview

    Total Time: 1-2 hours
    Estimated Cost: $40-80
    Difficulty: Beginner

    Tools & Supplies

    • Socket set and ratchet for drain/fill plugs
    • Fluid pump or hand sprayer for filling
    • Drain pan to catch old fluid
    • Funnel to prevent spills
    • Differential gear oil (check manual for weight/spec) 1-3 quarts
    • Replacement crush washers or gaskets for plugs

    Step-by-Step Instructions

    • 1. First things first, get the car up on some sturdy jack stands. Don’t even think about working under a car held up by just a floor jack; I’ve seen too many close calls in the shop, and it’s not worth the risk. Make sure the surface is level so the fluid doesn’t all slosh to one side when you open it up.
    • 2. Locate your drain plug on the bottom of the differential housing. Grab your socket wrench and get that plug loosened, but keep a drain pan ready right underneath. This stuff is usually thick, dark, and smells like burnt metal, so try not to get it on your clothes—it’s a nightmare to wash out.
    • 3. Once the old, gritty fluid has finished dripping out, take a second to inspect the drain plug itself. Check the washer or gasket for any signs of damage; if it looks flattened or cracked, just swap it out for a new one to prevent any slow leaks later on.
    • 4. Now, find your fill plug—this is usually higher up on the housing. Before you even touch it, make sure you can actually get it loose. I always recommend loosening the fill plug first before you drain the old stuff, because if you drain the fluid and then realize your fill plug is seized tight, you’re stuck with a car that won’t move.
    • 5. Clean the area around the fill hole with some brake cleaner so you aren’t pumping dirt straight into your gears. Grab a fluid pump—you can get a cheap hand pump at any parts store—and start pumping in your fresh gear oil. Keep going until the fluid starts oozing back out of the fill hole; that’s your signal that it’s properly full.
    • 6. Wipe away the excess oil, thread your fill plug back in by hand to avoid cross-threading, and then snug it up with your wrench. Don’t go overboard with the torque, but make sure it’s tight enough to seal.
    • 7. Finally, give the area a quick once-over with a rag to make sure there are no drips, lower the car back to the ground, and take it for a short spin. Listen closely for any weird whining or grinding; if everything sounds smooth, you just saved yourself a massive shop bill.

    Spotting Changing Gear Oil Symptoms Before They Break You

    Spotting Changing Gear Oil Symptoms Before They Break You

    If you start hearing a high-pitched whine or a low growl coming from under your rear end when you’re accelerating, pay attention. That’s usually your car screaming for help. One of the most obvious changing gear oil symptoms is a sudden change in noise, especially during turns or under heavy load. If it sounds like there’s gravel spinning in a blender, your oil has likely lost its ability to lubricate those heavy gears, and you’re looking at serious metal-on-metal contact.

    You also need to keep an eye out for any weird smells or visible messes. If you catch a scent of burnt toast while driving, or if you see dark, oily spots on your driveway, you might be dealing with a differential leak repair situation sooner rather than later. Don’t just ignore a small drip; once the level drops too low, the heat buildup will shred your internals in no time. Keeping an eye on these red flags is way cheaper than replacing an entire housing.

    Getting the Right Viscosity of Gear Oil Without the Bs

    Getting the Right Viscosity of Gear Oil Without the Bs

    Look, when you walk into an auto parts store, the sheer amount of options for gear oil can feel like a total scam. You’ll see bottles ranging from 75W-90 to 80W-140, and most people just grab the cheapest one on the shelf. That’s a massive mistake. You need to check your owner’s manual or the sticker under your hood to find the exact viscosity of gear oil your manufacturer specifies. If you put oil that’s too thick in a modern diff, you’re going to deal with sluggish performance; too thin, and you aren’t getting the protection those heavy gears need.

    While you’re at it, don’t just guess how much you need to buy. Always check your differential fluid capacity before you start the job. There is nothing worse than being halfway through a service, covered in grease, only to realize you’re a quart short and have to drive back to the store. I usually grab one extra bottle just to be safe. It’s a small price to pay to ensure your automotive drivetrain maintenance is actually done right the first time.

    Pro-Tips From the Shop Floor (Things I Wish I Knew Sooner)

    • Always crack the fill plug before you touch the drain plug. Trust me on this one. If you drain all that old oil and then realize your fill plug is seized or stripped, you’re stuck with a car that can’t move. Get that fill hole open first so you know you can actually get the new stuff back in.
    • Don’t cheap out on the pump. Trying to squeeze a heavy bottle of gear oil into a tiny differential hole by hand is a nightmare that’ll end with oil all over your driveway and your clothes. Grab a cheap hand pump; it’ll save you a massive headache and a lot of cleanup.
    • Check your seals while you’re down there. Since you’re already under the car and everything is clean, take a second to look at the pinion seal and the axle seals. If you see any weeping or wetness, it’s way better to fix a leaky seal now than to deal with a dry differential later.
    • Use a magnetic drain plug if you can. Most of the time, the metal shavings you see on the old plug are just normal wear, but if you see actual chunks or “glitter” that looks like heavy metal, stop right there. That’s a sign of internal damage, and you might need more than just a fluid change.
    • Don’t overfill it. It’s tempting to keep pumping until it won’t take anymore, but you just want it to a level where it’s right at the bottom of the fill hole. Too much pressure from excess fluid can actually blow out your seals, and nobody wants to deal with that mess.

    The Bottom Line on Your Differential

    Don’t wait for a loud whine or grinding noise to act; if your gear oil looks like sludge or smells burnt, swap it out immediately to save yourself a massive repair bill.

    Stop guessing on the specs—check your owner’s manual or the differential housing itself to make sure you’re using the exact viscosity required for your gears.

    You don’t need a shop setup to do this right, just a decent pump, the right oil, and a little patience to make sure you don’t end up with a mess on your driveway.

    The Real Cost of Neglect

    “Most people wait until they hear that metal-on-metal grinding sound before they even think about their differential, but by then, you aren’t just paying for a fluid swap—you’re paying for a whole new gear set. Don’t let a ten-dollar bottle of oil turn into a thousand-dollar nightmare just because you were too busy to check it.”

    Nikolai·Osterman

    Don't Leave It to Chance

    Don't Leave It to Chance: Differential Maintenance

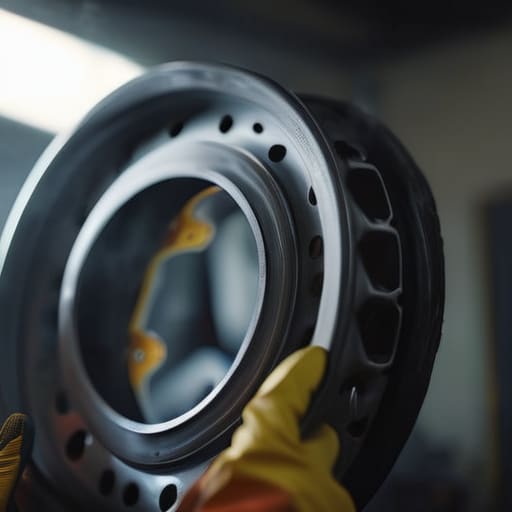
    Look, at the end of the day, changing your differential fluid isn’t some complex mystery that requires a master technician. You just need to keep an eye out for those weird whines, make sure you aren’t using the wrong viscosity, and actually get the job done before the metal starts grinding itself into dust. It’s a simple process of draining the old, gritty sludge and replacing it with fresh oil that actually does its job. If you follow the steps and keep your workspace clean, you’ve just saved yourself a massive headache and a much larger bill at the shop. Just remember to double-check your fill plug before you start driving, or you’ll be wishing you’d spent five more minutes on the job.

    I know it can feel intimidating when you’re staring down at a messy underside of a car, but that’s how everyone starts. Every pro I know—even the guys with thirty years under their belts—once had to figure out which bolt does what. Don’t let a little bit of grease or a confusing manual keep you from taking control of your own machine. Once you get this done, you’ll realize that most car maintenance is just about having the right tools and the guts to try. You’ve got this, so go out there, get your hands dirty, and keep that drivetrain running smooth.
    Frequently Asked Questions

    How do I know if I need to add a friction modifier or if just standard gear oil is fine?

    Look, if you’ve got a standard open differential, don’t overcomplicate it—just stick to the gear oil. You only need to worry about friction modifiers if you’re running a limited-slip differential (LSD). If you hear that annoying chatter or “groaning” when you’re making tight turns, that’s your signal that the LSD needs that extra additive to help the clutch packs slide smoothly. If it ain’t chirping, don’t go throwing extra stuff in there.

    Is it actually okay to just drain and fill, or do I need to do a full flush to get the old gunk out?

    Look, I get why you’re asking. It feels like you’re leaving half the dirty stuff behind. But honestly? A drain and fill is usually plenty. Most of the “gunk” is just heavy metal particles that settle at the bottom anyway. Unless you’re dealing with a massive leak or a total mechanical failure, don’t stress about a full flush. Just do a clean drain, fill it up, and change it again in a few hundred miles if you’re really worried.

    How can I tell if my differential seals are actually leaking or if it's just some surface seepage?

    Look, there’s a big difference between “sweating” and actually leaking. If you just see a thin film of grime or dust stuck to the housing, that’s usually just surface seepage—basically just oil misting out and catching dirt. But if you see actual wet droplets, or if you find fresh oil dripping onto your driveway or smelling burnt on the exhaust, that’s a real leak. Clean the area first; if it stays dry, you’re good.

  • Testing Your Car Battery With a Tester

    Testing Your Car Battery With a Tester

    I’ve lost count of how many times I’ve seen a guy standing over an open hood, staring at a dead engine like it’s some kind of unsolvable mystery. Usually, he’s about to drop a hundred bucks on a brand-new battery just because his car wouldn’t crank, even though the real issue was something else entirely. Most shops will try to sell you a whole new electrical setup, but honestly? Half the time, you just need a decent battery tester to see what’s actually happening. Stop letting people talk you into expensive replacements when a simple test could prove your current setup is actually fine.

    I’m not here to give you some textbook lecture or a list of overpriced tools you’ll never use. I’m going to show you exactly what to look for so you can stop guessing and start knowing. My goal is to break down the different types of gear out there—from the cheap handhelds to the digital ones—and tell you which ones are actually worth your money. I’ll help you find the right tool for the job so you can keep your own car running without getting ripped off.

    Table of Contents

    Mastering Digital Multimeter Battery Testing Without the Fancy Degree

    Mastering Digital Multimeter Battery Testing Without the Fancy Degree

    Look, you don’t need a specialized automotive battery load tester to get a decent reading, but you do need to know what you’re looking at. If you’ve got a basic digital multimeter lying around, you’re already halfway there. Start by setting your dial to DC voltage. Touch your red probe to the positive terminal and the black to the negative. This is the most basic way of how to check battery voltage before you even think about turning the key. If you’re seeing anything below 12.6 volts while the engine is off, your battery is likely sitting at a low state of charge and might need a long drive or a dedicated charger.

    Now, here’s the part where most people get tripped up: a static voltage reading doesn’t tell the whole story. A battery can show 12.6 volts but still fail the moment you try to start the car. To get real insight, you need to watch that number while someone else cranks the engine. If that voltage plummets below 9 or 10 volts during the crank, your battery is toast, regardless of what it showed while sitting idle. It’s not rocket science; it’s just about watching how the power holds up under pressure.

    The Truth About Cranking Amps Measurement and Real Power

    The Truth About Cranking Amps Measurement and Real Power

    Here’s the thing: seeing a healthy voltage reading on your screen doesn’t always mean your car is actually going to start on a cold morning. You can have a perfect 12.6 volts sitting there, but if that battery can’t dump enough juice the second you turn the key, you’re still stuck. That’s where cranking amps measurement comes into play. It’s the difference between a battery that looks good on paper and one that actually has the muscle to turn over a heavy engine under load.

    When I’m working on one of my vintage tuners, I don’t just trust a quick voltage check. I look for how the battery handles the sudden, massive demand of the starter motor. If you’re trying to get serious about lead acid battery diagnostics, you really need to understand that voltage is just the potential, while cranking amps are the actual work being done. If the voltage takes a massive dive the moment you crank, your battery is likely toast, regardless of what a basic meter tells you.

    5 Ways to Stop Guessing and Start Testing Like a Pro

    • Don’t trust your eyes; a battery might look brand new and have clean terminals but still be a total dud when you’re trying to turn the engine over on a cold morning.
    • Always clean your contact points before you hook up a tester, because even a thin layer of corrosion can mess with your readings and give you a false sense of security.
    • Check your battery while the car is actually sitting idle, not right after a long drive, because an alternator charging the system will throw off your baseline voltage numbers.
    • Learn the difference between a simple voltage check and a load test; knowing the voltage is fine is one thing, but knowing if it can actually handle the stress of a starter motor is what matters.
    • Get yourself a dedicated handheld tester instead of relying on a cheap multimeter for everything; it’s faster, more accurate for CCA, and way less headache when you’re under a tight hood.

    The Bottom Line: Don't Get Stuck on the Side of the Road

    Stop relying on “maybe” when it comes to your battery; a cheap tester is way more reliable than just guessing based on how slow your engine cranks.

    Understand that voltage isn’t everything—if your battery can’t hold the cranking amps needed to turn the starter, you’re still going to be stranded.

    You don’t need to be a master electrician to use these tools, just learn how to read the basic numbers so you can avoid paying a shop for a battery you might not even need to replace.

    Stop Guessing, Start Testing

    Most shops will try to sell you a brand new battery the second your car struggles to start, but don’t let them. Grab a decent tester, get the real numbers, and find out if you’re actually looking at a dead cell or just a bad connection.

    Nikolai·Osterman

    Stop Guessing and Start Testing

    Stop Guessing and Start Testing electrical systems.

    Look, at the end of the day, you’ve got two solid ways to handle this. You can play it old school with a digital multimeter to check your voltage, or you can invest in a dedicated tester to get those crucial cranking amps and load test readings. Don’t let a mechanic talk you into a full battery replacement just because your car struggled to start on a cold morning. Whether you’re checking for a parasitic draw or just verifying that your alternator is actually doing its job, the goal is the same: get the actual data so you aren’t throwing money at parts you don’t need. Stop playing the guessing game with your electrical system and start making decisions based on what the tools are actually telling you.

    I know it can feel a little intimidating when you’re staring at a mess of wires and sensors, but trust me, you’ve got this. Most people get stranded because they ignored the warning signs or didn’t have the right gear to spot a dying cell before it quit entirely. Owning a decent tester isn’t just about fixing a car; it’s about taking back control of your own ride and your wallet. Grab a tool, get a little grease on your hands, and learn the truth about what’s happening under that hood. You don’t need a fancy certification to be your own best mechanic.

    Frequently Asked Questions

    Is it worth buying a dedicated digital tester, or can I just rely on my multimeter for everything?

    Look, if you’re just checking if a battery has a charge, your multimeter is fine. But if you want the full story, get a dedicated tester. A multimeter tells you the voltage, but a digital tester tells you if the battery actually has the muscle to turn your starter. It tests internal resistance and cranking amps—stuff a multimeter just can’t see. Save the extra cash for tools you’ll actually use daily, but for battery health? The dedicated tester wins.

    How do I know if my battery is actually failing or if it's just the cold weather messing with the readings?

    Look, cold weather is a total liar. It makes your battery look weaker than it actually is because the chemical reaction slows down when it’s freezing. If you want the truth, test it when it’s warmer, or better yet, use a load tester. If the voltage drops significantly while you’re cranking in the cold, the battery’s struggling. But if it holds steady under load, it’s probably just the temperature playing tricks on you.

    Can a cheap tester from a big-box store give me accurate results, or am I just wasting my money?

    Look, I get the temptation to grab that $15 unit at the big-box store just to get the job done, but there’s a catch. For a basic “is it dead or alive” check, it’ll work fine. But if you’re trying to diagnose a parasitic draw or figure out if your alternator is actually charging properly, those cheap ones can lie to you. Don’t waste your money on junk if you actually want the truth.

  • Restoring Cloudy Headlight Lenses

    Restoring Cloudy Headlight Lenses

    I saw a guy at the shop the other day staring at his cloudy, yellowed lenses like they were some kind of unsolvable mystery, and the service advisor was already quoting him five hundred bucks for a total housing replacement. It honestly makes my blood boil. You don’t need to drop a massive chunk of your paycheck just because your plastic has oxidized from the sun; most people think they need brand-new parts, but the truth is that a solid headlight restoration is way simpler than the shops want you to believe. I spent my weekends in my dad’s garage learning that most “expensive” problems are just surface-level issues waiting for the right sandpaper and a bit of elbow grease.

    In this guide, I’m stripping away the fluff and showing you exactly how to do this right without getting ripped off. I’ll walk you through the specific supplies you actually need—and more importantly, the ones you can skip—so you can get that crystal-clear factory look back on your own time. We’re going to cover everything from the initial sanding to the final seal, ensuring your lights stay bright and don’t turn yellow again in two weeks.

    Table of Contents

    Guide Overview

    Total Time: 1-2 hours
    Estimated Cost: $20-40
    Difficulty: Beginner

    Tools & Supplies

    • Sandpaper (various grits for smoothing)
    • Microfiber cloths (for cleaning and drying)
    • Masking tape (to protect car paint)
    • Headlight restoration kit (includes compound/polish)
    • Water (for wet sanding)
    • UV sealant (to prevent future oxidation)

    Step-by-Step Instructions

    • 1. First things first, you gotta clean the surface. Grab a bucket of soapy water and some microfiber towels to get all that road grime and grit off the plastic. If you try to sand through a layer of dirt, you’re just going to scratch the lens even deeper, and that’s a headache you don’t need.
    • 2. Next, you need to mask off the area around the headlight. Use some high-quality painter’s tape to cover the surrounding paint and the chrome trim. I’ve seen too many people get sloppy and accidentally sand through their clear coat because they thought they could “wing it” without protection.
    • 3. Now it’s time for the actual sanding, and this is where you need some patience. Start with your coarsest sandpaper—usually something around 800 or 1000 grit—and work in small, overlapping strokes. You’ll see a milky, cloudy mess coming off the lens; don’t panic, that’s just the oxidized layer dying off.
    • 4. Once the heavy lifting is done, switch to a finer grit, like 1500 or 2000. You want to progressively smooth out those deep scratches from the previous step. Keep the surface wet while you work; if the sandpaper starts feeling “grabby” or dry, hit it with a little water to keep things moving smoothly.
    • 5. After you’ve worked your way up to the finest grit, give the headlights one last thorough wash to make sure every single grain of sand is gone. If you leave even one tiny piece of grit on there and move to the polishing stage, you’re basically just polishing scratches into the plastic instead of making it clear.
    • 6. Grab your polishing compound and a microfiber applicator—or an orbital sander if you want to save your arms—and start buffing. You’ll see the clarity start to return almost instantly. This is the part where you can really see the reward for your effort, as the lens transitions from cloudy to crystal clear.
    • 7. Finally, you have to seal the deal. Since you’ve just stripped away all the factory protection, the plastic is wide open to UV rays. Apply a high-quality UV sealant or a ceramic coating immediately. If you skip this step, those headlights will be back to looking like yellowed teeth in a matter of weeks.

    Sanding Headlight Lenses Without Fearing Youll Ruin Everything

    Sanding Headlight Lenses Without Fearing Youll Ruin Everything

    Look, I get it. The second you pick up that sandpaper, your brain starts screaming that you’re about to permanently wreck your car. I’ve seen plenty of guys freeze up halfway through because they’re scared of leaving scratches. Here’s the truth: the scratches you’re making are actually necessary to strip away that dead, oxidized layer. When you’re sanding headlight lenses, you aren’t trying to make them smooth yet; you’re just leveling the playing field. Start with the coarsest grit and work in straight, overlapping lines. If you go in circles, you’re just asking for trouble later.

    The real secret to restoring headlight clarity without the stress is staying wet. Keep a spray bottle handy and soak that surface constantly. If the paper starts feeling “grabby” or dry, stop and spray more. You want to see a milky, uniform slurry, not dry friction. If you keep the grit moving and the water flowing, you won’t end up with deep gouges that even a heavy compound can’t fix. Just stay steady, keep your pressure light, and don’t rush the process.

    The Secret to Long Lasting Uv Protection for Headlights

    The Secret to Long Lasting Uv Protection for Headlights.

    Look, here’s the part where most people mess up and end up back at square one. You can spend hours sanding headlight lenses until they look like glass, but if you don’t seal that surface, the sun is going to eat your hard work for breakfast. Once you’ve finished with your headlight polishing compound and the plastic is crystal clear, you’ve basically left the “skin” of the lens exposed. Without a proper barrier, those UV rays will penetrate the plastic immediately, leading right back to that nasty, cloudy mess.

    To actually make this fix stick, you need a high-quality clear headlight coating. Don’t just grab some cheap spray wax from the grocery store; you need something specifically designed for preventing headlight yellowing. I usually tell people to look for a sealant that offers professional-grade UV protection for headlights. It’s a small extra step, but it’s the difference between a fix that lasts six months and one that lasts years. Treat that final layer like it’s the most important part of the job, because it’s the only thing standing between you and a repeat trip to the shop.

    Pro Tips to Keep Your Headlights from Going Cloudy Again

    • Don’t skip the cleaning step; if there’s even a tiny bit of grit or grease left on the plastic before you start sanding, you’re basically just rubbing sandpaper into your lens and creating deep scratches you’ll never get out.
    • Always work in the shade—if you try to do this in direct sunlight, the plastic gets too hot, the water evaporates too fast while you’re sanding, and you’ll end up with a patchy, uneven mess.
    • Use plenty of water, like, way more than you think you need; keeping that sandpaper wet isn’t just about lubrication, it’s about flushing out the yellow oxidation so it doesn’t clog up your grit and ruin the finish.
    • Check your seal before you’re done; if you notice any moisture or fogging inside the actual headlight housing, you might have a cracked seal, and no amount of exterior polishing is going to fix that.
    • Be patient with the wet sanding; I see people rush through the higher grits because they’re tired, but if you don’t get those micro-scratches out during the final stages, your clear coat is going to look like crap within a month.

    The Bottom Line on Keeping Your Lights Clear

    Don’t let cloudy lenses scare you into a massive repair bill; as long as you’re patient with the sanding, you can get them looking clear again without breaking the bank.

    The real mistake most people make is skipping the UV sealant—if you don’t lock in that finish, those headlights are going to turn yellow again in a matter of weeks.

    You don’t need a professional setup to do this right, just a decent restoration kit, a little bit of elbow grease, and the confidence to actually do the work yourself.

    ## The Real Cost of Cloudy Lenses

    “A mechanic’s gonna tell you those cloudy headlights mean you need a whole new assembly, but honestly? It’s usually just a bit of oxidized plastic that needs some elbow grease and the right grit. Don’t let a hazy lens trick you into handing over a few hundred bucks when you could fix it for the price of a sandwich.”

    Nikolai·Osterman

    Look at That Clarity

    Look at That Clarity: polished lens.

    At the end of the day, clearing up those foggy lenses really comes down to three things: patience with the sanding, steady hands, and not skimping on the UV sealant. If you rushed the grit progression or tried to skip the protection step, you’d just be back where you started in a month. It’s about doing the job the right way instead of the fast way. You’ve gone through the grit, smoothed out the oxidation, and locked in that shine, which means you just saved yourself a couple hundred bucks that a shop would’ve easily charged you for the exact same result.

    Honestly, seeing the difference between a crusty, yellowed lens and a crystal-clear one is one of the most satisfying parts of working on cars. It’s not just about how the ride looks, though; it’s about knowing you actually own your vehicle instead of just paying someone else to maintain it. Don’t let a little cloudy plastic intimidate you or make you feel like you need a professional’s sign-off. Grab your supplies, get your hands a little dirty, and trust the process. You’ve got this, and your headlights—and your wallet—will definitely thank you for it.

    Frequently Asked Questions

    How do I know if my headlights are actually fixable or if the plastic is too far gone and I just need to buy new ones?

    Look, I’ve seen it all. If your lenses are just cloudy, yellowed, or feel rough like sandpaper, you’re good to go—restoration will save you a ton. But if you see deep cracks inside the plastic or if the lens feels physically pitted and “eaten away,” that’s usually internal damage or heavy UV degradation you can’t sand off. If the plastic is structurally compromised, don’t waste your time or money; just bite the bullet and buy new ones.

    Do I really need to mask off the paint around the lens, or can I just wing it without scratching my car?

    Look, you can wing it, but honestly? Don’t. I’ve seen way too many people try to save five minutes only to end up with swirl marks all over their fender because their sandpaper slipped. It’s way too easy to accidentally scuff your clear coat when you’re working with wet sandpaper. Just grab some blue painter’s tape, mask off the edges, and give yourself some peace of mind. It’s a tiny bit of extra work to prevent a huge headache.

    If I don't have a professional buffer, can I still get decent results using just hand sanding and some basic supplies?

    Look, you definitely don’t need a high-end buffer to get the job done. I’ve seen plenty of guys get great results just by putting in the elbow grease. The trick is to be patient with the hand sanding—don’t rush it. If you go through your grits properly and really even out those scratches, you’ll be fine. It just takes a bit more time and a steady hand, but it works.