Blog

  • Selecting a Versatile Pliers Set

    Selecting a Versatile Pliers Set

    I still remember being ten years old, stuck under my dad’s old sedan, trying to grab a dropped clip with a pair of rusty kitchen tongs because we didn’t have the right gear. I spent twenty minutes cursing and sweating, only to realize that the “professional” tool kit my dad had bought was just a glorified box of junk that didn’t actually fit the tight spaces in a modern engine bay. It’s frustrating how most big-box stores try to sell you some massive, overpriced pliers set that’s filled with twenty different tools you’ll never touch, while leaving you without the one specific pair you actually need when a sensor wire is digging into your knuckle.

    Look, I’m not here to sell you on some shiny, gold-plated tool collection that looks good on a pegboard but fails when things get greasy. I’ve spent enough hours in the shop to know exactly which grips hold, which handles won’t slip, and which ones are just a waste of your hard-earned cash. I’m going to break down the only tools you actually need to stop fighting your car and start actually fixing it. No hype, no filler—just the straight truth on building a kit that works.

    Table of Contents

    Combination Pliers vs Needle Nose Choosing Your Real Workhorses
    Combination Pliers vs Needle Nose Choosing Your Real Workhorses

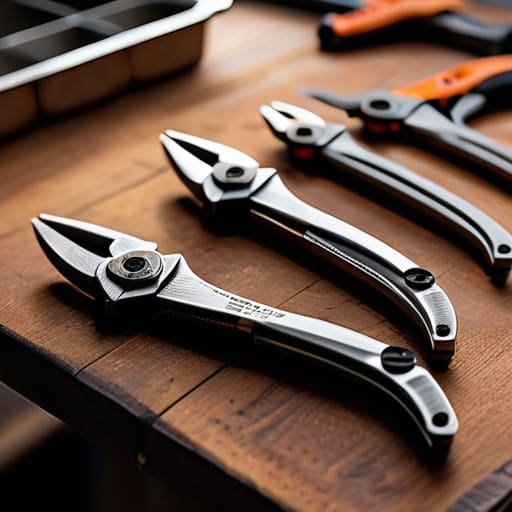
    Look, if you’re staring at a toolbox and wondering where to start, you’ll usually find two main players fighting for space: combination pliers vs needle nose. I see guys try to use needle nose for everything, and they end up snapping the tips or just getting frustrated. Combination pliers are your real workhorses for the heavy lifting. They’ve got that serrated grip that lets you grab onto a stubborn bolt or a thick wire without it slipping. If you’re dealing with something that requires heavy duty gripping tools, the combo is always going to be your first choice.

    On the flip side, needle nose pliers are all about access. I can’t tell you how many times I’ve been elbow-deep in a sensor harness or trying to fish a fallen clip out of a tight corner behind the dashboard where my hands barely fit. That’s where those slim, tapered jaws save your life. They aren’t for brute force, but they are the best pliers for electrical work when you need to bend a small gauge wire or reach into a cramped fuse box. You need both if you actually want to get anything done.

    Adjustable Pliers for Mechanics the Secret to Saving Time
    Adjustable Pliers for Mechanics the Secret to Saving Time

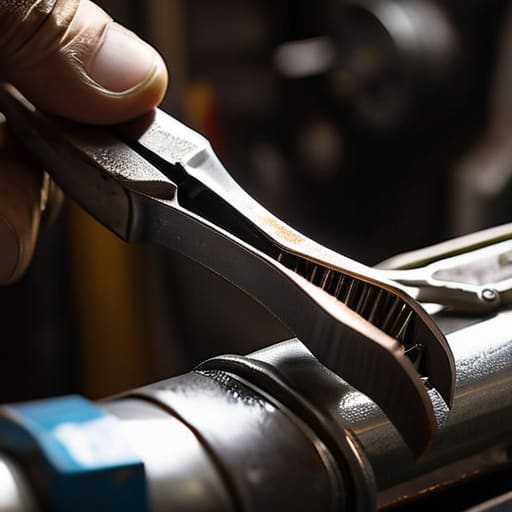
    If you’re anything like me, you’ve probably spent ten minutes digging through a messy toolbox just to find the one specific wrench that fits a stubborn nut, only to realize you should’ve just used a pair of adjustable pliers. I call these my “problem solvers.” When you’re working on an older tuner or a modern engine with tight clearances, you don’t always have the luxury of a full socket set laid out perfectly. Having a solid pair of adjustable pliers for mechanics in your hand means you can adapt to whatever weirdly sized bolt or pipe is throwing you a fit.

    The real magic happens when you stop treating them like a backup and start treating them as heavy duty gripping tools. Whether you’re trying to hold a stripped bolt steady or repositioning a cooling hose clamp, these things save you from that frustrating “trial and error” loop. While you definitely need to know the difference between combination pliers vs needle nose for the delicate stuff, the adjustable ones are what keep you from getting stuck halfway through a job. They aren’t about being fancy; they’re about being efficient so you can actually get the car back on the road.

    Pro Tips: Don't Let Your Tools Let You Down

    • Stop buying those cheap, generic sets from the big-box hardware stores. They look fine on the shelf, but the moment you try to grab a stubborn, rusted bolt, the teeth will slip and you’ll end up stripping the head. Spend a little extra on a brand with decent grip.
    • Always keep a pair of diagonal cutters—what some people call side cutters—separate from your main set. You’ll constantly need them for snipping zip ties or trimming wires, and you don’t want to be using your heavy-duty pliers for something that requires a clean cut.
    • Check the pivot point on your pliers before you start a job. If they feel gritty or stiff, they’re going to fight you every time you squeeze. A little bit of light machine oil goes a long way in making sure they actually work with you instead of against you.
    • Size matters more than you think. Don’t try to force a tiny pair of needle-nose pliers to do the work of a standard combination plier just because you’re too lazy to grab the right one. You’ll either snap the tool or bend the pliers’ handles.
    • Get used to the feeling of the grip. If you’re working on a long job, those plastic handles can start to dig into your palms. I always check to see if the insulation is thick enough to handle a bit of pressure so I’m not nursing sore hands for the rest of the shift.

    The Bottom Line: Don't Overcomplicate Your Toolbox

    You don’t need a massive, expensive kit to start; just grab a solid pair of combination pliers for the heavy lifting and some needle nose for the tight spots where everything else fails.

    Prioritize adjustable pliers if you want to save money, as they act like a Swiss Army knife for those weirdly sized bolts and nuts that don’t fit a standard wrench.

    Stop buying the cheap, flimsy stuff from the big-box hardware stores—investing a little more in tools with a decent grip and solid steel will save you from the headache of stripped parts and broken pliers halfway through a job.

    The Truth About Your Toolbox

    Look, you can spend a fortune on some fancy, 50-piece kit that comes in a plastic case, or you can just grab a few solid pairs of pliers that actually grip. At the end of the day, a tool isn’t about how many pieces are in the set; it’s about whether it’s in your hand when you’re halfway under a chassis and a bolt just won’t budge.

    Nikolai·Osterman

    Don't Let the Wrong Tools Slow You Down
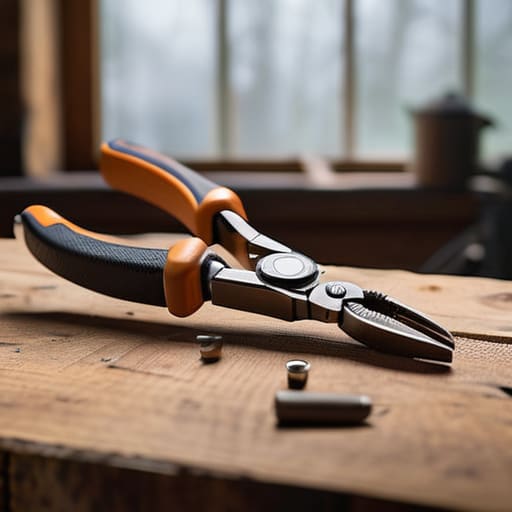
    Don't Let the Wrong Tools Slow You Down.

    Look, at the end of the day, you don’t need a massive, expensive chest full of every tool ever invented to get through a weekend project. If you’ve got a reliable pair of combination pliers for the heavy lifting, some needle nose for those annoying, tight spots, and a solid set of adjustable pliers to handle the oddball sizes, you’re already ahead of most people. It’s about having the right tool for the specific job instead of trying to force a tool that doesn’t fit and ending up stripping a bolt or snapping a clip. Invest in quality over quantity; it’s better to have three pairs of pliers that actually grip than twenty pairs that slip the second things get greasy.

    I know it can feel a bit intimidating when you first pop the hood and realize how much stuff is crammed in there, but don’t let that stop you. Every pro I know started out exactly where you are—probably frustrated and covered in more oil than they intended to be. Just take it one step at a time, keep your parts organized in a tray, and remember that most repairs are just about patience and the right gear. You’ve got this. Once you finish that first fix yourself, you’ll never look at a mechanic’s quote the same way again.

    Frequently Asked Questions

    Is it actually worth buying a massive 50-piece set, or am I just paying for a bunch of cheap junk I'll never use?

    Look, I’ll give it to you straight: don’t fall for those massive 50-piece kits. Most of that is just cheap, filler junk that’ll snap the first time you try to turn a stubborn bolt. You’re basically paying for a box full of plastic handles and useless sizes. Save your money. Buy three or four high-quality, solid pairs of pliers that actually fit your hand. I’d rather have one good pair of pliers than fifty that break mid-job.

    How do I know if I need professional-grade pliers or if the basic ones from a big-box hardware store will hold up?

    Look, if you’re just clipping a loose wire or tightening a nut once a year, the cheap stuff from the big-box store is fine. But if you’re spending your weekends under a chassis, get the professional grade. Cheap pliers have soft metal that teeth will round off or handles that’ll slip when things get greasy. For real repairs, you want tools that won’t fail you halfway through a job when you’re stuck in a tight spot.

    What kind of pliers should I keep in my glovebox for those quick roadside emergencies?

    Look, don’t waste space in your glovebox with a massive tool kit. If you’re stuck on the shoulder, you really only need two things: a decent pair of needle-nose pliers and some multi-purpose linesman pliers. The needle-nose are lifesavers for grabbing dropped clips or reaching into tight spots, while the linesman pliers can handle tougher stuff like stubborn wires or small bolts. Keep ’em small, keep ’em reliable, and you’ll be fine.
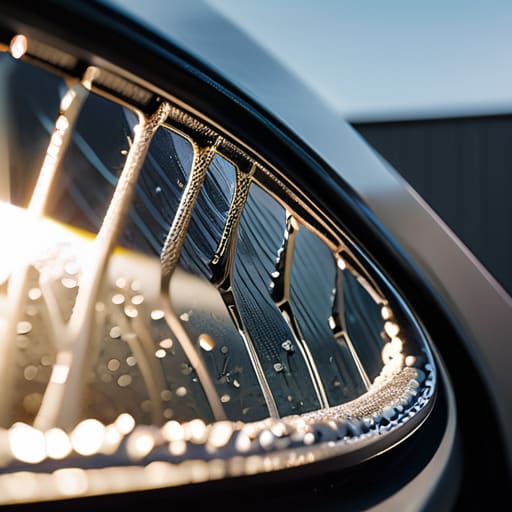

  • How to Check Windshield Seals for Leaks

    How to Check Windshield Seals for Leaks

    I remember pulling a beat-up old hatchback into my bay last week, and the customer was dead serious about paying a shop three hundred bucks just to “verify the structural integrity” of his glass. It’s honestly ridiculous how some places try to turn a simple windshield seal inspection into some high-tech, expensive mystery just to pad their invoices. I’ve spent enough weekends in my dad’s garage to know that most of the time, you don’t need a specialized diagnostic computer or a massive bill to figure out if your seal is shot; you just need to know what to look for with your own eyes.

    I’m not here to give you some textbook lecture or hide behind fancy terminology. My goal is to show you how to perform a proper windshield seal inspection using nothing more than a flashlight and a bit of common sense. I’ll walk you through the exact signs of failure I look for when I’m working on a car, so you can catch a leak before it turns into a moldy, ruined interior. Let’s get into it and make sure you aren’t paying for problems that you could have spotted yourself.

    Table of Contents

    Spotting the Real Signs of Windshield Seal Failure

    Spotting the Real Signs of Windshield Seal Failure.

    Most people don’t notice a bad seal until they’re staring at a puddle on their floor mats, but you shouldn’t wait that long. The first thing I always tell people is to keep an eye out for that telltale musty smell inside the cabin. If your car smells like a damp basement even after you’ve cleaned it, you’ve likely got moisture trapped somewhere it shouldn’t be. Another dead giveaway is seeing fog or condensation building up on the inside of the glass, especially in the corners. That’s a major red flag for signs of windshield seal failure because it means air and moisture are finding a way past the barrier.

    You also want to do a quick visual sweep of the perimeter. Grab a flashlight and look for any gaps, cracks, or areas where the rubber looks brittle or pulled away from the frame. If you see any bubbling in the paint near the edges, that’s a sign that water is actually getting under the surface. Catching these small issues early is the best way to handle preventing water intrusion in car windshields before you end up with expensive electrical gremlins or mold issues.

    Mastering Automotive Glass Leak Detection Yourself

    Mastering Automotive Glass Leak Detection Yourself.

    To really get good at automotive glass leak detection, you can’t just rely on your eyes; you’ve got to use a little bit of logic. One of the easiest ways I do this in the shop is the “hose test.” On a dry day, have a buddy run a garden hose around the edges of the glass while you sit inside with a flashlight. If you see even a tiny bead of water creeping in, you’ve found your culprit. It’s way better to catch that now than to find out later that your electronics are fried from moisture.

    You should also pay close attention to any weird smells or dampness in the footwells. If your carpets feel heavy or smell a bit musty, it’s a huge red flag for preventing water intrusion in car windshield areas. I always tell people to check the corners of the glass where the seal meets the frame. If the rubber looks cracked or feels brittle, that’s one of those clear windshield rubber seal replacement signs you shouldn’t ignore. Grab a flashlight, get low, and actually look at the edges.

    5 Pro Tips for Catching Leaks Before They Get Ugly

    • Grab a high-lumen flashlight and run it along the edges of the glass on a dark night; if you see any light peeking through the rubber, your seal is shot.
    • Keep an eye on your windows when it rains—if you see fogging or moisture building up specifically in the corners of the glass, that’s a dead giveaway for a failing seal.
    • Don’t ignore that weird whistling sound when you’re hitting highway speeds; usually, that’s just air finding its way through a gap in the weatherstripping.
    • Check your floor mats for dampness after a heavy storm, because water that leaks through the windshield often hides in the carpet before you even notice it’s there.
    • Give the rubber trim a quick feel with your fingers to see if it’s getting brittle or cracking; if it feels hard instead of flexible, it’s not doing its job anymore.

    The Bottom Line on Your Windshield

    Don’t ignore the small stuff; if you smell dampness or see fogging in the corners of your glass, that seal is already failing you.

    You don’t need a shop’s diagnostic computer to find a leak—a simple flashlight test and a quick look at the rubber trim will tell you everything you need to know.

    Catching a bad seal early saves you from a massive headache, like moldy upholstery or a windshield that pops loose while you’re driving.

    ## The Cost of Ignoring the Small Stuff

    “A bad seal might just be a little dampness today, but if you ignore it, you’re looking at mold in your upholstery and a whole lot of wasted money. Don’t let a tiny gap turn into a massive headache just because you were too busy to grab a flashlight.”

    Nikolai·Osterman

    Don't Leave It to Chance

    Don't Leave It to Chance: Check seals.

    Look, at the end of the day, keeping your windshield seal in check isn’t some high-level engineering feat. Whether you’re looking for those telltale moisture spots on your floor mats, listening for that annoying wind whistle on the highway, or doing a quick visual sweep of the rubber, you’re already ahead of most drivers. You don’t need to wait for a massive leak to turn your car into a swamp or, worse, compromise the structural integrity of your glass. Just keep a sharp eye on the edges and don’t ignore those small warning signs. Catching a bad seal early is the difference between a quick, cheap fix and a total headache that costs you a fortune at the shop.

    I know it can feel intimidating when you first start poking around under the hood or checking the seals, but honestly, you’ve got this. Every time you take a few minutes to inspect your own ride, you’re taking the power back from the shops that want to charge you for things you could’ve spotted yourself. It’s about building confidence and actually understanding the machine you drive every single day. So, grab your flashlight, get a little grease on your hands if you have to, and take control of your maintenance. Your car—and your wallet—will definitely thank you for it.

    Frequently Asked Questions

    If I find a small crack in the seal, can I just use some silicone sealant to patch it myself, or is that a waste of time?

    Honestly? It’s mostly a waste of time. I’ve seen guys try to glob silicone on a crack thinking they saved a buck, but it never actually holds. Windshields deal with massive temperature swings and constant vibration; that DIY patch is gonna peel off or leak within a week. If the seal is actually compromised, you’re looking at a real repair or a replacement. Don’t waste your money on sealant; save it for the actual fix.

    How often should I actually be checking these seals, especially if I live somewhere with crazy temperature swings?

    If you’re dealing with massive temperature swings, you can’t just set it and forget it. I’d say give it a solid look every couple of months, or at least whenever the seasons flip. Extreme heat makes the rubber brittle, and sudden cold makes everything contract. If you notice your defroster acting weird or a weird musty smell in the cabin, don’t wait for the next scheduled check—go look at those seals immediately.

    Is there a way to tell if the leak is coming from the windshield seal specifically or if it's actually coming from the roof gutter or door frame?

    That’s a fair question, and honestly, it’s where most people get stuck. Here’s how I do it: grab a garden sprayer or a hose and have someone spray one specific area at a time while you sit inside. If you spray just the windshield and the water hits your face, you’ve found your culprit. If you hit the roof gutters or door frames and it stays dry, you know the seal is actually fine.

  • Replacing Spark Plug Wires

    Replacing Spark Plug Wires

    I was working on a beat-up Silvia last weekend when the engine started stumbling like it was possessed, throwing a misfire code that had the owner convinced they needed a whole new ignition system. Most shops would see that and immediately start quoting you a bill for sensors and coils that you probably don’t even need. But honestly? Half the time, it’s just a matter of a cracked housing or a wire that’s seen too many winters. A proper spark plug wire replacement isn’t some high-tech mystery that requires a specialized diagnostic computer; it’s usually just a sign that your rubber has gotten old and crusty.

    I’m not here to sell you on some fancy, overpriced kit or tell you that you need a master’s degree to get the job done. I’m going to walk you through exactly how to spot the bad ones, how to keep from losing your mind when you can’t remember which wire goes where, and how to swap them out without breaking a sweat. You’re going to get the real, grease-under-the-fingernails truth so you can stop overpaying mechanics for something you can do in your own driveway with a basic socket set and a little bit of patience.

    Table of Contents

    Guide Overview

    Total Time: 1-2 hours
    Estimated Cost: $30-80
    Difficulty: Beginner

    Tools & Supplies

    • Socket wrench set for loosening clamps or components
    • Dielectric grease for sealing connections
    • Flashlight for visibility in engine bay
    • Replacement spark plug wire set (full set for engine type)
    • Shop rags for cleaning debris

    Step-by-Step Instructions

    • 1. First things first, grab your magnetic parts tray and clear a spot on your workbench. You’re going to want to pull these wires one by one, not all at once, because if you mix up which wire goes to which cylinder, you’re going to have a very bad time when you try to start the engine.
    • 2. Pop the hood and locate your spark plug wires. Before you even touch a tool, take a quick photo of the whole setup with your phone. It might look simple now, but once you start pulling things around, you’ll definitely want a visual reference to make sure everything goes back exactly where it belongs.
    • 3. Grab your pliers—ideally a pair of needle-nose ones—and gently pull on the boot of the wire. You want to grip the rubber part, not the actual wire itself, or you might tear the insulation. Give it a firm, steady tug until it pops off the spark plug, and then do the same at the distributor or ignition coil end.
    • 4. Once you’ve got the old, crusty wire out, take a second to look down into the spark plug well. If you see any dirt, oil, or debris sitting down there, use a bit of compressed air or a clean rag to wipe it out. You don’t want that junk falling into your engine once you seat the new wire.
    • 5. Take your new wire and match it up to the old one to make sure the length is right. Slide the boot onto the spark plug first, making sure it’s seated firmly all the way down. Then, connect the other end to the coil or distributor. You should feel or hear a slight click when it’s locked in place.
    • 6. Repeat this process for the rest of the wires, working through them one at a time. I know it’s tempting to just rip them all out to save time, but patience is key here. If you go one by one, you won’t have to deal with the headache of a misfire later.
    • 7. Once you’ve finished the last one, double-check that every single boot is pushed on tight and that no wires are resting against hot engine parts like the exhaust manifold. Give the wires a quick wiggle to ensure they’re secure, and you’re officially ready to fire it up.

    Spotting Electrical Resistance in Wires Before They Fail

    Spotting Electrical Resistance in Wires Before They Fail

    You don’t always have to wait for the car to start acting up to know something is wrong. If you’re paying attention, you can catch issues before they leave you stranded. One of the easiest things to do during a routine spark plug boot inspection is to look for physical signs of heat damage or cracks in the rubber. If the insulation looks brittle or has those weird white, chalky marks on it, that’s a huge red flag. It usually means the electricity is leaking out where it shouldn’t, which is a fast track to some nasty engine misfire symptoms when you’re trying to merge onto the highway.

    Another pro tip is to check for “carbon tracking.” If you see tiny black lines running down the side of the wire, that’s literally a path where the spark is jumping through the insulation instead of going to the plug. If you want to be really thorough, you can use a multimeter to check for excessive electrical resistance in wires. If the reading is way higher than what the service manual says, those wires are toast. Don’t wait for a total breakdown; catching it early saves you a lot of headache.

    Mastering Spark Plug Boot Inspection and Dielectric Grease Application

    Mastering Spark Plug Boot Inspection and Dielectric Grease Application

    While you’re swapping out those wires, don’t just yank them off and call it a day. You really need to perform a proper spark plug boot inspection while you’ve got the engine open. Grab the rubber ends and give them a quick look for any cracks, dry rot, or white powdery residue inside. If the rubber feels brittle or looks like it’s about to crumble in your hands, that’s a massive red flag. Ignoring a bad boot is a quick way to end up with frustrating engine misfire symptoms even after you’ve put in the work to install brand-new wires.

    Once you’ve confirmed the boots are actually decent, don’t skip the dielectric grease. This isn’t just some extra fluff; a little bit of dielectric grease application on the inside of the boot creates a moisture barrier and prevents the rubber from sticking to the ceramic of the plug. It makes your next tune-up way easier because you won’t be fighting a seized boot next time. Just a small dab is all you need—don’t go overboard and turn it into a greasy mess, or you’ll just be cleaning up more than you fixed.

    Pro Tips to Keep You From Making a Mess of It

    • Label everything before you pull a single wire. I know it sounds obvious, but once those old wires are off, they all look the same, and nothing kills a weekend faster than trying to guess which coil goes to which cylinder. Use some masking tape or even just a sharpie on a piece of paper to map it out.
    • Don’t go pulling on the actual wire. This is a big one. If you grab the wire and yank it to get it off the boot, you’re eventually going to tear the internal core or pull the wire right out of the end. Always grab the boot itself—the rubber part—and pull firmly.
    • Keep your workspace clean, especially around the spark plug holes. If you’ve got a bunch of grit or dirt sitting in those wells, it’s going to fall straight down into the combustion chamber the second you pull the old wires out. Use some compressed air to blow the junk out first.
    • Check your connections for a “click.” When you’re snapping those new wires back on, you should feel and hear a solid seat. If it feels mushy or loose, it’s not making a good connection, and you’re just asking for a misfire down the road.
    • Don’t cheap out on the wires. I see guys buy the absolute cheapest set they can find online just to save ten bucks, but those cheap cores can’t handle the heat or the electrical load. Stick to a decent brand; it’s way better than having to do this entire job over again in three months.

    The Bottom Line on Your Ignition System

    Don’t wait for a dead-on-the-highway misfire to act; if your wires look crusty or your engine feels sluggish, swap them out before they leave you stranded.

    A little bit of dielectric grease goes a long way in preventing that annoying boot-sticking issue, so don’t skip it just to save two minutes.

    You don’t need a shop’s diagnostic computer to do this right—just grab your basic socket set, stay organized with your parts tray, and take your time.

    ## The Truth About the Small Stuff

    “Mechanics love to charge you a premium for ‘electrical diagnostics,’ but honestly? Most of the time, you’re just looking at a cracked boot or a wire that’s seen too many winters. Don’t let a twenty-dollar part turn into a three-hundred-dollar shop bill just because you didn’t want to get your hands dirty.”

    Nikolai·Osterman

    Getting Back on the Road

    Getting Back on the Road with wires.

    Look, replacing these wires isn’t some high-level engineering feat; it’s just about being methodical. We covered how to spot those crusty, high-resistance wires before they leave you stranded, how to properly inspect your boots, and why that little bit of dielectric grease makes a massive difference in preventing future headaches. If you took the time to double-check your connections and ensured every boot was seated tight, you’ve already done more for your engine than most people ever bother to do. Just remember: don’t rush the seating process. If those wires aren’t snapped on firm, you’re just asking for a misfire down the road.

    At the end of the day, the goal isn’t just to fix a car; it’s to take the power back from the shops that try to overcharge you for five minutes of labor. Every time you get your hands dirty and successfully swap out a part, you’re proving that you don’t need a specialized degree to maintain your own ride. It might be intimidating the first time you pull those old wires off, but once you realize it’s just a matter of having the right tool and a bit of patience, you’ll start looking at every other repair with a lot more confidence. Keep that magnetic tray handy and keep turning wrenches.

    Frequently Asked Questions

    Do I really need to replace the whole set at once, or can I just swap out the one wire that looks fried?

    Look, you can just swap the one fried wire, but it’s usually a bad move. If one wire has gone to hell, the others aren’t far behind—they’ve all been through the same heat cycles and miles. Replacing just one is like patching a single hole in a worn-out tire; you’re just inviting another breakdown next week. Grab the whole set. It saves you from tearing the engine apart twice.

    I noticed some white crusty stuff inside my boots—is that normal or am I looking at a bigger electrical issue?

    That white, crusty stuff is actually pretty common, but it’s definitely a sign you shouldn’t ignore. It’s usually oxidation or corrosion building up where the terminal meets the spark plug. It creates resistance, which messes with your spark and can lead to misfires. Since you’ve already got the boots off, clean that connection well and make sure you’re using plenty of dielectric grease next time. It acts as a barrier to keep that gunk from coming back.

    How do I make sure I don't mix up the firing order and end up with a car that won't even start?

    Look, nothing kills your vibe faster than finishing a job only to have the engine cough and die because you swapped two wires. Before you pull anything off, grab your phone and snap a few clear photos of exactly how the wires are routed. If you’re still unsure, check your owner’s manual or look for the firing order printed right on the distributor cap. Don’t guess—just verify before you plug them back in.

  • Essential Tools for Car Diagnostics

    Essential Tools for Car Diagnostics

    I remember sitting on a cold concrete floor in my dad’s garage when I was twelve, staring at a dashboard full of warning lights that looked like a damn Christmas tree. My old man just sighed, wiped his hands on a greasy rag, and told me that most shops would charge you three hundred bucks just to tell you what a twenty-dollar plug could find. That’s the real scam: people think you need a degree and a factory-level computer to understand what your engine is trying to say. You don’t. Most of the time, you just need the right car diagnostic tools to stop the guessing game and actually see the data for yourself.

    I’m not here to sell you on some flashy, overpriced scanner that promises to fix your car with one button. I’ve spent enough time under hoods to know that real knowledge comes from understanding what those codes actually mean. In this guide, I’m going to break down the gear that actually matters for a DIYer, separating the useful tech from the total junk. I’ll show you exactly what I use in my own kit so you can stop getting ripped off and start taking control of your own repairs.

    Table of Contents

    Unmasking the Truth With Engine Fault Code Readers

    Unmasking the Truth With Engine Fault Code Readers

    Look, when that Check Engine light pops up on your dash, your first instinct might be to panic or immediately book a service appointment. Don’t. Most of the time, your car is just trying to tell you something specific, and you don’t need a shop’s expensive computer to listen. Using basic engine fault code readers is the fastest way to stop the guesswork. These little devices plug right into your OBD-II port and spit out a code that tells you exactly which sensor is acting up or which circuit is failing. It takes the mystery out of the situation so you aren’t just throwing parts at a problem hoping something sticks.

    I’ve seen so many people get overcharged for simple fixes because they didn’t realize a single faulty oxygen sensor was the culprit. While a high-end on-board diagnostics scanner might be overkill for a weekend warrior, even a budget-friendly handheld unit is a massive step up from total ignorance. It’s about taking control of the narrative before you step foot into a repair shop. Once you have that code, you can look up the fix yourself, grab the right wrench, and get back on the road without getting ripped off.

    The on Board Diagnostics Scanner Your New Best Friend Under the Hood

    The On Board Diagnostics Scanner Your New Best Friend Under the Hood

    If the basic code readers we just talked about are like reading a summary of a book, then an on-board diagnostics scanner is like having the full manuscript in your hands. I remember when I first started at the shop, I thought these things were just for the guys in the fancy jumpsuits. I was wrong. These scanners don’t just tell you that a sensor is acting up; they let you dive into the live data stream to see exactly how your car is breathing in real-time.

    When you’re dealing with something tricky like a stuttering idle or a weird hesitation under load, you can’t just rely on a static code. You need to see what the fuel trims and oxygen sensors are doing while the engine is actually running. Using these kinds of vehicle troubleshooting devices takes the guesswork out of the equation. It’s the difference between staring at a “Check Engine” light and actually understanding the conversation happening between your car’s computer and its components. It might feel intimidating at first, but once you see the data, you’ll realize you’ve got more control than you thought.

    Don't Get Burned: 5 Rules for Using Your Gear Like a Pro

    • Don’t just clear the codes and call it a day. If that Check Engine Light pops back on five minutes later, you didn’t fix the problem; you just hid the symptom. Use the tool to find the root cause, not to reset the dashboard.
    • Invest in a tool that actually talks to you. There’s no point in buying a cheap reader if it only spits out generic codes that tell you nothing. You want something that can access specific modules so you aren’t just guessing in the dark.
    • Keep your connections clean. I’ve seen guys get frustrated with a scanner thinking the sensor is dead, when really, it was just a dirty OBD-II port or a loose pin. A little contact cleaner goes a long way.
    • Learn to read the “Live Data,” not just the error codes. The code tells you what failed, but the live data tells you how it’s behaving. Watching your fuel trims or oxygen sensor voltages in real-time is how you catch a dying part before it actually breaks.
    • Match the tool to the job. You don’t need a $2,000 professional-grade tablet to change a spark plug or check a battery, but you also shouldn’t try to reprogram a modern ECU with a ten-dollar handheld from a gas station. Know your limits before you plug in.

    The Bottom Line: Don't Let the Dashboard Scare You

    You don’t need a $5,000 professional rig to stop getting ripped off; a decent mid-range scanner will get you through 90% of the common issues you’ll face at home.

    A fault code is just a starting point, not a final verdict—always use the code to guide your inspection rather than blindly swapping parts.

    Investing in your own tools is basically paying yourself back; the money you save by diagnosing a sensor yourself pays for the tool in a single afternoon.

    Stop Paying for Guesswork

    Most shops will charge you an hour of labor just to tell you what a twenty-dollar scanner could’ve told you in ten seconds. Don’t let them charge you for the privilege of knowing what’s actually wrong with your car.

    Nikolai·Osterman

    Cutting Through the Noise

    Cutting Through the Noise with diagnostic tools.

    Look, we’ve covered a lot of ground, from the basic code readers that tell you why your check engine light is acting up, to the more serious OBD-II scanners that actually give you the full picture. At the end of the day, these tools aren’t just gadgets; they are your eyes and ears when you’re staring at a dashboard full of warning lights. You don’t need to drop thousands on professional-grade shop equipment just to get started. Whether you’re just trying to figure out if it’s a loose gas cap or a dying oxygen sensor, having the right diagnostic tool in your hand means you’re no longer flying blind when you pop the hood.

    I know it can feel intimidating when you first see those error codes scrolling across a screen, but don’t let that stop you. Every time you use one of these tools, you’re taking a step toward understanding your machine instead of just being a passenger in it. My dad always told me that the car isn’t trying to hide anything from you; it’s actually trying to tell you exactly what it needs. So, grab a scanner, grab a bit of patience, and start digging. Once you realize that most of these “scary” issues are just simple fixes waiting to happen, you’ll realize that you’ve got this.

    Frequently Asked Questions

    Do I really need to drop hundreds on a professional-grade scanner, or can I get away with a cheap one from the auto parts store?

    Look, I get the temptation to grab the cheap one at the parts store, but don’t waste your money if you’re serious about DIY. Those basic readers are fine for telling you “your engine is acting up,” but they won’t give you the deep data you actually need to fix it. If you’re just chasing a Check Engine light, go cheap. But if you want to actually diagnose a sensor issue without getting ripped off? Invest in something mid-range.

    Once the tool gives me a code like P0300, how do I actually know what part needs replacing instead of just guessing?

    Look, a code like P0300 just tells you there’s a random misfire; it doesn’t point a finger at a specific part. If you just swap parts blindly, you’re basically throwing money into the oil pan. You’ve gotta play detective. Use that code to narrow it down to the ignition system or fuel delivery, then start testing components—like checking your spark plugs or looking for vacuum leaks—before you ever buy a new part.

    Can these tools tell me if my car is about to break down, or are they only useful once something's already gone wrong?

    Look, if you’re waiting for a light to pop up on the dash, you’re already playing catch-up. These tools are great for diagnosing a dead engine, but they’re even better for preventative maintenance. If you run a scan and see “pending codes” or weird sensor data that hasn’t triggered a light yet, that’s your car whispering that something is about to go sideways. Catch it early, and you’re buying a sensor; wait too long, and you’re buying a whole new engine.

  • How to Adjust Your Parking Brake

    How to Adjust Your Parking Brake

    You ever pull your handbrake and feel like you’re about to hit the ceiling just to keep the car from rolling? It’s a total joke. Most shops will try to tell you that your whole cable assembly is shot or that you need a whole new caliper setup, but honestly, nine times out of ten, it’s just a simple parking brake adjustment that’s been neglected. I remember working on my dad’s old sedan back in the garage, feeling that same frustration when the lever felt loose and useless. It wasn’t a massive mechanical failure; it was just a bit of slack that needed a steady hand and the right wrench to tighten up.

    I’m not here to give you some textbook lecture or sell you expensive parts you don’t need. I’m going to show you exactly how to grab your tools and get that tension back to where it belongs. We’re going to walk through the process step-by-step so you can stop guessing and start feeling confident every time you park on a hill. No fluff, no mechanic-speak—just the straight truth on how to get the job done right.

    Table of Contents

    Guide Overview

    Total Time: 30-60 minutes
    Estimated Cost: $0-20
    Difficulty: Beginner

    Tools & Supplies

    • Socket set and ratchet to access adjustment mechanisms
    • Screwdriver to remove interior trim or access points
    • Pliers or wrench for cable tensioning
    • Brake cleaner spray (1 can) to clean debris
    • Penetrating oil (1 small can) for seized cables

    Step-by-Step Instructions

    • 1. First things first, you need to get the car safe and stable. Park on a flat surface, engage the emergency brake (even if it’s loose), and chock your front wheels with some heavy blocks so the car doesn’t roll an inch while you’re working. Once you’re sure it’s solid, crawl underneath or grab your jack to get some clearance.
    • 2. You’re looking for the parking brake cables, which usually run from your handbrake lever down toward the rear wheels. Follow those lines until you find the adjustment nut where the cables meet. It’s usually tucked away in a spot that’s a total pain to reach, so don’t be surprised if you have to use a flashlight or even a small mirror to see what you’re doing.
    • 3. If your car uses a cable-style setup, grab a pair of pliers or a small wrench and start loosening that adjustment nut. You want to gradually tighten the tension by turning the nut so the cables pull the mechanism closer together. Just don’t go overboard right away; if you crank it too tight, you’ll end up with brakes that drag and overheat your rotors.
    • 4. If you’re working on a drum brake setup (common on older cars or rear drums), you’ll need to access the star wheel adjuster. You’ll likely have to pop the brake drum off first—just give it a good tap with a rubber mallet if it’s being stubborn. Once you see that star wheel, use a screwdriver to slowly rotate it until the brake shoes are snug against the drum.
    • 5. Now comes the part where most people mess up: the testing phase. Head back into the driver’s seat and pull the lever up. It shouldn’t feel like you’re pulling a lever through a mile of slack; you want to feel firm resistance after only a few clicks. If it still feels way too loose, go back under and give that adjustment nut another turn.
    • 6. Finally, do a quick test drive in a controlled area, like an empty parking lot. Make sure the brake isn’t dragging or squealing while you’re driving around, which would mean you over-tightened it. If the car rolls freely but the brake holds firm when you pull it, you’ve officially saved yourself a trip to the shop.

    Identifying the Culprit Checking Emergency Brake Lever Tension

    Identifying the Culprit Checking Emergency Brake Lever Tension

    Before you start cranking on bolts, you need to figure out if you’re actually dealing with a mechanical failure or just some stretched-out hardware. The easiest way to start is by checking your emergency brake lever tension. Sit in the driver’s seat and pull the lever up. If it feels way too loose—like you’re pulling it halfway to the ceiling before you even feel any resistance—you’ve likely got too much parking brake cable slack. It’s a common issue where the cable just stretches over time, making the whole system feel mushy and unreliable.

    If the lever feels tight but the car still rolls, the problem might not be the handle itself, but rather the brake shoe adjustment at the wheels. I’ve seen plenty of guys spend an hour messing with the lever only to realize the shoes inside the drums are just worn down or haven’t been set properly. A quick parking brake inspection involves checking if the lever height feels consistent. If the lever moves a lot but the car doesn’t stay put, you’re looking at a deeper issue than just a simple tune-up.

    Eliminating Parking Brake Cable Slack for Total Control

    Eliminating Parking Brake Cable Slack for Total Control

    If you’ve already checked the lever and it still feels like you’re pulling through mush, you’re likely dealing with parking brake cable slack. This usually happens because the steel cables have stretched over time or the adjustment nut underneath the chassis has backed off. I’ve seen plenty of guys try to fix this by just cranking the lever harder, but that’s a losing battle. You need to get under the car—watch your head—and locate the adjustment mechanism where the cables meet. It’s usually a simple threaded rod with a locknut.

    Before you start cranking that nut, make sure you aren’t overcompensating. If you tighten it too much, you’ll end up with draggy brakes that stay partially engaged even when you’re driving, which will cook your pads and ruin your fuel economy. I always recommend a quick parking brake inspection steps routine: tighten the nut a few turns, test the lever feel, and repeat. You want that sweet spot where the lever feels firm and holds the car on a steep incline without feeling like you’re fighting a losing war against the mechanism.

    Pro Tips to Keep That Brake From Giving You Grief

    • Don’t go overboard on the tension; if you have to pull the lever halfway up just to get it to bite, you’ve probably over-tightened it and you’re going to end up dragging your brake pads while you drive.
    • Grab some brake cleaner and hit those cables down by the wheels; half the time, it’s not a broken part, it’s just a mountain of road salt and grime making everything stick.
    • Always check both sides equally—if one side is grabbing way harder than the other, your car is going to pull to the side when you’re parked on a hill, and that’s a recipe for a bad time.
    • Keep a can of penetrating oil handy before you even touch a bolt; those underside components live in the worst conditions and if you try to force a seized adjuster, you’re just going to snap it.
    • Test it on a flat surface before you trust it on a steep driveway; I’ve seen too many people think they fixed it, only to realize the brake only holds when the ground is level.

    The Bottom Line on Your Parking Brake

    Don’t panic if your lever feels loose; most of the time it’s just a simple matter of tightening the cable slack rather than needing an expensive shop visit.

    Always double-check your tension after making an adjustment to make sure you haven’t gone too far and locked your wheels up.

    Keeping your cables clean and free of gunk is the easiest way to prevent them from seizing up and making this whole job a headache later on.

    ## Don't Trust the Lever Alone

    “A loose parking brake isn’t just a nuisance; it’s a sign that something’s disconnected or stretched out. Don’t just pull the lever harder and hope for the best—actually get under there, find the slack, and tighten it up so you can actually trust your car when it’s parked on a hill.”

    Nikolai·Osterman

    Don't Leave It to Chance

    Don't Leave It to Chance: Parking brake.

    At the end of the day, fixing your parking brake isn’t some complex mystery; it’s just about checking that lever tension and making sure you’ve eliminated the slack in those cables. If you followed these steps, you’ve already done more than most drivers ever bother to do. You’ve moved past just noticing a symptom and actually addressed the mechanical cause of the problem. Just make sure you give everything a final test in a safe, flat area before you head back out on the road. You want to be 100% sure that when you pull that lever, the car actually stays put.

    I know it can feel intimidating when you’re staring down at a chassis or a tight underside, but honestly, that’s how you learn. Every time you get your hands a little greasy to solve a problem, you’re taking power back from the shops that want to charge you hundreds for a twenty-minute job. Don’t let a loose brake or a weird feeling in the pedal make you feel like you’re not capable. Grab your tools, stay patient, and trust your hands. Once you realize you can handle the small stuff, you’ll realize there’s nothing under the hood that can truly stop you.

    Frequently Asked Questions

    How do I know if my brake pads are too worn down to even bother adjusting the cable?

    Look, don’t waste your time messing with the cable if your pads are shot. If you hear a constant grinding metal-on-metal sound or if your brake pedal feels spongy and goes way too deep before grabbing, your pads are likely toast. Check the thickness—if there’s less than 3mm of material left, stop right there. Adjusting the cable won’t fix thin pads; you just need new ones before you ruin your rotors.

    Is it normal to hear a clicking or grinding sound right after I finish tightening everything up?

    Honestly? No, that’s not normal. If you’re hearing clicking or grinding, something’s not sitting right. You might have over-torqued a bolt, or worse, a piece of grit or a metal shaving got caught in the mechanism while you were working. Stop right there and don’t drive it. Back off the tension a bit and double-check that the brake shoes or pads are actually seated properly. Better to spend ten minutes re-checking than to fry your rotors.

    If I adjust the lever but the car still rolls, does that mean my rear calipers are shot?

    Not necessarily. If you’ve tightened the cable and the lever feels firm but the car still rolls, it’s a massive red flag. It could be shot calipers, sure, but don’t jump to the most expensive fix yet. Check your rear brake pads first—if they’re worn down to the metal, they won’t grab anything. It could also be a seized caliper piston or even just a mechanical failure in the parking brake lever itself.

  • Cleaning an Engine Air Intake

    Cleaning an Engine Air Intake

    I remember sitting in my dad’s garage when I was ten, watching him stare at a clogged engine air intake like it was some kind of unsolvable mystery. A shop owner down the street had tried to tell him he needed a whole new manifold assembly, charging enough to make my dad’s eyes water. It was total garbage. The truth is, most people treat their intake systems like some high-tech black box that only a specialist can touch, but that’s just a way to drain your wallet. I’ve seen way too many guys get sold “performance upgrades” that do nothing but make noise, when all they actually needed was a clean path for their engine to breathe.

    I’m not here to sell you some overpriced carbon fiber tube or a fancy marketing gimmick. My goal is to give you the straight talk on how your engine air intake actually works and how you can maintain it without getting ripped off. I’ll show you exactly what to look for, what parts actually matter, and how a little bit of patience can save you hundreds of dollars in unnecessary repairs. Let’s get into it.

    Table of Contents

    Signs of a Clogged Air Filter You Cant Ignore

    Signs of a Clogged Air Filter You Cant Ignore

    Signs of a Clogged Air Filter You Can’t Ignore

    If you’ve noticed your car feels like it’s dragging its feet every time you hit the gas, don’t just assume it’s “getting old.” One of the most obvious signs of a clogged air filter is a sudden, massive drop in throttle response. It’s like trying to run a marathon while breathing through a straw; your engine is working twice as hard just to get the oxygen it needs. You might also see your fuel economy tanking. When the airflow is restricted, the computer tries to compensate by dumping more fuel into the mix, which absolutely kills your engine combustion efficiency.

    Another red flag is that annoying hesitation or stumbling when you’re pulling away from a stoplight. If the engine is gasping for air, the combustion cycle gets messy, leading to rough idling or even a weird, sputtering sound. I’ve seen plenty of guys ignore this until they end up with a much bigger repair bill. Keeping up with basic air intake system maintenance is way cheaper than replacing a sensor that’s been fried by a dirty environment. Just check the filter—if it looks like a piece of charcoal, swap it out.

    Improving Airflow to Engine for Real Results

    Improving Airflow to Engine for Real Results

    Once you’ve cleared out the gunk, the next step is actually making sure your setup is working for you, not against you. If you’re looking at improving airflow to engine components, you’ll eventually run into the whole debate of cold air intake vs warm air intake. Here’s the deal from someone who’s spent way too many late nights under a hood: a cold air intake pulls in denser, cooler air from outside the engine bay, which is great for power. A warm air intake is easier to install but pulls in that heated air from under your hood, which can actually hurt your engine combustion efficiency.

    If you aren’t ready to swap out the whole assembly, just stick to solid air intake system maintenance. Keep your hoses checked for cracks and make sure your intake manifold function isn’t being compromised by any vacuum leaks. It’s not about spending a fortune on fancy carbon fiber kits; it’s about ensuring the path from the filter to the cylinders is as clean and unobstructed as possible. That’s how you get real results without getting ripped off.

    Pro Tips to Keep Your Intake Breathing Easy

    • Stop waiting for the check engine light to pop up; just pull your air filter out once a season and give it a quick look. If it looks like a dusty old sponge, it’s time to swap it.
    • When you’re swapping filters, make sure the housing is actually clean. I’ve seen guys put a brand new filter into a box full of dead leaves and sand, which basically defeats the whole purpose.
    • If you’re messing with aftermarket cold air intakes, double-check your seals. If you’ve got a tiny gap in your intake piping, you’re just sucking in hot engine bay air, and that’s going to kill your performance.
    • Don’t go overboard with those “performance” oil-based filters unless you know what you’re doing. If you over-oil them, that gunk can coat your Mass Air Flow (MAF) sensor and cause your car to run like garbage.
    • Keep an eye on your intake hoses for cracks or dry rot. A tiny split in a vacuum line or an intake boot can cause a massive air leak that’ll make your idle feel super shaky and inconsistent.

    The Bottom Line on Your Air Intake

    Don’t wait for a dashboard light to tell you something’s wrong; if your car feels sluggish or sounds like it’s gasping, your air filter is probably toast.

    You don’t need a fancy performance kit to see a difference—just keeping your intake clean and your filter fresh is the easiest way to save gas and keep your engine breathing easy.

    Stop overcomplicating it. Most intake issues are just basic maintenance tasks that take ten minutes and a few bucks, so don’t let a shop talk you into a massive bill for something you can do yourself.

    ## The Truth About Breathing

    Think of your air intake like your own lungs; if you’re trying to run a marathon while breathing through a straw, you’re going to fail. Don’t let a cheap, dirty filter choke the life out of your engine just to save a few bucks at the shop.

    Nikolai·Osterman

    Don't Leave It to Chance

    Don't Leave It to Chance: Clean Intake.

    At the end of the day, keeping your air intake clean isn’t some high-level engineering mystery; it’s just basic upkeep. We’ve talked about spotting those warning signs like sluggish acceleration and checking your filter for dirt, plus how much of a difference a clean airflow path makes for your fuel economy. If you’re ignoring the intake, you’re essentially asking your engine to run a marathon while breathing through a straw. It’s an easy fix that saves you from much more expensive headaches down the road, like sensor failures or even internal engine damage. Just stay on top of the basics and your car will thank you with smoother pulls and better mileage.

    I know looking under the hood can feel intimidating if you didn’t grow up with grease under your fingernails, but trust me, you’ve got this. You don’t need a fancy diagnostic computer to know when your engine is struggling for breath. Most of the time, it’s just a matter of grabbing your tools, popping the housing, and taking control of your own maintenance. Don’t let some shop talk you into a massive bill for something you can do in your own driveway. Keep tinkering, keep learning, and stop letting your car’s performance slip away just because of a little bit of dust.

    Frequently Asked Questions

    Is it actually worth spending the extra cash on a high-flow aftermarket intake, or am I just wasting money for a tiny bit of sound?

    Look, I’ll give it to you straight: if you’re expecting a massive horsepower jump just by swapping the intake, you’re gonna be disappointed. Most of those high-flow kits are mostly for the sound—that deep induction growl that feels great when you’re driving. But, if you’ve got a tuned car or you’re tired of breathing through a straw, it can help smooth out the airflow. For a daily driver? Save your cash.

    Can I just clean my old paper filter with some compressed air, or is that going to mess up the engine?

    Look, I get the temptation to save a few bucks, but don’t do it. Blowing compressed air through a paper filter is a quick way to ruin it. You’re basically blasting tiny paper fibers straight into your intake and, eventually, your cylinders. It’s not worth the risk of choking your engine just to save twenty bucks. If it’s dirty, just swap it for a fresh one. It’s a five-minute job and way safer.

    How often should I actually be checking my intake if I don't live in a dusty area?

    Look, if you aren’t driving through construction zones or desert trails, you don’t need to be obsessive. Honestly, just check it every time you do an oil change—so maybe every 5,000 to 7,500 miles. It takes two minutes to pop the clips and peek inside. If it looks clean, leave it alone. But don’t get lazy; even in a clean suburb, seasonal debris can sneak in. Just keep an eye on it.

  • Choosing the Right Socket Set

    Choosing the Right Socket Set

    I remember being ten years old, hunched over my dad’s old sedan in the driveway, staring at a bolt that looked like it had been welded in place. I had a cheap, flimsy kit I’d bought at a big-box store, and the moment I put any real pressure on it, the socket stripped the head clean off. It’s a rite of passage, but honestly, it’s a total waste of money. Most of the stuff you see online claiming to be the ultimate socket set guide is just marketing fluff designed to make you drop five hundred bucks on a massive, heavy case full of tools you’ll never actually use.

    Look, I’m not here to sell you a lifestyle or a professional-grade tool chest that’ll break your back. I’m here to tell you what actually works when you’re stuck under a chassis with grease up to your elbows. I’m going to break down exactly what you need to buy so you can stop getting ripped off by the hardware store and start actually fixing your own ride. This is a real-world socket set guide built on what I’ve learned in the shop, not what’s trending on an ad.

    Table of Contents

    Metric vs Imperial Socket Sets Choosing Your Weapon

    Metric vs Imperial Socket Sets Choosing Your Weapon

    This is where most people trip up before they even crack a bolt. If you’re working on anything modern—especially the Japanese tuners I spend my weekends messing with—you’re going to be living in a metric world. Most of what I see at the shop every day is measured in millimeters. But, if you’re digging into an older American muscle car or some vintage domestic truck, you’re going to run into SAE (Imperial) measurements. Trying to force a 13mm socket onto a 1/2-inch bolt is the fastest way to strip a head bolt, and trust me, that’s a headache nobody wants.

    My advice? Don’t try to buy one massive kit that claims to do everything. You’ll end up with a bunch of useless sizes taking up space in your toolbox. Instead, focus on the automotive tool kit essentials that actually fit what you drive. I usually keep a dedicated metric set for my daily drivers and a smaller imperial set tucked away for the old-school projects. Once you know which “weapon” you’re grabbing, you won’t waste half your afternoon hunting for the right fit.

    Socket Drive Sizes Explained for Real World Repairs

    Socket Drive Sizes Explained for Real World Repairs

    Once you’ve decided between metric and imperial, you have to deal with the actual drive size—the square nub on your ratchet that actually powers the socket. Most of the stuff I work on in the shop uses a 3/8-inch drive. It’s the sweet spot for most automotive tool kit essentials because it’s small enough to fit in tight engine bays but beefy enough to handle decent torque. If you’re doing heavy-duty work, like pulling lug nuts or working on suspension components, you’ll want a 1/2-inch drive. It’s much harder to snap a 1/2-inch tool when you’re really leaning into it.

    For the tiny, delicate stuff—like interior trim or small sensors—a 1/4-inch drive is your best friend. Just don’t try to crank on a 1/4-inch ratchet with too much force, or you’ll end up with a broken tool and a very bad day. When it comes to socket drive sizes explained, it’s all about matching the scale of the job to the tool. If you try to use a massive 1/2-inch drive on a tiny bolt, you’re going to lose all your finesse and probably strip something.

    Don't Get Stuck: 5 Pro Tips for Picking Your Next Set

    • Don’t buy the massive, cheap 200-piece kits you see in those late-night infomercials. Most of those extra pieces are junk you’ll never touch, and the actual sockets are usually made of soft metal that’ll round off your bolts the second you apply real pressure.
    • Grab a decent set of impact sockets if you’re even thinking about using a cordless impact wrench. Using standard chrome sockets on an impact gun is a fast way to shatter a socket and potentially send a piece of metal flying into your face.
    • Always check if the set includes extensions. There is nothing more frustrating than finding the perfect socket only to realize you’re two inches short of actually reaching the bolt hiding behind a bracket.
    • Look for deep sockets. I learned this the hard way on an old tuner—if you’re working on a long threaded stud or a bolt with a thick washer, a shallow socket won’t even catch the nut, and you’ll just end up stripping it.
    • Prioritize a ratcheting handle that feels solid in your hand. You’re going to be using it for hours; if the mechanism feels loose or “mushy” right out of the box, it’s going to fail you when you’re mid-repair in a tight engine bay.

    The Bottom Line on Picking Your Set

    Don’t go overboard buying a massive, cheap kit that’ll strip your bolts; focus on getting high-quality metric and SAE pieces in the drive sizes you actually use most.

    Always check the drive size of your ratchet before you buy sockets, because nothing kills a Saturday faster than realizing your new tools don’t actually fit your wrench.

    Prioritize quality over quantity—one good, heavy-duty socket is worth way more than a dozen flimsy ones that’ll round off a lug nut the second things get tight.

    ## Don't Get Blinded by the Shiny Tools

    “A fancy, $500 tool kit won’t fix a stripped bolt any faster than a cheap one, but a socket that actually fits the nut will save you from a three-hour headache and a trip to the scrap yard.”

    Nikolai·Osterman

    Stop Overthinking It and Start Turning Wrenches

    Stop Overthinking It and Start Turning Wrenches.

    Look, at the end of the day, you don’t need to own every single socket ever manufactured to get through a weekend project. Just remember the basics we talked about: figure out if you’re working on a domestic or import so you don’t end up with rounded-off bolts, and make sure you’ve got a drive size that actually fits the job without stripping the hardware. Whether you’re grabbing a standard 1/4-inch set for those tiny sensor bolts or a heavy-duty 1/2-inch set for suspension work, the goal is to have the right tool for the specific task at hand. Don’t let the sheer amount of options paralyze you; just build your kit piece by piece as you realize what’s missing from your tray.

    I know it can feel intimidating when you’re staring down a greasy engine bay for the first time, but I promise you, it gets easier. Every time you successfully crack a stubborn nut or swap out a part yourself, you’re taking a little bit of power back from the shops that try to overcharge you for simple fixes. My advice? Grab a decent set, keep your parts organized in a tray, and don’t be afraid to get a little grease under your fingernails. You’ve got this, and honestly, there’s no better feeling than knowing you fixed it yourself.

    Frequently Asked Questions

    Do I really need to buy a massive 200-piece set, or can I just start with a small kit?

    Look, don’t fall for those massive 200-piece kits you see in those flashy commercials. Half of those sets are just filler—tiny, useless bits you’ll lose in your floor mats within a week. Start with a decent, mid-sized kit that has the basics: a good range of sockets, a couple of extensions, and a solid ratchet. You can always add specialized tools as you actually need them. Don’t waste your money on clutter.

    Is there a difference between cheap hardware store sets and the professional-grade stuff?

    Look, I’ve seen it happen a dozen times: someone buys a $20 set from a big-box store, tries to crack a stubborn lug nut, and the socket literally shatters or rounds off the bolt head. Now they’re stuck with a stripped bolt and a much bigger headache. Cheap sets use softer metals that deform under pressure. If you’re just changing a lightbulb, fine. But if you’re actually working on an engine, buy the professional-grade stuff. It’s an investment in not ruining your car.

    How do I know if I'm looking at a 1/4-inch or a 1/2-inch drive if the box doesn't say?

    Look, if the label’s gone or the box is a mystery, just look at the square nub on the ratchet. That’s your drive size. A 1/4-inch drive is tiny—about the width of a pencil—and it’s meant for small, delicate stuff like interior trim or sensor bolts. A 1/2-inch drive is beefy, roughly the size of your thumb, and built for the heavy lifting like lug nuts. If it looks massive, it’s a 1/2.

  • When to Service Your Differential

    When to Service Your Differential

    I was under a beat-up Silvía last summer, the smell of old grease and summer heat heavy in the garage, when I heard it—that unmistakable, high-pitched whine coming from the rear end. It’s a sound that makes your stomach drop because you know exactly what it means: someone ignored their differential service for way too long. I watched a guy at the shop last week get quoted nearly a grand just to swap out some gear oil and a gasket, and honestly, it pisses me off. Most shops treat this like some high-level mystery that requires a master technician, but they’re really just banking on you being too intimidated to look under your own car.

    Look, I’m not here to give you a lecture or sell you on some overpriced synthetic brand that promises magic. I’m just going to show you the straight truth about how to get in there, drain the old junk, and get fresh fluid into your gears without breaking the bank. I’ll walk you through the tools you actually need and the common mistakes that turn a simple job into a nightmare. My goal is to make sure you keep your money in your pocket and your car running smooth.

    Table of Contents

    Decoding Signs of Differential Failure Before Its Too Late

    Decoding Signs of Differential Failure Before Its Too Late

    If you start hearing a low-pitched whine or a rhythmic growl coming from under your seat, don’t just turn up the radio and hope it goes away. That’s usually the first real red flag in rear axle noise troubleshooting. Most of the time, that sound is metal-on-metal screaming for help because your lubrication has turned into sludge or leaked out entirely. If it feels like you’re driving over small pebbles or you notice a shudder when you’re accelerating, your gears are likely struggling against friction they weren’t designed for.

    You really need to keep a mental differential inspection checklist running every time you’re under the car. Look for any signs of weeping oil around the seals; even a small drip can lead to a massive drop in pressure over time. If you catch these signs of differential failure early, you’re looking at a simple fluid swap. If you ignore them, you’re looking at a catastrophic gear failure that’ll cost you a grand or more to fix. Listen to what the car is telling you before it starts telling you how much money you’re about to lose.

    The Truth About Differential Fluid Replacement Intervals

    The Truth About Differential Fluid Replacement Intervals

    Look, if you check your owner’s manual, it’ll probably give you some vague number like “every 30,000 miles” or “inspect every year.” Honestly? That’s just a baseline. The truth about differential fluid replacement intervals depends way more on how you actually drive than what a piece of paper says. If you’re just cruising to work on flat highways, you might get away with more mileage. But if you’re towing a trailer, hitting trails, or living somewhere with brutal winters where salt eats everything, you need to be way more proactive.

    I’ve seen guys ignore their gear oil for way too long, thinking as long as it isn’t leaking, they’re fine. That’s a massive mistake. You have to account for gear oil viscosity importance; as that fluid breaks down and gets filled with microscopic metal shavings, it loses its ability to protect those heavy-duty gears. If you want to avoid a massive repair bill, don’t just wait for a scheduled interval. Instead, make a quick visual check part of your regular differential inspection checklist every time you’re under the car for an oil change.
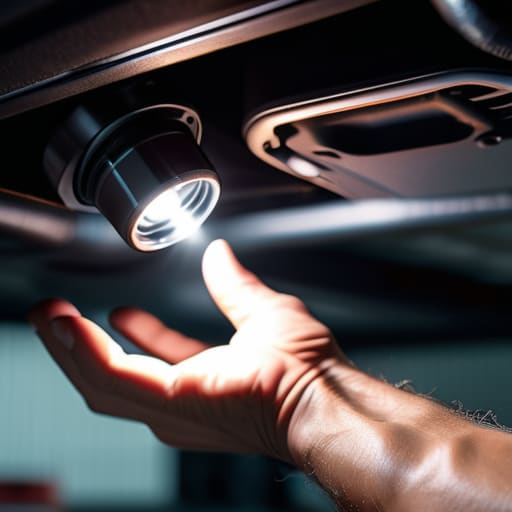
    Pro Tips from the Shop Floor: How to Not Screw Up Your Differential Service

    • Don’t skimp on the gear oil; I’ve seen guys try to save a few bucks with generic fluids, but if you aren’t using the specific viscosity your manual calls for, you’re basically asking for heat buildup and premature wear.
    • Get yourself a decent fluid pump; trying to pour thick gear oil directly into a fill hole on the side of the axle is a nightmare, and you’ll end up with a greasy mess all over your driveway and your clothes.
    • Always, and I mean always, make sure you can loosen your fill plug before you even touch the drain plug; there is nothing worse than draining all your old, nasty oil only to realize you’re stuck with a dry differential because the fill bolt is seized.
    • Inspect the old fluid like it’s a crime scene; if you see tiny metal flakes or it looks like a milky milkshake, that’s not just “old oil”—that’s a sign that your seals are shot or your bearings are starting to disintegrate.
    • Keep your workspace clean when swapping parts; a single grain of sand or a tiny piece of grit getting into the gear housing during a fluid change can act like sandpaper on your ring and pinion gears.

    The Bottom Line on Differential Care

    Listen to your car; if you’re hearing whining or grinding while turning, that’s your differential begging for fresh fluid before it turns into a massive repair bill.

    Stop following the “lifetime fluid” lie—most factory manuals are being overly optimistic, so swap that gear oil out every 30k to 60k miles depending on how hard you drive.

    You don’t need a lift to do this, just get a decent drain pan, the right gear oil, and a magnetic tray so you don’t lose your bolts in the driveway.

    The Cost of Ignoring the Gears

    Most shops will try to tell you it’s just ‘routine maintenance’ to pad their invoice, but here’s the reality: if you’re hearing that low whine while you’re cruising, you’re already playing a high-stakes game with your bank account. Changing your differential fluid is cheap; replacing a blown-out gear set is a nightmare you don’t want.

    Nikolai·Osterman

    Don't Leave It to Chance

    Don't Leave It to Chance: Differential Maintenance

    Look, at the end of the day, servicing your differential isn’t some complex engineering feat; it’s just about being proactive. We’ve covered how to listen for those death rattles in your drivetrain, why you can’t just follow a generic manual blindly, and how a simple fluid swap can save you thousands in replacement parts. If you’ve been hearing a whine or noticed your oil looks more like metallic sludge than actual lubricant, stop putting it off. Getting ahead of the wear and tear now means you won’t be stuck on the side of the road later with a blown gear set that costs more than your first car.

    I know it can feel intimidating when you’re staring at a pile of tools and a car that’s lifted up on stands, but that’s exactly where the real learning happens. Don’t let the fear of making a mess keep you from taking control of your own machine. Every time you get under there and successfully swap out that old, gritty oil for something fresh, you’re proving that you don’t need to be a master mechanic to take care of your own stuff. Grab your magnetic tray, get your hands a little dirty, and just start doing the work. Your car—and your wallet—will thank you for it.
    Frequently Asked Questions

    Do I really need to use a specific type of gear oil, or can I just use whatever is on the shelf?

    Look, I get the temptation to grab whatever’s on sale, but please don’t do that. Using the wrong gear oil is a fast track to a massive repair bill. Differentials are high-pressure environments; if the viscosity or the additives—like those limited-slip friction modifiers—aren’t exactly what your manual calls for, you’re going to hear some nasty whining or grinding. Check your owner’s manual first. Get the specific spec, or don’t touch it at all.

    Is it actually safe to drain the fluid while the car is sitting on jack stands, or do I need a lift to do it right?

    Look, you don’t need a professional lift to get this done, but safety is everything. Jack stands are fine, provided you’ve got a solid, level surface and the car is stable. I never trust a floor jack alone. Just make sure the stands are positioned under the frame, not the suspension components, or you’ll be fighting a losing battle. As long as that car isn’t going anywhere, you’re good to go.

    How do I know if I've got a leak in the seals versus just a little bit of old fluid sweating out?

    It’s a classic headache. If you see a light film of dust sticking to the housing, that’s usually just “sweating”—old fluid seeping through microscopic pores. But if you’re seeing actual puddles on your driveway or the fluid is dripping off the bottom of the casing, your seal is toast. Check the level; if it’s dropping fast, you’ve got a real leak. Don’t just wipe it off and pray; find the source.

  • Inspecting the Fuel Tank Vent System

    Inspecting the Fuel Tank Vent System

    I was working on a buddy’s old sedan last weekend when the engine started stumbling like it was gasping for air, even though the tank was full. Most shops would have immediately slapped a diagnostic computer on it and quoted him a grand for a “complex fuel system failure,” but I knew better. Half the time, it’s something as stupid and simple as a clogged fuel tank vent causing a vacuum issue that makes your car act like it’s dying. It’s one of those things mechanics love to overcomplicate because it’s much easier to charge for a mystery than it is to tell you a piece of plastic is just stuck with dirt.

    I’m not here to give you some textbook lecture or sell you on expensive proprietary software. My goal is to show you exactly how to spot a bad vent, how to test it yourself, and how to get it sorted without emptying your bank account. I’ve spent enough time with grease under my nails to know that most of these “major” issues are just small hurdles waiting for a bit of patience. We’re going to get under the hood and tackle this the right way.

    Table of Contents

    Unmasking the Charcoal Canister Function and Its Real Role

    Unmasking the Charcoal Canister Function and Its Real Role

    So, let’s talk about the charcoal canister. Most people think it’s just some random plastic box tucked away under the car, but it’s actually a massive part of your evaporative emission control system. Think of it like a sponge for gasoline fumes. Instead of letting raw vapors just float out into the atmosphere every time your fuel temperature shifts, the canister soaks them up. It’s basically there for preventing fuel vapor leaks and keeping your car from smelling like a gas station every time you pull into your driveway.

    When you’re digging around under the chassis, you might see it looking a bit worn, but its job is pretty straightforward: it stores those vapors until the engine is ready to burn them off. If this part fails, you aren’t just dealing with a bad smell; you’re looking at potential fuel system vacuum issues that can mess with how your car runs. I’ve seen plenty of guys get charged a fortune for a whole system overhaul when really, the canister was just saturated and needed a simple swap. It’s all about understanding the parts before you start throwing money at a mechanic.

    Spotting Those Sneaky Gas Cap Vent Valve Symptoms

    Spotting Those Sneaky Gas Cap Vent Valve Symptoms

    So, how do you actually know if this thing is failing? Usually, it doesn’t just die overnight; it starts throwing subtle hints that most people ignore until a check engine light pops up. One of the biggest red flags is a weird smell—if you catch a whiff of raw gas around the rear of the car after you’ve refueled, you’re likely dealing with gas cap vent valve symptoms. It basically means the system isn’t managing those vapors correctly, and instead of being filtered, they’re just hanging out where they shouldn’t be.

    Another huge giveaway is if you notice your car struggling to start right after you hit the gas station. If you pump a full tank and then immediately try to crank the engine, but it feels sluggish or takes a few extra turns to catch, you’ve probably got fuel system vacuum issues on your hands. This happens because the vent isn’t letting the pressure equalize properly. It’s a super common headache, but once you recognize these patterns, you won’t be blindsided by a massive repair bill later.

    Pro Tips to Keep Your Vent System from Driving You Crazy

    • Before you go buying expensive new parts, grab some compressed air and give the vent lines a quick blast. Sometimes it’s just a buildup of dust or a tiny spider web blocking the airflow, and a little pressure is all it takes to clear it.
    • Keep an eye on your gas cap. It sounds basic, but a cracked seal on the cap can mess with the pressure in the whole venting system, making the car think there’s a leak when there actually isn’t one.
    • If you’re working near the charcoal canister, don’t go kicking it or hitting it with a heavy tool. Those canisters are pretty delicate, and if you crack the housing, you’re looking at a much bigger headache than a simple clog.
    • Always double-check your hoses for cracks or dry rot while you’re under there. If a vent hose is brittle and splitting, it’s going to let air in where it shouldn’t, and that’ll throw off your fuel readings and cause those annoying check engine lights.
    • Don’t rush the cleaning process. If you’re trying to clear out a clogged vent, take your time with the vacuum or air tool. You don’t want to accidentally suck debris deeper into the canister or damage the internal valves by being too aggressive.

    The Bottom Line on Your Fuel Vent System

    Don’t panic if you see a Check Engine light because of a vent issue; it’s usually just a clogged canister or a stuck valve, not a total engine failure.

    Most of these problems can be tackled with a basic set of hand tools and a little patience, so don’t let a shop talk you into a massive repair bill right away.

    Keep an eye out for weird smells or trouble refueling, because those are your car’s way of telling you the vent system is struggling before it becomes a real headache.

    The Truth About That Check Engine Light

    Look, when your fuel tank vent starts acting up, a shop is gonna try to sell you a whole new evaporative system, but half the time it’s just a tiny valve choked with dust. Don’t let them overcharge you for a problem that just needs a little cleaning and some patience.

    Nikolai·Osterman

    Don't Let a Small Vent Stop You

    Don't Let a Small Vent Stop You.

    At the end of the day, dealing with a faulty fuel tank vent or a clogged charcoal canister doesn’t have to be some massive, engine-replacing nightmare. We’ve looked at how these parts keep your fuel system breathing and how to spot those annoying symptoms like a check engine light or a weird smell around the pump. Most of the time, you aren’t looking at a total system failure; you’re just looking at a piece of plastic or a small valve that’s seen better days. If you can recognize the signs early, you can avoid that massive repair bill the dealership would try to drop on you for something that’s actually a pretty straightforward fix.

    Look, I get it. Opening up your car’s ventilation system feels intimidating when you aren’t used to it, but that’s exactly why I write this stuff. You don’t need a master technician’s certification to grab a socket set and solve a problem. Once you get that vent cleaned out or that valve swapped, you’ll feel a massive sense of pride knowing you actually took control of your machine. Stop letting the fear of “breaking something” keep you from learning. Just grab your tools, take it one bolt at a time, and stop letting mechanics overcharge you for things you can do yourself in your own driveway.

    Frequently Asked Questions

    Can a bad vent cause my car to stall or struggle to start right after I fill up at the gas station?

    Yeah, it absolutely can. If your vent valve or charcoal canister is acting up, it can’t regulate the pressure in your tank properly. When you pump gas, you’re basically forcing air out; if that air has nowhere to go because the vent is stuck, it creates backpressure. That pressure messes with your fuel system’s vacuum, making the car struggle to start or even stall out right there at the pump. It’s a headache, but definitely a common one.

    Is there any way to test if the vent valve is actually stuck without tearing the whole thing apart?

    Yeah, you definitely don’t need to strip the whole car down just to test it. The easiest way is to use a bit of compressed air or even just blow into the valve itself. If you can blow air straight through it while it’s supposed to be closed, you’ve found your culprit—it’s stuck open. If it’s blocked and won’t let air through at all, it’s stuck shut. Quick, dirty, and saves you a massive headache.

    If I notice a weird smell around the back of the car, does that definitely mean my vent system is shot?

    Not necessarily, but it’s definitely a red flag. If you’re catching a whiff of raw gas near the rear, your vent system—specifically that charcoal canister—could be failing to trap the vapors. However, don’t panic yet. It could just be a loose gas cap or a leaking fuel line. Grab a flashlight, pop the trunk, and see if anything looks wet or smells stronger near the tank. If it’s just the vent, it’s an easy fix.

  • Best Flashlights for Automotive Inspection

    Best Flashlights for Automotive Inspection

    I still remember being twelve years old, hunched over my dad’s old sedan in a garage that smelled like stale coffee and motor oil. I was trying to trace a vacuum leak, but I was basically working blind because I was using one of those cheap, plastic hardware store lights that flickered every time I moved my hand. I spent twenty minutes fighting with a dying flashlight just to realize I was looking at a cracked hose that was right in front of my face. It’s frustrating because most people think you need some $200 tactical military-grade gear to see what you’re doing, but honestly, that’s just a massive waste of money.

    I’m not here to sell you on some overhyped gadget that looks cool on a keychain but dies the second it hits a drop of grease. My goal is to cut through the marketing garbage and tell you exactly what kind of light you actually need when you’re stuck under a chassis or digging through a dark engine bay. I’ll show you which features actually matter for real work and which ones are just expensive fluff, so you can stop squinting and start actually fixing your car.

    Table of Contents

    Why a High Lumen Tactical Flashlight Changes Everything

    Why a High Lumen Tactical Flashlight Changes Everything

    Look, I’ve spent enough late nights hunched over a leaking head gasket to know that half the battle is just being able to see the problem. If you’re relying on some cheap, plastic keychain light, you’re asking for trouble. When you’re deep in the wheel well or trying to spot a hairline crack in a vacuum line, you need a high lumen tactical flashlight that actually punches through the shadows. It’s not about looking cool; it’s about having enough light to see the difference between a greasy smudge and a genuine oil leak.

    Most people don’t realize how much beam distance and brightness actually matter when you’re working in a cramped engine bay. A weak light just creates more shadows, making you squint until your eyes ache. I always tell my friends to grab something rugged that won’t die on them mid-job. If you invest in a solid rechargeable LED torch, you aren’t just buying a light; you’re buying the ability to actually diagnose a fault without having to call a tow truck because you couldn’t see a blown fuse.

    Mastering Beam Distance and Brightness Under the Hood

    Mastering Beam Distance and Brightness Under the Hood

    When you’re leaning over a fender or trying to spot a hairline crack in a vacuum line, you realize quickly that not all light is created equal. It’s easy to get distracted by big numbers on a box, but you really need to focus on the balance between beam distance and brightness. If the light is too wide and diffused, you’ll just end up with a blurry mess of glare hitting the chrome. You want a tight, focused beam that can actually reach into the dark corners of the engine bay without washing everything out.

    I’ve spent way too many hours squinting at a leaking water pump because I was using a cheap light that just couldn’t punch through the shadows. If you’re serious about DIYing, invest in a rechargeable LED torch that offers a decent throw. You don’t need a stadium floodlight, but you do need something that stays bright enough to show you the actual texture of a component. There’s nothing more frustrating than having your light dim right when you’re halfway through a difficult bolt, so keep an eye on the specs.

    Pro Tips for Not Going Blind (or Losing Your Mind) While Working

    • Get yourself a headlamp. I know, it feels a bit dorky, but when you’re trying to hold a socket wrench with one hand and a flashlight with the other, you’re going to drop something. Having hands-free light is a total game changer for those tight spots near the firewall.
    • Look for something waterproof and shockproof. You’re going to drop this on concrete, or worse, it’s going to take a dip in a puddle of coolant or oil. If it’s a cheap plastic toy, it’s going to crack the first time you slip.
    • Avoid the “blindingly bright” trap. A massive tactical light is great for seeing down a dark alley, but if you’re staring directly into a 2000-lumen beam while trying to find a tiny clip in a dark engine bay, you’re just going to give yourself a headache. Look for something with adjustable brightness.
    • Check for a magnetic base. This is a lifesaver. If you can stick your light to a strut tower or a frame rail, you can actually position the light exactly where you need it instead of constantly repositioning it every five seconds.
    • Don’t skip the spare batteries. There is nothing more frustrating than being halfway through a brake job, finally seeing the problem, and having your light flicker and die. Always keep a fresh set of AAA’s or a charged power bank in your toolbox.

    The Bottom Line on Picking Your Light

    Don’t get blinded by massive lumen numbers on a box; you need a light that actually lets you see the difference between a greasy bolt and a leaking gasket.

    Prioritize a solid beam pattern over raw brightness so you aren’t just staring at a massive white glare when you’re trying to find a specific sensor.

    If it doesn’t have a decent grip or a way to stay hands-free, it’s just going to end up rolling under your tire halfway through the job.

    ## Stop Guessing, Start Seeing

    You can have the best diagnostic scanner in the world, but if you can’t actually see the cracked vacuum line or that tiny bit of corrosion on the terminal, you’re just guessing. A real flashlight isn’t a luxury; it’s the difference between fixing a problem and just staring at it.

    Nikolai·Osterman

    Don't Get Left in the Dark

    Don't Get Left in the Dark flashlight.

    At the end of the day, a flashlight isn’t just some extra gadget you toss in your glovebox; it’s the difference between actually finding that hairline crack in a vacuum hose and wasting three hours staring at shadows. We talked about why you need high lumens to cut through the grime, the importance of a beam that actually reaches the back of the engine bay, and why a tactical build matters when you’re working in tight, awkward spots. If you invest in a tool that has the right brightness and a solid beam pattern, you’re not just buying light—you’re buying the ability to actually see what you’re doing instead of just guessing.

    Look, I know getting under a car can feel intimidating, especially when you’re staring at a mess of wires and sensors you don’t recognize. But once you can actually see the parts you’re working on, that fear starts to fade. My advice? Don’t let bad lighting be the reason you give up on a DIY job or end up paying a shop way too much for something you could’ve handled yourself. Grab a decent light, keep your magnetic tray handy, and just start digging. You’ve got this, and honestly, once you see how much easier it is, you’ll wonder why you ever waited this long.

    Frequently Asked Questions

    Is it worth spending extra money on a tactical flashlight, or will a cheap hardware store one do the job?

    Look, I’ve spent plenty of nights wrestling with a cheap hardware store light, and honestly? It sucks. Those flimsy plastic ones die right when you’re halfway through a job, or the beam is so weak you’re basically just squinting at shadows. If you’re serious about DIY, spend the extra cash on a tactical one. You need something rugged that can take a drop on concrete and actually cut through the grease and grime.

    How do I know if a flashlight is actually bright enough for working in dark engine bays?

    Look, don’t just trust the “10,000 lumens” sticker on some cheap light from a big-box store; half those brands are lying to you. To see if it’s actually legit, check the CRI (Color Rendering Index). If the light is too blue or “cool,” you won’t be able to tell the difference between a tiny oil leak and just some road grime. You need a high CRI so colors actually look real under the hood.

    Should I go with a rechargeable model or just stick to replaceable batteries so I don't get stuck mid-repair?

    Look, if you’re asking me, go rechargeable but keep a backup set of AAAs in your toolbox just in case. I use a lithium-ion rechargeable light because it’s way brighter and saves a ton of money long-term, but nothing kills my momentum faster than a dead light mid-job. If you go rechargeable, just make sure you have a dedicated charging station in the garage so you aren’t hunting for a cable when you’re ready to work.