Author: Nikolai·Osterman

  • How to Safely Clean an Engine Bay

    How to Safely Clean an Engine Bay

    I remember standing over my dad’s old sedan back in high school, staring at a layer of sludge so thick I couldn’t even tell where the plastic covers ended and the metal began. Most shops will tell you that you need a specialized steam machine or a professional detailer to handle it, but honestly? That’s just a way to inflate the bill. Real engine cleaning isn’t about fancy equipment; it’s about knowing which grime is harmless and which buildup is actually hiding a leaking gasket or a cracked hose. You don’t need a shop’s worth of expensive gear to see what’s actually going on under your hood.

    In this guide, I’m skipping the fluff and showing you how to do this right without stripping your wiring or drowning your sensors. I’ll walk you through the exact degreasers I use in the shop and the step-by-step process to get that grime off safely. My goal is to give you the confidence to grab a brush and a spray bottle so you can stop guessing and start seeing the truth about your car’s condition. Let’s get to work.

    Table of Contents

    Guide Overview

    Total Time: 1-2 hours
    Estimated Cost: $20-50
    Difficulty: Beginner

    Tools & Supplies

    • Degreaser spray nozzle for targeted application
    • Soft-bristle brushes for scrubbing crevices
    • Shop vacuum or compressed air for drying
    • Engine degreaser (1 can)
    • Microfiber towels (3-5 cloths)
    • Plastic bags and tape for covering sensitive electronics

    Step-by-Step Instructions

    • 1. First things first, clear out the junk. I’m talking about those old leaves, twigs, and random debris that settle in the crevices near your windshield wipers. If you spray water into a pile of dried leaves, you’re just making sludge that can clog your drain lines. Grab a shop vac or even just a stiff brush and get that loose crap out of there before you even think about touching a hose.
    • 2. You’ve got to protect the sensitive stuff. Modern engines are basically giant computers on wheels, and the last thing you want is water getting into your alternator or your fuse box. I always grab a couple of plastic grocery bags and some rubber bands to wrap up the electrical connectors and any exposed sensors. It’s a five-minute job that saves you a massive headache later.
    • 3. Now, grab your degreaser. Don’t go buying some overpriced “professional grade” stuff that costs fifty bucks; a decent can of engine degreaser from the local auto shop works just fine. Spray it liberally over the dirty areas, but try to avoid getting it directly onto the intake or any sensitive wiring. Let it sit for maybe ten minutes so it can actually eat through the grime, but don’t let it dry completely on the surface.
    • 4. Get a brush in there. If you’re trying to clean around tight spots or those stubborn oil stains, a cheap paintbrush or an old toothbrush is your best friend. Scrub the areas where the degreaser is sitting to help break up the heavy buildup. It’s all about mechanical action here—the more you agitate that grease, the easier it’ll wash away.
    • 5. Time for the rinse, but keep it low-pressure. This is where most people mess up. Do not hit your engine with a high-pressure power washer like you’re cleaning a driveway; you’ll blast water right into places it shouldn’t be. Use a garden hose on a gentle spray setting and rinse from the top down. You’ll see the dirty water running off, and honestly, it’s one of the most satisfying parts of the whole process.
    • 6. Dry everything out as much as you can. I usually grab some compressed air if I have it, but if you’re working from your home driveway, a few clean microfiber towels will do the trick. Pay extra attention to those electrical connections you covered up. You want to make sure there isn’t any standing water sitting in the nooks and crannies before you start the car.
    • 7. Finally, pop the plastic covers off and fire it up. Once the engine is running, let it idle for a few minutes. The heat from the engine will help evaporate any remaining moisture that you couldn’t get to with a towel. Just keep an eye on your gauges to make sure everything looks normal, and then you’re good to go.

    Removing Oil Buildup From Engines Without the Fancy Shop Tools
    Removing Oil Buildup From Engines Without the Fancy Shop Tools

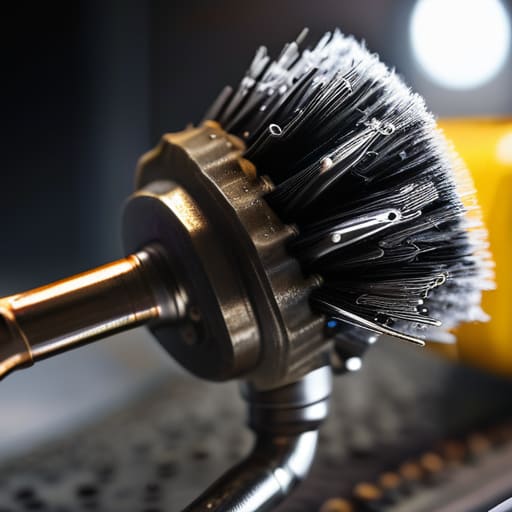
    Look, you don’t need a $500 pressurized steam cleaner or a professional-grade setup to tackle thick sludge. Most of the time, you’re just dealing with old, baked-on grime that’s been sitting there since your last oil change. If you’re removing oil buildup from engines at home, my best advice is to grab a decent can of automotive degreaser and a couple of stiff-bristled nylon brushes. The secret isn’t the price of the tool; it’s the dwell time. Spray your degreaser on, let it sit for a few minutes so it can actually break down the chemistry of the oil, and then scrub. It’s more about patience than power.

    The biggest mistake I see beginners make, though, is being too aggressive with the water. If you’re cleaning engine bay safely, you have to treat the electronics like they’re made of glass. I always tell people to wrap their alternator and fuse box in plastic bags before they even touch a hose. If you aren’t careful about preventing electrical damage during cleaning, you’re going to trade a little bit of grease for a massive electrical headache that’ll cost way more than a mechanic’s visit.

    Cleaning Engine Components Safely to Avoid a Messy Mistake
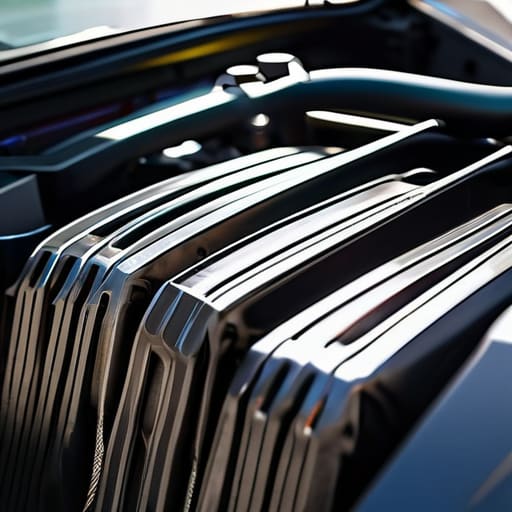
    Cleaning Engine Components Safely to Avoid a Messy Mistake

    Look, I’ve seen plenty of guys go into a job thinking they can just blast everything with a hose and call it a day, only to end up with a car that won’t start. If you want to focus on cleaning engine components without turning your ride into a paperweight, you have to respect the electronics. Before you even touch a spray bottle, grab some plastic bags and electrical tape. Cover your alternator, the fuse box, and any exposed sensors you can find. Preventing electrical damage during cleaning is the difference between a successful weekend project and a massive headache at the shop.

    Once you’ve shielded the sensitive stuff, you can get more aggressive with your automotive degreaser application. Instead of soaking the whole bay at once, work in small sections. Use a stiff-bristled brush to agitate the thickest grime around the valve covers or near the oil filter. If you try to spray everything down in one go, you’re just going to end up with a muddy slurry running into every crevice. Take your time and let the chemicals do the heavy lifting so you aren’t scrubbing until your hands go numb.

    Pro Tips to Keep You From Making a Massive Mess

    • Cover your electrical stuff first. I’ve seen guys spray degreaser straight onto an alternator or a sensitive sensor and spend the next three hours chasing phantom electrical issues. Wrap your alternator, fuse box, and air intake in some plastic bags and tape them down tight before you even touch the water.
    • Don’t go overboard with the pressure washer. I get it, it feels satisfying, but high-pressure water is a great way to force moisture into connectors where it doesn’t belong. Use a standard garden hose or a low-pressure spray; you want to wash the grime away, not blast it into your wiring harness.
    • Work in stages, not all at once. If you douse the whole engine bay in degreaser and then walk away to grab a coffee, that stuff is going to dry into a crusty mess that’s even harder to get off. Spray a section, let it sit for a minute to break down the oil, scrub it, and rinse it immediately.
    • Keep a dedicated brush handy. You can’t get into the tight nooks and crannies around the valve cover or the fuel rails with just a hose. I always keep a cheap, stiff-bristled nylon brush in my kit—it’s the only way to actually lift the heavy sludge out of the corners.
    • Dry it out properly before you start the car. This is where most beginners mess up. Once you’re done rinsing, use some compressed air if you have it to blow water out of the spark plug wells and electrical plugs. If you don’t have air, just let it sit in the sun for a good while. You don’t want to turn that key and hear a misfire because of leftover moisture.

    The Bottom Line on Keeping Your Engine Clean

    Don’t let a layer of sludge scare you off; you don’t need a professional steam cleaner to get the job done, just some decent degreaser and a bit of elbow grease.

    Protect your electronics at all costs—cover those sensors and connectors before you start spraying, or you’ll turn a simple cleaning into a massive headache.

    Cleaning isn’t just about looks; it’s about being able to spot actual leaks and cracks before they turn into a breakdown on the side of the road.

    ## The Real Reason to Clean Your Engine

    Most people think cleaning an engine is just about making it look pretty for a car show, but it’s actually about visibility. You can’t fix what you can’t see, and you definitely can’t spot a slow oil leak or a cracked vacuum line if it’s buried under two inches of old grease and road grime.

    Nikolai·Osterman

    Getting the Job Done
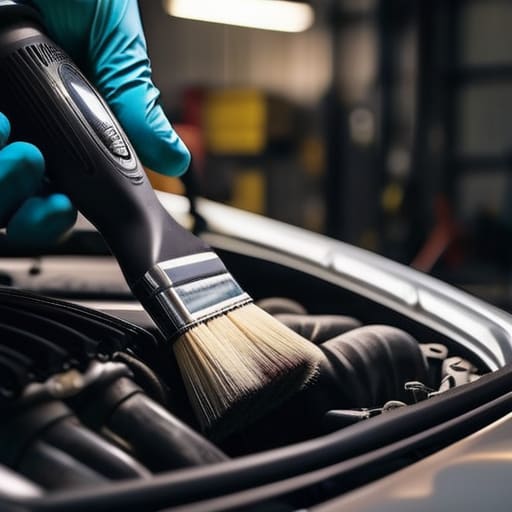
    Getting the Job Done cleaning an engine.

    Look, cleaning an engine isn’t some mystical ritual that requires a master certification. We’ve covered the essentials: you don’t need a pressurized steam cleaner to tackle that thick grime, and you definitely don’t need to go blasting sensitive sensors with high-pressure water if you know how to work smart. By focusing on targeted degreasing and being careful with your components, you’ve basically done more for your car’s longevity than most people do in a year of scheduled oil changes. Just remember to keep your connections dry and don’t rush the process, because a little patience saves you from a massive headache later.

    At the end of the day, my goal isn’t just to show you how to wipe away dirt; it’s about getting you comfortable enough to actually look under the hood without feeling intimidated. Most shops will try to charge you a premium just for doing what you can do yourself with a brush and some decent chemicals. Don’t let them. Once you see how much easier it is to spot a leak or a cracked hose on a clean engine, you’ll realize that you’re in control of your machine. Grab your tools, keep that magnetic tray handy, and just start working. You’ve got this.

    Frequently Asked Questions

    Is it actually safe to spray water near all those sensitive sensors and electrical connectors?

    Look, I get why you’re nervous. Seeing all those wires and plugs makes you want to steer clear. Honestly? It’s risky if you’re just blasting it with a high-pressure hose like you’re washing a driveway. That’s how you force water into a connector and end up with a nightmare electrical ghost. Stick to a damp rag or a light misting. If you must spray, keep the pressure low and avoid the sensitive spots.

    How do I know if the grime I'm seeing is just surface dirt or if it's actually a sign of a leaking gasket?

    Look, it’s easy to panic when you see a layer of black gunk, but don’t sweat it yet. If the grime is dry, dusty, and spread evenly across everything, it’s probably just road salt and spilled fluids that have settled over time. But if you see a fresh, wet “weeping” look—especially around a seam or a bolt head—that’s a leak. If it feels oily to the touch, you’ve likely got a gasket issue.

    Can I use a regular pressure washer, or am I going to end up blowing something apart?

    Look, I’ve seen guys turn a simple wash into a nightmare because they went full power-washer mode. Honestly? Don’t do it. You’re asking for trouble. Those high-pressure streams can blast water straight into electrical connectors, sensors, or even your alternator, and once that moisture gets in there, you’re looking at expensive sensor failures or even a car that won’t start. Stick to a garden hose with a decent spray nozzle—it’s safer and gets the job done.
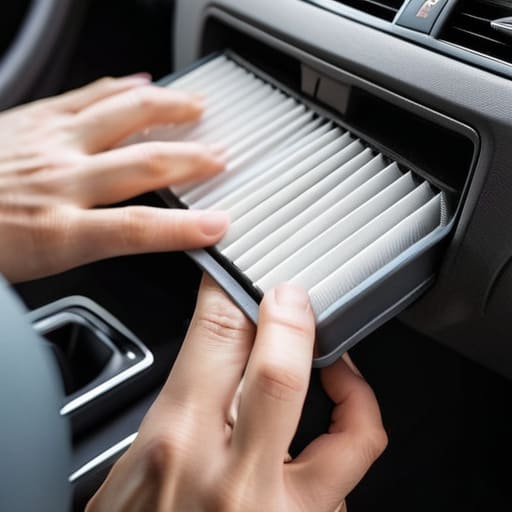
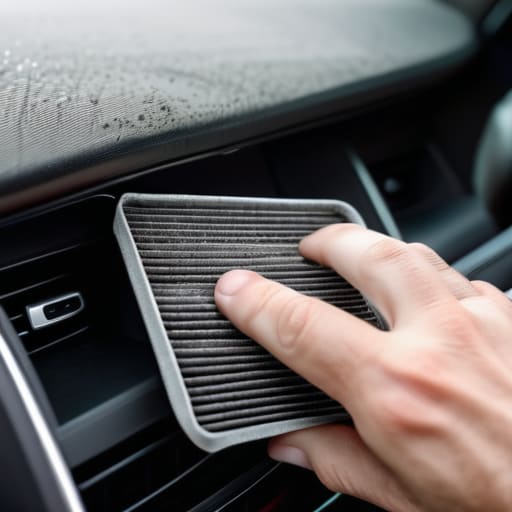
  • Changing Your Cabin Air Filter

    Changing Your Cabin Air Filter

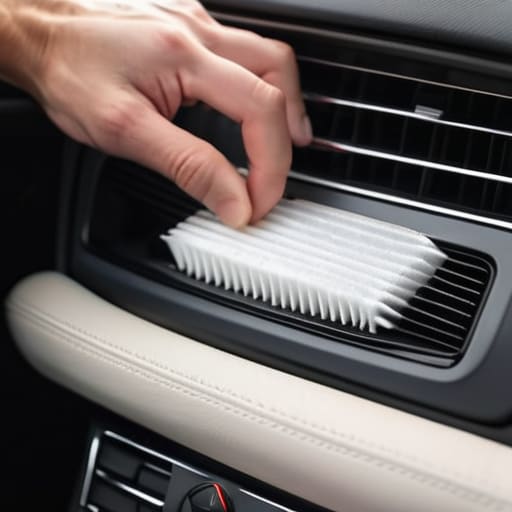
    Ever pull into a red light and realize your car smells like a pile of wet gym socks? Most people think that’s just “old car smell” or something they need to mask with a cheap little hanging tree, but it’s actually a massive red flag. The truth is, you’re likely just breathing in months of dust, pollen, and road grime because you haven’t done a cabin air filter change in way too long. I’ve seen mechanics try to tell customers that a clogged filter means they need a whole new HVAC system, but honestly, that’s just total nonsense designed to pad their service invoice.

    I’m not here to give you some textbook lecture or a list of expensive specialized tools you’ll never use again. I’m going to show you exactly how to find that filter, pop it out, and slide a fresh one in without breaking a sweat or spending more than twenty bucks. This is a five-minute job that anyone with a little bit of patience can master. By the time we’re done, you’ll be breathing clean air and keeping that extra cash in your own pocket instead of the shop’s.

    Table of Contents

    Guide Overview

    Total Time: 10-20 minutes
    Estimated Cost: $15-30
    Difficulty: Beginner

    Tools & Supplies

    • Flashlight or phone light to see inside the housing
    • None (most vehicles use tool-less clips)
    • Replacement cabin air filter (1 unit)
    • Microfiber cloth or vacuum (for cleaning debris)

    Step-by-Step Instructions

    • 1. First, grab your new filter and find where yours is hiding. In most cars, it’s tucked behind the glove box, but on some older models, you might have to look under the dashboard near the passenger footwell. Don’t stress if you don’t see it immediately; just give it a quick search around the passenger side.
    • 2. Open your glove box and clear everything out so you aren’t dealing with loose pens or coins flying everywhere. You’ll usually see two plastic tabs or a small dampener arm on the side holding the box in place. Gently squeeze those tabs or unclip the arm to let the glove box drop down further toward your knees.
    • 3. Once the glove box is hanging open, you’ll see a rectangular plastic cover. This is the housing for the filter. It might be held in by a couple of tiny clips, so just give them a gentle tug until the cover pops off. If it feels like it’s going to snap, stop and look for a screw you might have missed.
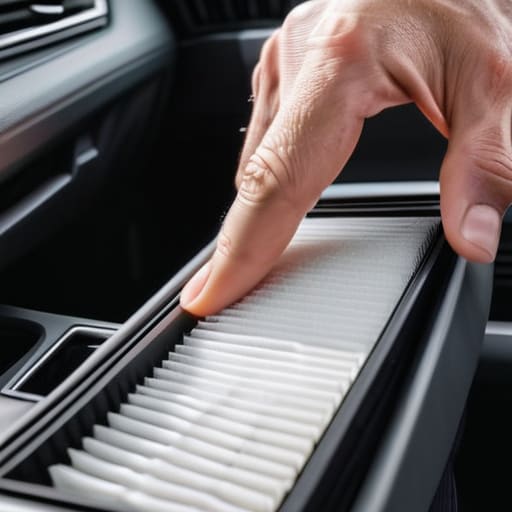
    • 4. Slide the old, nasty filter out. I’m telling you, you’ll probably see a thick layer of dust and dead leaves in there, which is exactly why your AC has been smelling like a basement lately. Take a second to look at the airflow arrows printed on the side of the old filter so you know which way the air is supposed to move.
    • 5. Before you slide the new one in, take a damp rag and wipe out the empty housing. There’s no point in putting a clean filter into a tray full of grit. You want that space to be as clean as possible so the new filter can actually do its job without getting clogged instantly.
    • 6. Slide your brand-new filter into the slot. This is the most important part: make sure the airflow arrow on the new filter is pointing in the same direction as the one you just pulled out. If you put it in backward, you’re basically choking your ventilation system and making the motor work way harder than it needs to.
    • 7. Snap the plastic cover back on and lift your glove box back up into position. Re-attach the dampener arm or the side tabs until you hear a solid click. Give the glove box a quick shake to make sure everything is secure and seated properly, and you’re officially done.

    Spotting the Signs of a Dirty Cabin Filter Before It Stinks

    Spotting the Signs of a Dirty Cabin Filter Before It Stinks.

    You don’t always have to wait for a service light to pop up to know something is wrong. Usually, your car will start giving you hints. The biggest giveaway is a sudden, funky smell hitting you the second you crank the AC—that’s a classic sign of preventing AC odors from becoming a permanent fixture in your upholstery. If it smells like old gym socks or damp basement, that filter is likely choked with dust, pollen, or even dead bugs.

    Another red flag is when your airflow just feels… weak. If you’ve got the fan on full blast but it feels like you’re barely getting a breeze, your filter is probably clogged solid. This puts extra strain on your blower motor, which is a much pricier fix than just a quick swap. Keeping an eye out for these signs of a dirty cabin filter is the easiest way to handle basic automotive HVAC maintenance without waiting for a breakdown. Honestly, if the air feels stale or the windows are fogging up more than usual, it’s time to stop ignoring it and just get it done.

    Mastering Automotive Hvac Maintenance Without a Mechanics Degree

    Mastering Automotive Hvac Maintenance Without a Mechanics Degree

    Look, most people think automotive HVAC maintenance is some high-level mystery that requires a specialized scanner and a heavy-duty shop compressor. It’s not. Honestly, the biggest mistake I see people make is treating their air system like it’s “set it and forget it.” If you’re constantly cranking your fan to max just to get a decent breeze, or if you notice a weird musty smell every time you hit the defrost, you’re already behind. You don’t need to be a master tech to realize that preventing AC odors is way cheaper than trying to deep-clean a moldy evaporator core later on.

    A good rule of thumb for your cabin air filter replacement interval is every 12,000 to 15,000 miles, but if you live somewhere with high pollen or heavy construction dust, you might need to swap it sooner. I always tell my buddies that improving vehicle air quality starts with staying ahead of the grime. Don’t wait for the airflow to become a joke. Just keep an eye on it, grab a fresh filter when the season changes, and you’ll save yourself a massive headache—and a much larger bill—at the dealership.

    Pro Tips to Keep Your DIY Job from Turning into a Headache

    • Grab a flashlight before you start. Most filter housings are tucked away in dark corners behind the glovebox, and trying to fumbled around in the shadows is a quick way to snap a plastic clip.
    • Don’t just shove the new filter in. Take a second to look at the airflow arrows on the side of the frame. If you put it in backward, you’re basically choking your AC system instead of helping it.
    • Check the housing for debris while the old filter is out. I’ve seen everything from dried leaves to old french fries stuck in there, and if you don’t clear that out, your new filter will be trashed in a week.
    • Be gentle with the glovebox clips. Most modern cars use these little plastic tabs to hold the compartment in place, and they can be finicky. If you force it, you’ll be hearing a permanent rattle every time you hit a bump.
    • Keep a spare filter in your trunk or garage. If you’re already halfway through the job and realize your old one was a total disaster, you don’t want to be stuck driving around with no protection for your lungs.

    The Bottom Line on Your Cabin Filter

    Don’t let a shop talk you into a “maintenance package” just to swap a filter; it’s a ten-minute job that shouldn’t cost you more than the part itself.

    If your AC starts smelling like a locker room or your defroster feels weak, your filter is likely choked with dust and needs a swap immediately.

    Keep a spare filter in your glovebox or under your seat so you can handle the job the second you notice the airflow dropping, rather than waiting for a scheduled service.

    The Real Cost of Neglect

    Honestly, watching a shop try to charge someone eighty bucks for a cabin filter swap is what drives me nuts. It’s not some high-tech sensor calibration; it’s literally just pulling out a piece of paper and sliding a new one in. If you can handle a screwdriver, you can handle this, and you’ll keep your lungs a lot cleaner doing it.

    Nikolai·Osterman

    Don't Let Them Overcharge You

    Don't Let Them Overcharge You: DIY filter.

    At the end of the day, swapping out your cabin air filter is one of those tasks that feels way more intimidating than it actually is. You’ve learned how to spot the signs—like that weird musty smell or your AC struggling to blow—and you’ve seen how easy it is to actually get the old one out and the new one in. It really just comes down to checking it every few months and making sure you don’t let dust and debris pile up in your HVAC system. You don’t need a specialized diagnostic tool or a shop bay to handle this; you just need a few minutes and a fresh filter to keep your air clean.

    I know it’s tempting to just drop the car off at the dealership and let them handle the “dirty work,” but that’s exactly how they pad their margins. Every time you handle a basic maintenance task like this yourself, you’re taking back control of your vehicle and your wallet. It might feel small right now, but these little wins build the confidence you need to tackle the bigger stuff under the hood later on. Keep that magnetic tray handy, stay patient, and remember: you’re more than capable of keeping your own ride running right.

    Frequently Asked Questions

    Can I just use a standard paper filter from the auto parts store, or do I really need to spend the extra cash on those fancy carbon-activated ones?

    Look, if you’re just trying to keep the dust out, the cheap paper filter from the parts store gets the job done. It’s fine. But if you’re driving in heavy traffic or near construction, grab the carbon-activated one. Those fancy ones actually trap smells and exhaust fumes instead of just letting them drift into your face. Honestly? It’s worth the extra few bucks if you don’t want your car smelling like a bus tailpipe.
    If I can't find the filter behind the glovebox like everyone says, is there somewhere else it might be hiding in my car?

    Look, don’t panic—you aren’t crazy. Not every car follows the “glovebox rule.” If it’s not there, check under the dashboard near the passenger footwell, or even behind the center console. Some manufacturers, especially on older models or certain European builds, hide them under the cowl near the windshield wipers. Grab a flashlight and poke around the footwell area. It might be tucked behind a plastic panel that needs a quick snap to pop off.

    How often should I actually be doing this if I live in a city with a ton of dust and construction going on?

    If you’re living in a city with constant construction and dust, forget that “every 15,000 miles” rule you see in the manual. That’s for ideal conditions. In a dusty urban environment, your filter is basically acting like a vacuum cleaner for the street. I’d check it every 6,000 to 8,000 miles. Honestly, just pop the housing open and take a look once a season; if it looks gray and fuzzy, swap it.

  • How to Locate and Fix an Exhaust Leak

    How to Locate and Fix an Exhaust Leak

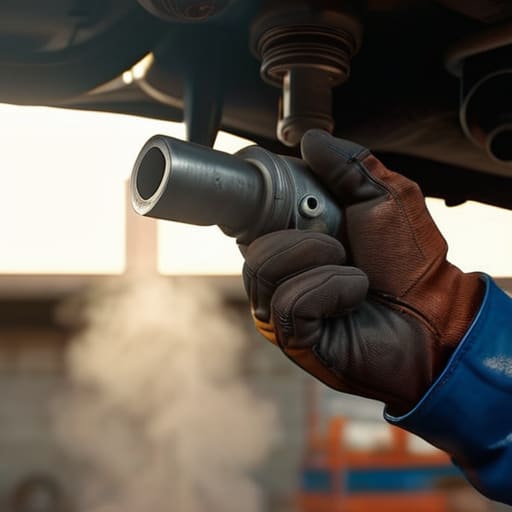
    There’s nothing quite like that sudden, rhythmic ticking sound that starts creeping up from under your floorboards every time you hit the gas. I remember the first time I heard it on my old project car; I was convinced I’d blown a gasket and was looking at a massive repair bill. Most shops will see that sound and immediately try to sell you a brand-new, high-priced catalytic converter or a full manifold replacement just to pad their margins. But here’s the truth: a lot of times, a simple exhaust leak repair is way less intimidating—and way cheaper—than the guys in the clean jumpsuits want you to believe.

    I’m not here to give you some textbook lecture or a list of parts you don’t actually need. I’ve spent enough time under greasy chassis to know that most of these issues come down to a rusted bolt or a cracked flange that you can tackle with a basic socket set and some patience. I’m going to walk you through how to pinpoint exactly where that leak is coming from and how to patch it up yourself. My goal is to get you back on the road without you feeling like you just got ripped off at the dealership.

    Table of Contents

    Spotting Exhaust System Symptoms Before They Get Costly

    Spotting Exhaust System Symptoms Before They Get Costly

    If you’re hearing a sound that wasn’t there during your last commute, don’t just crank the radio to drown it out. Most people ignore a ticking or roaring noise, thinking it’s just an old car acting up, but that’s usually the first sign of trouble. One of the biggest red flags I see in the shop is a sudden car exhaust smell in cabin while you’re sitting at a red light. If you can smell that sulfurous, burnt scent through your vents, you aren’t just dealing with a nuisance; you’re dealing with a serious carbon monoxide danger vehicle situation. That gas doesn’t care if you’re driving a brand-new SUV or my old project tuner—it gets into your lungs, and that’s not something to mess with.

    Beyond the smell, pay attention to how your engine feels. If the car feels sluggish or you notice a weird vibration under your feet, you might be looking at something more serious like a cracked manifold. Sometimes it’s just a simple fix, but if you wait too long, a tiny crack can turn into a massive job like an exhaust manifold bolt replacement, which is a total headache. Catching these symptoms early is the difference between a quick fix and a massive bill.

    The Truth About That Scary Car Exhaust Smell in Cabin

    The Truth About That Scary Car Exhaust Smell in Cabin

    If you’re sitting at a red light and suddenly notice a weird, acrid scent drifting through your vents, don’t just roll down the windows and pretend it’s fine. That car exhaust smell in cabin is your car’s way of screaming that something is wrong. It’s not just a nuisance; it’s a massive red flag. When you smell that stuff inside, it means gases that should be exiting out the tailpipe are finding a way into your passenger compartment.

    The reality is that this isn’t just a bad smell—it’s a serious carbon monoxide danger vehicle issue. Carbon monoxide is colorless and odorless on its own, so if you’re smelling the sulfur or the heavy fumes, you’re already breathing in the byproduct. This usually happens because of a crack in the manifold or a failing gasket. I’ve seen people ignore this for weeks, thinking it’s just a “quirk” of an old car, but you’re essentially inhaling engine waste while you drive. If you catch it early, you might just be looking at a simple gasket swap rather than a massive headache later.

    Don't Get Ripped Off: 5 Ways to Tackle the Leak Yourself

    • Grab a soapy water spray bottle. If you can safely run the car for a minute, spray some soapy water on the exhaust pipes; if you see bubbles popping, you’ve found your leak without needing a fancy smoke machine.
    • Check your manifold bolts first. A lot of times, it’s not a broken pipe, it’s just a loose or snapped bolt on the manifold that’s letting air escape, and that’s a much easier fix than replacing the whole assembly.
    • Don’t just slap on some cheap putty. If you’re using exhaust sealant, make sure the surface is ground down to bare metal first; if you apply it over grease or old rust, it’s going to flake off in ten minutes.
    • Get yourself a decent set of penetrating oil. Before you even think about turning a wrench on those rusted-out clamps, soak them overnight. If you try to force a frozen bolt, you’re just going to snap it and turn a simple fix into a nightmare.
    • Watch out for the flex pipe. If the leak is coming from that braided section, don’t bother trying to patch it with tape—it’s a moving part. You’re better off just swapping the whole flex pipe section out so you aren’t back under the car next week.

    Quick Lessons Before You Get Under the Car

    Don’t wait for a massive repair bill; if you hear a new ticking or roaring sound, it’s probably just a small leak that you can catch early.

    If you start smelling exhaust inside the cabin, stop driving immediately—it’s not just annoying, it’s actually dangerous for you.

    You don’t need to be a master mechanic to handle basic leaks, but you do need to grab the right tools and some patience so you don’t strip a bolt.

    ## Don't Let a Small Crack Break Your Bank

    “An exhaust leak isn’t just some annoying noise; it’s your car telling you something is wrong before it turns into a massive repair bill. Most shops will try to sell you a whole new system, but usually, all you really need is a bit of patience, the right sealant, or a fresh gasket to get back on the road.”

    Nikolai·Osterman

    Don't Let a Small Leak Break Your Bank

    Don't Let a Small Leak Break Your Bank

    Look, fixing an exhaust leak isn’t some impossible feat of engineering. We’ve covered how to listen for those telltale rattles, identify that nasty sulfur smell creeping into your cabin, and pinpoint exactly where the gas is escaping. Whether it’s a blown manifold gasket or just a rusted-out flange that needs a new bolt, the key is to act before the leak gets bigger. If you catch it early, you’re looking at a simple weekend project with a wrench and some sealant. If you wait, you’re looking at a massive repair bill and potentially damaging your engine’s sensors. Just stay ahead of the noise and keep those eyes peeled.

    At the end of the day, I don’t want you to feel intimidated by what’s under your hood. Mechanics are going to try to tell you that every little hiss requires a trip to the shop, but most of the time, you’ve got this. It’s about having the right tools, a bit of patience, and the guts to get your hands dirty. Once you patch that leak and hear your engine running smooth and quiet again, you’ll realize you didn’t need a master technician to do it—you just needed to trust your own hands. Now, grab your gear and get to work.

    Frequently Asked Questions

    Can I just use some high-temp sealant to patch a hole, or is that just a temporary band-aid?

    Look, I’ll be straight with you: sealant is a band-aid. It’s fine if you’re stuck on the side of the road or just need to limp the car to a shop, but don’t expect it to last. The vibration and heat cycles will eventually crack that patch right off. If you want a real fix that won’t leave you stranded, you’ve gotta patch the metal or swap the section. Don’t let a cheap fix become a costly mistake.

    How do I know if the leak is in the manifold or further down the pipe without taking everything apart?

    The easiest way to tell without tearing the whole thing down is to listen to the rhythm. If you hear a sharp, rapid tapping or “ticking” sound that gets faster as you rev the engine, that’s almost always your exhaust manifold. Manifold leaks happen right at the engine block where pressure is highest. If it’s more of a low, heavy rumble or a loud roar coming from under the car, the leak is further down the pipe.

    Is it actually dangerous to keep driving with a small leak, or can it wait until my next paycheck?

    Look, I get it—money is tight and sometimes you just need to make it to payday. But honestly? Don’t gamble with it. Even a “small” leak means exhaust gases, including carbon monoxide, can seep into your cabin. It’s not just about a loud noise; it’s about your health. If you can’t fix it today, at least crack a window and keep the fresh air moving. Don’t push your luck.

  • Using a Car Diagnostic Scanner

    Using a Car Diagnostic Scanner

    I remember sitting in my dad’s garage when I was twelve, watching him stare at a dashboard light like it was some kind of unsolvable riddle. Back then, if a check engine light popped up, you basically had to take it to a dealership and pray they didn’t charge you three hundred bucks just to tell you a sensor was dusty. It used to feel like there was this massive wall between us and the actual guts of the machine, but honestly? That’s mostly a lie. All you really need is a decent diagnostic scanner to bridge that gap and finally hear what your car is trying to tell you.

    I’m not here to sell you some overpriced, professional-grade rig that requires a PhD to operate. My goal is to cut through the marketing fluff and show you how to use a diagnostic scanner to actually solve problems without getting ripped off. I’ll walk you through what to look for, what the codes actually mean, and how to avoid the common traps that leave people wasting money on parts they don’t even need. Let’s get to work.

    Table of Contents

    Decoding the Check Engine Light Meaning Without the Mechanics Markup

    Decoding the Check Engine Light Meaning Without the Mechanics Markup

    When that little orange engine icon pops up on your dash, your first instinct might be to panic and book an appointment at the dealership. Don’t. Most of the time, the car isn’t about to explode; it’s just trying to tell you something is slightly out of spec. If you grab a basic reader, you’ll get a code that points you in the right direction, but understanding the actual check engine light meaning requires a bit more digging. You aren’t just looking for a random string of letters and numbers; you’re looking for the specific component that’s acting up.

    Instead of letting a shop charge you a hundred bucks just to “interpret” a code, you should look into automotive scan tool features that give you more context. A decent tool won’t just tell you that a sensor is failing; it can show you how that sensor is performing in the moment. If you can see the live data, you can tell if a part is truly dead or if it’s just a loose connection or a dirty sensor. Once you’ve actually fixed the problem, you can use the tool for clearing error codes to reset the system and get back on the road.

    Mastering Obdii Protocol Compatibility for Your Own Garage

    Mastering Obdii Protocol Compatibility for Your Own Garage

    Look, before you drop fifty bucks on some random piece of plastic online, you need to understand OBDII protocol compatibility. It sounds like a mouthful, but it’s basically just making sure the tool speaks the same language as your car’s computer. Most cars made after 1996 follow the standard, but if you’re messing with something older or a weird import, a generic reader might just sit there staring at you blankly. I’ve seen guys buy a fancy unit only to realize it can’t actually communicate with their specific ECU, which is a total waste of cash.

    Once you know the tool actually fits your ride, you want to look past just clearing error codes. Anyone can hit a button to turn off a light, but that doesn’t actually fix the problem. You want to find something that offers real-time data stream monitoring. That’s where the real magic happens—seeing exactly how your oxygen sensors or fuel trims are behaving while the engine is actually running. It’s the difference between just guessing and actually knowing what’s happening under the hood.

    Five Ways to Stop Wasting Money and Start Using Your Scanner Like a Pro

    • Don’t just clear the code and drive away. If that light pops back on ten minutes later, you didn’t fix the problem, you just hid the symptom. Use the scanner to find the “Freeze Frame” data—it shows you exactly what the engine was doing the second things went sideways.
    • Stop buying the cheapest $15 handhelds you see on those random shopping sites. They’re okay for a quick glance, but if you want to actually see live data streams—like how your oxygen sensors are performing in real-time—you’re gonna need something with a bit more backbone.
    • Learn to read the “Live Data” instead of just hunting for error codes. A code tells you something is broken, but live data tells you how it’s breaking. Watching your fuel trims or manifold pressure while the engine is actually running is where the real diagnostic magic happens.
    • Keep a small notebook or a notes app on your phone handy. When you pull a code, write down the exact alphanumeric string and the mileage. It helps you track if a sensor is slowly dying over time or if it just had a random glitch.
    • Always check your battery voltage before you start a deep diagnostic session. If your battery is weak or your alternator is acting up, it can throw a dozen “ghost codes” that have nothing to do with the actual engine components. Fix the power, and half your headaches might just disappear.

    The Bottom Line: Don't Let the Data Intimidate You

    A scanner isn’t a magic wand, but it’s your best way to stop guessing; use the codes to pinpoint the problem so you don’t waste money buying parts you don’t actually need.

    Make sure you’re checking protocol compatibility before you buy, because a scanner that can’t talk to your car’s specific computer system is just an expensive paperweight.

    Treat the scanner as a starting point for your research, not a final answer—once you have the code, use it to learn exactly what’s happening under the hood.

    ## The Truth About the Check Engine Light

    A diagnostic scanner isn’t some high-tech mystery box designed to keep you in the dark; it’s just a translator that tells you exactly what your car is complaining about so you don’t end up paying a shop five hundred bucks to replace a sensor that costs twenty.

    Nikolai·Osterman

    Stop Guessing and Start Fixing

    Stop Guessing and Start Fixing car issues.

    Look, getting a diagnostic scanner isn’t about turning yourself into a master technician overnight. It’s about taking control. We’ve covered how to stop paying that massive “check engine light” tax at the shop, how to read those cryptic codes for what they actually are, and why you need to make sure your tool actually speaks your car’s language through OBDII. Once you have the right scanner and you know how to interpret the data, you’re no longer just some person staring at a dashboard in panic. You’re someone with actual information, and that makes all the difference when you’re deciding whether a fix is a simple sensor swap or something that really needs a professional’s eyes.

    At the end of the day, my goal is to see you walk into a shop with confidence instead of hesitation. Most people get ripped off because they don’t know what’s happening under the hood, but that’s a choice you don’t have to make anymore. Grab a decent scanner, keep your wits about you, and don’t let anyone intimidate you with technical jargon. You’ve got the tools and the logic to handle this. Just keep a little patience, maybe grab a magnetic tray for those stray bolts, and get to work. Your car—and your wallet—will thank you.

    Frequently Asked Questions

    Do I really need a fancy Bluetooth scanner, or will a cheap plug-in one from the hardware store actually work?

    Look, if you’re just trying to see why that light popped up, the cheap plug-in ones are fine. They get the job done. But if you’re actually planning on doing your own work, go for the Bluetooth ones. Being able to watch live data on your phone while you’re actually under the hood or leaning over the engine bay is a game changer. It saves you from constantly getting in and out of the driver’s seat.

    Is there a difference between a scanner that just reads codes and one that actually tells me how to fix the problem?

    There’s a massive difference, and it’s the difference between a hint and a roadmap. A basic code reader just tells you the “what”—like, “Hey, your oxygen sensor is acting up.” But a high-end diagnostic tool or a scanner with live data gives you the “why.” It shows you the actual sensor readings in real-time so you can see if the part is actually dead or if you’ve just got a vacuum leak. One leaves you guessing; the other actually gets you back on the road.

    If I clear a code with my scanner, am I just hiding a serious problem instead of actually fixing it?

    Look, I’ll be straight with you: clearing a code is like hitting the snooze button on an alarm clock. It stops the noise, but the problem is still there. If you clear a code for a faulty sensor or a vacuum leak without actually replacing the part, that light is going to pop back on—usually within a few drive cycles. Don’t just mask the symptoms to get rid of the light; fix the root cause so you aren’t just chasing ghosts.

  • Finding an Engine Oil Leak

    Finding an Engine Oil Leak

    I remember being ten years old, kneeling on the oil-stained concrete of my dad’s garage, staring at a dark, shimmering puddle under his old sedan. I thought the whole engine was basically melting down and that we were going to need a massive loan just to get it back on the road. That’s exactly how most shops want you to feel when you notice an engine oil leak—like your car is a ticking time bomb and you’re too clueless to do anything but hand over your credit card. They love to turn a simple, messy problem into a “critical engine failure” just to pad their service invoices.

    Look, I’m not here to sell you a premium package or scare you into a repair you don’t need. My goal is to show you how to track down that drip, figure out if it’s just a loose gasket or something more serious, and fix it yourself without getting ripped off. We’re going to talk about the real stuff—the smells, the spots, and the actual tools you’ll need to get your hands dirty. I promise to give you the straight truth about what’s happening under your hood.

    Table of Contents

    Spotting the Signs of Oil Leak Under Your Car

    Spotting the Signs of Oil Leak Under Your Car

    The first thing you’re going to notice isn’t always a puddle on the ground. Sometimes, it starts with a smell—that heavy, acrid scent of burning oil hitting your nostrils when you’re sitting at a red light. If you catch that, it usually means oil is escaping a gasket and dripping onto something hot, like your exhaust manifold. You might also notice a thin film of grime coating the side of the engine block. It’s easy to confuse oil leak vs oil consumption, but if your dipstick is constantly showing a lower level than it was last week, you’ve definitely got a physical leak somewhere rather than just a thirsty engine.

    When you actually get under there, keep an eye out for those telltale dark spots on your driveway. If you see a fresh puddle, grab a flashlight to start figuring out how to find oil leak location by tracing the drip back up the engine. Look for wet, shiny patches around the valve cover or the oil pan. Don’t panic if it’s just a tiny weep; catching these small drips early is the best way to avoid a massive repair bill later.

    The Truth About Oil Leak vs Oil Consumption

    The Truth About Oil Leak vs Oil Consumption

    Here’s the thing: people often get these two mixed up, and that mistake can end up costing you a lot of money at the shop. When I’m looking at a car, I’m trying to figure out if the oil is escaping through a crack in a gasket or if it’s being burned inside the combustion chamber. If you see puddles or wet spots on the engine block, you’re dealing with an actual leak. But if your oil level is dropping and the ground underneath is bone dry, you’re likely looking at oil consumption.

    Consumption usually means your piston rings or valve seals are worn out, allowing oil to slip into the cylinders and burn off. It’s a much nastier problem because it’s internal. On the flip side, an external leak is often just a matter of a faulty seal or a loose drain plug. Understanding the difference between oil leak vs oil consumption is the first step in deciding whether you need a simple wrench job or a much more expensive engine rebuild.

    5 Ways to Tackle the Leak Before It Costs You a New Engine

    • Grab a flashlight and do a visual sweep of the engine bay. Look for those dark, wet-looking patches around the valve cover or the oil pan. If it looks like someone spilled coffee all over the engine, that’s your smoking gun.
    • Check your oil level using the dipstick more often than usual. If you’re constantly topping it off but don’t see a puddle on the ground, you might be burning it, but if the level is dropping fast and the ground is messy, you’ve definitely got a leak.
    • Keep an eye on that “Oil Pressure” light on your dash. If it flickers or stays on, stop driving immediately. A leak can drop your pressure so low that your engine literally starts eating itself from the inside out.
    • Don’t just throw a piece of cardboard under your car and call it a day. Use it to catch the drips so you can see the color and consistency. Fresh, amber oil tells a different story than old, black sludge, and it helps me figure out if it’s a slow seep or a full-on blowout.
    • Start with the cheap stuff first, like a new gasket or a tightened drain plug. A lot of times, shops will try to tell you that you need a whole new engine, but half the time it’s just a $20 rubber seal that’s gone brittle.

    The Bottom Line on Your Oil Leak

    Don’t panic if you see a spot on the driveway, but don’t ignore it either—check your dipstick regularly to see if your oil level is actually dropping.

    Learn the difference between a slow seep and a high-pressure leak, because one is a weekend project and the other is an emergency.

    Most leaks are just old gaskets or seals that have dried out, and you can usually save a ton of money by swapping them yourself instead of letting a shop charge you for a full engine teardown.

    The Golden Rule of the Garage

    “An oil leak isn’t just a mess on your driveway; it’s your car trying to tell you something is wrong before it turns a simple gasket swap into a massive repair bill you can’t afford.”

    Nikolai·Osterman

    Don't Let a Leak Drive You Crazy

    Don't Let a Leak Drive You Crazy.

    Look, we’ve covered a lot of ground here. Whether you’re spotting dark puddles on your driveway, realizing your oil level is dropping faster than it should, or trying to figure out if your engine is actually leaking or just burning through oil, the goal is the same: stop the damage before it starts. Don’t ignore those smells or those messy stains under the hood. Most of the time, it’s just a worn-out gasket or a loose drain plug that’s costing you way more in unnecessary shop fees than it would to just swap the part out yourself. Get in there, find the source, and get it sealed up.

    At the end of the day, I don’t want you to feel intimidated by a little bit of grease or a messy engine bay. Mechanics love it when people get scared of a simple leak because they know you’ll hand over your credit card without asking questions. But you’ve got this. Once you realize that most of these “major” issues are just basic maintenance tasks waiting to happen, the whole game changes. Grab your tools, keep your eyes on the details, and take control of your own ride. You’ll save a ton of money, and honestly, there’s no better feeling than knowing your car is running right because you made sure of it.

    Frequently Asked Questions

    Is it actually dangerous to keep driving if I only see a tiny bit of oil on the ground?

    Look, if it’s just a tiny drop every few days, you aren’t going to blow your engine overnight. But don’t get complacent. A small leak is just a warning shot. It can turn into a massive spray in a heartbeat if a gasket finally gives up or a seal cracks. Keep a close eye on your dipstick. If the level is dropping fast, stop driving immediately. Don’t let a cheap fix turn into a total engine rebuild.

    How can I tell if it's a simple gasket issue or if I'm looking at a much more expensive repair?

    Look, here’s the deal: if the oil is just weeping from a seam—like your valve cover or oil pan—it’s usually just a gasket. That’s a relatively cheap fix if you’ve got the right sockets. But if you see oil pooling inside the engine block or if your oil pressure light is flickering, run. That usually means internal seals or something much heavier are failing. Don’t guess; check where the wetness actually starts.

    What's the best way to clean up an oil spill on my driveway without making a huge mess?

    Look, don’t just spray it with a hose—that’s how you end up with a greasy rainbow spreading across your whole driveway. First, grab some kitty litter or even sawdust and dump it thick over the spill. Let it sit for a bit to soak up the heavy stuff. Once it’s absorbed, sweep it up. Then, hit the stain with some dish soap and a stiff brush to get the rest.

  • Fixing Power Steering Rack Issues

    Fixing Power Steering Rack Issues

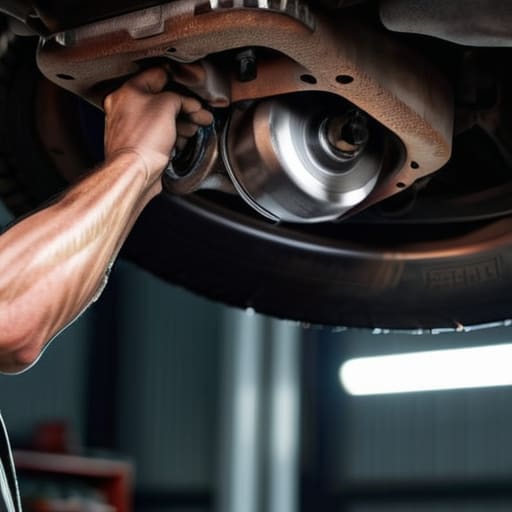
    I was under a lifted ’98 Silvia last Tuesday when a customer’s quote for a steering rack repair came across my desk. The shop manager wanted to charge him nearly two grand just to swap the assembly, claiming it was “too complex” for a DIYer. Honestly, it makes my blood boil. Most shops love to treat a steering issue like a death sentence for your bank account, but they’re usually just overcomplicating a job that really just requires a decent set of sockets and some elbow grease. You don’t need a master technician’s certification to realize that most of these “catastrophic” failures are just worn-out boots or a simple leak that you can fix yourself.

    Look, I’m not going to feed you some sanitized, textbook version of how this goes down. I’m going to give you the straight truth from someone who spends his days covered in grease and his nights turning wrenches on my own projects. I’ll walk you through the actual process of a steering rack repair, from diagnosing the play in your wheel to the moment you finally tighten that last bolt. My goal is to make sure you walk away knowing exactly what’s happening under your hood so you never get ripped off again.

    Table of Contents

    Decoding Steering Rack Symptoms Before They Get Costly

    Decoding Steering Rack Symptoms Before They Get Costly

    You don’t want to wait until you’re stranded on the shoulder of a highway to realize something is wrong with your steering. Most of the time, your car will try to tell you something is up through those early steering rack symptoms. I usually tell my friends to listen for a whining or groaning sound when they turn the wheel. If that sound is accompanied by a heavy, sluggish feeling in the steering wheel, you might be looking at a power steering pump failure, but it could also be a leak in the rack itself.

    Another big red flag is seeing fluid puddling under your front end or noticing a weird “clunking” sensation when you hit a bump. If you’re hearing metal-on-metal grinding, it’s time for some serious steering rack noise diagnosis. Sometimes, it’s just a matter of a quick steering rack seal replacement to stop a leak, but if you ignore it, you’ll end up having to replace the whole unit. Catching these small issues early is the difference between a cheap fix and a massive bill at the shop.

    Mastering Steering Rack Noise Diagnosis With Your Own Ears

    Mastering Steering Rack Noise Diagnosis With Your Own Ears

    One thing I’ve learned working in the shop is that your ears are actually better than most cheap OBD scanners when it comes to the steering system. If you’re sitting in the driver’s seat and hear a high-pitched whine every time you turn the wheel, don’t immediately assume you need to replace steering rack assembly and drop a thousand bucks. Often, that whine is actually a sign of a power steering pump failure or just low fluid levels. You need to distinguish between a mechanical grind coming from the rack itself and a hydraulic scream coming from the pump.

    If the noise sounds more like a rhythmic clicking or clunking specifically when you’re hitting bumps or turning sharply, that’s a different story. That’s usually the internal gears or the mounting bushings playing up. I always tell people to try and isolate the sound: turn the engine off and move the wheel. If it’s silent, it’s likely hydraulic. If it still makes a “clack,” you’re looking at a mechanical issue within the rack. Getting the hang of steering rack noise diagnosis early can save you from a massive headache down the road.

    Pro Tips to Save Your Sanity (and Your Wallet) During the Swap

    • Don’t just wing it with any old fluid; check your manual for the specific power steering fluid your rack calls for, because using the wrong stuff is a fast track to blowing out your new seals.
    • Grab a decent set of flare nut wrenches before you start, because using a standard open-end wrench on those hydraulic lines is the easiest way to strip a fitting and turn a simple job into a nightmare.
    • Keep your magnetic parts tray handy—seriously, I can’t tell you how many times I’ve lost a critical mounting bolt in the dark abyss of a wheel well because I wasn’t being careful.
    • Before you pull the old rack out, take a bunch of photos of the tie rod connections and sensor wiring; once everything is disconnected, your brain is going to forget exactly how those lines were routed.
    • When you’re reinstalling, make sure you’re bleeding the air out of the system properly by turning the wheel lock-to-lock several times while the engine is off, or you’ll be stuck with a loud, shuddering mess.

    The Bottom Line on Your Steering

    Don’t ignore the warning signs; if your wheel is vibrating or making weird noises, catching it early can save you from a massive repair bill later.

    You don’t always need a shop to diagnose the issue—pay attention to how the car feels and listens, and you’ll know if it’s a simple fix or something more serious.

    Most steering rack issues aren’t a death sentence for your car, as long as you have the right tools and don’t let a small leak turn into a total system failure.

    ## The Truth About Steering Issues

    Most shops will try to tell you a leaking steering rack is a “replace-only” job that’ll cost you a grand, but half the time, it’s just a worn seal or a loose mounting bolt that a little grease and the right wrench can fix.

    Nikolai·Osterman

    Don't Let the Shop Overcharge You

    Don't Let the Shop Overcharge You.

    At the end of the day, fixing your steering rack isn’t some mysterious black box that only a master technician can touch. We’ve walked through the warning signs—from that annoying fluid leak on your driveway to the weird clunking sounds that keep you up at night—and you now know how to actually listen to what your car is telling you. Whether it’s a simple seal replacement or a full rack swap, the key is catching the issue early. If you wait until your steering feels like you’re driving through wet cement, you’re not just looking at a repair; you’re looking at a massive headache and a much bigger bill.

    I know it feels intimidating when you’re staring at a heavy component under your chassis, but don’t let that stop you. I’ve spent countless weekends covered in grease, and I promise you, the feeling of finally getting that steering wheel smooth and responsive again is worth every bit of the struggle. You don’t need a fancy degree or a million-dollar lift to take control of your machine. Grab your tools, keep your parts organized, and just take it one bolt at a time. You’ve got this, and your wallet will definitely thank you later.

    Frequently Asked Questions

    Do I really need to replace the whole rack, or can I just fix a leaking seal myself?

    Look, it depends on how bad the damage is. If it’s just a weeping seal and the fluid level is holding steady, you might be able to swap the seal out and save a ton of cash. But if the internal gears are notched or the shaft is pitted, a new seal won’t do squat—it’ll just leak again in a week. If the steering feels notched or heavy, just bite the bullet and replace the whole rack.

    How can I tell if the issue is actually my power steering pump and not the rack?

    Look, it’s easy to blame the rack when things feel off, but don’t jump the gun. If you’re hearing a high-pitched whine that changes pitch when you turn the wheel, that’s usually your pump screaming for help, not the rack failing. Also, check your fluid. If it looks like burnt coffee or you see bubbles in the reservoir, your pump is likely struggling. If the steering is just “heavy” or vague, then we start looking at the rack.

    Is it safe to keep driving if my steering just feels a little "mushy" for a few more days?

    Honestly? I wouldn’t risk it. If your steering feels “mushy,” you’re likely losing pressure in your power steering system or dealing with air in the lines. That’s a huge red flag. It might feel fine for a few miles, but if a seal blows or a hose snaps while you’re mid-turn, you’re going to lose control fast. Check your fluid levels right now, but please, don’t treat this like a “wait and see” situation.

  • Process for Flushing Engine Coolant

    Process for Flushing Engine Coolant

    I remember watching my dad stare at a thermometer in frustration while steam poured out from under the hood of an old sedan, thinking the entire cooling system needed a total replacement. The shop told him it would cost a fortune, but the truth is, most of the time, you’re just looking at neglected fluid. A proper coolant flush isn’t some mysterious, high-level procedure that requires a master technician; it’s just about getting the old, acidic sludge out of your radiator before it starts eating your gaskets from the inside out. Don’t let a mechanic talk you into a massive bill when the fix is actually this straightforward.

    I’m not here to give you some textbook lecture or sell you on expensive, unnecessary additives. I’m going to show you exactly how to tackle a coolant flush using basic tools you probably already have in your garage. We’ll go through the actual process—from draining the old junk to making sure you don’t leave any air pockets trapped in the lines—so you can do it right the first time. No hype, no fluff, just the real way to keep your engine from overheating on a hot summer day.

    Table of Contents

    Guide Overview

    Total Time: 1-2 hours
    Estimated Cost: $30-60
    Difficulty: Beginner

    Tools & Supplies

    • Drain pan to catch old fluid
    • Funnel to prevent spills
    • Pliers to loosen hose clamps
    • Gloves and safety glasses for protection
    • New coolant/antifreeze (check manual for type)
    • Distilled water (if mixing concentrate)
    • Rags for cleaning spills

    Step-by-Step Instructions

    • 1. First things first, make sure your engine is completely cold. I’ve seen way too many people try to crack a radiator cap on a warm engine, and trust me, you don’t want a face full of boiling liquid. Once you’re sure it’s cool, grab your drain pan and position it right under the radiator petcock (that little plastic valve at the bottom) or the lower radiator hose.
    • 2. Open your radiator cap to let the pressure vent, then slowly unscrew that petcock. If your car doesn’t have a petcock, just loosen the lower radiator hose clamp and pull the hose off. Let that old, murky fluid drain out until it’s just a slow drip. If the fluid looks like chocolate milk, you might have a bigger head gasket issue on your hands, but let’s just hope it’s just old coolant for now.
    • 3. Now you need to get the gunk out of the system. Find your coolant reservoir (the plastic tank next to the radiator), drain that out too, and then refill it with distilled water. Start the car, turn your heater on full blast, and let it run for about ten minutes. This helps the water circulate through the heater core and flush out the hidden sludge.
    • 4. Once the engine has cycled through the water, shut it off and let it cool down again. Drain that water out just like you did with the old coolant. I usually like to do this twice if the old stuff was particularly nasty. You want that water coming out looking as clear as possible before you move on to the actual refill.
    • 5. Now it’s time for the good stuff. Grab a jug of the correct 50/50 pre-mixed coolant for your specific make and model—don’t just buy whatever is on sale at the grocery store. Slowly pour it into the radiator and the reservoir until they’re both at the proper levels. Don’t just dump it in and walk away; you need to watch for air bubbles.
    • 6. With the cap off, start the engine and let it run. You’ll see the level drop as air pockets escape the system. Keep topping it off as needed. Once the level stays steady, put the cap back on tight. It’s a good idea to check the level again after your first drive to make sure everything settled in correctly.

    Mastering Engine Temperature Regulation Without a Mechanic

    Mastering Engine Temperature Regulation Without a Mechanic

    Look, keeping your engine at a steady temperature isn’t just about swapping fluids; it’s about understanding how the whole system breathes. A lot of people ignore their cooling system until they see steam pouring from under the hood, but by then, you’re already looking at a massive repair bill. To really master engine temperature regulation, you need to keep an eye on more than just the gauge. Check your hoses for soft spots or cracks and make sure your radiator cap isn’t losing pressure. If the rubber feels mushy, it’s time to swap it out before it fails you on the highway.

    I also see way too many people getting confused about coolant vs antifreeze differences. Here’s the deal: antifreeze is the concentrated stuff you mix with water, while coolant is the pre-mixed version ready to go. If you’re doing your own cooling system maintenance, don’t just guess. Stick to what your owner’s manual says regarding the specific type your car needs. Getting the chemistry wrong can actually cause buildup that ruins your radiator cleaning process later on. Just stay consistent with your service intervals, and your car will thank you.

    The Real Difference Between Coolant vs Antifreeze Differences

    The Real Difference Between Coolant vs Antifreeze Differences

    Look, I see people at the parts counter all the time grabbing whatever bottle is cheapest, thinking they’re saving money. But if you don’t understand the coolant vs antifreeze differences, you might actually be doing more harm than good. Technically, antifreeze is just the concentrated chemical—usually ethylene glycol—that you mix with water to keep things from freezing or boiling. Coolant is the finished product ready to go into your engine. If you’re just topping off with straight antifreeze without diluting it properly, you’re actually messing with the thermal properties and could end up sabotaging your engine temperature regulation.

    When you’re doing your routine cooling system maintenance, you need to check your owner’s manual to see if your car requires a specific type, like OAT or HOAT. Using the wrong chemistry can lead to sludge buildup that ruins your radiator cleaning process. Don’t just guess; a mistake here is way more expensive than a $20 bottle of the right stuff. Keeping an eye on your coolant flush interval ensures you aren’t just circulating old, acidic fluid that eats away at your gaskets from the inside out.

    Pro Tips to Keep You From Making a Mess (or a Mistake)

    • Never, and I mean never, open that radiator cap while the engine is hot. You’re basically asking to get sprayed with pressurized, boiling liquid, and trust me, that’s a hospital trip you don’t want.
    • Don’t just eyeball the fluid level. Once you’ve finished the flush and the engine has cooled back down, double-check the reservoir. If it’s low, top it off, or you’re heading straight for an overheat.
    • Make sure you’re using the right stuff for your specific car. Mixing different types of coolant—like an organic acid technology (OAT) with an older conventional stuff—can actually turn into a weird, sludge-like mess that clogs your heater core.
    • Get a dedicated drain pan that’s actually bigger than your radiator drain plug. I’ve seen too many guys get caught off guard when that old, heavy coolant comes out faster than they expected and spills all over their garage floor.
    • When you’re refilling, try to run the car with the heater on full blast for a few minutes. It helps circulate the new fluid through the entire system, including the heater core, so you don’t end up with air pockets trapped inside.

    The Bottom Line on Keeping Your Engine Cool

    Don’t wait for a temperature spike to act; if your coolant looks like muddy water or feels gritty, it’s already time for a flush.

    Stop treating coolant and antifreeze like they’re the same thing—using the wrong one can mess up your seals and lead to a much more expensive repair.

    You don’t need a specialized shop rig to do this right, just a drain pan, some patience, and the right coolant for your specific make and model.

    ## The Truth About Your Cooling System

    “Most shops will try to tell you that a radiator flush is some high-level technical procedure, but honestly? It’s just about clearing out the sludge before it turns your engine into a very expensive paperweight. Don’t wait for the temperature needle to climb; just get in there and clean it out yourself.”

    Nikolai·Osterman

    Don't Let Your Engine Rot From the Inside Out

    Don't Let Your Engine Rot From the Inside Out

    Look, at the end of the day, a coolant flush isn’t some high-level engineering feat; it’s just basic maintenance that keeps your car from turning into a very expensive paperweight. We covered how to spot the signs of old, sludge-like fluid, the real distinction between antifreeze and coolant, and the actual steps to get that old gunk out of your radiator. If you follow the process and don’t skip the final rinse, you’re already ahead of 90% of the drivers on the road. Taking twenty minutes to swap out your fluids now is a whole lot better than dealing with a blown head gasket and a massive repair bill three months down the line.

    I know it can feel intimidating when you’re staring down a steaming engine bay for the first time, but don’t let that stop you. Every pro I know started exactly where you are—probably covered in a bit of spilled fluid and feeling a little unsure. The more you get your hands dirty, the more you realize that these machines aren’t mysteries; they’re just puzzles waiting to be solved. Grab your tools, keep your workspace clean, and trust your instincts. Once you realize you can handle the stuff the shops charge hundreds for, you’ll never look at your car the same way again.

    Frequently Asked Questions

    How do I know if I actually need a flush or if I can just top off the reservoir?

    Look, if your reservoir is just a little low, topping it off with the right mix is fine. But don’t just ignore it. Pop the radiator cap (when it’s cold!) and check the color. If it looks like clean, bright liquid, you’re good. If it looks like muddy water, rusty sludge, or has oily chunks floating in it, stop topping it off and just do the flush. That’s old fluid doing damage.

    Is it safe to mix different colors of coolant, or am I asking for trouble?

    Look, I’ve seen guys do this thinking they’re saving a buck, and it’s a nightmare. Don’t do it. Different colors usually mean different chemical additives—like OAT vs. IAT. If you mix them, they can react, turn into a weird, thick sludge, and clog your heater core or radiator. If you’ve already mixed them, you’re looking at a full flush. Just stick to what your manual calls for. Don’t risk your engine for a shortcut.

    How long does it actually take to do this, and do I need any special tools beyond a drain pan?

    Honestly, if you’ve got a clear workspace, you can knock this out in about an hour or ninety minutes tops. Most of that is just waiting for the engine to cool down so you don’t melt your skin off. Beyond a drain pan, grab a funnel to avoid making a massive mess, some pliers to move the hose clamps, and maybe a cheap spill mat. Just don’t wing it without a way to catch the runoff.

  • When to Resurface Brake Rotors

    When to Resurface Brake Rotors

    I was working a shift at the shop last Tuesday when a guy came in, looking totally defeated because a mechanic told him he needed a full set of brand-new rotors just because he felt a slight shimmy in the pedal. It’s the same old story: shops trying to upsell you on parts you don’t actually need. Honestly, it drives me crazy. Most of the time, you aren’t looking at a total failure; you’re just dealing with uneven wear that can be fixed with simple brake rotor resurfacing. You don’t need to drop hundreds of dollars on shiny new metal when the core of your current setup is still perfectly solid.

    I’m not here to give you some textbook lecture or sell you on fancy equipment you’ll never use. My goal is to give you the real-world truth about when you can actually save your old rotors and when you really do need to replace them. I’ll walk you through the process, the tools you actually need, and how to tell if your job is worth the effort. Let’s get into it so you can stop overpaying and start doing it right.

    Table of Contents

    Identifying Warped Brake Rotor Signs Before They Cost You

    Identifying Warped Brake Rotor Signs Before They Cost You

    You don’t always need a diagnostic scanner to know something is off; usually, your car will tell you through your hands and feet. The most obvious brake pulsation symptoms show up as a rhythmic shimmy or vibration in the steering wheel when you’re slowing down from highway speeds. If you feel a pulsing sensation through the brake pedal itself, that’s a dead giveaway that your rotors aren’t hitting the pads evenly anymore.

    Another thing to watch for is that annoying squealing or grinding noise that persists even after you’ve swapped out your pads. Sometimes, what feels like a simple pad issue is actually the rotor surface being uneven, which can lead to uneven wear patterns. I always tell people to pay attention to how the car “feels” during deceleration. If it feels inconsistent or shaky, you’re likely looking at warped brake rotor signs that need immediate attention. Catching these small tells early is the difference between a quick shop visit and having to replace your entire braking assembly because you ignored the warning signs.

    Brake Pulsation Symptoms You Shouldnt Ignore

    Brake Pulsation Symptoms You Shouldnt Ignore

    If you feel a rhythmic thumping or a shuddering sensation through the brake pedal when slowing down, those are classic brake pulsation symptoms that you can’t just ignore. It’s not just an annoying vibration; it’s your car telling you that the contact surface between your pads and the rotor isn’t flat anymore. Sometimes it feels like you’re driving over tiny speed bumps every time you hit the pedal. If that sensation is accompanied by a high-pitched squeal or a heavy feeling in the pedal, you’re likely dealing with uneven wear or heat spots that have physically altered the metal.

    You also need to keep an eye on how your steering wheel reacts. If the wheel starts shaking violently in your hands specifically when you apply pressure to the brakes, the issue is likely centered on the front rotors. I’ve seen plenty of people try to power through this, but ignoring it usually leads to more expensive headaches down the road. Before you jump straight into a full brake pad replacement vs resurfacing debate, pay attention to whether the vibration is constant or only happens under heavy braking. That distinction tells you exactly how much life is actually left in your setup.

    Pro Tips for Resurfacing Without Making a Mess of Things

    • Check your minimum thickness before you even start. If those rotors are already too thin, resurfacing them is just a fast track to a brake failure, and no amount of patience will fix that.
    • Don’t skip the cleaning step. After you’re done machining, those rotors are going to be covered in fine metal dust and oils; hit them down with some brake cleaner so they don’t mess up your new pads.
    • Get a decent lathe or a specialized resurfacing tool. You can try to DIY it with some sandpaper and a drill, but if you want a smooth, even surface that doesn’t vibrate, you need something that actually cuts consistent grooves.
    • Always bed in your new pads. Once you’ve got those fresh, flat rotors installed, don’t just go out and slam on the brakes. Do a few controlled stops to let the pad material transfer properly to the rotor surface.
    • Keep an eye on your calipers while you’re at it. There’s no point in getting a perfect rotor surface if your caliper piston is sticking and causing uneven wear from the jump.

    The Bottom Line on Your Rotors

    Don’t rush to the parts store just because you feel a shake; if your rotors aren’t cracked or too thin, resurfacing is a much cheaper way to get that smooth braking feeling back.

    Pay attention to your steering wheel and brake pedal—if they’re pulsing or vibrating, your rotors are likely warped and need immediate attention before they mess up your pads too.

    You don’t need a massive shop setup to handle this, just the right tools and a bit of patience to ensure the surface is even and safe for your next drive.

    ## The Real Truth About Your Rotors

    “Look, most shops will try to sell you a whole new set of rotors the second they feel a vibration, but if the thickness is still good, don’t let them rip you off. Resurfacing them is usually all you need to get that smooth braking feeling back without draining your bank account.”

    Nikolai·Osterman

    The Bottom Line on Your Brakes

    The Bottom Line on Your Brakes.

    Look, at the end of the day, resurfacing your rotors is all about recognizing those early warning signs—the steering wheel shake, the pedal pulsation, or that annoying vibration—before they turn into a full-blown emergency. You don’t always have to go out and drop hundreds of bucks on a brand-new set of rotors just because they aren’t perfectly flat anymore. If the thickness is still within the manufacturer’s specs, resurfacing is a massive money-saver that gets your braking performance back to where it needs to be. Just make sure you’re measuring that minimum thickness carefully; you don’t want to shave off too much and end up with thin, unreliable metal.

    I know it can feel intimidating when you’re staring at your brake assembly and wondering if you’re about to mess something up, but I promise you, it’s manageable. Most of the time, it’s just about having the right tools and a little bit of patience. Don’t let a shop talk you into an expensive replacement just because they can. Take it one bolt at a time, keep your workspace clean, and trust your gut. Once you get that first smooth stop after doing the work yourself, you’ll realize that you’re more than capable of handling what’s under your hood.

    Frequently Asked Questions

    How do I know if my rotors are too thin to be resurfaced safely?

    Look, you can’t just eyeball this. You need a micrometer to check the actual thickness against the “discard” spec listed in your service manual. Every rotor has a minimum thickness limit—once you hit that, resurfacing is a no-go because the heat will warp them instantly or, worse, they’ll crack under pressure. If you’re too close to that limit, don’t risk it. Just grab a new set. It’s not worth a brake failure.

    Is it actually better to just buy new rotors instead of paying to have these machined?

    Look, I get why you’re asking. It seems easier to just grab a fresh set online. But here’s the truth: if your rotors still have plenty of thickness left, machining them is way cheaper and keeps your original parts in the game. If they’re thin or have deep grooves, don’t bother—just swap them. But if they’re solid, resurfacing saves you a ton of cash and keeps your braking smooth.

    Can I resurface my rotors at home with a hand tool, or do I really need a lathe?

    Look, I’ll be straight with you: forget the idea of using a hand tool to resurface them. You might be able to sand down some light surface rust, but that isn’t “resurfacing.” To actually get a flat, true surface, you need a lathe. Trying to DIY it with hand tools is just asking for uneven braking and a massive headache. If you don’t have a lathe, take them to a local shop to get them turned.

  • Maintaining Correct Tire Pressure

    Maintaining Correct Tire Pressure

    I remember being ten years old, sitting on a greasy concrete floor in my dad’s garage, watching him swear at a cheap, plastic stick-style tool that wouldn’t give him a reading to save his life. He was trying to prep an old sedan for a long trip, and we wasted twenty minutes just fighting with a piece of junk that was completely useless. It’s the same thing I see now at the shop: people think they need some high-tech, computerized sensor system to know if their rubber is healthy, but honestly, most of that is just expensive noise. All you really need is a reliable tire pressure gauge that actually tells you the truth before you hit the highway.

    Look, I’m not here to sell you on some overpriced gadget that requires a PhD to operate. My goal is to cut through the marketing BS and show you exactly what to look for so you don’t get ripped off at the service station. I’ll walk you through the different types—from the old-school analog ones to the digital ones that actually work—and help you pick a tool that’ll last longer than your next car. Let’s get your pressure right and stop wasting money on guesswork.

    Table of Contents

    Digital vs Analog Tire Gauges Choosing Your Best Tool

    Digital vs Analog Tire Gauges Choosing Your Best Tool

    Digital vs Analog Tire Gauges: Choosing Your Best Tool

    I get asked about digital vs analog tire gauges all the time, especially when someone’s just starting to build out their basic kit. Honestly, it comes down to what you value more: convenience or reliability. Digital ones are great because they do the heavy lifting for you—you just press a button and get a crisp reading on a screen. They’re perfect for quick checks in the driveway, but if you’re a bit hard on your tools or work in a dusty garage like I do, those sensitive sensors can eventually glitch out.

    Analog gauges, on the other hand, are the old-school workhorses. They don’t rely on batteries, so they’re always ready to go when you’re out on a road trip. They can be a little harder to read if the needle is tiny, but they’re tougher in the long run. If you’re serious about checking tire inflation levels regularly, I usually tell people to grab a solid analog stick or dial gauge. It’s a simple piece of gear that won’t fail you when the electronics decide to quit.

    Checking Tire Inflation Levels Without Getting Overwhelmed

    Checking Tire Inflation Levels Without Getting Overwhelmed

    Look, I get it. Opening your owner’s manual and seeing a bunch of numbers and charts can feel like you’re staring at a math exam you didn’t study for. But checking tire inflation levels shouldn’t be some high-stress event. You don’t need to be a pro to get it right; you just need to know where to look. Most people make the mistake of following the number printed on the sidewall of the tire itself, but that’s actually the maximum pressure the tire can handle, not what your specific car actually needs.

    To avoid the headache, find that sticker on your driver’s side door jamb—that’s where the manufacturer lists the correct tire psi for vehicles like yours. Once you have that number, it’s a breeze. Just make sure you’re checking them while the tires are “cold,” meaning the car hasn’t been driven for a while. If you go to a gas station right after a long highway haul, the friction heat will throw your readings off, and you’ll end up chasing a number that isn’t actually there. Just stay consistent, and you’ll be fine.

    Pro Tips for Getting an Accurate Reading

    • Check your pressure when the tires are cold. If you’ve been driving down the highway for an hour, the friction heats up the air inside and gives you a fake high reading. Wait until the car’s been sitting for a few hours so you’re getting the real numbers.
    • Don’t just trust the number on your dashboard. Most car sensors are actually measuring temperature, not just PSI, and they can be off by a few pounds. Always grab a handheld gauge to verify what the computer is telling you.
    • Make sure you’re getting a solid seal. When you press the gauge onto the valve stem, you should hear a brief hiss, but if it keeps whistling, you aren’t seated right. If you don’t get a tight seal, the air escaping will mess up your measurement entirely.
    • Find your “door placard” instead of looking at the tire sidewall. The number printed on the side of your tire is the maximum pressure the tire can hold, not what your car actually needs. Open your driver’s side door and look for the sticker on the frame; that’s your actual target.
    • Keep a gauge in your glovebox, not just in your garage. I’ve seen too many people get stuck on the side of the road because they noticed a low tire but didn’t have the tool to check if it was just a minor leak or a total blowout.

    The Bottom Line: Don't Let Your Tires Die Slow

    Don’t get fancy—whether you go digital or stick to a classic analog stick, the best gauge is the one you actually keep in your glovebox and use regularly.

    Check your pressure when your tires are cold; trying to get an accurate reading after a long highway drive is just asking for a false number.

    Treat your tire pressure like a routine checkup, not a crisis response; catching a low PSI early saves you from expensive tread wear and potential blowouts.

    The Truth About That Cheap Gauge

    Look, you can spend fifty bucks on a fancy digital readout if it makes you feel better, but at the end of the day, a solid gauge is just about accuracy and not wasting your time. If you aren’t checking your pressure regularly, you’re basically just waiting for a blowout or a massive repair bill to find you.

    Nikolai·Osterman

    Don't Leave It to Chance

    Check tire pressure: Don't Leave It to Chance.

    Look, at the end of the day, whether you decide to go with a rugged analog stick or a quick-read digital gauge, the most important thing is that you actually use it. We’ve covered how to pick the right tool for your kit and the proper way to check your levels without stressing out, so now the ball is in your court. Don’t let a cheap, inaccurate gauge or a “close enough” attitude lead to uneven tread wear or a sudden blowout on the highway. Getting your pressure right is one of the simplest ways to protect your wallet and keep your car feeling tight on the road.

    I know it might feel like just another chore on a long list of car maintenance, but trust me, it’s worth the five minutes. I’ve seen too many people get stuck on the side of the road or get hit with a massive repair bill just because they ignored something as basic as tire inflation. You don’t need to be a master technician to take control of your vehicle’s health; you just need to take ownership of the small stuff. Grab a decent gauge, keep it in your glovebox, and stop letting your tires dictate how your drive goes. You’ve got this.

    Frequently Asked Questions

    How often should I actually be checking my tire pressure if I'm not driving every day?

    If your car is mostly sitting in the driveway, you can’t just rely on that “once a month” rule. Air leaks out naturally over time, even if you aren’t moving. Honestly, I’d check them at least once every two weeks. If you’re heading out on a long trip after the car has been parked for a while, grab your gauge and check them immediately. It’s better to spend two minutes checking now than dealing with a flat later.

    Is it worth spending more on a high-end digital gauge, or will a cheap analog one do the job just fine?

    Look, if you’re just checking your pressure once a month to make sure you aren’t driving on rims, a cheap analog gauge is totally fine. It’s reliable and doesn’t need batteries. But if you’re serious about tuning or you hate squinting at a tiny needle, go digital. The precision is better, and it’s way easier to read. Honestly? Just get something mid-range that won’t break if you drop it in the driveway.

    Should I be checking the pressure when the tires are cold, or does it matter if I just finished a long drive?

    Always check them when they’re cold. If you’ve just finished a long drive, the friction from the road heats up the air inside, which spikes the pressure reading. It’ll give you a false high, and then you’ll under-inflate your tires when you finally top them off. My rule of thumb? Check them first thing in the morning before you head out, or at least let the car sit for a few hours.

  • How to Adjust a Clutch Pedal

    How to Adjust a Clutch Pedal

    You ever feel like your car is fighting you every time you try to shift gears? I remember working on my neighbor’s old hatchback last summer—the guy was convinced he needed a whole new transmission because the pedal felt like it was made of lead. I pulled my magnetic tray out of my back pocket, took one look at the linkage, and realized he was about to spend a fortune on something that just needed a simple clutch adjustment. Most shops will try to sell you a whole kit or a new pressure plate when, in reality, your pedal engagement is just off-center.

    I’m not here to give you some textbook lecture or a list of expensive specialized tools you’ll never use again. I’m going to show you exactly how to dial in your pedal feel so your gear shifts feel crisp and predictable again. We’re going to walk through the actual process of clutch adjustment step-by-step, focusing on the real-world tweaks that make a difference. No fluff, no gatekeeping—just the straight truth on how to get your car back to feeling smooth without getting ripped off.

    Table of Contents

    Guide Overview

    Total Time: 1-2 hours
    Estimated Cost: $0-20
    Difficulty: Beginner

    Tools & Supplies

    • Wrench or Socket set for adjusting linkage bolts
    • Screwdriver for accessing adjustment screws or covers
    • Penetrating oil for loosening rusted bolts
    • Rag for cleaning debris

    Step-by-Step Instructions

    • 1. First things first, you need to get your car on something stable. If you’re working on a cable-operated clutch, you’ll usually be under the dash, but if it’s a hydraulic setup, you might be looking at the master cylinder under the hood. Either way, make sure the car is parked on level ground and the parking brake is pulled tight so you aren’t moving while you’re elbow-deep in the footwell.
    • 2. Grab a flashlight and find the adjustment nut. On most older cars or tuners, this is a threaded rod right where the clutch cable meets the pedal assembly. You’re looking for a little nut that you can turn to either tighten or loosen the tension. I always keep my magnetic parts tray handy for this because those little nuts love to disappear into the carpet the second you let go of them.
    • 3. Before you start turning anything, check your “free play.” This is that tiny bit of wiggle you get in the pedal before it actually starts feeling resistance. Push the pedal down with your hand and see how much it moves before it hits the actual mechanism. If there’s zero play, you’re going to burn through your clutch plate in no time, so we definitely need to fix that.
    • 4. Now, start adjusting. If the pedal feels too “mushy” or engages way too high up, you need to tighten the tension by turning the adjustment nut so the cable pulls the lever closer to the pedal. Don’t go overboard in one go; just give it a half-turn at a time. If you over-tighten it, the clutch won’t fully disengage, and you’ll start having a nightmare of a time shifting gears.
    • 5. Once you think you’ve nailed it, test the pedal feel. Press it down a few times to make sure it doesn’t feel “sticky” or weird. You want a smooth, consistent travel from the top of the stroke to the bottom. If it feels consistent and firm, you’re likely heading in the right direction.
    • 6. Take it for a quick spin around the block. This is the most important part because you need to see how it actually behaves under load. Pay close attention to how easy it is to get into first gear from a standstill and how the gear transitions feel while you’re moving. If it’s not biting where it should, go back to step four and tweak it a little more.
    • 7. Finally, double-check your work one last time before you pack up your tools. Make sure the adjustment nut is secure and isn’t going to vibrate loose while you’re driving down the highway. Once you’re sure it’s solid, clean up your workspace—a messy garage is a recipe for losing a 10mm socket in the floorboards.

    Decoding the Symptoms of a Bad Clutch

    Decoding the Symptoms of a Bad Clutch.

    Before you start turning bolts, you need to be sure you’re actually dealing with a setup issue and not a part that’s just plain dead. One of the biggest giveaways is a shifting clutch engagement point that feels way too high or too low. If you’re having to floor it just to get the gear to bite, or if it’s grabbing the second you touch the pedal, your linkage is likely out of whack. I’ve seen plenty of guys rush into a full replacement when all they really needed was a simple tweak to the tension.

    Keep an eye (and an ear) out for other symptoms of bad clutch behavior, like a pedal that feels spongy or doesn’t spring back up like it should. If you have a newer car, that mushy feeling usually points toward a leak in the hydraulic clutch master cylinder rather than a simple mechanical slack issue. If it’s an older tuner with a physical cable, you’ll notice the pedal feels inconsistent. Don’t just ignore the warning signs; catching a minor adjustment early can save you from a massive repair bill down the road.

    Finding Your Perfect Clutch Engagement Point

    Finding Your Perfect Clutch Engagement Point.

    Once you’ve finished the actual mechanical work, you need to figure out exactly where that bite point sits. It’s not just about whether the car moves; it’s about how it feels when you’re actually driving. If you find that you have to ride the pedal halfway up before the power kicks in, you’re probably dealing with too much clutch pedal free play. I always tell people to test this in a controlled environment—a quiet side street is perfect. You want that engagement to happen in a predictable, consistent window so you aren’t constantly guessing when the gears are going to catch.

    If you’re working on an older rig, you’re likely adjusting clutch cable tension to get this right, which is a bit of a trial-and-error game. If you’ve got a newer setup, you might be looking at a hydraulic clutch master cylinder, where things get a little more complicated because you’re dealing with fluid pressure rather than just physical slack. Either way, the goal is the same: smooth, predictable transitions. If it feels jumpy or “grabby,” you haven’t hit the sweet spot yet. Grab a coffee, take a breath, and tweak it until it feels natural.

    Pro Tips to Keep Your Clutch from Acting Up

    • Don’t go overboard with the adjustment; if you tighten it too much, you’ll end up riding the clutch without even realizing it, which is a fast track to burning out your pressure plate.
    • Keep your workspace clean, seriously. I can’t tell you how many times I’ve lost a tiny adjustment screw in a pile of greasy rags or floor mats. Use that magnetic tray I’m always talking about.
    • Check your hydraulic fluid levels while you’re at it. Sometimes what feels like a mechanical adjustment issue is actually just a low reservoir or some air trapped in the lines.
    • Listen to the car. If you adjust it and start hearing a new grinding noise or a weird shudder when you pull away, back off the tension immediately—you’ve gone too far.
    • Treat the pedal with some respect. Once you’ve got the engagement point dialed in, stop “stabbing” the clutch at red lights; a smooth release goes a long way in making a DIY adjustment actually last.

    The Bottom Line on Your Clutch

    Don’t let a mushy pedal scare you; most of the time, a quick adjustment is all it takes to get that crisp engagement back without dropping hundreds at a shop.

    Trust your gut—if the pedal feels weird or you’re smelling something burnt, stop messing around and actually look at the hardware before you turn a small fix into a total transmission nightmare.

    Grab the right tools and take your time; rushing a clutch adjustment is the fastest way to strip a bolt or mess up your cable, and nobody has time for that.

    ## The Truth About That Feeling

    “A clutch that’s fighting you isn’t a death sentence for your car; usually, it’s just a sign that it’s lost its rhythm. You don’t need a master tech to find it again—just a steady hand and the patience to dial it back in.”

    Nikolai·Osterman

    Getting It Right

    Getting It Right: Adjusting car clutch.

    Look, adjusting your clutch isn’t some high-level engineering feat, but you can’t afford to be sloppy with it. We went over how to spot those early warning signs like slipping or a pedal that feels like it’s stuck in mud, and we walked through the actual process of dialing in that engagement point. If you’ve followed these steps, you should notice the pedal feeling more consistent and the gear shifts feeling a lot more natural. Just remember to double-check your work before you head out on the highway; you want to make sure that tension is exactly where it needs to be so you aren’t constantly fighting the gearbox every time you hit a stoplight.

    At the end of the day, my goal is to make sure you feel confident when you’re staring down an open hood. Most shops will try to tell you that a weird pedal feel means you need a whole new assembly, but more often than not, it’s just a matter of taking control of your own maintenance. Don’t let the fear of a little grease or a heavy wrench keep you from understanding your own machine. Grab your tools, trust your hands, and keep that car running on your terms. You’ve got this.

    Frequently Asked Questions

    If I adjust the clutch and it still feels like it's slipping, does that mean the pressure plate is shot?

    Look, if you’ve dialed in the adjustment and it’s still slipping, yeah, you’re likely looking at a hardware problem. If the pedal feels fine but the RPMs jump without the car actually speeding up, your pressure plate or the clutch disc itself is probably toast. You can’t adjust your way out of worn-down friction material. It’s frustrating, I know, but at that point, it’s time to stop tweaking and start replacing.

    Can I mess things up if I over-tighten the adjustment screw, or is there a specific limit I should watch out for?

    Yeah, you definitely can mess things up. If you crank that screw down too tight, you’re basically putting constant pressure on the release bearing. That’s a fast track to premature wear or even a total failure of the throw-out bearing. It’s not like a bolt where you just “tighten it until it stops”; you’re looking for a specific feel. Just go slow. If you feel heavy resistance, back it off a hair. Don’t force it.

    How often should I actually be checking this, or is it a "only when it feels weird" kind of thing?

    Honestly? It’s mostly a “only when it feels weird” kind of thing. Your car talks to you; you just have to listen. If the pedal starts feeling mushy, or you notice you’re having to push it almost to the floor to get into gear, that’s your signal. Don’t wait for it to fail completely on the highway. Just keep an eye on the pedal travel during your regular oil changes. If it changes, check it.