Blog

  • Testing Car Electrical Systems With a Multimeter

    Testing Car Electrical Systems With a Multimeter

    I remember sitting on my dad’s oil-stained garage floor when I was twelve, staring at a dead battery and feeling completely helpless. I thought I needed a whole new electrical system or a massive loan to fix it, but all I really needed was to understand how to use a multimeter. Most shops will try to tell you that an electrical issue means you need a whole new ECU or a massive wiring harness overhaul, charging you hundreds just to “diagnose” it. That’s a load of crap. Usually, it’s just a single bad ground or a blown fuse that you could have found in five minutes if you weren’t guessing in the dark.

    I’m not here to give you some textbook lecture on electrical engineering or sell you on a thousand-dollar piece of gear you’ll never use. My goal is to show you how to grab a decent multimeter, poke around the sensors and wires, and actually see what’s happening with your power supply. I’ll give you the straight truth on what to test and how to read the numbers, so you can stop getting ripped off and start trusting your own hands.

    Table of Contents

    Digital Multimeter vs Analog Choosing Your Real Tool

    Digital Multimeter vs Analog Choosing Your Real Tool

    When you’re staring at a wall of tools at the shop, you’ll see these two types of testers, and honestly, it can get confusing. The old-school analog versions use a needle that swings across a scale. Some veteran techs swear by them because they’re great for watching slow, steady fluctuations in voltage, but for most of us, they’re just a headache to read accurately. If you aren’t precise with your eyes, you’ll misread the scale and end up chasing a ghost in your wiring.

    For anyone starting out or just trying to get through a weekend project without losing their mind, go with a digital one. When you’re deep into automotive electrical troubleshooting, you need numbers you can actually trust. A digital display gives you a clear, steady reading, which makes tasks like continuity testing basics a whole lot easier. You aren’t guessing if that needle is on the 5 or the 10; you just see the exact decimal point. It’s more reliable, harder to mess up, and frankly, it’s just more efficient when you’re trying to find a short in a harness.

    Measuring Ac vs Dc Voltage Without Wasting Time

    Measuring Ac vs Dc Voltage Without Wasting Time

    This is where most people get stuck and end up blowing a fuse or, worse, damaging their meter. In a car, almost everything you’re touching—the battery, the starter, the fuel pump—runs on DC (Direct Current). If you leave your dial set to AC while poking at the battery terminals, you aren’t going to get a useful reading, and you’re just wasting your time. When you’re deep into automotive electrical troubleshooting, you need to be certain that your dial is pointed toward that straight line symbol.

    Now, don’t get confused; you will encounter AC (Alternating Current) if you start testing things like the actual wall outlets in your garage or certain specialized inverter systems. The key is to switch your settings to the wavy line icon for AC. I’ve seen guys struggle for an hour thinking a component was dead, only to realize they were just on the wrong setting. Mastering measuring AC vs DC voltage is basically the “don’t trip over your own feet” rule of electrical work. Get the setting right first, then start probing.

    Pro Tips to Keep You From Blowing a Fuse (Literally)

    • Always check your leads before you start poking around; if the insulation is cracked or the metal tips are corroded, you’re going to get garbage readings or, worse, a nasty shock.
    • Don’t just trust the first number you see—car electrical systems can be noisy, so take a few readings over a minute to make sure the voltage isn’t just jumping around.
    • If you’re testing a battery, make sure the car is off and everything is shut down; trying to test a live system while the alternator is cranking will just confuse your meter and your brain.
    • Keep your probes clean of grease and oil, especially when working in a shop like mine; a layer of gunk on the tip acts like an insulator and’ll make you think a circuit is dead when it’s actually fine.
    • Learn to read your continuity setting properly—it’s the fastest way to find a broken wire in a harness, but don’t use it on a live circuit unless you want to see your meter go up in smoke.

    The Bottom Line: Don't Fly Blind

    Stick with a digital multimeter; analog tools are cool for nostalgia, but you need the precision and ease of a digital readout when you’re chasing a ghost in a wiring harness.

    Always double-check your settings—switching between AC and DC by mistake is the fastest way to get a junk reading or, worse, blow a fuse in your meter.

    Stop guessing which part is dead; use your meter to isolate the problem to a specific fuse, wire, or sensor so you aren’t throwing money at parts you don’t actually need.

    ## Stop Guessing, Start Testing

    “Look, you can spend three hours staring at a wiring harness praying for a miracle, or you can spend five minutes with a multimeter and actually see where the juice is stopping. Don’t let a mechanic charge you a hundred bucks just to tell you a fuse is blown—trust the numbers, not your gut.”

    Nikolai·Osterman

    Stop Guessing and Start Testing

    Stop Guessing and Start Testing with meters.

    Look, we’ve covered a lot of ground here. We talked about why you’re probably better off sticking with a solid digital multimeter instead of messing around with those old analog needles, and we broke down the difference between AC and DC so you don’t end up blowing a fuse—or worse, your meter. At the end of the day, whether you’re chasing a parasitic drain that’s killing your battery overnight or trying to see if a sensor is actually sending a signal, the goal is the same: get accurate data. Don’t just swap parts blindly hoping the car starts; use your meter to actually see what’s happening in the circuit.

    I know it can feel a bit intimidating when you’re staring at a mess of wires and a screen full of numbers, but I promise you, it gets easier. Every time you use your multimeter to solve a mystery, you’re getting one step closer to being the person who knows their stuff. You don’t need to be a master electrical engineer to keep your ride on the road; you just need the right tool and the guts to use it. So, grab your meter, keep that patience high, and stop letting the mystery under the hood get the better of you. You’ve got this.

    Frequently Asked Questions

    Do I really need a high-end multimeter, or can I just get a cheap one from a hardware store to start?

    Look, I get it. You don’t want to drop a hundred bucks on a tool you might only use twice. If you’re just checking if a battery is dead or a fuse is blown, a cheap hardware store meter will get the job done. But if you’re digging into sensitive sensors or ECU wiring, those cheap ones can be wildly inaccurate. Grab something mid-range with a decent auto-ranging feature—it’ll save you more headaches than it costs.

    How do I know if I'm actually getting a reading or if my probes are just making bad contact with a corroded wire?

    That’s the million-dollar question. If your reading is jumping all over the place, you’re likely fighting corrosion. First, check your probe tips; if they look dull or crusty, clean them. Next, try scraping the wire insulation back a bit to hit fresh copper. If you’re still unsure, use a jumper wire to bypass the suspected bad connection. If the reading stabilizes, you’ve found your culprit. Don’t trust a floating number.

    Can I use a multimeter to find a parasitic drain that's killing my battery overnight?

    Yeah, you definitely can, and honestly, it’s way better than just buying a new battery every month. If your car’s sitting dead in the morning, you’ve likely got a parasitic drain—something’s staying awake when it should be sleeping. Set your meter to Amps, pull a fuse to isolate circuits, and see what’s pulling juice. It takes a little patience, but it’ll save you a massive headache (and a tow truck).

  • Replacing Your Serpentine Belt

    Replacing Your Serpentine Belt

    I still remember the sound of my dad’s old sedan screaming at me on a Tuesday afternoon—that high-pitched, rhythmic squeal that tells you something is definitely wrong. I was ten, sitting in the driveway, watching him wipe grease off his forehead while he explained that a tiny piece of rubber was about to leave us stranded. Most shops will see that squeal and immediately try to sell you a whole new tensioner assembly or some overpriced service package, but honestly? A lot of the time, a simple belt replacement is all you actually need to get back on the road.

    I’m not here to give you some textbook lecture or a list of parts you don’t need. I’ve spent enough hours hunched over engine bays to know that the real trick isn’t just having the part, it’s knowing exactly where to put the tension so you don’t strip a bolt or snap a pulley. I’m going to walk you through this process with the same straight-up honesty I’d use if we were working in my own garage. We’ll get your car quiet and reliable again without you having to hand over a week’s worth of pay to a mechanic.

    Table of Contents

    The Real Signs of a Worn Timing Belt

    The Real Signs of a Worn Timing Belt

    Look, you aren’t going to see a little warning light pop up on your dash specifically saying “your timing belt is about to snap.” It’s usually much more subtle than that. If you start hearing a rhythmic slapping or squealing sound coming from the front of the engine, pay attention. That’s a classic one of those engine belt symptoms that people usually ignore until it’s too late. Sometimes it’s just a loose tensioner, but if that sound is accompanied by a weird vibration through the steering wheel, your belt might be fraying internally.

    Another thing to watch for is the physical condition when you actually pop the plastic covers off. If you see any heavy cracking along the ribbed side or if the belt looks “glazed”—meaning it’s got a shiny, smooth, burnt appearance—it’s toast. Don’t wait for it to shred. One of my biggest automotive belt maintenance tips is to never trust a belt that looks even slightly weathered. If you catch these signs of a worn timing belt early, you’re looking at a simple job. If you wait until it snaps while you’re driving, you’re looking at a massive repair bill for a ruined engine.

    Mastering Alternator Belt Troubleshooting at Home

    Mastering Alternator Belt Troubleshooting at Home.

    Before you go throwing money at a shop, you need to know how to actually diagnose the issue. Most people hear a squeal and assume the whole system is shot, but half the time, it’s just a loose or glazed alternator belt. Start by doing a visual inspection while the engine is off. Look for glazing—that’s when the underside of the belt looks shiny or smooth like glass. That usually means it’s slipping and losing its grip. If you see cracks or fraying along the ribs, you’re looking at clear engine belt symptoms that mean it’s time to pull the old one.

    If the belt looks fine but you still hear that high-pitched chirping, the problem might not be the rubber itself. Check your tensioner. If the tensioner is bouncing wildly or feels loose when you apply pressure, you’re looking at belt tensioner replacement signs. A weak tensioner won’t keep enough pressure on the belt, leading to slips that mimic a worn-out part. Don’t just swap the belt and call it a day; make sure the hardware holding it in place is actually doing its job.

    Pro Tips to Keep You From Screwing Up the Job

    • Double-check your belt length before you even touch a wrench; nothing kills a Saturday faster than pulling an old, snapped belt off only to realize your new one is two inches too short.
    • Keep your hands clear of the pulleys while you’re tensioning—I know it sounds obvious, but when you’re focused on getting that tension just right, it’s easy to get careless.
    • Use a dedicated tensioner tool instead of trying to muscle it with a standard breaker bar; you want controlled pressure, not a sudden snap that sends your tool flying into the engine bay.
    • While you’ve got the belt off, take a second to inspect the idler pulleys for any wobbling or grinding noises; if they feel sketchy, just swap them now so you don’t have to do this whole job again in a month.
    • Grab my magnetic parts tray before you start; you’ll be dealing with small bolts and clips, and the last thing you want is to be hunting for a dropped 10mm in a puddle of oil.

    The Bottom Line: Don't Wait for the Snap

    If you hear a high-pitched squeal or see cracks in the belt, don’t ignore it; that’s your car telling you it’s about to quit on you.

    Check your manual for the specific replacement interval so you can swap it out on your own terms instead of paying a shop for an emergency tow.

    You don’t need a professional garage to do this—just grab your basic socket set, a tensioner tool, and a bit of patience to save yourself a massive repair bill.

    ## The Cost of Waiting

    “A snapped belt is a lot cheaper to fix on a Saturday afternoon in your driveway than it is to fix when it turns your engine into a pile of expensive scrap metal on the side of the highway.”

    Nikolai·Osterman

    Don't Let a Simple Belt Break Your Bank

    Don't Let a Simple Belt Break Your Bank

    Look, replacing a belt isn’t some high-level engineering feat; it’s just about being proactive. We’ve covered how to spot those telltale cracks in your timing belt and how to diagnose a squealing alternator belt before it actually snaps on the highway. If you’ve been listening to those weird noises or noticed your battery light flickering, you already know the clock is ticking. The goal here was to show you that identifying the problem is half the battle. Once you know exactly what’s failing, you can grab your tools, get that magnetic tray ready, and swap it out yourself instead of sitting in a greasy waiting room for three hours while a shop charges you triple for labor.

    At the end of the day, keeping your car on the road shouldn’t feel like a mystery designed to drain your wallet. Every time you pick up a wrench and fix something yourself, you’re taking back control from the big shops. It might be a little messy, and you might get some grease on your favorite hoodie, but that’s just part of the process. Stop being intimidated by your own engine. You’ve got the knowledge now, so just take it one bolt at a time and trust your hands. You’re more capable than you think.

    Frequently Asked Questions

    How do I know if it's just a squeaky belt or if the actual tensioner is shot?

    If it’s just a high-pitched squeal when you first start the car, it’s usually just a glazed or loose belt. But if you hear a constant rhythmic chirping or a heavy rattling, that’s your tensioner screaming for help. A quick trick? With the engine running, watch the tensioner. If it’s bouncing or vibrating like it’s possessed, the internal spring is shot. Don’t ignore that chatter; a failed tensioner will shred your belt in minutes.

    Can I get away with just replacing the belt, or do I really need to swap out the pulleys and tensioner too?

    Look, I’ve seen guys try to cut corners by just slapping a new belt on an old, shaky tensioner, and it never ends well. If your tensioner is shot or the pulleys are making that high-pitched chirping sound, a new belt won’t fix the underlying issue. You’ll just be back under the hood in a month. Do it right the first time: swap the whole kit. It saves you a massive headache later.

    Is there a specific way to check the belt tension without accidentally snapping it or leaving it too loose?

    Look, you don’t want to go ham on it. Use your thumb to press down on the longest span of the belt—usually the middle. You’re looking for maybe half an inch of “give.” If it feels like a guitar string, it’s too tight and you’re gonna wreck your bearings; if it flops around like a wet noodle, it’s too loose. Just steady pressure, don’t yank it, or you’ll end up with a snapped belt and a bad day.

  • Troubleshooting and Repairing a Manual Clutch

    Troubleshooting and Repairing a Manual Clutch

    I remember sitting on my dad’s oil-stained concrete floor when I was twelve, watching him stare down a slipping transmission like it was a personal insult. He wasn’t a master mechanic with a fancy degree; he just had a set of wrenches and a refusal to let a machine win. Most shops will see you coming a mile away and try to quote you three grand for a “total system overhaul” the second they hear your pedal feels spongy. But here’s the truth: a lot of what they call complex clutch repair is really just about knowing which bolt is fighting you and having the grit to stay under the car until it’s done.

    I’m not here to give you some textbook lecture or sell you on expensive, specialized diagnostic software you’ll never use. My goal is to walk you through the actual, greasy reality of doing the work yourself. I’m going to show you how to identify the real culprits—whether it’s a worn pressure plate or a failing slave cylinder—and how to tackle the clutch repair process without losing your mind or your entire savings account.

    Table of Contents

    Spotting Worn Clutch Disc Signs Before They Fail

    Spotting Worn Clutch Disc Signs Before They Fail

    You don’t have to wait for your car to leave you stranded on the shoulder of the highway to know something is wrong. Usually, your car will start giving you little warnings long before the pedal hits the floor. One of the most obvious worn clutch disc signs is that “slipping” feeling. If you’re cruising at a steady speed and you step on the gas, but the engine RPMs jump up without the car actually accelerating faster, your clutch is struggling to grip. It’s basically like trying to run on ice; all that power is being wasted because the friction material is too thin to do its job.

    Another thing to watch for is how the pedal feels under your foot. If you’re noticing weird clutch engagement issues, like the biting point suddenly moving way up toward the top of the pedal travel, that’s a massive red flag. You might also catch a distinct burning smell—sort of like burnt toast or old brake pads—whenever you’re sitting in stop-and-go traffic. Don’t ignore that scent. It’s your car’s way of telling you that the friction material is literally cooking itself.

    Solving Common Clutch Engagement Issues Yourself

    Solving Common Clutch Engagement Issues Yourself

    If your pedal feels spongy or won’t stay in gear, don’t immediately assume you need a whole new kit. A lot of the time, you’re actually looking at clutch hydraulic system troubleshooting rather than a mechanical failure of the disc itself. Check your master and slave cylinders for leaks first. If there’s fluid weeping around the seals, that’s your culprit. Sometimes, all it takes is a simple bleed to get the air out of the lines and restore that firm, responsive feel you’re looking for.

    On the other hand, if the pedal is sticking or feels incredibly heavy, you might be dealing with a cable issue or a failing pressure plate. I’ve seen plenty of people panic thinking they need a massive automotive drivetrain repair job when they really just had a frayed adjustment cable. Take a second to inspect the linkage and ensure everything is moving freely without grit or old, dried-up grease holding it back. It’s usually just a matter of cleaning things up and getting the tension back to where it belongs.

    Pro Tips to Save Your Clutch (and Your Wallet)

    • Don’t ride the pedal. I see people do this all the time—just resting their foot on the clutch pedal while they drive. It creates constant friction that wears down the disc way faster than it should. Keep your foot off unless you’re actually shifting.
    • Invest in a decent torque wrench. When you’re bolting that pressure plate back down, “eyeballing it” is a recipe for disaster. If you don’t tighten those bolts evenly and to the right spec, you’re going to end up with a warped plate and a massive headache.
    • Always replace the throw-out bearing while you’re in there. If you’ve already gone through the trouble of pulling the transmission to get to the clutch, don’t be cheap. That bearing is usually cheap, and if it fails in six months, you’re paying for the same labor all over again.
    • Clean your surfaces properly. Before you drop the new disc in, make sure the flywheel and pressure plate are spotless. Any leftover oil or old residue will cause the new clutch to slip immediately, and you’ll be right back where you started.
    • Check your hydraulic fluid levels. Sometimes it’s not even the clutch itself that’s the problem; it’s a leak in the master or slave cylinder. Before you tear the whole thing apart, check your fluid and look for air bubbles in the line. It might save you hours of unnecessary work.

    Don't Let a Clutch Job Break Your Bank

    Pay attention to those early warning signs like slipping or a spongy pedal; catching a worn disc early can save you from a much more expensive repair down the line.

    Most engagement issues are just simple fixes involving your linkage or hydraulics, so don’t let a shop talk you into a full replacement before you’ve checked the basics.

    You don’t need a master technician’s certification to swap a clutch—just get the right socket set, clear your schedule, and take it one bolt at a time.

    ## The Truth About the Clutch

    Most shops will tell you a slipping clutch is a death sentence for your wallet, but honestly? It’s just a matter of getting the right jack stands, a decent socket set, and not letting the fear of a greasy mess stop you from doing it yourself.

    Nikolai·Osterman

    Don't Let the Shop Fleece You

    Don't Let the Shop Fleece You.

    Look, fixing a clutch isn’t some impossible feat reserved for master techs with specialized degrees. We’ve covered how to listen for those telltale slipping sounds, how to identify a worn disc before you’re stranded on the shoulder, and how to troubleshoot engagement issues that usually just require a bit of adjustment. If you can recognize the symptoms early and keep a basic set of sockets within reach, you’re already ahead of most drivers. The goal is to catch these problems while they’re still manageable so you aren’t facing a massive, unexpected repair bill when your car finally decides to quit on you.

    At the end of the day, my goal is to make sure you feel confident when you pop that hood. It’s easy to get intimidated by the complexity of modern drivetrains, but most of the time, it really just comes down to having the right tool and a little bit of patience. Don’t let a mechanic convince you that a simple repair is a total nightmare just to pad their invoice. Grab your magnetic tray, get under the car, and take control of your own ride. You’ve got this.

    Frequently Asked Questions

    Do I really need to replace the entire clutch assembly, or can I just swap out the disc and pressure plate?

    Look, I get the temptation to just swap the disc and pressure plate to save some cash, but honestly? It’s usually a trap. If you’ve already gone through the massive headache of pulling the transmission, you might as well do it right. Replacing the whole assembly—including the throw-out bearing and flywheel resurfacing—means you won’t be back under the car in six months. Don’t do the same job twice. Just do the whole kit.

    How do I know if my slave cylinder is the actual problem instead of the clutch itself?

    Look, don’t go dropping hundreds on a whole clutch kit just yet. If your pedal feels spongy or stays stuck to the floor, it’s usually hydraulic, not mechanical. Check your slave cylinder first. If you see fluid leaking around the seal or the pedal feels “mushy” without any slipping, that’s a dead giveaway. I always check the fluid level in the reservoir first—if it’s low, you’ve got a leak, and that’s your culprit.

    Is it worth trying to fix a slipping clutch, or am I just wasting my time and money?

    Look, I’ll be straight with you: if the clutch is slipping, the friction material is toast. You can’t “fix” a worn disc with a spray can or a quick adjustment; you have to replace it. Is it worth it? Absolutely. Replacing the assembly yourself saves you hundreds in labor costs. If you’ve got the tools and a jack, don’t waste money on a shop just to have them tell you what I’m telling you.

  • Steps for a Basic Oil Change

    Steps for a Basic Oil Change

    I was sitting in my dad’s garage last Saturday, watching him wipe grease off a 90s Silvia, when I realized something that still bugs me today: most shops charge you a massive markup just for something you can do in your own driveway. They try to make it sound like some high-level science, but honestly, a lot of these “professional” service centers are just banking on you being too intimidated to get your hands dirty. If you’re looking for a complicated, technical manual, you’re in the wrong place, but if you want a real oil change guide that actually respects your time and your wallet, I’ve got you covered.

    I’m not here to sell you on fancy, overpriced synthetic blends you don’t need or tell you that you need a lift to get the job done. My goal is to walk you through the actual process—from picking the right filter to making sure you don’t leave a puddle on your floor—using nothing but basic tools and a bit of patience. This is the no-nonsense truth about keeping your engine healthy without letting a service advisor talk you into a hundred-dollar “maintenance package” you never asked for.
    Table of Contents

    Guide Overview

    Total Time: 30-60 minutes
    Estimated Cost: $30-70
    Difficulty: Beginner

    Tools & Supplies

    • Socket wrench set for drain plug
    • Oil filter wrench for removal
    • Oil drain pan to catch old fluid
    • Funnel to prevent spills
    • Jack and jack stands for vehicle lifting
    • Motor oil (check manual for quantity and grade)
    • New oil filter (vehicle specific)
    • Drain plug washer/gasket (if replacement is needed)
    • Rags or paper towels for cleanup

    Step-by-Step Instructions

    • 1. First things first, grab your oil and a new filter, and get them ready before you even touch a wrench. You don’t want to be halfway through the job, covered in sludge, only to realize you forgot the specific oil weight your owner’s manual calls for. Check the cap under your hood to be sure; putting the wrong viscosity in can mess with your sensors later on.
    • 2. Pop the hood and let the engine run for maybe two or three minutes. You don’t want it screaming hot—that’s a quick way to get a serious burn—but you want the oil warm enough to flow out easily. If the engine is stone cold, the old gunk is going to be thick and slow, making a mess of your driveway.
    • 3. Get your car up on jack stands or a ramp. Never, and I mean never, trust just a hydraulic jack to hold you up while you’re underneath a heavy piece of machinery. Once you’re settled, find the oil pan and position your drain pan directly underneath the plug. If you don’t line it up right, you’re going to be cleaning black sludge off your garage floor for the next hour.
    • 4. Unscrew the drain plug using your socket wrench. As soon as it gets loose, finish it by hand, but be ready for the flow. Once the stream slows down to a tiny drip, wipe the plug clean and check the washer. If it looks crushed or nasty, swap it out for a new one so you don’t end up with a slow leak down the road.
    • 5. Now, tackle the old filter. Position your drain pan under it because, trust me, oil is going to spill out the second you break that seal. Use an oil filter wrench if it’s stuck, but once it’s off, take a clean rag and wipe the mounting surface on the engine. You want that area to be completely spotless before you try to seat the new one.
    • 6. Before you screw the new filter on, dip your finger in some fresh oil and smear it around the rubber gasket. This is a pro tip that most beginners skip, but it’s the best way to prevent the gasket from binding or tearing when you tighten it down. Thread the new filter on by hand until it’s snug, then give it just one more little nudge. Don’t over-tighten it like you’re trying to win a wrestling match.
    • 7. Screw that drain plug back in tight, grab your new oil, and start pouring. Use a funnel to keep things clean—nobody likes oil dripping down the side of the engine block. Once you’ve filled it to the correct level, start the car, let it idle for a minute to circulate everything, and then check the dipstick one last time to make sure you’re in the sweet spot.

    The Essential Oil Change Tools Checklist for Real Work

    The Essential Oil Change Tools Checklist for Real Work.

    Before you even crack the hood, you need to get your gear sorted. I’ve seen too many people start a job only to realize halfway through that they’re missing a specific socket or a way to catch the mess. My personal oil change tools checklist always starts with a decent jack and jack stands—never, and I mean never, trust a hydraulic jack alone while you’re under a car. You’ll also want a drain pan that’s actually big enough to catch the flow, otherwise, you’re just painting your driveway with black sludge.

    One thing that trips up most beginners is the drain plug wrench size. Don’t just guess; check your manual beforehand so you aren’t struggling with a rounded-off bolt because you used the wrong socket. While you’re at it, grab a new crush washer if your car requires one. Also, don’t get caught in the debate of synthetic vs conventional oil without a plan; just check your owner’s manual to see what the manufacturer actually calls for. If you follow the specs, you won’t have to worry about premature engine wear.

    Synthetic vs Conventional Oil Choosing What Your Engine Deserves

    Synthetic vs Conventional Oil Choosing What Your Engine Deserves

    Look, when you’re staring at that shelf full of colorful bottles at the auto parts store, it’s easy to just grab the cheapest one and call it a day. But if you want to actually follow your automotive maintenance schedule without constant headaches, you need to understand what you’re pouring in. Conventional oil is basically the old-school standard—it works fine for older, low-mileage engines that aren’t under much stress. However, if you’re driving something modern or you push your car hard, you really should be looking at synthetic vs conventional oil more closely.

    Synthetic oil is engineered to handle extreme heat and stay stable much longer than the basic stuff. It doesn’t break down as fast, which means it keeps your engine internals cleaner for longer periods. If you’re working on a newer car with tight tolerances, synthetic is almost always the better play. It might cost a few extra bucks upfront, but it’s way cheaper than the repair bill you’ll get if your oil turns into sludge. Just make sure you still know how to check oil level regularly, regardless of which type you choose.

    Pro Tips to Keep You From Making a Mess (or a Mistake)

    • Don’t trust the manual blindly; always double-check your owner’s manual or the oil cap for the exact viscosity your engine actually needs.
    • Get the car warm before you start. A little bit of heat makes the oil flow much faster and easier when you pull that drain plug.
    • Always replace the crush washer on the drain bolt. It’s a tiny piece of metal, but if you skip it, you’re going to be dealing with a slow, annoying leak for weeks.
    • Never, and I mean never, tighten that drain plug like you’re trying to win a wrestling match. Hand-tight plus a tiny nudge with the wrench is plenty; over-tightening is how you strip threads.
    • Keep a catch pan positioned slightly under the plug before you unscrew it. Oil likes to come out faster than you expect, and nobody wants a puddle of black sludge all over their driveway.

    The Bottom Line on Your Next Oil Change

    Don’t let a shop talk you into expensive synthetic blends if your manual calls for conventional; just follow what the manufacturer says and save your money.

    Having the right tools, especially a decent oil filter wrench and a way to catch the old stuff without a mess, is the difference between a quick job and a disaster in your driveway.

    Doing this yourself isn’t just about saving cash—it’s about actually knowing what’s going on with your engine so nobody can pull a fast one on you later.

    ## The Truth About Maintenance

    Look, most shops will try to sell you a whole list of “essential” services the second you pull into the bay, but at the end of the day, an oil change isn’t some complex mystery—it’s just the most basic way to show your engine some respect. If you can handle a wrench and follow a few steps, you’re already doing more for your car than most people ever will.

    Nikolai·Osterman

    Wrapping It All Up

    Wrapping It All Up: Car Oil Maintenance

    At the end of the day, changing your oil isn’t some mysterious ritual reserved for people with expensive degrees. We’ve covered the ground: you need the right tools, you need to pick a quality oil that actually matches your engine’s specs, and most importantly, you need to follow the procedure without cutting corners. Whether you went with a full synthetic or stuck to a conventional blend, the goal remains the same: keeping the sludge out of your internals so your car actually lasts. It’s about taking control of your maintenance instead of just handing over your credit card and hoping for the best.

    I know it can feel intimidating when you’re staring down at a greasy drain plug for the first time, but honestly, the first time is always the hardest. Once you’ve got the rhythm down, it becomes just another Saturday morning task. Don’t let the fear of making a mess stop you from learning something useful. Every time you get under that chassis, you’re building a connection with your machine and saving yourself a massive headache down the road. Grab your wrench, keep that magnetic tray handy, and just get to work. You’ve totally got this.

    Frequently Asked Questions

    How do I know if I'm actually stripping the drain plug bolt when I'm tightening it?

    You’ll know something’s wrong if the bolt feels “mushy.” If you’re turning the wrench and there’s zero resistance—like you’re just spinning it in butter—you’ve likely stripped the threads. It’s a gut-sinking feeling, I know. Also, if the bolt feels loose even when it’s seated, or if you see metal shavings in your old oil, that’s a massive red flag. Just stop immediately. Don’t try to force it; you’ll only make the hole bigger.

    Is it actually okay to reuse the old crush washer, or am I asking for a leak?

    Look, I’ve seen guys try to get away with it, and honestly? You’re asking for a headache. That crush washer is designed to deform slightly to create a perfect, airtight seal. Once you’ve squeezed it down once, it’s done. If you try to reuse it, you’re basically gambling on a slow drip that’ll eventually coat your driveway in oil. Grab a new one—they cost pennies and save you a massive mess.

    What’s the best way to clean up the spilled oil so I don't ruin my driveway?

    Look, nothing kills the vibe of a successful DIY job like seeing a dark stain creeping across your driveway. If you spill, don’t just spray it with a hose—that just spreads the mess. Grab some kitty litter or even sawdust and dump it thick over the puddle. Let it sit for a bit to soak up the liquid, then sweep it up. If there’s a stubborn stain left, a little dish soap and a stiff brush usually do the trick.

  • How to Flush Your Engine Coolant

    How to Flush Your Engine Coolant

    I saw a guy at the shop last week getting quoted three hundred bucks just to swap out some old, murky fluid, and honestly, it made my blood boil. Most mechanics will act like a coolant flush procedure is some high-level surgical operation that requires a master technician and a specialized machine, but that’s just a line item on an invoice designed to pad their margins. The truth is, your cooling system isn’t a mystery box; it’s just a loop of hoses and a radiator that needs a little cleaning to keep your engine from melting down.

    I’m not here to give you some textbook lecture or a list of expensive shop tools you’ll never use again. I’m going to walk you through the real-world way to do this in your own driveway using basic gear and a bit of patience. We’ll cover exactly how to drain the old gunk, how to make sure you aren’t leaving any sludge behind, and how to refill it without trapping any air in the system. By the time we’re done, you’ll have the confidence to keep your own car running without handing over your paycheck to a service writer.

    Table of Contents

    Guide Overview

    Total Time: 1-2 hours
    Estimated Cost: $30-60
    Difficulty: Beginner

    Tools & Supplies

    • Drain pan to catch old fluid
    • Pliers for hose clamps
    • Funnel to prevent spills
    • Gloves and safety glasses for protection
    • New engine coolant (check manual for type)
    • Distilled water (if mixing concentrate)
    • Rags for cleaning spills

    Step-by-Step Instructions

    • 1. First things first, make sure your engine is completely cold. I can’t stress this enough—trying to open a radiator cap on a hot engine is a one-way ticket to a trip to the ER with a face full of boiling liquid. Once you’re sure it’s cool, grab your drain pan and slide it under the radiator drain plug (the petcock).
    • 2. Locate the petcock at the bottom of the radiator and slowly turn it to let the old, nasty coolant drain out. If your car is older and the plastic plug feels like it’s going to snap, don’t force it; just be gentle. Let it run until it’s nothing but a slow drip, then tighten that plug back up so you don’t end up with a massive leak later.
    • 3. Now you need to get the old stuff out of the engine block itself. Most people skip this and wonder why their coolant still looks murky, but you should find the heater hose connections and give them a quick disconnect to let the remaining fluid drain. It’s a bit messy, so keep that drain pan positioned perfectly before you start loosening the clamps.
    • 4. Time to flush the system with fresh water. Pour some distilled water into the radiator until it’s full, then start the car and turn your heater on to the highest setting. This helps the water circulate through the heater core to flush out any leftover gunk. Let it run for a few minutes, shut it off, and drain it all out again. Repeat this until the water coming out looks completely clear.
    • 5. Once you’ve got clean water draining out, it’s time to actually fill it up. Grab your new coolant—make sure it’s the right type for your specific make and model—and start pouring it into the radiator. I always prefer using a pre-mixed 50/50 blend because it takes the guesswork out of the ratio, and you don’t have to worry about messing up the concentration.
    • 6. Fill the radiator and the overflow reservoir to the “max” line, then replace the cap. Start the engine and let it run for a bit while you keep a close eye on the temperature gauge. You’ll likely see the level in the reservoir drop as air bubbles escape the system; if that happens, just top it off again until the level stabilizes.
    • 7. The last thing you need to do is a final check for leaks. Grab a flashlight and look around the radiator, hoses, and that drain plug you tightened earlier. If everything looks dry and the temperature stays steady, you’re officially done. You just saved yourself a hundred bucks in shop labor.

    The Truth About Cooling System Maintenance and Engine Health

    The Truth About Cooling System Maintenance and Engine Health.

    Look, most people think the coolant is just there to keep the engine from melting, but it’s doing way more than that. Over time, that fluid breaks down and stops protecting your internals from corrosion and scale buildup. If you ignore basic cooling system maintenance, you’re basically asking for a massive repair bill down the road. I’ve seen too many guys ignore a slightly discolored reservoir only to end up with a blown head gasket because they thought they could skip a simple service. It’s not just about the liquid; it’s about preventing engine overheating before it becomes a catastrophic failure.

    While you’re under the hood, don’t just focus on the fluid. Do a quick radiator cap inspection to make sure the seal isn’t shot—if that cap can’t hold pressure, your boiling point drops and your temperature will spike. Also, keep an ear out for any weird whining or grinding sounds near the belt line; that’s usually a sign of declining water pump health. Taking ten minutes to check these small things can save you thousands in parts and labor later.

    How to Drain and Refill Coolant Without the Mechanics Markup

    How to Drain and Refill Coolant Without the Mechanics Markup

    Look, the biggest way shops pad your bill is by charging two hours of labor for something that’s basically just a glorified oil change. When you’re doing the drain and refill coolant yourself, the secret is in the preparation. Don’t just dump the old stuff and call it a day; make sure you’re checking your radiator cap inspection while the system is empty. If that seal is shot, your new fluid won’t mean a thing because you’ll be losing pressure and fighting engine temperature regulation issues within a week.

    Another thing I see people mess up constantly is the chemistry. You can’t just grab whatever cheap jug is on sale at the gas station. You have to respect the coolant mixing ratio specified in your owner’s manual—usually a 50/50 split of distilled water and concentrate. If you go too heavy on the water, you’re asking for corrosion; too much concentrate, and you’re not getting the heat transfer you need. Getting this right is the easiest way to handle cooling system maintenance without handing your paycheck over to a service advisor.

    Pro Tips to Keep You from Making a Mess (or Killing Your Engine)

    • Never, and I mean never, open that radiator cap while the engine is hot. I’ve seen guys try to rush it and end up with a face full of boiling coolant. It’s not worth the scar tissue; let the car cool down completely first.
    • Don’t just guess on the coolant type. Check your owner’s manual or the cap itself. Mixing different types of coolant—like an old-school green with a modern OAT—can turn into a weird, sludge-like mess that clogs your heater core.
    • Get a dedicated drain pan that actually fits under your car. There’s nothing more frustrating than trying to catch a slow drip with a shallow pan and ending up with a greasy puddle all over your driveway.
    • When you’re refilling, don’t just dump it in and call it a day. You need to “burp” the system. Run the engine with the cap off and the heater on high to let those air pockets escape, otherwise, you’ll deal with overheating issues almost immediately.
    • Keep an eye on your temperature gauge for the first few drives after the flush. If it starts creeping up higher than usual, you probably still have an air pocket trapped in the system, and you need to go back and burp it again.

    The Bottom Line on Your Cooling System

    You don’t need a fancy shop setup to do this right; just grab a drain pan, the right coolant, and a bit of patience to save yourself a massive markup.

    Don’t just swap the fluid and call it a day—make sure you’re actually flushing the old gunk out of the system so you aren’t just diluting the problem.

    Keep an eye on your temperature gauge after you’re done; catching a small air bubble early is way better than dealing with an overheated engine later.

    ## Don't Let Them Gatekeep Your Engine's Life

    “Mechanics love to act like a coolant flush is some kind of dark art that requires a specialized degree, but it’s really just about getting the old, acidic sludge out before it eats your water pump. Don’t let them charge you a three-figure markup for something you can do in your own driveway with a drain pan and twenty minutes of your time.”

    Nikolai·Osterman

    Don't Let Them Keep You in the Dark

    Don't Let Them Keep You in the Dark.

    At the end of the day, flushing your coolant isn’t some mysterious ritual reserved for guys with master certifications and expensive hydraulic lifts. You’ve learned that it’s really just about draining the old, acidic sludge out and replacing it with fresh fluid to keep those engine temps stable. Whether you’re dealing with a simple drain-and-fill or you went the extra mile to purge the radiator completely, you’ve successfully protected your cooling system from the internal corrosion that eats cars from the inside out. Just remember to keep an eye on your levels for the next few days to make sure you haven’t got any pesky air pockets trapped in the lines.

    I know it can feel intimidating when you’re staring down a steaming engine bay for the first time, but honestly, the more you do this, the more it just becomes part of the routine. Every time you grab your tools and tackle a job yourself, you’re taking back control from the shops that rely on people being too intimidated to ask questions. Don’t let anyone tell you that you’re “not a car person” just because you didn’t spend a decade in a classroom. Keep that magnetic tray handy, stay patient, and keep turning wrenches. You’ve got this.

    Frequently Asked Questions

    Can I just use regular tap water to refill the system, or am I going to mess something up?

    Look, I get the temptation to just grab the garden hose, but please don’t do that. Using tap water is a fast track to mineral buildup and scale inside your radiator, which eventually chokes your cooling flow. If you’re in a pinch, use distilled water—it’s cheap and won’t leave junk behind. But honestly? Just grab some pre-mixed 50/50 coolant. It saves you the math and keeps your internals clean. Don’t risk a head gasket over a few bucks.

    How do I know if I actually need a full flush versus just topping off the reservoir?

    Look, if you’re just low on fluid because of a tiny leak, a top-off is fine. But don’t get lazy. If your coolant looks murky, like old tea, or has oily bits floating in it, that’s your sign. Also, if you’re seeing crusty buildup around the reservoir or your temp gauge is acting twitchy, stop topping it off and just do the full flush. It’s better to spend an hour now than a grand on a blown head gasket later.

    Is it safe to do this while the engine is still warm, or am I asking for a burn?

    Look, I’m gonna be real with you: do not touch that radiator cap while the engine is hot. You’re asking for a serious burn. When the system is pressurized and hot, that coolant wants to spray everywhere like a geyser, and it’ll cook you instantly. Wait until the engine is cool to the touch. It takes longer, sure, but I’d rather wait an hour than spend a week in the ER.

  • How to Replace Engine and Cabin Air Filters

    How to Replace Engine and Cabin Air Filters

    I was working on a beat-up old sedan last week when a customer came in, looking totally stressed because the shop told him he needed a “major intake system overhaul” just to fix a sluggish engine. I almost lost it. The guy was looking at a bill for hundreds of dollars when all his car actually needed was a simple air filter replacement. It kills me how some shops try to dress up the most basic maintenance as some high-tech, expensive surgery just to pad their margins. Honestly, if your car feels like it’s gasping for breath, it’s usually not a mystery—it’s just choking on dust.

    Look, I’m not here to give you some textbook lecture or sell you on fancy additives you don’t need. I’m going to show you exactly how to handle an air filter replacement yourself, without the headache or the massive markup. I’ll walk you through what to look for, how to spot a bad one, and how to swap it out in under five minutes. You’ve got this, and I’m going to make sure you don’t get ripped off.

    Table of Contents

    Spotting the Signs of a Clogged Filter Before It Costs You

    Spotting the Signs of a Clogged Filter Before It Costs You

    You don’t always have to wait for a dashboard light to tell you something is wrong. Usually, your car will start “talking” to you through how it drives. If you notice your engine feels sluggish or you’re getting significantly worse gas mileage, it’s a huge red flag. A choked-out filter makes the engine work twice as hard just to breathe, which is a total killer for improving fuel efficiency. If you’re constantly hitting the gas just to keep up with traffic, your car is likely gasping for air.

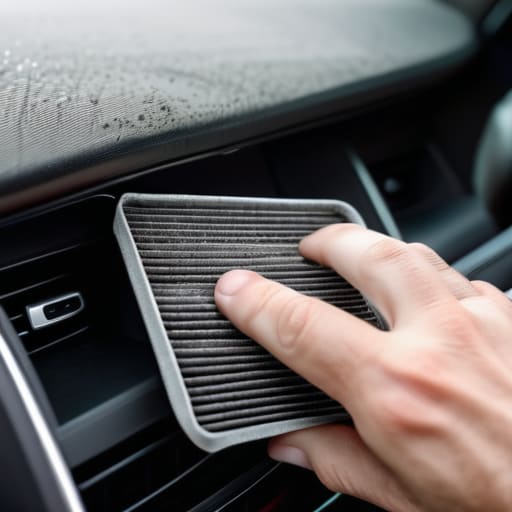
    Another thing to watch for is how your cabin feels. If you turn on the AC and it feels like a weak breeze instead of a blast, or if you start noticing a musty smell, that’s a clear sign of a clogged filter. It’s not just about the engine, though; it’s about your HVAC system performance and the air you’re actually breathing. If the vents feel weak or the air quality inside the car just feels off, don’t ignore it. Catching these small issues early keeps you from turning a cheap fix into a massive headache.

    Mastering Your Vehicle Maintenance Schedule Without a Mechanics Degree

    Mastering Your Vehicle Maintenance Schedule Without a Mechanics Degree

    Look, you don’t need a massive binder full of technical jargon to stay on top of things. Most shops try to make the vehicle maintenance schedule seem like some complex, high-stakes puzzle just to justify their labor rates. In reality, it’s mostly about rhythm. I always tell my friends to just pick a milestone—like every oil change or every six months—and make that their trigger for a quick inspection. If you can check your oil, you can definitely check a filter.

    Don’t get bogged down in the fine print of your owner’s manual, either. Just focus on the stuff that actually impacts how your car feels on the road. For example, keeping your engine breathing clean air is one of the easiest ways of improving fuel efficiency without spending a dime on fancy additives. It’s about being proactive rather than reactive. If you wait until the car is sputtering to look at your logs, you’ve already lost the battle. Just stay consistent, and you’ll find you’re saving a ton of money in the long run.

    Pro Tips to Keep Your Engine Breathing Easy

    • Don’t just eyeball it; if you see a thick layer of gray dust or debris stuck in the pleats, it’s already time for a swap.
    • Grab a can of compressed air to blow out the airbox housing before you drop the new filter in—you don’t want old grit falling onto your clean sensor.
    • Check your owner’s manual for the actual interval, but honestly, if you live somewhere dusty or near a construction site, expect to change it more often than the book says.
    • Never try to “clean” a paper filter by washing it; you’ll just ruin the fibers and end up sucking dirt straight into your intake.
    • Make sure the rubber seal on the new filter sits perfectly flush in the housing; if it’s crooked, you’re basically letting unfiltered air bypass the whole system.

    The Bottom Line on Keeping Your Engine Breathing

    Don’t wait for a dashboard light or a massive drop in MPG; if your filter looks like it’s been through a sandstorm, just swap it out.

    You don’t need a specialized toolkit for this—most cars let you pop the airbox open with just a screwdriver or even your bare hands.

    Checking your filter every few oil changes takes two minutes and can save you hundreds in fuel costs and engine wear down the road.

    The Real Cost of Cutting Corners

    “Mechanics love it when you ignore your air filter because it turns a five-minute swap into a massive bill for engine cleaning later. Don’t give them that satisfaction; just grab a new one, pop it in, and keep your money in your pocket.”

    Nikolai·Osterman

    Don't Let Them Charge You for Five Minutes of Work

    Don't Let Them Charge You for Five Minutes of Work.

    Look, at the end of the day, swapping an air filter isn’t some high-level engineering feat. We’ve covered how to spot that sluggish acceleration, how to keep track of your mileage without feeling overwhelmed, and why letting that debris build up is just throwing money out the window. It really comes down to two things: staying observant and having that one new filter sitting in your trunk when you need it. Once you realize that most of these “maintenance tasks” are just simple mechanical movements, you stop being a victim to the service advisor’s sales pitch. You’ve got the signs to watch for and the schedule to follow; now you just need to actually do the work.

    I know it can feel intimidating when you first pop that hood and see all those wires and plastic housings, but I promise you, it gets easier. Every time you grab your tools and handle a repair yourself, you’re taking back control of your ride and your wallet. Don’t let the fear of “doing it wrong” keep you stuck in a cycle of expensive shop visits. Just grab a new filter, take your time, and trust your hands. You’re more capable than any mechanic wants you to believe, and honestly, your car will probably run better for it.

    Frequently Asked Questions

    Can I just blow the dust out with some compressed air instead of buying a new one?

    Look, I get the temptation to save a few bucks, but honestly? Don’t do it. Blowing out a filter with compressed air might clear the big chunks, but it’s not going to pull the fine grit out of those microscopic pleats. You’re basically just rearranging the dirt. Plus, you risk tearing the paper, which lets debris straight into your engine. Just grab a new one; it’s cheaper than a ruined turbo or engine rebuild.

    How do I know if I need a standard paper filter or one of those reusable oiled ones?

    Look, don’t let the marketing fool you. Check your owner’s manual first—that’s your bible. If it calls for a standard paper filter, stick with it. They’re cheap and they do the job. Those reusable oiled ones can be cool for tuning, but if you over-oil them, you’ll actually gunk up your Mass Air Flow sensor, and then you’re looking at a much more expensive headache. If you’re just daily driving, paper is king.

    Is it actually worth checking the cabin air filter too, or is that just another way for shops to upcharge me?

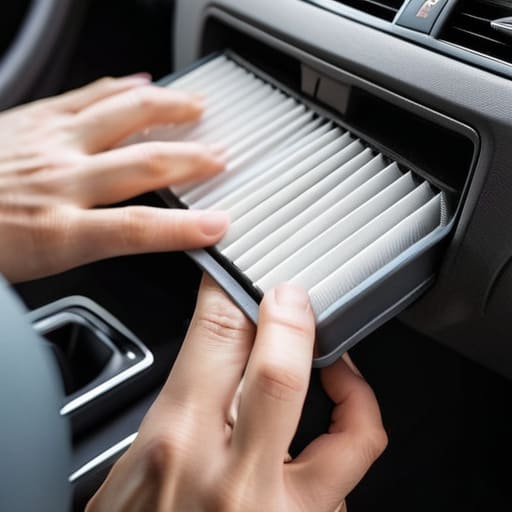
    Look, I get it—it feels like another way for shops to pad the bill. But here’s the truth: the cabin filter is actually worth your time. While the engine filter keeps the motor breathing, the cabin filter keeps you breathing. If your AC smells funky or the airflow feels weak, it’s probably clogged with dust and dead bugs. It’s usually a five-minute job behind the glovebox. Don’t pay a shop $50 for it.

  • Benefits of Using an Impact Wrench

    Benefits of Using an Impact Wrench

    I still remember the first time I tried to swap out a brake caliper on my old sedan in my dad’s garage. I spent forty-five minutes sweating, cursing, and nearly snapping a lug nut because I was trying to muscle everything with a standard breaker bar. My knuckles were shredded, and I felt like a total amateur. That was the day I realized that brute force is a lie; you don’t need bigger muscles, you just need a decent impact wrench to do the heavy lifting for you. There is nothing quite like that sudden, sharp rat-tat-tat sound when a stubborn, rusted bolt finally gives up the fight and spins free.

    Look, I’m not here to sell you on some overpriced, professional-grade pneumatic setup that costs more than your first car. I’ve spent enough time under hoods to know that most of the “must-have” gear lists out there are just ways to empty your wallet. My goal is to give you the straight truth about what actually works for a DIYer. I’m going to break down which models are worth your hard-earned cash and which ones are just expensive paperweights, so you can get back to fixing your ride without the headache.

    Table of Contents

    Battery Powered vs Pneumatic Impact Tools Pick Your Fighter

    Battery Powered vs Pneumatic Impact Tools Pick Your Fighter

    If you’re setting up a home garage, you’re eventually going to face the classic debate: battery powered vs pneumatic impact tools. I remember when my dad only ever used air lines. Pneumatic tools are the old-school heavyweights—they’re lightweight, incredibly fast, and you never have to worry about a battery dying halfway through a brake job. But man, those hoses are a pain. You’re constantly tripping over them or hunting for a compressor that actually has enough CFM to keep up with you.

    On the flip side, cordless tech has come a long way since I started out. Nowadays, I find myself reaching for my subcompact cordless impact drivers more often than not. They give you total freedom to move around the car without being tethered to a wall or a tank. The downside? You have to be mindful of your battery life and make sure you’re using automotive socket sets for impact use so you don’t shatter a cheap chrome socket when the tool hits full power. If you want pure, raw muscle for the heavy stuff, go air; if you want to actually enjoy your Saturday afternoon, go cordless.

    High Torque Fastening Solutions for the Diyer

    High Torque Fastening Solutions for the Diyer

    Look, if you’re moving past basic oil changes and starting to tackle things like suspension components or lug nuts, you can’t just wing it with whatever cheap tool you found in a clearance bin. You need real high torque fastening solutions that won’t strip your bolts or leave you stranded halfway through a job. I’ve seen too many guys try to force a low-end tool onto a seized axle bolt, only to end up snapping the head clean off. It’s a nightmare you don’t want to deal with on a Saturday afternoon.

    When you’re dealing with heavy-duty hardware, the most important thing to remember is that more power isn’t always better—it’s about control. You have to actually pay attention to the torque specifications for impact wrenches provided by the manufacturer, especially on critical parts like cylinder head bolts. If you just pull the trigger and hope for the best, you’re asking for trouble. Grab a decent set of automotive socket sets for impact use to match your power, and you’ll actually be able to finish the job without breaking your tools or your spirit.

    5 Ways to Not Ruin Your Car (or Your Hands) Using an Impact Wrench

    • Don’t go full throttle immediately. If you’re working on something delicate, like a bracket near a sensor, start with short bursts. You don’t want to snap a bolt head off just because you were too eager to get the job done.
    • Use impact-rated sockets only. I’ve seen guys try to use their shiny chrome set from the kitchen drawer, and let me tell you, those things can shatter like glass under the vibration. Get the black oxide impact sockets—they’re built for the abuse.
    • Watch your torque settings. Just because the tool can rip a bolt out doesn’t mean it should. If you’re tightening things back up, always double-check your specs. Over-tightening is just as bad as leaving something loose, and it’s a massive headache to fix later.
    • Keep your workspace clean. If you’re using a pneumatic wrench, make sure your air lines aren’t leaking and your compressor is drained. Nothing kills my mood faster than a tool losing power halfway through a job because of some moisture in the line.
    • Listen to the tool. A good impact wrench has a rhythm. If it starts sounding weird—like it’s struggling or hitting a metal-on-metal grind that doesn’t sound right—stop. It’s usually a sign that you’re either hitting a seized bolt or the tool itself is crying for help.

    The Bottom Line Before You Start Wrenching

    Don’t get blinded by big torque numbers on the box; what actually matters is whether the tool fits your workspace and if you can actually control it without snapping a bolt.

    If you’re working in a home garage without a massive air compressor setup, just go cordless—the convenience and freedom to move around the car are worth every penny.

    Investing in a decent impact wrench isn’t about being fancy, it’s about saving your knuckles and your sanity when you’re dealing with years of road salt and rust.

    The Real Cost of Skipping This Tool

    You can spend two hours sweating and swearing over a seized lug nut with a breaker bar, or you can spend two seconds with a decent impact wrench and get back to actually enjoying your build. Don’t let a stubborn bolt ruin your entire weekend.

    Nikolai·Osterman

    Don't Let a Rusty Bolt Win

    Don't Let a Rusty Bolt Win.

    Look, choosing the right impact wrench isn’t about buying the most expensive tool on the shelf just because it has a flashy brand name. It’s about knowing your setup. If you’ve got a dedicated garage space and a compressor, those pneumatic tools are going to give you unmatched longevity and power. But if you’re working out of a small driveway or a cramped apartment garage like I used to, a solid cordless brushless model is going to be your best friend. You’ve weighed the torque requirements, you’ve decided between air and battery, and you’ve looked at the budget. Now, it’s time to stop researching and actually start turning wrenches.

    At the end of the day, the goal isn’t to own a massive collection of tools; it’s to have the confidence to open your hood and say, “I can handle this.” There is a specific kind of satisfaction you get when you crack a seized bolt loose without breaking a sweat, and that feeling is worth every penny you invest in your gear. Don’t let the complexity of modern cars intimidate you. Grab your tools, stay patient, and remember that every pro mechanic started exactly where you are right now. You’ve got this.

    Frequently Asked Questions

    Do I really need a high-torque model for basic brake jobs, or is that just overkill?

    Look, for a standard brake job, a massive high-torque beast is definitely overkill. You’re mostly just dealing with caliper bolts and maybe a couple of stubborn bracket screws. If you show up with a heavy-duty monster, you’re just gonna end up snapping something because you’ve got too much power for a small bolt. Grab a mid-range cordless model instead. It’s enough muscle to get the job done without turning a simple brake swap into a nightmare.

    If I go with a cordless one, how much battery life am I actually going to get before I'm stuck mid-job?

    Look, I’ve been stuck mid-job more times than I’d like to admit. If you’re running a standard 5.0Ah battery, you’ll usually get through a decent brake job or swapping out some suspension components without sweating it. But if you’re hammering away at heavy-duty subframe bolts all day, expect that juice to drain fast. My advice? Don’t cheap out on the batteries. Grab a high-capacity one so you aren’t staring at a dead tool while your car’s in pieces.

    Will an impact wrench strip out my bolts if I'm not careful, or is it safe for everything under the hood?

    Look, I’ll be real with you: yeah, you can absolutely wreck a bolt if you’re careless. An impact wrench has a ton of raw power, and if you just hammer away at a tiny sensor bolt or something fragile, you’re going to have a bad time. My rule of thumb? Use the impact for the heavy, rusted stuff like lug nuts or suspension bolts. For anything delicate, stick to a hand ratchet. Just don’t go full throttle on everything.

  • Steps for Replacing a Faulty Alternator

    Steps for Replacing a Faulty Alternator

    You ever notice how your dashboard lights start acting possessed right before your car decides it’s done for the day? Most people see that dimming headlight or flickering dash and immediately think they need to drop a thousand bucks at a dealership for an alternator replacement. Honestly, that’s just a massive money grab. I remember my first week at the shop, watching a guy freak out because his car died at a red light, only to realize it was just a loose terminal and a tired alternator. It’s not some high-level electrical wizardry; it’s just a part that wears out, and it’s way easier to swap than the service advisors want you to believe.

    I’m not here to give you some textbook lecture or sell you on fancy diagnostic computers you don’t need. I’m going to walk you through the real-world process of an alternator replacement using the same logic I use when I’m working on my own Japanese tuners in the garage. I’ll show you exactly which bolts to watch out for, how to avoid frying your ECU, and how to get the job done without getting ripped off. Let’s get to work.

    Table of Contents

    Guide Overview

    Total Time: 1-3 hours
    Estimated Cost: $100-$300
    Difficulty: Intermediate

    Tools & Supplies

    • Socket set and ratchet for removing mounting bolts
    • Wrench set for electrical terminals and belt tensioners
    • Screwdriver for securing electrical connectors or clips
    • Pliers for adjusting or removing serpentine belt tensioners
    • New alternator compatible with your vehicle model
    • Multimeter to test voltage before and after installation

    Step-by-Step Instructions

    • 1. First things first, you need to disconnect the battery. I can’t stress this enough—if you start messing with the alternator while the battery is still hooked up, you’re asking for a massive spark or a blown fuse. Use a wrench to loosen the negative terminal first, pull it off, and tuck it aside so it can’t touch the post.
    • 2. Next, you’ve gotta clear a path. Depending on what you’re driving, you might need to move some plastic trim or even pull a belt shield out of the way. I usually grab my flashlight and inspect the area to make sure I’m not going to smash my knuckles on a radiator hose or an air intake tube while I’m working.
    • 3. Now, get ready to loosen the serpentine belt. You’ll need a long-handled wrench or a breaker bar to rotate the tensioner pulley. Once you apply enough pressure to release the tension, slide the belt off the alternator pulley. Don’t let the belt snap back and hit you; keep a steady hand and guide it so it doesn’t get tangled in the fan.
    • 4. Unplug the electrical connections. You’ll see a heavy-gauge wire bolted to the back of the alternator and a smaller plastic wiring harness. Use a socket to remove the nut on the main power wire, then carefully unclip the plastic connector. If that connector feels brittle or stuck, don’t force it—just give it a little wiggle until it pops free.
    • 5. It’s time to unbolt the old unit. Most alternators are held in place by two or three long bolts. I like to keep my magnetic parts tray right next to me so these bolts don’t end up lost in the bottom of the engine bay. Loosen them in stages so the alternator doesn’t tilt and pinch your fingers.
    • 6. Pull the old alternator out and get your new one ready. Before you drop the new one in, take a second to wipe down the mounting surface with a clean rag. You don’t want any old grime or grit getting trapped between the new unit and the engine block, as that can cause vibrations later on.
    • 7. Reverse the whole process to get back on the road. Bolt the new alternator in, reconnect your wires, and then use that tensioner to slide the belt back over the pulley. Once everything is tight, reconnect the battery and start the engine. If you hear a smooth hum instead of a screeching belt, you’ve nailed it.

    Spotting the Truth Common Alternator Symptoms and Signs

    Spotting the Truth Common Alternator Symptoms and Signs

    Look, most people wait until they’re stranded in a dark parking lot before they even think about their charging system. By then, it’s usually too late. You need to pay attention to the little things before they turn into a massive headache. If you notice your headlights getting dim or your dashboard lights flickering like a bad horror movie, that’s a huge red flag. Another dead giveaway is a battery that looks brand new but keeps dying overnight. That’s usually because the alternator isn’t actually pushing enough juice back into the cells while you drive.

    If you want to be certain before you start tearing things apart, don’t just guess. Grab a multimeter and learn how to test alternator with multimeter settings. You’re looking for a steady reading—usually between 13.5 and 14.5 volts while the engine is running. If the numbers are jumping all over the place or staying low, you’ve found your culprit. It’s much better to catch these alternator symptoms and signs early than to find yourself staring at a dead engine when you’re already late for work.

    How to Test Alternator With Multimeter and Voltage Regulator Testing

    How to Test Alternator With Multimeter and Voltage Regulator Testing

    Before you go tearing everything apart, you need to be 100% sure the alternator is actually the culprit. I’ve seen guys spend three hours on a teardown only to realize they just had a loose battery terminal. To do this right, you’ll need to know how to test alternator with multimeter settings. Set your meter to DC volts, connect the leads to the battery terminals, and start the engine. You’re looking for a steady reading between 13.5 and 14.7 volts. If that number stays low or fluctuates wildly while the engine is running, you’ve definitely got a problem.

    If the voltage is steady but your lights are still flickering or dimming, you might be looking at a specific issue with voltage regulator testing. The regulator is what keeps the output consistent, and when it fails, it can cook your battery or leave you stranded. It’s a common headache in automotive electrical system repair, but catching it early saves you from a much bigger bill later. Just keep your multimeter steady and watch those numbers—they don’t lie.

    Pro-Tips to Keep You From Making a Mess of the Job

    • Don’t skip the battery disconnect. Seriously. You’re working right next to the main power source, and if your wrench slips and touches the frame while you’re loosening the B-terminal, you’re going to see some nasty sparks and potentially fry your ECU.
    • Grab a can of electrical contact cleaner before you start. While you’ve got the old unit out, spray down those connector pins. Most of the “broken” alternators I see in the shop are actually just dealing with crusty, corroded connections that are killing the signal.
    • Keep your magnetic parts tray handy—I keep mine in my back pocket for a reason. Between the mounting bolts and the smaller wiring clips, it’s way too easy to drop a bolt into the deep recesses of the engine bay where you’ll never find it again.
    • Check your drive belt while you’re in there. If you’re already going through the trouble of stripping the belt to get the alternator out, check it for cracks or glazing. It’s better to spend twenty bucks on a new belt now than to have it snap on the highway next week.
    • Double-check your mounting bolts’ torque. You don’t want them loose enough to vibrate out, but you also don’t want to go overboard and strip the threads in the engine block. Just get them snug and solid, then move on.

    The Bottom Line on Swapping Your Alternator

    Don’t just guess based on a dim dashboard light; use a multimeter to confirm the alternator is actually the culprit before you start tearing things apart.

    Most of the “scary” part of this job is just managing the battery connection and keeping track of your bolts—keep that magnetic tray handy so you don’t lose them.

    You don’t need to pay a shop’s massive labor markup for this; if you’ve got the basic tools and a little patience, you can get this done in your own driveway.

    ## The Real Cost of Hesitation

    Most shops will try to sell you a whole new charging system when all you really need is a new alternator and twenty minutes of your time. Don’t let a little bit of electrical fear turn a simple fix into a massive bill; once you’ve got the right socket in your hand, the car is yours again.

    Nikolai·Osterman

    Getting Back on the Road

    Getting Back on the Road after repairs.

    Look, swapping out an alternator might seem like a massive headache when you first see those wires and bolts, but we just broke it down. You learned how to spot the warning signs like dimming headlights or a dying battery, how to use a multimeter to confirm the culprit, and the actual steps to get that old unit out and the new one in. Just remember to keep your workspace clean and double-check your connections before you even think about turning that key. If you took your time and didn’t rush through the testing phase, you’ve already done the hardest part of the job.

    At the end of the day, the goal isn’t just to fix a car; it’s about knowing that you aren’t at the mercy of a shop’s high hourly rate for something you could have done in your own driveway. Every time you pick up a wrench and tackle a job like this, you’re building a level of confidence that no textbook can teach you. Don’t let the complexity of modern engines intimidate you. Grab your tools, keep your head down, and remember that you are more than capable of maintaining your own ride. I’ll see you in the next one.

    Frequently Asked Questions

    If I replace the alternator and my lights are still dim, could it be a bad ground wire or the battery itself?

    Honestly, yeah, it definitely could be. If you just swapped the alternator and your lights are still dim, don’t go buying another one just yet. You’re likely looking at a bad ground wire or a dying battery. If that ground connection is corroded or loose, the electricity can’t flow properly, no matter how good the new alternator is. Check your battery terminals for crusty buildup first—it’s a simple fix that saves a lot of headache.

    Do I really need to replace the serpentine belt at the same time, or can I just reuse the old one?

    Look, I get the temptation to save a few bucks, but honestly? Just swap the belt too. If you’re already in there pulling the alternator, you’ve done 90% of the hard work. It’s a cheap part, and if that old belt snaps or slips a week from now, you’re right back to square one, covered in grease, doing the whole job again. Do it once, do it right.

    Is it safe to just jump-start my car to get to the parts store, or am I going to fry my ECU?

    Look, I get the panic—you’re stuck and just want to move. You can jump-start it to get to the parts store, but don’t go driving around like that. If your alternator is totally shot, that jump-start is just a temporary band-aid. The second you disconnect the donor car, your battery is on its own. If the voltage drops too low or spikes weirdly while you’re driving, you’re definitely risking your ECU. Get it to the shop, then stop.

  • Signs Your Brakes Need Inspection

    Signs Your Brakes Need Inspection

    I remember sitting in my dad’s garage when I was ten, listening to that high-pitched, metal-on-metal screech every time he tapped the pedal on his old sedan. He’d just sigh, grab his wrench, and tell me that most shops would try to sell you a whole new rotor assembly when all you really needed was a simple brake inspection and some fresh pads. It drives me crazy how some mechanics treat a basic check like it’s some kind of complex, high-tech mystery just to pad their service invoices. Most of the time, your car is trying to tell you exactly what’s wrong; you just have to know how to listen.

    I’m not here to give you some textbook lecture or a list of parts you don’t actually need. My goal is to show you how to grab a flashlight, get under there, and do a real brake inspection yourself so you know exactly what’s happening behind those wheels. I’ll walk you through the actual signs of wear and the specific things I look for when I’m on the clock at the shop. No fluff, no gatekeeping—just the honest truth about keeping your stopping power solid without getting ripped off.

    Table of Contents

    Listen Close to Those Annoying Brake Squealing Sounds

    Listen Close to Those Annoying Brake Squealing Sounds

    If you start hearing a high-pitched screech every time you hit the pedal, don’t just turn up the radio and hope it goes away. Most of the time, those brake squealing sounds are actually a built-in warning system. Many pads have a tiny metal tab called a wear indicator designed to scrape against the rotor once the material gets too thin. It’s annoying as hell, but it’s basically your car screaming at you that it’s time for a change before you end up with metal-on-metal grinding that ruins your rotors.

    Beyond the noise, pay attention to how the car actually reacts when you slow down. If you notice a weird vibration or a spongy brake pedal feel, that’s a massive red flag. It could be anything from air in the lines to warped rotors. I always tell people that if the car feels “off” during a stop, your stopping distance safety is officially compromised. Don’t wait until you’re at a red light and the pedal goes straight to the floor to realize something is wrong.

    Watch for the Real Signs of Worn Brake Pads

    Watch for the Real Signs of Worn Brake Pads.

    Beyond just the noise, you need to pay attention to how the car actually behaves when you’re hitting the pedal. One of the biggest red flags is a change in your brake pedal feel. If it suddenly feels spongy, or if it sinks way too close to the floor before the car actually slows down, that’s not just “old car character”—that’s a warning. You might also notice a slight vibration or pulsing through the pedal when you’re slowing down from highway speeds. That usually means your rotors are getting warped, which is a sign that your pads have been overheating or are just worn down too thin.

    Another thing to keep an eye on is your stopping distance safety. If you find yourself having to press harder or earlier just to get the car to come to a halt, don’t just ignore it. It’s easy to think you’re just driving more aggressively, but your car is literally telling you it’s struggling to do its job. If you notice you’re traveling a few extra feet before the weight shifts forward, it’s time to pull the wheels off and do a proper brake component inspection to see exactly how much meat is left on those pads.

    5 Ways to Check Your Brakes Without Getting Ripped Off

    • Grab a flashlight and look through your wheel spokes. You don’t need to take the whole wheel off just to see if your pads are getting dangerously thin; a quick visual check can save you a massive headache later.
    • Get your hands a little dirty and feel the brake rotors for any deep grooves or “lip” around the edge. If the surface feels like a record player with scratches, your rotors are likely warped or too worn to keep things smooth.
    • Pay attention to how the pedal feels under your foot. If it feels spongy or you have to floor it just to get the car to slow down, you probably have air in the lines or a failing master cylinder, and that’s not something to ignore.
    • Check your brake fluid level in the reservoir, but don’t just look at the lines. If the fluid looks dark or murky like old coffee, it’s time for a flush because moisture in that fluid will eat your system from the inside out.
    • Do a quick shake test when the car is on a jack. If you wiggle the wheel and feel any play or clicking, your calipers might be loose or your brake components are shot, which is a huge red flag for your safety.

    The Bottom Line on Your Brakes

    If you’re hearing high-pitched squealing or feeling a weird vibration in the pedal, don’t ignore it—that’s your car telling you something is actually wrong.

    Grab a flashlight and visually check your pad thickness; if they look paper-thin, it’s time to swap them before you end up ruining your rotors too.

    You don’t need to be a master tech to spot the basics, but you do need to be proactive so you don’t get hit with a massive repair bill later.

    Stop Guessing, Start Looking

    A mechanic might tell you that you need a whole new rotor assembly just to get you out the door, but if you actually take five minutes to look at the pad thickness yourself, you might realize you just need a simple pad swap. Don’t let anyone charge you for a problem that’s staring you right in the face.

    Nikolai·Osterman

    Don't Leave Your Safety to Chance

    Don't Leave Your Safety to Chance.

    At the end of the day, checking your brakes isn’t some complex science project; it’s just about paying attention to what your car is trying to tell you. Whether you’re listening for that high-pitched squeal that means the wear indicators are doing their job, or you’re actually getting down on the ground to check the thickness of your pads with a flashlight, you’re taking control. Don’t ignore the vibrations in the pedal or that weird pulling sensation when you hit the brakes. If you catch these things early, you’re looking at a simple pad swap instead of a massive, expensive bill for new rotors or calipers that could have been avoided.

    Look, I know it can feel intimidating to poke around under your car, especially when you’re worried about messing something up. But honestly, most people get overcharged because they’re too afraid to ask questions or look for themselves. Once you realize that maintenance is just patience and the right set of tools, you’ll stop feeling like a victim of the repair shop. Keep that magnetic tray handy, stay observant, and don’t let anyone tell you that you aren’t capable of understanding your own machine. You’ve got this.

    Frequently Asked Questions

    How do I know if it's just the pads wearing down or if my rotors are actually warped?

    Here’s the easiest way to tell: feel the steering wheel or the brake pedal. If you hit the brakes and the whole car starts shaking or the steering wheel vibrates in your hands, that’s almost always warped rotors. If it’s just a high-pitched squeal or a grinding noise but the car feels smooth, you’re likely just down to the wear indicators on your pads. Don’t let a shop charge you for rotors if it’s just pads.

    Is it worth trying to change the brake fluid myself, or is that something I should leave to a shop?

    Honestly? It’s worth doing yourself, but don’t go in blind. Changing fluid is mostly about patience and not letting air bubbles into the lines—that’s where people mess up. If you’ve got a friend to help you pump the pedal or a decent vacuum bleeder, you’re golden. It’s way cheaper than a shop markup, and it’s a solid way to make sure your system stays clean. Just grab a manual and take your time.

    Can I still drive the car if I hear a grinding noise, or am I asking for a total breakdown?

    Look, I’m gonna be straight with you: if you’re hearing grinding, you’re already past the “warning” stage. That’s metal-on-metal contact. You aren’t just wearing down your pads anymore; you’re actively eating into your rotors. You might make it to the shop, but you’re risking a total brake failure or a much more expensive bill for new rotors. Stop driving it and get those pads swapped before you lose stopping power entirely.

  • How to Rotate Your Tires

    How to Rotate Your Tires

    I remember watching my dad struggle with a set of unevenly worn front tires on an old sedan back in my garage, and the shop owner tried to tell him he needed a whole new set just because the tread looked “off.” That’s total nonsense. Most people think they need a specialized lift or a professional setup to keep their rubber even, but honestly, a basic tire rotation guide is all you really need to stop wasting money. You don’t need a fancy degree or a bay at a dealership to make sure your tires wear down at the same rate; you just need to understand the pattern and not get intimidated by the jack.

    In this guide, I’m stripping away all the dealership fluff and giving you the straight truth on how to do this yourself. I’ll walk you through the specific patterns for different drive trains, the exact tools you should have in your trunk, and the common mistakes that actually end up causing more harm than good. My goal isn’t to turn you into a master mechanic overnight, but to make sure you have the confidence to handle this simple task so you can keep your hard-earned cash in your pocket instead of the shop’s.

    Table of Contents

    Guide Overview

    Total Time: 30-60 minutes
    Estimated Cost: $0 (assuming tools are owned)

    Tools & Supplies

    • Jack to lift the vehicle safely
    • Jack stands to secure the vehicle
    • Lug wrench or impact wrench to remove nuts
    • Torque wrench to tighten nuts to spec
    • Wheel chocks to prevent rolling
    • Gloves for hand protection

    Step-by-Step Instructions

    • 1. First things first, find a flat, solid spot to park. You don’t want to be doing this on a slope or on soft dirt because once that jack starts moving, you’re in real trouble. Grab your lug wrench and your jack, and make sure you’ve got your wheel chocks handy to block the tires that aren’t moving.
    • 2. Before you even think about lifting the car, grab your lug wrench and loosen the nuts on each wheel. You don’t want to take them all the way off yet; just crack them loose while the tire is still touching the ground. It’s way easier to break them loose with the weight of the car holding the wheel in place.
    • 3. Now, get your jack under a solid frame point—check your owner’s manual if you aren’t sure, because you don’t want to be jacked up on a plastic trim piece. Lift the car until the tire is off the ground, then slide a jack stand under the frame for safety. Never, and I mean never, trust just a hydraulic jack while you’re working under or near the car.
    • 4. Once the car is stable, finish unscrewing the lug nuts and pull the wheels off. This is where I usually grab my magnetic parts tray from my pocket so I don’t lose any of the hardware in the grass or the garage floor. Keep the nuts in order so you don’t get confused when it’s time to put them back on.
    • 5. Now you need to move the tires according to your car’s specific pattern. If you’ve got a front-wheel-drive car, you’ll usually move the front tires straight back to the rear, and the rear tires go to the front but cross them over to the opposite sides. If you’re working on an All-Wheel Drive setup, double-check your manual because the pattern might be totally different.
    • 6. Slide the tires back onto the hubs, making sure they sit flush against the mounting surface. Put the lug nuts back on by hand and tighten them as much as you can without a wrench. This helps prevent the wheel from wobbling or threading the bolts incorrectly while you’re getting things ready.
    • 7. Lower the jack until the tires are touching the ground again, then take your wrench and tighten those lug nuts for real. You want to do this in a star pattern—not just going in a circle—to make sure the pressure is even across the wheel. Give them one last firm tug, pull your tools inside, and you’re done.
    Mastering Jack and Lug Wrench Usage Without the Stress

    Mastering Jack and Lug Wrench Usage Without the Stress

    Look, I’ve seen plenty of guys struggle with a stuck lug nut or, worse, a jack that starts to slip because they weren’t paying attention. When it comes to jack and lug wrench usage, the biggest mistake is rushing. Before you even lift the car, make sure you’re on level ground—concrete is your best friend here. Once you crack those lug nuts loose while the car is still on the ground, you’ve already won half the battle. Trying to break them loose while the wheel is spinning in the air is a recipe for a massive headache and a lot of wasted energy.

    Once the car is up, don’t just toss the jack anywhere. Find a solid frame point; if you lift on the wrong spot, you’re looking at expensive body damage. When you’re tightening everything back up, remember to use a star pattern. It’s not just some textbook rule; it ensures the wheel sits perfectly flush against the hub. Getting this right is a huge part of tire lifespan extension, because an unevenly seated wheel is going to cause vibrations that’ll drive you crazy. Just take your time and stay focused.

    Cracking the Code of Tire Rotation Patterns for Longevity

    Cracking the Code of Tire Rotation Patterns for Longevity

    Look, I see people at the shop all the time who think you just swap the fronts with the rears and call it a day. That’s a mistake. If you want actual tire lifespan extension, you have to understand how your specific setup moves. For a standard front-wheel-drive car, you’re usually looking at an X-pattern, where the rear tires move straight to the opposite front corners. But if you’re driving something with an AWD system, you can’t just wing it; you need to check your manual for the specific all-wheel drive tire rotation sequence, or you might end up stressing the drivetrain.

    The whole point of mastering these different tire rotation patterns is to fight off uneven wear before it starts. If you notice the inside edge of your tread is wearing faster than the outside, you’re likely dealing with alignment issues or just a bad rotation habit. Stick to your automotive maintenance schedule and don’t skip these intervals. It’s way cheaper to spend twenty minutes in your driveway now than to drop a few hundred bucks on a fresh set of rubber because you got lazy.

    Pro Tips to Keep You from Making a Mess of It

    • Double-check your tire pressure before you even touch a lug nut. There’s no point in rotating everything perfectly only to realize one of them was low to begin with, and it’ll mess up your readings once they’re back on the ground.
    • Don’t go overboard with the impact wrench. I see guys at the shop over-tighten everything until they strip the studs, and then they’re stuck with a massive bill. Hand-tighten them first, then use a torque wrench to get them just right.
    • Keep a close eye on your tread depth while you’ve got the wheels off. If one tire is looking way more worn than the others, rotating it might just be a band-aid for an alignment issue you need to actually fix.
    • Always grab a clean rag to wipe down the mounting surfaces on the rim. If there’s grit or rust sitting between the wheel and the hub, it can cause vibrations that feel like a death wobble once you hit highway speeds.
    • Remember that your spare might be a “donut.” If you’re rotating a set and one of your main tires is shot, don’t try to force a temporary spare into your regular rotation pattern; it’s not built for that kind of abuse.

    The Bottom Line on Keeping Your Rubber Healthy

    Don’t let a shop charge you fifty bucks for something you can do in twenty minutes; just keep your lug wrench and a jack handy so you aren’t stuck waiting on an appointment.

    Pay attention to your tread—if you’re rotating them and one side looks way more worn than the rest, you’ve probably got an alignment issue that needs more than just a quick swap.

    Consistency is everything, so don’t wait until your tires look bald to check them; stick to a regular rotation schedule and you’ll squeeze way more life out of your investment.

    The Real Reason to Rotate

    Most shops will charge you a premium just to move some rubber around, but honestly? It’s not rocket science. If you take twenty minutes to swap your tires yourself, you aren’t just saving cash—you’re making sure you aren’t buying a whole new set of tires a year earlier than you should.

    Nikolai·Osterman

    Don't Let the Shop Overcharge You

    Don't Let the Shop Overcharge You.

    Look, at the end of the day, rotating your tires isn’t some mystical ritual that requires a master certification. It really just comes down to three things: having a solid jack, knowing your specific rotation pattern, and making sure you actually torque those lug nuts down properly. If you can manage those basics, you’re already ahead of most drivers who just blindly trust whatever a shop tells them. You’ve learned how to handle the gear and how to spot the wear patterns, which means you aren’t just guessing anymore—you’re actually taking control of your vehicle’s lifespan.

    I know it can feel a little intimidating the first time you’re staring at a heavy wheel and a greasy lug nut, but trust me, the feeling of doing it yourself is unmatched. There’s a massive sense of pride in knowing that your car is running better because you put in the work, not because you handed over a credit card. Don’t let the fear of making a mistake keep you in the passenger seat. Grab your tools, get a little grease under your fingernails, and just start doing it. Your wallet and your car will definitely thank you in the long run.

    Frequently Asked Questions

    How often should I actually be doing this if I'm not driving a ton?

    Look, I get it. If your car is mostly just sitting in the driveway or you’re only hitting the grocery store, the manual’s “every 5,000 miles” rule feels like overkill. But don’t let it sit forever. Even if you aren’t putting miles on it, rubber degrades and weight distribution still matters. Honestly? Just aim for once a year or every six months. It’s easier to spend twenty minutes now than to replace a whole set of tires later.

    Do I need to worry about rotating my spare tire too, or is that just extra work?

    Honestly, don’t sweat it. If it’s just sitting in your trunk, you don’t need to worry about rotating it with the others. The goal of rotation is to even out the tread wear on the tires actually touching the pavement. Since your spare isn’t doing any work, it’ll stay exactly as it is. Just make sure you check the air pressure in it every few months so it isn’t flat when you actually need it.

    Is it safe to rotate them myself if I don't have a torque wrench to tighten the lugs?

    Look, I’ll be real with you: it’s doable, but it’s not ideal. If you’re just using the lug wrench that came with the car, you’re mostly relying on muscle memory to avoid over-tightening or leaving them loose. It’s risky because uneven torque can warp your brake rotors. If you can’t swing a torque wrench right now, just make sure you tighten them in a star pattern and double-check them after your first drive.